Table of Contents
Advertisement
Advertisement
Table of Contents

Related Manuals for dbx ProVocal


Summary of Contents for dbx ProVocal
- Page 1 ProVocal ™ Digital Vocal Processor User Manual...
- Page 2 IMPORTANT SAFETY INSTRUCTIONS WARNING FOR YOUR PROTECTION PLEASE READ THE FOLLOWING: KEEP THESE INSTRUCTIONS HEED ALL WARNINGS FOLLOW ALL INSTRUCTIONS DO NOT USE THIS APPARATUS NEAR WATER The symbols shown above are internationally accepted symbols that warn of potential hazards with electrical products.
- Page 3 • this device may not cause harmful interference, and September 25, 2001 • this device must accept any interference received, European Contact: Your local dbx Sales and Service Office including interference that may cause undesired or Harman Music Group operation.
-
Page 4: Table Of Contents
ProVocal ™ Table of Contents Introduction Section 3 Application Guide Basic Connections ..........14 0.1 Defining the ProVocal........i Connections to a Mixing Console .......14 0.2 Service Contact Info.........ii Applications 3.3 to 3.6 ........15 0.3 Warranty............ii Appendix 0.4 Installation Recommendations......iii Block Diagram ............18 dbx Type IV™... - Page 5 ProVocal ™ INTRODUCTION INTRO CUSTOMER SERVICE INFO ProVocal DEFINED WARRANTY INFO ®...
-
Page 6: Defining The Provocal
This manual will be your guide to understanding the full functionality of the powerful ProVocal™. After you have become familiar with the unit, we encourage you to experiment and find creative ways that the ProVocal™ can help you optimize your specific application. -
Page 7: Service Contact Info
In no event shall dbx or its dealers be liable for spe- cial or consequential damages or from any delay in the performance of this warranty due to causes beyond their control. -
Page 8: Installation Recommendations
Introduction 0.4 Installation Recommendations FOR RACK MOUNT USE ONLY - Install the ProVocal™ in your rack with the provided rack screws. When installed in a rack, the unit should be positioned with enough room (at least 1U above and 1U below the unit) to allow proper ventilation. The ProVocal™ should not be mounted above or below anything that generates excessive heat. -
Page 9: Section 1 - Getting Started
Section 1 ProVocal ™ Getting Started Getting Started ®... -
Page 10: Rear Panel Connections
Getting Started 1.1 Rear Panel Connections IEC Power Cord Receptacle This is the power cord receptacle of the ProVocal™. An IEC cord is included with the shipped product. S/PDIF Digital Output Connector The ProVocal™ provides S/PDIF digital output formatting through the RCA coaxial connector. -
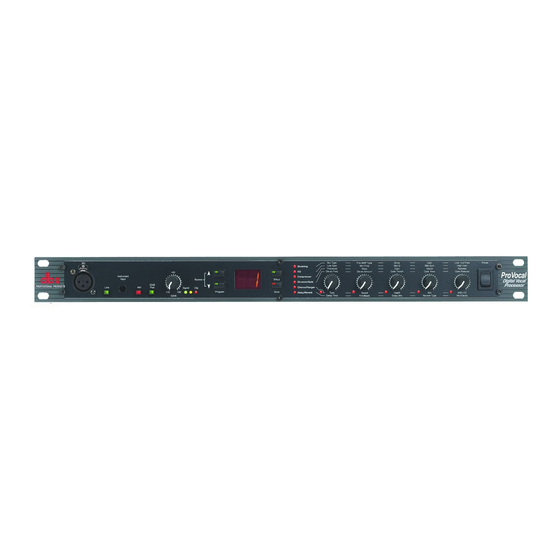
Page 11: Front Panel Connections
Program Up and Down buttons These buttons are used to scroll through the Program menu and when pressed simultaneously, will bypass all ProVocal™ effects. To take the unit out of bypass mode, press either the <Program Up>, <Program Down> or <Effect> button. - Page 12 Getting Started Effect Select Button and LEDs This button is used to select any one of the six effect module blocks available in the ProVocal™. Successive presses will scroll through the effect menu. The corresponding LED will light when the effect module is selected and will be lighted in performance mode, when the effect mod- ule is on, or used in the current program.
-
Page 13: Basic Operation And Utility
Section 2 ProVocal ™ Operation DETAILED PARAMETERS, BASIC OPERATION UTILITY ®... -
Page 14: Section 2 - Detailed Parameters
This Section has been created to offer an overview and explanation of the effects available in the ProVocal™, as well as a basic tutorial guide for operation of the unit. Modeling - Mic Type - OF, and D1-D9 and CI-C9... - Page 15 The ATTACK control sets the amount of time it takes the ProVoca™l to begin compressing a sig- nal (once the detector has sensed a signal above threshold). The ATTACK range is from 1 (FAST) for a tighter and more noticeable compression effect with very little overshoot) to 99 (SLOW) ProVocal™ User Manual...
- Page 16 Section 2 Detailed Parameters (for more delayed, gradual compression). A very fast ATTACK setting will cause the ProVocal™ to act like a peak limiter even though RMS detection circuitry is used. Slower ATTACK settings cause the ProVocal™ to act like an RMS or averaging detecting compressor/limiter.
-
Page 17: Basic Operation
• Turn off all equipment before making any connections. • Install the ProVocal™ in your rack with the provided rack screws. It is essential that when the ProVocal™ is being mounted in a rack mounting enclosure, the unit should be positioned with enough room (at least 1U of space above the unit and 1U of space below the unit) to allow proper ventilation. - Page 18 XLR or 1/4” Line output. • Apply power to the ProVocal™. Connect the AC power cord to the AC power receptacle on the back of the unit. Route the AC power cord to a convenient power outlet away from audio lines.
-
Page 19: Utility Functions
Section 2 Navigation • Effect Bypass - To bypass all effect in the ProVocal, press the <Program Up> and <Program Down> buttons simultaneously. To take the unit out of bypass mode, press either the <Program Up>, <Program Down> or <Effect> but- ton. -
Page 20: Program List
ProVocal ™ Section 2 Navigation 2.4 Factory Program List Dry Studio Vocal Mic and Pre-amp Modeling Live in a Hall Mic and Pre-amp Modeling, Hall Reverb Special Effect Telephone Mic and Pre-amp Modeling, modulation effects Wood Room Mic and Pre-amp Modeling, Wood Room Reverb... -
Page 21: Section 3 Application Guide
Section 3 ™ ProVocal DIGITAL APPLICATIONS APPLICATION GUIDE ®... -
Page 22: Basic Connections
• Turn off all equipment before making any connections. • Install the ProVocal in your rack with the provided rack screws. It is essential that when the ProVocal is being mounted in a rack mounting enclosure, the unit should be positioned with enough room (at least 1U of space above the unit and 1U of space below the unit) to allow proper ventilation. -
Page 23: Applications 3.3 To 3.6
3.4 Direct Connection to a DAW (CPU) Connections • Connect the source to the desired 1/4” TRS or XLR input. • Connect the S/PDIF output of the ProVocal and run into the S/PDIF input interface of the DAW (CPU). ProVocal™ User Manual... - Page 24 Connect the S/PDIF output of the ProVocal and run into the S/PDIF input interface of the DAW (CPU). • Connect the 1/4” TRS or XLR output of the ProVocal and run into the 1/4” TRS or XLR input of the monitoring device. ProVocal™ User Manual...
-
Page 25: Appendix
Appendix ™ ProVocal APPENDIX APPENDIX Block Diagram dbx Type IV™ White Paper Specifications ®... -
Page 26: Block Diagram
ProVocal ™ Appendix Block Diagram Block Diagram ProVocal™ User Manual... -
Page 27: Dbx Type Iv™ Conversion System
Type IV™ not only exploits the wide linear dynamic range of today’s A/D con- verters, but also enhances it and extends the useable dynamic range beyond the linear range. - Page 28 Enter the dbx Type IV™ Conversion System. Like its related predecessor technologies—Type I™, Type II™, and Type III™—dbx Type IV™ succeeds in preserving the wide dynamic range of the original analog signal within a limit- ed dynamic range medium. Whereas Type I™ and Type II™ expand the dynamic range of analog tape and other limit- ed dynamic range media, and the simultaneous encode/decode process of Type III™...
- Page 29 Another advantage of the logarithmic mapping of our dbx Type IV™ Conversion System is that it preserves the high-frequency detail of the signal in the overload region. Figs. 3a through 3d illustrate what happens when you over- load an A/D converter without Type IV™.
- Page 30 ProVocal ™ Appendix Type IV™ White Paper ProVocal™ User Manual...
-
Page 31: Microphone Modeling Technique
The benefits of the dbx Type IV™ Conversion System can easily be heard by switching it in and out while lis- tening to signals with high-level peaks captured in the Type IV™ Over Region. You will notice an obvious audible dif- ference. -
Page 32: Specifications
Connector: Impedance: 75Ω A-D System Performance A-D Conversion: 24-bit, dbx Type IV™ Conversion System Convertor Dynamic Range: 105dB typical, A-weighted, 22kHz bandwidth 102dB typical, unweighted, 22kHz bandwidth Type IV™ Dynamic Range: Up to 117dB with transient material, A-weighted, 22kHz bandwidth... - Page 33 ® A Harman International Company 8760 South Sandy Pkwy. Sandy, Utah 84070 Phone: (801) 568-7660 Fax: (801) 568-7662 Questions or comments? E•mail us at: customer@dbxpro.com or visit our World Wide Web home page at: www.dbxpro.com 18-0448-C ProVocal User Manual...
Need help?
Do you have a question about the ProVocal and is the answer not in the manual?
Questions and answers