
Related Manuals for Dell Venue 10 Pro – 5055


Summary of Contents for Dell Venue 10 Pro – 5055
- Page 1 Dell Venue 10 Pro – 5055 User’s Guide Regulatory Model: T14G Regulatory Type: T14G001...
- Page 2 WARNING: A WARNING indicates a potential for property damage, personal injury, or death. Copyright © 2015 Dell Inc. All rights reserved. This product is protected by U.S. and international copyright and intellectual property laws. Dell and the Dell logo are trademarks of Dell Inc.
-
Page 3: Table Of Contents
Contents 1 Working on Your Tablet..................5 ....................... 5 Before Working Inside Your Tablet ......................... 6 Turning off Your Tablet 2 Features........................8 3 Setting Up Your Tablet..................10 ..........................10 Charging the Tablet ........................11 Turning On Your Tablet .........................12 Turning off the Screen .................... - Page 4 9 Cleaning Your Tablet..................31 10 Troubleshooting....................32 ...........................32 Battery problem ..........................32 System problem .........................33 Touchscreen problem ..........................34 Network problem 11 System Setup..................... 35 ......................35 System Setup (BIOS) Options ..........................38 Updating the BIOS 12 Technical Specifications................. 40 13 Contacting Dell....................44...
-
Page 5: Working On Your Tablet
Damage due to servicing that is not authorized by Dell is not covered by your warranty. Read and follow the safety instructions that came with the product. -
Page 6: Turning Off Your Tablet
CAUTION: Before touching anything inside your tablet, ground yourself by touching an unpainted metal surface, such as the metal at the back of the tablet. While you work, periodically touch an unpainted metal surface to dissipate static electricity, which could harm internal components. - Page 7 b. Touch Settings —> Power —> Shut down to turn off the tablet.
-
Page 8: Features
Features Table 1. Camera Camera-status light Microphones Power button Windows button MicroSD memory card reader Micro-SIM reader (LTE/ HSPA+ models only) Speaker Noble security-cable slot 10. Back camera 11. Dock-guide slots 12. Dock pins 13. Service-tag label 14. Wi-Fi / WWAN status light (optional) 15. -
Page 10: Setting Up Your Tablet
Setting Up Your Tablet Charging the Tablet CAUTION: Charge the battery in an ambient temperature of 0 °C to 40 °C. CAUTION: Use only the power adapter and power cable that came with your tablet. Using unauthorized power adapters or power cables may cause severe damage to your tablet. NOTE: The battery is not fully charged when you unpack your tablet. -
Page 11: Turning On Your Tablet
Battery icon Description Battery is fully charged and AC adapter is connected. Battery is charging with AC adapter. Your tablet is running on battery power and the battery is discharging. Your tablet is plugged in, and either no battery is detected or the battery is not working correctly. -
Page 12: Turning Off The Screen
Turning off the Screen Using power button Press the Power button to turn off the screen. Using Charms Swipe from the right edge of the display to access the Charms bar. Touch Settings → Power → Sleep to turn off the screen. NOTE: If your tablet is in a sleep state, press the Power button or Windows button once to turn on the screen. -
Page 13: Using Your Tablet
Using Your Tablet Screen Orientation For optimal viewing experience, the screen orientation changes automatically to portrait or landscape format depending on how you hold the tablet. NOTE: Some applications may not support automatic screen rotation to portrait or landscape format. How to lock / unlock the screen orientation Swipe from the right edge of the display to access the Charms bar. -
Page 14: Gestures
Gestures Your tablet has a multi-touch display. You can touch the screen to operate the tablet. Gesture Actions Functions • Select items on the screen, including options, Touch entries, images, and icons Tap gently on the display with your fingertip. •... -
Page 15: Right-Click
Gesture Actions Functions Zoom in Enlarge the view of an image or web page Touch the display with two fingers and then move the fingers apart Zoom out Reduce the view of an image or web page Touch the display with two fingers and then move the fingers closer Rotate Rotate an object by 90 degrees... -
Page 16: The Windows Start Screen
The Windows Start Screen The Windows Start screen displays a list of default and custom Live Tiles, which act as a shortcut to Control Panel, Windows Explorer, Weather application, RSS, Windows Store, Internet Explorer, and other installed applications. Live Tiles on your Start screen change and update in real time so you can get real-time updates about news or sports, check what your friends are up to, and get the latest weather forecast. -
Page 17: Swipe Left
If your tablet is running on an application or performing actions, pressing the Start icon takes you back to the Start screen. If you are at the Start screen, pressing the Start icon takes you to the most recently used application or most recently viewed screen. NOTE: The functionality of the Start icon is same as Windows button Swipe Left... -
Page 18: Inserting The Micro-Sim Card (Optional)
After you connect your device to the audio port, a pop-up window displays with options. Select the appropriate option and click OK. NOTE: These are the default options on the tablet, which display only when you connect a device to the audio port. Depending upon your device, you can select any of these options. WARNING: Listening to loud music for extended period of time can lead to hearing loss. -
Page 19: Inserting The Microsd Card
CAUTION: Opening the card-slot door without loosening the screw may damage the door. NOTE: The type of screw may vary depending on the tablet configuration. NOTE: Make sure that the card is correctly aligned and is inserted all the way. NOTE: Turn off your device before inserting the micro‑SIM card. - Page 20 NOTE: Make sure that the card is correctly aligned and is inserted all the way. NOTE: Turn off your device before inserting the microSD card.
-
Page 21: Managing Your Tablet Settings
Managing your tablet settings Wi-Fi setting Turning On/Off Wi-Fi Swipe from the right edge of the display to access the Charms bar. Touch Settings → Change PC settings → Networks → Airplane mode. Swipe Wi-Fi icon right or left to turn Wi-Fi on or off. Connecting to a network Swipe from the right edge of the display to access the Charms bar. -
Page 22: Mobile Broadband Setting
Mobile broadband setting Turning On/Off mobile broadband Swipe from the right edge of the display to access the Charms bar. Touch Settings →Change PC settings → Networks → Airplane mode. Swipe Mobile broadband icon left or right to turn mobile broadband on or off. Connecting to a mobile broadband network Ensure that an active SIM card is inserted into the tablet. -
Page 23: Disconnecting From Mobile Broadband Network
Touch Settings → Networks → Connections → Your Service Provider → Connect. The estimated data usage will be shown after the mobile broadband network is enabled. NOTE: You can choose the option Connect automatically to connect the mobile broadband automatically. NOTE: Your tablet will automatically prioritize Wi-Fi networks over mobile broadband networks, when both are available. -
Page 24: Service Provider Hardware Information
Service Provider hardware information Swipe from the right edge of the display to access the Charms bar. Touch Settings → Change PC settings → Network. Touch Your Service Provider to view the hardware information including the subscriber information and International Mobile Equipment Identity (IMEI) number. Enabling PIN lock Swipe from the right edge of the display to access the Charms bar. -
Page 25: Remove Everything And Re-Install Windows
Remove everything and re-install Windows This option enables you to recycle or start over your tablet completely, and you can reset to its default / factory settings. If you want to perform this action: Click Get Started. The Reset your PC window opens. Click Next. -
Page 26: Synchronizing Your Tablet
Synchronizing your tablet Using Microsoft account If your computer has Microsoft Windows 8.1 installed, you can synchronize user settings of your tablet with your computer using a Microsoft account. When you sign in with your Microsoft account on your tablet, you can automatically synchronize your settings, including internet browser history, application settings, and personal files etc., with other Windows 8.1 PCs and Windows 8.1 tablets. -
Page 27: Getting Your Stylus Ready For Use
Getting Your Stylus Ready for Use Twist the barrel in a counter clockwise direction. Insert an AAAA battery with the positive side facing the tip of the pen. NOTE: Follow your local and regional statutes and regulations on disposal of battery waste. Re-assemble the barrel securely. -
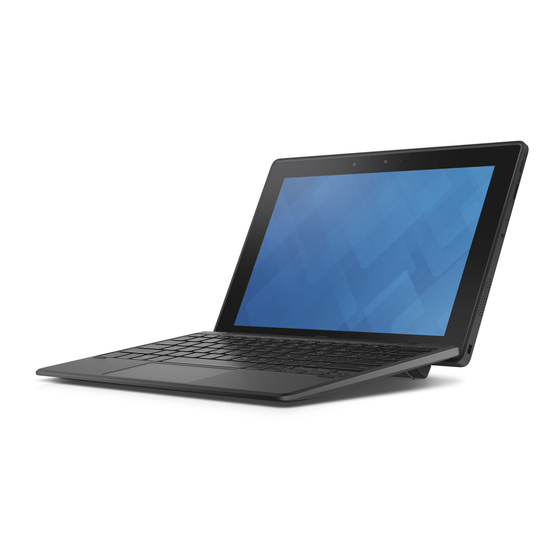
Page 29: Docking Your Tablet To The Keyboard Dock
Docking Your Tablet to the Keyboard Dock Rotate the keyboard dock to a 90-degree angle. NOTE: The hinge position will be open, when you dock you tablet to the keyboard dock. Dock the tablet to the keyboard dock. NOTE: When the connection is made, you need to manually turn the on-screen keyboard off if it is displayed on the screen. -
Page 31: Cleaning Your Tablet
Cleaning Your Tablet CAUTION: Before you clean your tablet, disconnect all cables. Clean your tablet with a soft cloth dampened with water. Do not use liquid or aerosol cleaners, which may contain flammable substances. Turn off your tablet. For more information on turning off your tablet, see Turning Off Your Tablet. Disconnect any attached devices, headphones, speakers, and keyboard dock from the tablet and from their electrical outlets. -
Page 32: Troubleshooting
Troubleshooting Battery problem Problems Possible causes Possible solutions • Unplug the Dell AC power Battery does not charge adapter from the wall and verify that the outlet is functioning. • Check all cable connections and plug back into the wall, then back into the tablet. -
Page 33: Touchscreen Problem
• Operating system failure tablet. • Virus/Malware Refresh the tablet. Contact Dell’s support service. Go to dell.com/ support or dell.com/ contactdell. Software or feature is not Restart your tablet. Software working as expected updates may have been downloaded in the background. -
Page 34: Network Problem
Network problem Problems Possible causes Possible solutions No wireless connection Check if the wireless radio is on. See Wi-Fi setting. Try to get closer to the wireless access point. Try to connect to another known wireless access point. Reset the wireless router if using a private network;... -
Page 35: System Setup
Press and hold the Volume Up button when the Dell logo appears on the screen. When the F12 Boot Selection menu appears, press the Volume Up button to change the boot selection to the BIOS Setup option. - Page 36 Option Function BIOS Version Displays the BIOS revision. EC Version Displays the EC Version. Product Name Displays the product name of your tablet. Service Tag Displays the service tag of your tablet. Asset Tag Displays the asset tag of your tablet. Allows you to create a system asset tag if an asset tag is not already set.
- Page 37 Option Function NOTE: The default settings may vary depending on the tablet configuration. Table 4. Security Option Function Admin Password The administrative password is a user-configurable password that will prohibit modification of most of the BIOS setup fields until the correct administrative password is typed in the ‘Unlock Setup’...
-
Page 38: Updating The Bios
For tablet, ensure that the battery is fully charged and connected to a power outlet. Restart the tablet. Go to dell.com/support. Enter the Service Tag or Express Service Code and click Submit. NOTE: To locate the Service Tag, click Where is my Service Tag? NOTE: If you cannot find your Service Tag, click Detect My Product. - Page 39 The Drivers and Downloads page opens. On the Drivers and Downloads screen, under the Operating System drop-down list, select BIOS. Identify the latest BIOS file and click Download File. You can also analyze which drivers need an update. To do this for your product, click Analyze System for Updates and follow the instructions on the screen.
-
Page 40: Technical Specifications
Technical Specifications NOTE: Offerings may vary by region. The following specifications are only those required by law to ship with your computer. For more information about the configuration of your computer, go to Help and Support in your Windows operating system and select the option to view information about your computer. - Page 41 USB 2.0 connector Micro USB one micro USB connector Memory card reader one microSD card reader Docking port one Dell 6-pin dock connector Subscriber Identity Module (SIM) port one Micro SIM slot Display LED-LCD with MIPI interface, HD (1280x800), and Type...
- Page 42 Storage Storage eMMC 4.5.1 32/64 GB (HS200) Battery Type Rechargeable Li-ion Battery (32Whr) Dimensions Depth 224.2 mm (8.83 inches) Height 4.45 mm (0.18 inches) Width 78.5 mm (3.09 inches) Weight 170.00 g (0.38 lbs) Voltage 3.7 VDC (nominal) and 4.35 VDC (maximum) Temperature range Charge: Operating...
- Page 43 AC Adapter Non-operating –40 °C to 70 °C (–40 °F to 158 °F) Physical Height 9.9 mm (0.39 inches) Width 262.6 mm (10.34 inches) Depth 175.8 mm (6.92 inches) Weight (minimum) 656.9 grams (1.45 lbs) Environmental Temperature: Operating 0 °C to 40 °C Storage -40 °C to 65 °C Relative humidity (maximum):...
-
Page 44: Contacting Dell
Dell product catalog. Dell provides several online and telephone-based support and service options. Availability varies by country and product, and some services may not be available in your area. To contact Dell for sales, technical support, or customer service issues: Go to dell.com/support.
Need help?
Do you have a question about the Venue 10 Pro – 5055 and is the answer not in the manual?
Questions and answers