Advertisement
Table of Contents
- 1 Component Identification
- 2 Rotoflex™ Pump
- 3 Compressor Repair
- 4 Roller Replacement
- 5 Capacitor Replacement
- 6 Motor Repair
- 7 Cooler Repair
- 8 Relief Valve Replacement
- 9 Rotor Replacement
- 10 Troubleshooting
- 11 Wiring Diagram
- 12 Air Diagram
- 13 Technical Data
- 14 Graco Standard Warranty
- 15 Graco Information
- Download this manual
Repair
Interior Texture Sprayers
TexSpray™ RTX 750™
and RTX 1000™
U.S. patent D526,045
For Water-Based Materials Only
Models:
246183 - RTX 750, 6 Gallon
55 psi (0.379 MPa, 3.79 bar)
Maximum Fluid Working Pressure
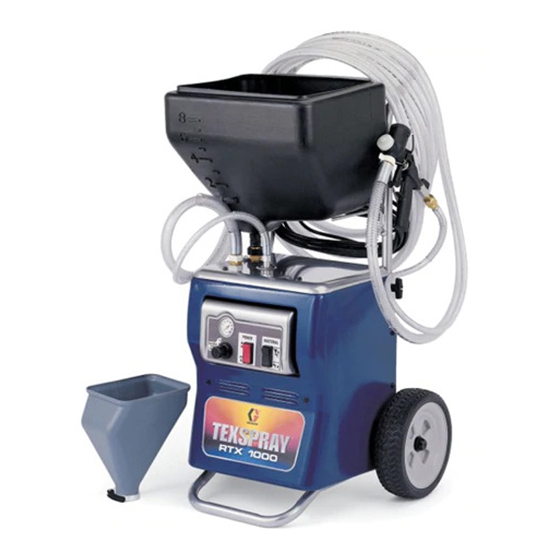
246184 - RTX 1000, 8 Gallon
60 psi (0.414 MPa, 4.14 bar)
Maximum Fluid Working Pressure
Important Safety Instructions
Read all warnings and instructions in this manual.
Save these instructions.
Related Manuals
309584
309585
U.S. patent D501,241
Graco Inc. P.O. Box 1441 Minneapolis, MN 55440-1441
www.graco.com
Copyright 2003
Graco Inc. is registered to I.S. EN ISO 9001
Model 246184 Shown
US
C
Conforms to ANSI/UL
standard 1450
309586R
Advertisement
Table of Contents

Related Manuals for Graco TexSpray RTX 750


Summary of Contents for Graco TexSpray RTX 750
- Page 1 Read all warnings and instructions in this manual. Save these instructions. Related Manuals 309584 309585 Model 246184 Shown U.S. patent D501,241 Graco Inc. P.O. Box 1441 Minneapolis, MN 55440-1441 www.graco.com Copyright 2003 Graco Inc. is registered to I.S. EN ISO 9001 Conforms to ANSI/UL standard 1450...
- Page 2 • Route hoses away from traffic areas, sharp edges, moving parts and hot surfaces. Do not expose Graco hoses to temperatures above 130 F (55 C) or below -35 F (-37 C). • Air hoses at the compressor end, can get very hot! Allow sprayer to cool down 15 minutes before removing air hose.
- Page 3 WARNINGS Electric Shock Hazard To reduce the risk of electric shock: • Be sure sprayer is adequately grounded through electrical outlet, page 5. • Use only 3-wire, extension cords. • Make sure ground prongs are intact on sprayer and extension cords. •...
-
Page 4: Component Identification
Component Identification Component Identification Item Component Item Component Air hose outlet Touch-up hopper (3/4 gallon) Material hose outlet Nozzle storage Material flow control (RTX 1000) Hose plug Hopper gun/spray gun selector switch Gun plug ON/OFF switch Material thickness gauge Air Compressor (inside) Nozzle Material/air hose Gun air valve... - Page 5 Preparation Preparation Pressure Relief Procedure WARNING To reduce risk of injury, follow this procedure page 2 whenever you see this symbol throughout this manual, Also, perform this procedure whenever you: 120V AC Systems • stop spraying. • This equipment • check or repair any part of this system.
-
Page 6: Rotoflex™ Pump
RotoFlex™ Pump RotoFlex™ Pump Disassembly 6. Loosen bolt (A) located between air 1. Relieve Pressure, page 5. and material hose outlets. Unscrew 2. Unplug sprayer from outlet. bolt to lower plate, leaving about 4-5 3. Remove shroud threads on bolt. (6 bolts). - Page 7 RotoFlex™ Pump Reassembly 3. Align dots located on hose fitting, making sure they are facing each other at all times to ensure the hose Reinstall RotoFlex Pump hose on plate. does not twist during reinstallation. 1. Kink hose as shown, making sure dots located on hose fitting face each other.
-
Page 8: Compressor Repair
Compressor Repair Compressor Repair Use Compressor Repair Kit, 234211. 7. Tilt compressor forward and remove from hous- ing. Disassembly 1. Relieve Pressure, page 5. 2. Unplug sprayer. TI3011a 3. Remove shroud (6 bolts). CAUTION Fan blades are very delicate and can be damaged very easily. -
Page 9: Roller Replacement
Roller Replacement Roller Replacement Use Roller Repair Kit 234214. Reassembly Disassembly CAUTION When installing bolt through roller, keep nylon washer 1. Relieve Pressure, page 5. on shoulder of bolt. 2. Unplug sprayer from outlet 1. Replace rollers. 3. Remove shroud (6 bolts). ti3030a ti3025a 2. - Page 10 Cylinder Cylinder Reassembly Use Cylinder Repair Kit 246574, RTX 750. Use Cylinder Repair Kit 246575, RTX 1000. 1. Insert swing arm through ti3086a hole. Disassembly 1. Relieve Pressure, page 5. 2. Unplug sprayer from outlet. 3. Remove shroud (6 bolts). 2.
-
Page 11: Capacitor Replacement
Capacitor Replacement Capacitor Replacement 5. Cut strap. Use Capacitor Replacement Kit 246683. 6. Unplug capaci- WARNING tor and page 2 remove. ti3167a Disassembly 7. Clean surface to remove dirt and any remaining 1. Relieve Pressure, page 5. adhesive. 2. Unplug sprayer. Reassembly 3. -
Page 12: Motor Repair
Motor Repair Motor Repair Use Motor Repair Kit 246572. 10. Using a flat screw driver, remove c-clip (E). Disassembly 1. Relieve Pressure, page 5. TI3099a 2. Unplug sprayer from outlet. 11. Using your hand to sup- port the motor, carefully 3. - Page 13 Motor Repair 4. Using one hand to support 8. Reattach yellow wire (B). motor, slide rod (F) through 9. Secure all wires together with wire tie (A), making motor bracket. sure the wires to not touch air line (H) and the motor can swing the full travel (I) without stressing wires.
-
Page 14: Cooler Repair
Cooler Repair Cooler Repair Use Cooler Repair Kit 246578. 6. Carefully drill out rivets. Disassembly 1. Relieve Pressure, page 5. 2. Unplug sprayer. ti3096a 3. Remove shroud (6 bolts). 7. Pull cooler out of hous- ing. Reassembly 1. Install cooler in housing. ti3025a 2. -
Page 15: Relief Valve Replacement
Relief Valve Replacement Relief Valve Replacement Use Air Relief Valve Kit 246580, RTX 750. 7. Disconnect air hose at quick disconnect fitting. Use Air Relief Valve Kit 246581, RTX 1000. Disassembly 1. Relieve Pressure, page 5. TI3093a 2. Unplug sprayer. 3. -
Page 16: Rotor Replacement
Rotor Replacement Rotor Replacement Use Rotor Kit 246585 (includes Roller Kit 234214) 7. Remove rotor. Disassembly 1. Relieve Pressure, page 5. 2. Unplug sprayer. TI2868A Reassembly 3. Remove shroud (6 bolts). 1. Install rotor with flange facing outward. 4. Remove RotoFlex pump hose, page 6, Disassem- 2. -
Page 17: Troubleshooting
Electrical Requirements, page 5. Gun needle plugged Clean needle and retry. Lines not connected Check all quick disconnect connec- tions to gun and hoses Damaged hose Replace hose Worn compressor Replace compressor. Contact a qual- ified Graco Service Center. 309586R... - Page 18 Troubleshooting Problem Cause Solution Speed of application too slow Material too thick Thin material. Nozzle too small Change nozzles to a larger size. See Operation Manual, Recommended Nozzle Selection Chart, page 10. Too much air being used. Partially close gun air valve to reduce air flow.
-
Page 19: Wiring Diagram
Wiring Diagram Wiring Diagram ELECTROLYTIC CAPACITOR BLACK BLACK MOTOR BLUE YELLOW SELECTOR POWER GREEN SWITCH SWITCH POWER GROUND CORD GREEN WHITE GREEN BLACK WHITE BLACK BLACK ti3120a AIR COMPRESSOR Air Diagram ALTERNATE RTX 1000 CONFIGURATION FOR UNITS WITH REGULATOR DIAL AND GAUGE. AIR MANIFOLD GAUGE REGULATOR... - Page 20 Parts Parts Model 246183, RTX 750 52(A) 57(B) ti2690d 309586R...
- Page 21 Parts Parts Model 246183, RTX 750 (A)50 (B)57 309586R...
- Page 22 Parts Parts Model 246183, RTX 750 Part No. Description Part No. Description 15B507 CORD set, power 234214 KIT, roller 234217 GUN, texture, manual 309584 117563 SWITCH, selector 246316 HOPPER, 6-gallon 117693 SWITCH, on/off 15B676 STORAGE, nozzle 15B859 LEG, frame 15B990 GUARD, burp 15A903 PLATE, hose 115099 GASKET 246585 KIT, pulley, includes 1, 2, 41...
- Page 23 Parts Parts Model 246184, RTX 1000 309586R...
- Page 24 Parts Parts Model 246184, RTX 1000 (A) 50 (B)52 49 25 ti7077b 309586R...
- Page 25 Parts Parts Model 246184, RTX 1000 Part No. Description Part No. Description 234148 KIT, hose 234214 KIT, roller 248930 KIT, quick disconnect 117563 SWTICH, power 234217 GUN, spray, manual 309584 117693 SWITCH, power 117672 BELT, GT2, 3mm 15A903 PLATE, hose 117671 PIN, clevis 246585 KIT, pulley, includes 1, 2, 43 117668 PIN, cotter, bow tie...
-
Page 26: Technical Data
Technical Data Technical Data Main unit power requirements ..... 120 Vac, 60 Hz, 15A, 1 phase Maximum fluid working pressure ....60 psi, (4.137 bar) Maximum air working pressure. - Page 27 NOTES NOTES 309586R...
-
Page 28: Graco Standard Warranty
With the exception of any special, extended, or limited warranty published by Graco, Graco will, for a period of twelve months from the date of sale, repair or replace any part of the equipment determined by Graco to be defective.
Need help?
Do you have a question about the TexSpray RTX 750 and is the answer not in the manual?
Questions and answers