
Related Manuals for Lorex LW2100


Summary of Contents for Lorex LW2100
-
Page 1: Instruction Manual
DIGITAL WIRELESS QUAD VIEW MONITORING SYSTEM Interference Free, Secure, Indoor/Outdoor, Day/Night Instruction Manual English Version 1.0 MODEL: LW2100 www.lorexcctv.com Copyright © 2009 Lorex Technology Inc. - Page 2 Thank you for purchasing the Digital Wireless Quad View Monitoring System. This manual refers to the following products: • LW2100 Please visit us on the web for the most current Manuals and Quick Start Guides. Additional Language Manuals may also be available at: WARNING: TO PREVENT FIRE OR SHOCK HAZARD, DO NOT EXPOSE THIS UNIT TO RAIN OR MOISTURE.
-
Page 3: Before You Start
B E F O R E Y O U S T A R T THIS PRODUCT MAY REQUIRE PROFESSIONAL INSTALLATION LOREX IS COMMITTED TO FULFILLING YOUR SECURITY NEEDS • We have developed user friendly products and documentation. Please read the Quick Start Guide and User Manual before you install this product. -
Page 4: Avant De Commencer
AVANT DE COMMENCER CE PRODUIT POURRAIT EXIGER UNE INSTALLATION PROFESSIONNELLE LOREX S’ENGAGE À SATISFAIRE VOS BESOINS SÉCURITAIRES • Veuillez lire le guide de démarrage rapide et le mode d’emploi avant d’installer ce produit. • Les guides du consommateur et les séances de tutorat vidéo sont disponibles sur l’Internet en visitant www.lorexcctv.com/support... -
Page 5: Need Help
NEED HELP? DO NOT RETURN THIS PRODUCT TO THE STORE Please make sure to register your product at www.lorexcctv.com to receive product updates and information EASy WAyS TO CONTACT US: Online: Pr oduc t Suppo r t i s a v a i l a b l e 24/ 7 i n c l u di ng p r o du ct in for m a ti o n, us e r m a nu a l s , qu i c k s ta r t u p gu i de s a n d F A Q ’... -
Page 6: Necesita Ayuda
NECESITA AYUDA COMUNÍQUESE PRIMERO CON NOSOTROS NO DEVUELVA ESTE PRODUCTO A LA TIENDA Cerciórese de por favor colocar su producto en www. lorexcctv.com/registration para recibir actualizacio- nes y la información del producto maneras sencillas de comunicarse con nosotros En línea: apoyo al producto disponible 24/7 incluyendo infor- mación del producto, manuales para el usuario, guías de inicio rápido y preguntas más frecuentes en... -
Page 7: Important Safeguards
Important Safeguards In addition to the careful attention devoted to quality standards in the manufacture process of your video product, safety is a major factor in the design of every instrument. However, safety is your responsibility too. This sheet lists important information that will help to assure your enjoyment and proper use of the video product and accessory equipment. -
Page 8: Service Use
Important Safeguards Service 13. Servicing - Do not attempt to service this video equipment yourself as opening or removing covers expose dangerous voltage or other hazards. Refer all servicing to qualified service personnel. 14. Conditions Requiring Service - Unplug this video product from the wall outlet and refer servicing to qualified service personnel under the following conditions. -
Page 9: General Precautions
General Precautions 1. All warnings and instructions in this manual should be followed 2. Remove the plug from the outlet before cleaning. Do not use liquid aerosol detergents. Use a water dampened cloth for cleaning 3. Do not use this unit in humid or wet places 4. -
Page 10: Camera Features
* Stated IR Illumination range is based on ideal conditions. Actual range and image clarity depends on installation location, viewing area and light reflection/absorption level of object The Digital Wireless signal transmission type used by the Lorex LW2100 series is also known as Frequency Hopping Spread Spectrum. -
Page 11: Table Of Contents
Table of Contents Getting Started ... 8 Wireless Receiver ... 9 Connecting the Camera... 9 Installation Warnings: ... 10 Installing the Camera... 10 Setting up the Wireless Receiver ... 11 Viewing Modes... 12 On-Screen Display... 13 Adding Cameras ... 14 Using Auto-Scan ... -
Page 12: Getting Started
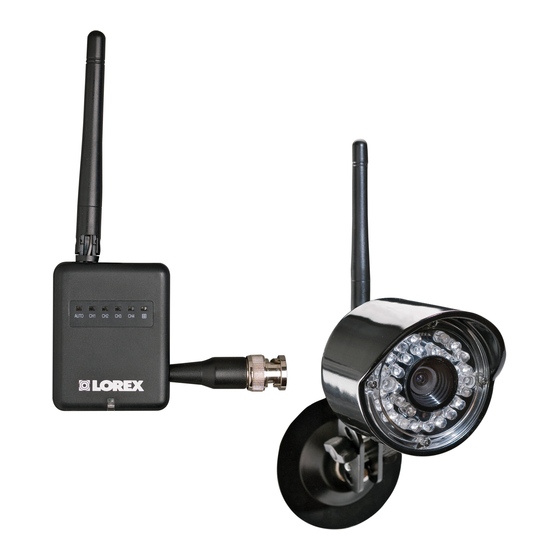
Getting Started Getting Started The System comes with the following components: 1 x WIRELESS CAMERA* 1 x CAMERA 1 x WIRELESS RECEIVER MOUNTING STAND 1 x MOUNTING 1 x BNC/RCA SCREW KIT ADAPTER 1 X WIRELESS 3ft/1m BNC 2 x POWER ADAPTERS ANTENNA Female/BNC (FOR RECEIVER &... -
Page 13: Wireless Receiver
Wireless Receiver 1. Wireless Antenna: Screws onto to the top of the receiver. 2. Channel LEDs: When lit up, indicates the current viewing mode. 3. Resolution* button: Press to switch between VGA and QVGA video resolutions; press and hold for several seconds to remove/replace channels from Auto-Scan. -
Page 14: Installation Warnings
Connecting the Camera Installation Warnings: • Aim the Cameras to best optimize the viewing area: Select a location for the camera that provides a clear view of the area you want to monitor, which is free from dust, and is not in line-of-sight to a strong light source or direct sunlight. -
Page 15: Setting Up The Wireless Receiver
Setting up the Wireless Receiver To connect the wireless receiver to a surveillance recorder (DVR): 1. Screw the antenna onto the top of the receiver. 2. Connect the BNC connector on the receiver directly into an available video input. NOTE: If necessary, attach the 3ft (1m) BNC/BNC extension cable at one end to the receiver and at the other end to the surveillance recorder. -
Page 16: Viewing Modes
Viewing Modes Viewing Modes There are six different viewing modes available on the system: individual viewing of channels 1~4, Quad split-screen, and Auto-Scan. For details on Auto-Scan, see page 14. Press the CHANNEL button Quad mode Channel 4 Figure 3.0 View Mode diagram *Images simulated. -
Page 17: On-Screen Display
On-Screen Display 1. Signal Indicator – The signal indicator shows the strength of the signal being received from the camera. The number of bars in the Signal Indicator shows the strength of the signal – One or No Bars indicates the signal is poor, and 4 bars indicate a very strong signal. -
Page 18: Adding Cameras
Adding Cameras Adding Cameras The System comes with a camera that has already been paired. The Pairing Function assigns each camera to a different channel on the Wireless Receiver (up to four cameras), and is necessary for configuring additional cameras. By default, the camera included with the system appears on channels 1 on the wireless receiver. -
Page 19: Setting Dwell Time
Setting Dwell Time You can set the length of time (in seconds) that the receiver displays each channel while in Auto Scan. To set dwell time: 1. Make sure the Wireless Receiver and cameras are fully connected and powered 2. Press and hold the RESOLUTION button at the same and CHANNEL button the Dwell Time screen appears. -
Page 20: Appendix A: System Specifications
Appendix A: System Specifications Appendix A: System Specifications Receiver Specifications Receiver Receiving Frequency Range RX Sensitivity Demodulation Data Rate Supported Resolutions Power Requirement Power Consumption Operating Temp Range Camera Specifications Camera Transmit Frequency Range TX Power Data Rate Modulation TX Range Image Sensor Type Effective Pixel Image Processing... -
Page 21: Appendix B: About Digital Wireless Technology
Appendix B: About Digital Wireless Technology Appendix B: About Digital Wireless Technology The Digital Wireless signal transmission type used by the Lorex LW2100 is also known as FHSS –Frequency Hopping Spread Spectrum. This type of signal is highly resistant to deliberate jamming as it generates a channel hopping sequence using an algorithm generated by the receiver system. -
Page 22: Appendix C: Strengthening The Range Of The Wireless Signal
Appendix C: Strengthening the Range of the Wireless Signal Appendix C: Strengthening the Range of the Wireless Signal Is your wireless signal choppy? Do you want to extend the range of wireless transmission? There are several ways to boost your wireless signal as well as options to help you extend the range of the wireless signal. -
Page 23: Ghz Directional Wireless Panel Antenna
Appendix C: Strengthening the Range of the Wireless Signal 2.4 GHZ Directional Panel Antenna Use the 2.4GHz Directional Panel Antenna (model#: ACCANTD9) in one of two scenarios: SCENARIO 1—Single camera installation: Attach the directional antenna to either the camera or receiver or both to extend the range. -
Page 24: Ghz Omni-Directional Wireless Antenna
Appendix C: Strengthening the Range of the Wireless Signal 2.4 GHZ Omni-Directional Antenna Use the 2.4GHz Omni-Directional Antenna (model#: ACCANTO8) in the following scenario: Multi-camera installation: Attach the Omni-Directional antenna to the receiver to extend the wireless transmission range of the receiver. To further improve the strength of the wireless signal, consider adding directional antennas to those cameras which are located far away. -
Page 25: Troubleshooting
Troubleshooting If you have problems with your System, there is often a quick and simple solution. Please try the following: Problem There is no picture from a camera. There is interference with the camera picture. The picture is dropping The picture is or has become choppy The picture appears to be grainy/distorted... -
Page 26: Faq
Q: What is the maximum distance I can have between the camera and the receiver? A: Typically 450 feet (137 m) with a clear line of sight in open space, or approximately 150 feet (46 m) in a house. Walls, studs, furniture will interfere with the range of wireless transmission. Q: Why does my “wireless camera”... - Page 30 SEE HEAR PROTECT Enhance your security with genuine Lorex Cameras, Digital Video Recorders, Integrated Systems and Accessories. Order whatever you need at www.lorexcctv.com or call 1-888-42-LOREX (1-888-425-6739) Restaurant Warehouse Office Convenience Store CVC6998HR CVC6993R CNC1020 VQ1536HR PROTECT EVERYTHING Day Care Home Office THAT MATTERS Add wired or wireless cameras to expand the...
Need help?
Do you have a question about the LW2100 and is the answer not in the manual?
Questions and answers