Logitech Harmony 1000 User Manual
Logitech harmony 1000 user manual
Hide thumbs
Also See for Harmony 1000:
- Getting started (2 pages) ,
- Catalog (20 pages) ,
- User manual (19 pages)
Table of Contents
Advertisement
Quick Links
Advertisement
Table of Contents

Related Manuals for Logitech Harmony 1000


Summary of Contents for Logitech Harmony 1000
- Page 1 Harmony 1000 User Manual version1.0...
-
Page 2: Table Of Contents
GETTING ADDITIONAL HELP ... 15 INDING NSWERS TO UESTIONS v. 1.0 ... 3 EMOTE ... 4 ... 4 ... 6 EMOTE ... 8 ... 9 ARMONY EMOTE ... 10 ... 13 XTENDER ... 13 ETWORK ... 15 Harmony 1000 page i... -
Page 3: Introduction
If in doubt about how to set up your Harmony remote, follow the information and instructions using the Logitech Harmony Remote Software (also referred to as Harmony Remote Software). The Harmony remote is an Internet-powered universal remote control. Your Harmony remote can control most devices that understand infrared (IR) signals. -
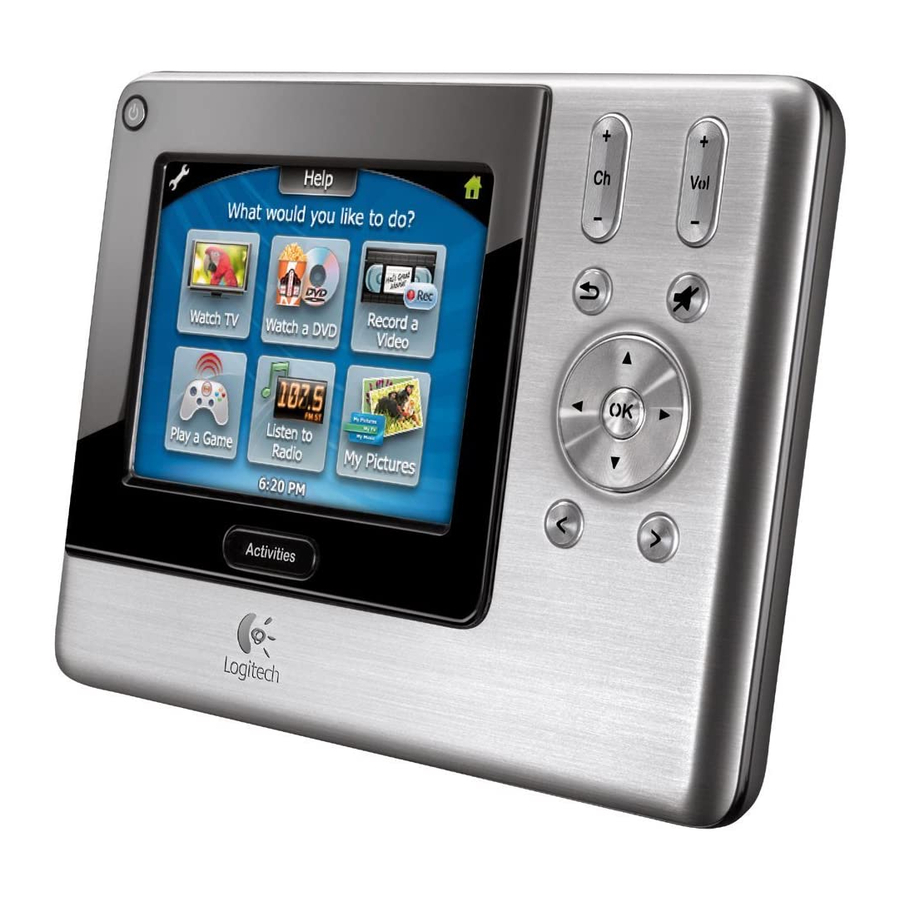
Page 4: Overview Of The Harmony Remote
G. Display: Shows a list of your Activities and devices, help, infrared (IR) commands and any available listings. H. Previous Channel: Press to return to the previous channel. v. 1.0 Changing the Behavior of Buttons Within an Harmony 1000 Activity. page 2... -
Page 5: Navigating The Menus On The Remote
The display, its backlight, and the keypad backlight will remain on for a few seconds, and then turn off. • When the battery is low, the display will flash a message reminding you to charge the battery. v. 1.0 Harmony 1000 page 3... -
Page 6: Adding Device To Your Account
Before you can add devices, you must install the software from the CD that was packaged with the remote, or from the Logitech web site. Once you have installed the software, you will be prompted to create a member account so that you can store your information about the devices in your home entertainment center. -
Page 7: Identifying The Inputs A Device Uses
• Review the device's user manual, which should list all of the available inputs. • Look at the back of the device and make a note of the names and amount of inputs. v. 1.0 Harmony 1000 page 5... -
Page 8: User Manual Harmony
To create Activities you must install the software from the CD that was packaged with the remote, or from the Logitech web site. Once you have installed the software, you will be prompted to create a member account so that you can store your information about the devices in your home entertainment center and the settings for each Activity you create. -
Page 9: Type Of Help Available
Asks questions about all the devices in your system. Select Full help if you find devices aren’t being controlled the way you want them to and the help on the remote is not asking you questions about these devices. v. 1.0 Harmony 1000 page 7... -
Page 10: Using The Remote Assistant
While the Help button helps you solve device problems within an Activity, the Remote Assistant teaches you how to use your Harmony remote. The following is an example of the type of help the Remote Assistant offers: Example If any devices are not set up correctly, press Help now. v. 1.0 Harmony 1000 page 8... -
Page 11: Customizing Your Harmony Remote
Favorite Channels. Changing the Behavior of Buttons Within an Activity When you select an Activity, the Harmony remote will: • Turn on all the correct entertainment devices v. 1.0 Harmony 1000 page 9... -
Page 12: Adding Custom-Labeled Buttons
The Harmony remote has an infrared sensor along the bottom side. The Harmony remote uses this sensor to learn commands from original device remotes. • A: Your original remote • B: Distance between remotes: 5-10 cm (2"-5") apart • C: Your Harmony remote v. 1.0 Harmony 1000 page 10... -
Page 13: Naming An Infrared Command
Do not name the input based on what you have connected to your device, rather name it based on what it is called on the front of the device, or on the remote control (e.g. InputAux, InputVideo1, InputTape, InputDVD, InputVCR). v. 1.0 Harmony 1000 page 11... -
Page 14: Using The Remote With The Rf Wireless Extender
Indicates that the RF Wireless Extender is sending commands. • Power (B) Indicates that the RF Wireless Extender is powered either by AC or USB. • RF (C) Indicates that the RF Wireless Extender is receiving RF signals. v. 1.0 Harmony 1000 page 12... -
Page 15: Installing The Rf Wireless Extender
2. Press Add on the remote when you see a message reminding you to add an RF Wireless Extender to your network. 3. Press Connect on the RF Wireless Extender. By pressing Connect you will add the extender to your Z-Wave network. v. 1.0 Harmony 1000 page 13... -
Page 16: Controlling Devices
Controlling a Device With the Remote: In order for the remote to control the device, there must be a direct line of sight between the signal sent by the remote and the device receiving the signal. v. 1.0 Harmony 1000 page 14... -
Page 17: Getting Additional Help
Click this button for help specific to the step you are A support tool that helps you identify the settings that need to be adjusted in your configuration when the Harmony remote is not controlling your system correctly. Harmony 1000 page 15...
Need help?
Do you have a question about the Harmony 1000 and is the answer not in the manual?
Questions and answers