Table of Contents
Advertisement
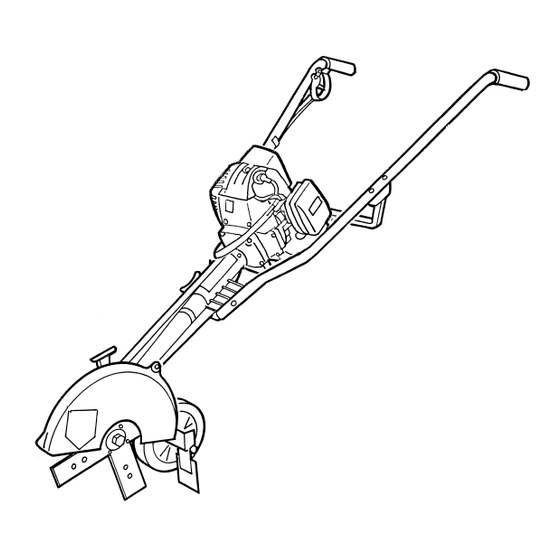
LITTLE WONDER
OPERATOR/OWNER MANUAL
SAFETY INSTRUCTIONS
Patents Granted in USA and Australia.
US Patent No. 5,826,667. Other US patents pending.
Design registrations Granted in
USA, Australia, Japan, Great Britain
Patent Pending on Cross-Blade System.
IMPROPER USE
CAN CAUSE
SERIOUS INJURY
MAKE SURE THIS
MANUAL IS READ
AND CAREFULLY
UNDERSTOOD
BEFORE STARTING
OR OPERATING
THIS EQUIPMENT
IMPORTANT MANUAL – DO NOT THROW AWAY
Manual always to be available for reference or instructing new operators
SUPERVISORS, THIS IS YOUR RESPONSIBILITY
2003, LITTLE WONDER, Div. Schiller-Pfeiffer, Inc.
©
AND
for
EDGER
®
Advertisement
Table of Contents

Subscribe to Our Youtube Channel
Related Manuals for Little Wonder Xtra


Summary of Contents for Little Wonder Xtra
-
Page 1: Safety Instructions
AND CAREFULLY UNDERSTOOD BEFORE STARTING OR OPERATING THIS EQUIPMENT IMPORTANT MANUAL – DO NOT THROW AWAY Manual always to be available for reference or instructing new operators SUPERVISORS, THIS IS YOUR RESPONSIBILITY 2003, LITTLE WONDER, Div. Schiller-Pfeiffer, Inc. © EDGER ®... -
Page 2: Table Of Contents
EXPLANATIONS WITH THEM DESERVE YOUR CAREFUL ATTENTION AND UNDERSTANDING. THE SAFETY WARNINGS IN THIS MANUAL AND ON THE XTRA EDGER DO NOT, BY THEMSELVES, ELIMINATE ANY DANGER. THE INSTRUCTIONS OR WARNINGS THEY GIVE ARE NOT SUBSTITUTES FOR PROPER ACCIDENT PREVENTION MEASURES. -
Page 3: Arts And Ontrols
● KEEP BYSTANDERS AT LEAST 50FT (16M) AWAY ● ALWAYS WEAR EAR PROTECTION ● WEAR SNUG FITTING CLOTHING ● MINORS SHOULD NEVER BER PERMITTED TO USE THIS EDGER ● WEAR STURDY SHOES WITH NON-SLIP SOLES ● DO NOT LEND, RENT OR SELL THIS EDGER WITHOUT THE OPERATOR MANUAL. -
Page 4: Afety Recautions
As a result, engineering changes and improvements are made from time to time. If the operating characteristics or the appearance of your Xtra Edger differs from those described in this manual, please contact your Little Wonder dealer for information and assistance. -
Page 5: Proper Clothing
Do not operate an Xtra Edger when fatigued. Be alert - if you get tired while operating the machine, take a break. Tiredness may result in loss of control. Working with any power tool can be strenuous. If you have any condition that might be aggravated by strenuous work, check with your doctor before operating the machine. - Page 6 Never operate your machine if it is damaged, improperly adjusted or not completely and securely assembled. At correct idle speed, the blade should not turn. Do not use the Xtra Edger with incorrect idle speed; see the speed setting instructions on page 13.
-
Page 7: Safe Working Conditions
Fit a new spark plug if electrodes are badly pitted or fouled with carbon build-up. Store Xtra Edger in a dry, high or locked location place and out of reach of children. ▲ WARNING... -
Page 8: Uel Mix And Ueling
(Key #1) and 4 locknuts (Key #2) provided in packet. 2. Fit handle assembly to edger. Insert 150mm (6”) bolt through left handle, edger body and right handle. Screw large wing nut (Key #85) on bolt (Key #31) so that bolt end is approximately flush (level) with face of the center boss of the large wing nut. -
Page 9: Important Note
See Page 6 - Safety Precautions, Fueling. Fill or add fuel to the tank only when the edger is in a horizontal position as shown (Fig. 7). Allow engine to cool down for at least 5 minutes before adding fuel. -
Page 10: Stopping Instructions
TARTING AND Place lawn edger on ground in horizontal position (see Fig. 9C). Be sure the ignition switch is “ON.” Pull switch toward operator to turn ON. Switch is located on right side of trigger (see Fig. 8). COLD START: Move choke lever up to start (closed) position (Fig. -
Page 11: Operating Instructions
Storing for a long period: Drain the fuel tank and run engine until carburetor is dry. PERATING The Xtra Edger is very easy and simple to use. For some people, it may take a few edgings to become an expert. - Page 12 10. Sideways Tilting: Lower either left or right handle to achieve angle cutting (Fig 12D). 11. Clutch: The Xtra Edger is equipped with a centrifugal clutch. DO NOT run edger at low speeds or, if blade is jammed, at high speeds as clutch shoes will prematurely wear out and cause damage.
-
Page 13: Fuel Filter Maintenance
ILTER AINTENANCE NOTE: Clean and re-oil the air filter every 5 hours of operation or daily. The air filter is one of the most important areas to maintain. If it is not maintained, you will void the warranty. Before cleaning, make sure the unit is turned off. Wash the two filters in detergent and water (Fig. -
Page 14: Blade Replacement
Tighten nut. Clean plastic dust cap (Key #72) and housing (Key #80); press back by gently ▲ USE ONLY LITTLE WONDER BLADES (P/N 100105). Other blades have larger size holes (1/2”) which will cause out-of-balance vibrations which will damage unit and cause injury. -
Page 15: Spark Plug
Xtra Edger. Remove air deflector to clean. FIG 21 FIG 22... -
Page 16: Troubleshooting Tips
PROBLEM CAUSE Engine will not run. Ignition switch is “OFF” Empty fuel tank Primer bulb was not pushed enough times Engine is flooded Engine runs rough Carburetor/crankcase/cylinder or is hard to start. gaskets/crankshaft seal leaking Damaged engine parts Engine lacks power Dirty air filter or stalls when cutting. - Page 17 OTES...
-
Page 21: Parts Breakdown
LITTLE WONDER DGER NGINE ARTS REAKDOWN... -
Page 22: Little Wonder
1 small washer, and nut. Tighten nut (Fig. 1B & 1C) to 15-20 ft. lbs. or hand tight. ▲ WARNING Use only Little Wonder Blades. Other blades have larger size holes (1/2”) which will cause out-of-balance vibrations which will damage unit and can cause injury. - Page 23 replaces shaft and maintains alignment and contains washers, spacer and gear in housing - DO NOT TURN HOUSING OVER. Carefully push new blade shaft up into bearing and tap through carefully so washers, crown gear and spacer remain in position and the 3/8 bolt is pushed out (Fig.
- Page 24 12. Remove bearing holding screw (A), self tapping clutch housing locating screw (B) and loosen 2 x 5mm screws (C) (see Fig. 6). 13. Remove 3 screws, blade support plate and one self-tapper on blade cover. Remove 6 screws (D) (Fig. 6) holding main housing bearing cover.
- Page 25 EPLACING LUTCH OUSING 17. To replace clutch housing, remove clutch drum (Fig. 11), tap shaft through housing (Fig. 12) and slide off bearing and clutch housing. Replace with new housing, reinstall bearing, spacer and clutch drum. Place clutch drum housing on top of jaws of vice and carefully tap down (as shown in center of hex nut - not the drum, as you could distort same) until bearing bottoms into housing (Fig.
- Page 26 (Fig. 21). ▲ WARNING Only use Little Wonder hardened bevel washers (P/N 100506). Soft washers will not allow blade to tighten up and blade will slip in use. Note washer assembly.
-
Page 31: California Emission Control Warranty Statement Your Warranty Rights And Obligations
YOUR WARRANTY RIGHTS AND OBLIGATIONS THE CALIFORNIA AIR RESOURCES BOARD AND LITTLE WONDER ARE PLEASED TO EXPLAIN THE EMISSION CONTROL SYSTEM WARRANTY ON YOUR XTRA (TM) LAWN EDGER ENGINE. IN CALIFORNIA, NEW UTILITY AND LAWN AND GARDEN EQUIPMENT ENGINES MUST BE DESIGNED, BUILT AND EQUIPPED TO MEET THE STATE'S STRINGENT ANTI-SMOG STAN- DARDS. -
Page 32: Warranty
Little Wonder Xtra Operator’s Manual. This warranty does not apply to any damage to the Little Wonder Xtra Edger that is the result of improper maintenance or to any Little Wonder Xtra Edger that has been altered or modified so as to adversely affect the product’s...
Need help?
Do you have a question about the Xtra and is the answer not in the manual?
Questions and answers