
Related Manuals for Esatto EO64


Summary of Contents for Esatto EO64
- Page 1 User Manual: Model Code/s: Product: Page: Document: EO64 60cm User Manual Fan-Forced Oven...
- Page 2 Dear Customer, Congratulations on purchasing your new fan-forced oven. The Esatto brand is proudly distributed within Australia by Residentia Group Pty Ltd. Please refer to the warranty card at the rear of this manual for information regarding your product’s parts and labour warranty, or visit us online at www.residentiagroup.com.au.
-
Page 3: Table Of Contents
User Manual: Page: Contents: Page: Safety instructions Your Esatto Oven Installation Instructions Operating Your Oven Cleaning & Maintenance Troubleshooting & Technical Data Warranty Information Notes... -
Page 4: Safety Instructions
User Manual: Page: Safety Instructions This oven must only be installed by a suitably qualified and licenced person and in accordance with the instructions provided. Incorrect installation may cause harm to persons, damage property and void the product’s warranty. IMPORTANT! The power supply to the oven must be cut off before any adjustments or maintenance work is undertaken. - Page 5 User Manual: Page: Safety Instructions (Continued) → To reduce the risk of fire, do not place or install this oven in areas where the ventilation or circulation ducts may become blocked. → The oven’s power cord must be connected to a properly grounded and protected, 220-240V electrical outlet.
-
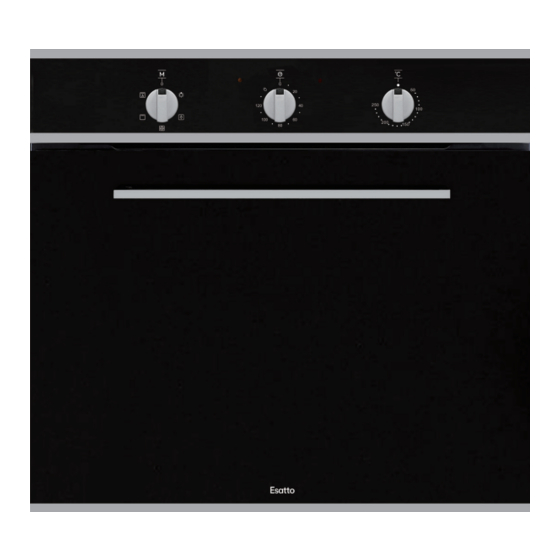
Page 6: Your Esatto Oven
User Manual: Page: Your Esatto Oven CONTROLS — Oven function selection knob Temperature control knob Minute Minder Timer... - Page 7 User Manual: Page: Your Esatto Oven (Continued) OVEN COMPONENTS ROASTING TRAY GRILLING RACK/SHELF ROASTING TRAY INSERT...
-
Page 8: Installation Instructions
User Manual: Page: Installation Instructions It’s important to carefully read the following installation instructions before beginning the installation of your oven. IMPORTANT! The connection of this oven must be carried out by a suitably qualified and licensed person, in accordance with the current versions of the following: →... - Page 9 User Manual: Page: Installation Instructions (Continued) POSITIONING The adjacent cabinetry and wall materials must be able to withstand a minimum temperature rise of 85°C above the ambient temperature of the room. → The kitchen area should be dry and equipped with sufficient ventilation. When installing the oven, easy access to all control elements should be ensured.
- Page 10 User Manual: Page: Installation Instructions (Continued) FITTING GUIDELINES WARNING! The installation must be carried out by a suitably qualified and licensed person and in accordance with the current standards. → The oven is manufactured to work with three-phase alternating current (220V-240V/50Hz).
- Page 11 User Manual: Page: Operating your Oven BEFORE THE OVEN’S FIRST USE Remove all packaging and clean the interior of the oven. → Take out and wash the oven fittings with warm soapy water. → Switch on any ventilation within the room (such as a rangehood), or open any windows. →...
- Page 12 Grill and fan assist roasts, sealing the juices in. FAST START FEATURE Your Esatto oven is equipped with a fast start function which can be used to bring your oven up to 150°c in approximately 4 minutes. To use this feature: →...
-
Page 13: Cleaning & Maintenance
User Manual: Page: Cleaning & Maintenance By ensuring proper cleaning and maintenance of your Esatto oven, you can ensure that it will have a long and fault free operation. WARNING! Do not start cleaning the oven until it has completely cooled. - Page 14 User Manual: Page: Cleaning & Maintenance (Continued) REMOVAL OF THE INTERNAL GLASS PANEL Unscrew and unfasten the plastic latch that is in the corner at the top of the door. Next take out the glass from the second blocking mechanism and remove. After cleaning, insert and block the glass panel, and screw in the blocking mechanism.
-
Page 15: Troubleshooting & Technical Data
User Manual: Page: Troubleshooting & Technical Data OPERATION IN CASE OF EMERGENCY In the event of an emergency you should: → Switch off all oven controls (i.e. Cooking Function and Temperature) → Switch the oven off at the isolation switch or at the fuse box. →... -
Page 16: Warranty Information
User Manual: Page: Warranty WARRANTY TERMS AND CONDITIONS COOKING APPLIANCES → This document sets out the terms and conditions of the product warranties for Residentia Group Appliances. It is an important document. Please keep it with your proof of purchase documents in a safe place for future reference should you require service for your Appliance. - Page 17 User Manual: Page: Warranty continued You may not make a claim under this warranty unless the defect claimed is due to faulty or defective parts or workmanship. Residentia Group is not liable in the following situations (which are not exhaustive): the Appliance is damaged by: accident (ii)
-
Page 18: Notes
User Manual: Page: Notes... -
Page 19: User Manual: Page
User Manual: Page:... - Page 20 User Manual: Model Code/s: Page: EO64...
Need help?
Do you have a question about the EO64 and is the answer not in the manual?
Questions and answers