Table of Contents
Advertisement
Quick Links
SERVICE MANUAL
COLOR TELEVISION
The above model is classified as a green product (*1), as indicated by the underlined serial number.
This Service Manual describes replacement parts for the green product. When repairing this green
product, use the part(s) described in this manual and lead-free solder (*2).
For (*1) and (*2), see the next page.
FILE NO. 050-200702GR
(MFR'S VERSION A)
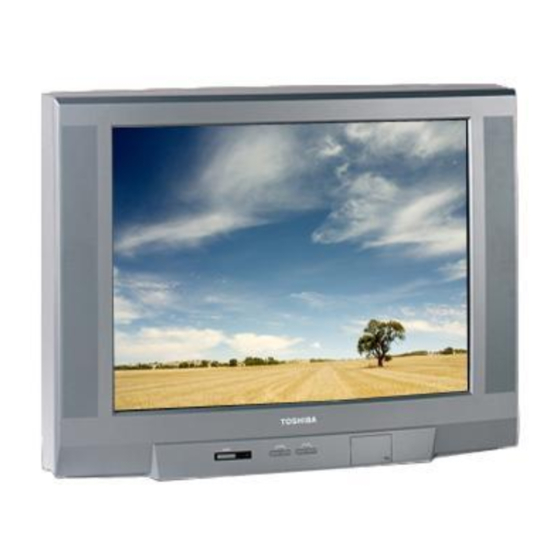
27D47
DOCUMENT CREATED IN JAPAN, February, 2007 GREEN
Advertisement
Table of Contents

Related Manuals for Toshiba 27D47


Summary of Contents for Toshiba 27D47
-
Page 1: Service Manual
(MFR'S VERSION A) SERVICE MANUAL COLOR TELEVISION 27D47 The above model is classified as a green product (*1), as indicated by the underlined serial number. This Service Manual describes replacement parts for the green product. When repairing this green product, use the part(s) described in this manual and lead-free solder (*2). -
Page 2: Green Product Procurement
Hazardous Substances. From July 1, 2006, the RoHS Directive will prohibit any marketing of new products containing the restricted substances. Increasing attention is given to issues related to the global environmental. Toshiba Corporation recognizes environmental protection as a key management tasks, and is doing its utmost to enhance and improve the quality and scope of its environmental activities. -
Page 3: Servicing Notices On Checking
SERVICING NOTICES ON CHECKING 1. KEEP THE NOTICES 6. AVOID AN X-RAY As for the places which need special attentions, Safety is secured against an X-ray by consider- they are indicated with the labels or seals on the ing about the cathode-ray tube and the high cabinet, chassis and parts. -
Page 4: Table Of Contents
TABLE OF CONTENTS GREEN PRODUCT PROCUREMENT ..................A1-1 LEAD-FREE SOLDER ........................A1-1 SERVICING NOTICES ON CHECKING ..................A1-2 HOW TO ORDER PARTS ......................A1-2 IMPORTANT ..........................A1-2 TABLE OF CONTENTS ....................... A2-1 GENERAL SPECIFICATIONS ..................... A3-1~A3-5 DISASSEMBLY INSTRUCTIONS 1. REMOVAL OF ANODE CAP ....................B1-1 2. -
Page 5: General Specifications
GENERAL SPECIFICATIONS CRT Size / Visual Size 27 inch / 676.0mmV System CRT Type Normal Magnetic Field BV/BH +0.45G/0.18G Color System NTSC Display Capability 480i Speaker 2Speaker Position Front Side Size 2.0 x 3.5 Inch Impedance Sound Output 1.0 + 1.0 10%(Typical) NTSC3.58+4.43 /PAL60Hz Tuning... - Page 6 GENERAL SPECIFICATIONS Unit RC-NH Remote Control Glow in Dark Remocon Format Toshiba Remocon Format Toshiba Custom Code 40-BFh Power Source Voltage(D.C) UM size x pcs UM-4 x 2 pcs Total Keys 26 Keys Keys Power CH Up/MENU Cursor Up CH Down/MENU Cursor Down...
- Page 7 GENERAL SPECIFICATIONS Picture Brightness, Contrast, Color, Tint, Sharpness G-10 Features Mode (Picture preference) Color Temperature Audio Tone Control (Bass, Treble, Balance) Stable Sound Surround SRS WOW(SRS 3D/Focus/Tru Bass) Variable Audio Out Tuning TV/CABLE CH Program Add/ Delete Label CH Label Video Label Favorite CH Lock...
- Page 8 GENERAL SPECIFICATIONS Owner's Manual Language English / Spanish G-11 Accessories W/ Warranty Remote Control Unit Rod Antenna Poles Terminal Loop Antenna Terminal U/V Mixer DC Car Cord (Center+) Guarantee Card Warning Sheet Circuit Diagram Antenna Change Plug Service Station List Important Safety Instruction Dew/AHC Caution Sheet AC Plug Adapter...
- Page 9 60 (ORION SPEC:31) Container Stuffing Sets/40' container Cabinet Cabinet Front PS 94V0 DECABROM G-16 Material Cabinet Rear PS 94V0 DECABROM Non-Halogen Demand Eyelet Demand Environmental standard requirement Green procurement of Toshiba G-17 Environment Pb- Free Phase3(PHASE3A) Measures for Whisker A3-5...
-
Page 10: Disassembly Instructions
DISASSEMBLY INSTRUCTIONS 3. After one side is removed, pull in the opposite direction to 1. REMOVAL OF ANODE CAP remove the other. Read the following NOTED items before starting work. NOTE After turning the power off there might still be a potential Take care not to damage the Rubber Cap. -
Page 11: Removal And Installation Of Flat Package Ic
DISASSEMBLY INSTRUCTIONS When IC starts moving back and forth easily after REMOVAL AND INSTALLATION OF desoldering completely, pickup the corner of the IC using a FLAT PACKAGE IC tweezers and remove the IC by moving with the IC desoldering machine. (Refer to Fig. 2-3.) REMOVAL NOTE Put the Masking Tape (cotton tape) around the Flat... - Page 12 DISASSEMBLY INSTRUCTIONS INSTALLATION When bridge-soldering between terminals and/or the soldering amount are not enough, resolder using a Thin-tip Take care of the polarity of new IC and then install the new Soldering Iron. (Refer to Fig. 2-8.) IC fitting on the printed circuit pattern. Then solder each lead on the diagonal positions of IC temporarily.
-
Page 13: Service Mode List
SERVICE MODE LIST This unit is provided with the following SERVICE MODES so you can repair, examine and adjust easily. To enter to the SERVICE MODE function, press and hold both buttons simultaneously on the main unit or on the main unit and on the remote control for more than a standard time in the appropriate condition. - Page 14 WHEN REPLACING EEPROM (MEMORY) IC If a service repair is undertaken where it has been required to change the MEMORY IC, the following steps should be taken to ensure correct data settings while making reference to TABLE 1. IN IT Table 1 CONFIRMATION OF INITIAL DATA Enter DATA SET mode by setting VOLUME to minimum.
-
Page 15: Servicing Fixtures And Tools
SERVICING FIXTURES AND TOOLS JG205 JG206 Flash UP-Date Soft JG176 2007 SD DTV Rom Serial Communication Disc Disc Change JIG Ref. No. Part No. Parts Name Remarks Serial Communication JG205 APJG205000 Connect the set to personal computer Change JIG Up-Date of the Firmware JG206 APJG206000 Flash UP-Date Soft Disc... -
Page 16: Electrical Adjustments
ELECTRICAL ADJUSTMENTS 1. ADJUSTMENT PROCEDURE FUNCTION FUNCTION OSD H Read and perform these adjustments when repairing the CONT.CENT OSD C CONT.MAX circuits or replacing electrical parts or PCB assemblies. CUT OFF CONT.MIN H.POSI COL.CENT CAUTION H BLK L COL.MAX H BLK R COL.MIN •... - Page 17 ELECTRICAL ADJUSTMENTS 2-5: BRIGHT CENT 2-7: TINT Receive the monoscope pattern. (RF Input) Receive the color bar pattern. (RF Input) Set the screen mode to FULL. Using the remote control, set the brightness, contrast Using the remote control, set the brightness and contrast color and tint to normal position.
- Page 18 ELECTRICAL ADJUSTMENTS 2-12: VERTICAL POSITION Receive the monoscope pattern. Using the remote control, set the brightness and contrast to normal position. Adjust the VR401 until the horizontal line becomes fit to the notch of the shadow mask. 110% (Refer to Fig. 2-3) horizontal line white 100% Fig.
- Page 19 ELECTRICAL ADJUSTMENTS 2-16: COR TOP/BTM 2-18: Confirmation of Fixed Value (Step No.) Receive the crosshatch signal from the Pattern Generator. Please check if the fixed values of each of the adjustment Set the screen mode to FULL. item is set correctly referring below. Using the remote control, set the brightness and contrast ANALOG DIGITAL...
-
Page 20: Purity And Convergence
ELECTRICAL ADJUSTMENTS 3-3: STATIC CONVERGENCE 3. PURITY AND CONVERGENCE ADJUSTMENTS NOTE Adjust after performing adjustments in section 3-2. NOTE Receive the crosshatch pattern from the color bar Turn the unit on and let it warm up for at least 30 generator. - Page 21 ELECTRICAL ADJUSTMENTS 4. ELECTRICAL ADJUSTMENT PARTS LOCATION GUIDE (WIRING CONNECTION) CRT PCB TP024 R805 TP022 R803 J801 S801 CP802B CP801B CP803 CD803 CD802 CD801 CP801A CP101 J702 J703 J704 J701 FB401 CP401 CD1001 TP003 SPEAKER W002 VR401 VR502 CP1001 CP802A DEGAUSS COIL L503 CP502...
-
Page 22: Micon/Chroma
MICON/CHROMA BLOCK DIAGRAM CHROMA IC IC601 LA76327M-MPB-E FB401 J801 Q802, Q806 35 XTAL 3.58 X601 B OUT BLUE OUT Q803, Q805 3.579545MHz GREEN OUT G OUT FRONT -VIDEO VIDEO IN2 V801 Q801, Q804 J705 V-OUT IC RED OUT R OUT IC401 LA7847-E 30 Y IN V OUT... -
Page 23: Sd Digital Module
SD DIGITAL MODULE BLOCK DIAGRAM X2401 25MHz SPI FLASH IC2405 EN25P16-50HCP 5 6 2 DTV ASIC 256Mbit DDR SDSAM IC2401 IC2402 ZR39740HGCF-B0 HY5DU561622ETP-D43 +2.6V +2.6V 1 2 3 4 AUDIO DAC EEPROM IC2406 IC2403 CS4345-CZZ AT24C04N-10SU-2.7 10 7... -
Page 24: Printed Circuit Boards Tv Mt/Crt
PRINTED CIRCUIT BOARDS TV MT/CRT (INSERTED PARTS) SOLDER SIDE CP801A C430 D404 CP101 J702 J704 D412 J701 J703 W890 B402 R408 D405 D411 C419 C733 W882 W889 W883 C715 C405 R459 W175 R430 L403 W176 Q003 W177 W013 W012 R006 W178 R441 R006... - Page 25 PRINTED CIRCUIT BOARDS TV MT/CRT (CHIP MOUNTED PARTS) SOLDER SIDE Q105 R127 R125 C720 R744 R102 CCF076A R104 R131 R136 IC199 Q104 Q108 R115 Q106 Q506 Q510 R175 IC102 Q604 R810 R814 R626 R656 CMF094A R039 R638 R038 R030 Q612 Q605 Q601 R635...
-
Page 26: Digital
PRINTED CIRCUIT BOARDS DIGITAL (TOP SIDE) DIGITAL (BOTTOM SIDE) CEF242A R2414 R2415 C2468 R2402 C2469 R2416 X2401 NTSC C2470 C2471 R2425 R2506 R2426 C2551 NR2404 NR2405 R2503 R2460 C2554 C2454 C2535 C2414 C2538 C2547 R2461 R2472 IC2402 R2497 C2474 R2445 C2420 R2498 NR2407... -
Page 27: Micon
MICON SCHEMATIC DIAGRAM P.CON+5V (TV MT PCB) CP101 A2001WR2-8P SCL1 BUFFER SDA1 Q104 IIC_OFF VIDEO_OUT KTA1504S_Y_RTK IIC_OFF C139 DTV_RX R142 DTV_RX VIDEO_AMP DTV_TX C109 DTV_TX C104 Q108 +3.3V_D KTC3875S +3.3V R140 Y_RTK RESET RESET 390K EEP ROM IC 8K IC R117 R116 TO AV SW/SOUND AMP/TONE CTL... -
Page 28: Chroma/If
CHROMA/IF SCHEMATIC DIAGRAM (TV MT PCB) FROM POWER W886 P.CON+5V_SW UN_REG.12V Q609 KTD1691Y P.CON+5V_SW C638 Q608 W817 KTC3209_Y R650 R659 UN_REG.12V R632 FROM/TO AV SW/SOUND AMP/TONE CTL R625 100 1/4W R623 Y_IN 100 1/4W U_IN V_IN Q604 VIDEO_IN1 C628 KTC3875S_ R641 Y_RTK VIDEO_IN2... -
Page 29: Deflection
DEFLECTION SCHEMATIC DIAGRAM (TV MT PCB) FROM/TO DY V.DRIVE IC IC401 LA7847-E V801 Pump up M68LWF088X50 CP401 A1561WV2-A6P L402_1 25.9 25.3 15.7 311015027 R407_1 R439 5.6K 1/4W +-1% P.CON+5V_B C425 0.0012 TO CRT/SVM CD803 CD807 CH823004 CH823004 (CP803) (CP807) R417 R414 R459 R444... - Page 30 POWER SCHEMATIC DIAGRAM (TV MT PCB) CP501 003P-2100 D516 RELAY DRIVE R515 Q504 CP509 10.9 1SS133 KTC3198 4.7K 1/4W 003P-2100 C516 0.001 TO AV SW/SOUND AMP/TONE CTL RY501 D505 W836 W855 ALKS321_M60 SOUND+B SR290-F R501 R541 P.CON+9V DEGAUSS COIL L503 CP502 T028R27021 0.22 1W...
-
Page 31: Tuner
TUNER SCHEMATIC DIAGRAM (TV MT PCB) TU001 ENG36E03KF 31.4 C038 0.001 B C040 0.1 B TO CHROMA/IF C002 W850 6.3V A_TUNER_CVBS L001 22uH 0607 DTV_DATA SDA1 DTV_CLOCK W824 LEVEL CONVERT SCL1 Q006 2SK393800L LEVEL CONVERT Q005 2SK393800L FRON/TO MICON AFT_MAIN DTV_TX DTV_RX DEGI_ST_L... -
Page 32: Av Sw/Sound Amp/Tone Ctl
AV SW/SOUND AMP/TONE CTL SCHEMATIC DIAGRAM (TV MT PCB) YUV_IN(REAR) R1014 FROM/TO CHROMA/IF J704 5.6K MSP-213V1-652_NI_LF V_IN SOUND AMP IC IC1001 AN17822A U_IN R1015 VIDEO_IN3 P.CON+5V 5.6K Y_IN VIDEO_IN1 VIDEO_IN2 S_VIDEO_IN[Y] S_VIDEO_IN[C] AT+5V V_IN C1003 U_IN Y_IN C1001 FROM TUNER TUNER_AUDIO[R] TUNER_AUDIO[L] FROM/TO MICON... -
Page 33: Crt/Svm
CRT / SVM SCHEMATIC DIAGRAM (CRT PCB) CRT BLOCK L801 150uH 0607 FROM DEFLECTION R802 CP801B 2.7K 1/4W R803 FROM DEFLECTION B2013H02-5P RED OUT RED OUT 180V Q804 C802 S801 Q801 100.6 15K 2W KTC4217 R812 KTC3199_Y 123.0 0.001 TP022 D810 C811 R817... -
Page 34: Power&Ground
POWER & GROUND SCHEMATIC DIAGRAM (DIGITAL PCB) DTV_ASIC IC DTV_ASIC IC IC2401 ZR39740HGCF-B0 (1/6 POWER) IC2401 ZR39740HGCF-B0 (2/6 GND) VDD Bypass Cap Place cap near pin C2424 3V3_D ADAC_VDD MVDD VDD Bulk Bypass cap 0.1 B Place 1 cap per side of ZR740 ADAC_VSS MVDD C2425... -
Page 35: Sdram
SDRAM SCHEMATIC DIAGRAM (DIGITAL PCB) DTV_ASIC IC IC2401 ZR39740HGCF-B0 (3/6 DDR) NR2404 NR2401 4D02WGJ0150TCE 4D02WGJ0150TCE DDRWEN SWEN SDATA3 DDRDQ15 SWEN SDATA3 DDRRASN SRASN SDATA5 DDRDQ14 SRASN SDATA5 DDRBS1 SBS1 SDATA7 DDRDQ13 SBS1 SDATA7 DDRA0 SADR0 SDATA1 DDRDQ12 DDR Bypass Cap DDR Bypass Cap SADR0 SDATA1... -
Page 36: Flash/Gpio
FLASH/GPIO SCHEMATIC DIAGRAM FROM/TO AV IN/OUT (DIGITAL PCB) 3V3_D UART1TX_MB UART1RX_MB 740_INIT DTV_ASIC 740_COMM IC2401 ZR39740HGCF-B0 (4/6 FLASH/GPIO) SD_H/SEL_SW AFT1 MSG_REQ AFT0 I2C0C JG2425 (SPI_HOLD) GPIO_03 I2C0D NR2408 4D02WGJ0470TCE RESETN SPI_SO SD card update SPI_CLK SPI_CSN JG2445 C2472 CLKIN SPI_SI 18P CH SPI_WEN SPI_FLASH IC... -
Page 37: Vif/Sif
VIF/SIF SCHEMATIC DIAGRAM (DIGITAL PCB) DTV_ASIC IC IC2401 ZR39740HGCF-B0 (5/6 VIF/SIF) FROM AV IN/OUT R2445 C2476 IF_P IFE_AIN_P 0.01 B R2446 C2477 IF_N IFE_AIN_N 0.01 B R2448 IF_AGC IF_AGC 2K +-1% JG2418 RF_AGC JG2419 AGC_SENSE JG2420 PWM_OUT C2533 JG2421 SADATA 0.1 B C2536 JG2422... -
Page 38: Av In/Out
AV IN/OUT SCHEMATIC DIAGRAM (DIGITAL PCB) Spurious filter Place circuit near CP2403 DTV_ASIC B2407 IC2401 ZR39740HGCF-B0 (6/6 AV I/O) SD_H/SEL_SW FCM1608KF-102T02 VDAC_COMP PIXOUT7 B2406 IF_AGC PIXOUT6 FCM1608KF-102T02 PIXOUT5 PIXOUT4 L2421_1 PB_OUT VDAC_U PIXOUT3 0.47uH NLV25 PIXOUT2 PIXOUT1 CP2403 IMSA-6029B-1-28Z136-PT1 PIXOUT0 CVBS_IN/740_INIT L2422_1 CVBS_IN/740_INIT... -
Page 39: Waveforms
WAVEFORMS DEFLECTION POWER ON 20µs 10µs 200mV 10.0V AV/SOUND 20µs 20µs 20µs 200mV CHROMA/IF DEFLECTION 10µs 10ms 20µs 200mV 0.5V MICON 2µs 50µs 50µs 20µs 20µs 0.1ms NOTE: The following waveforms were measured at the point of the corresponding balloon number in the schematic diagram. - Page 40 WAVEFORMS DEFLECTION 50µs 200V AV/SOUND 20µs 200mV CRT/SVM 20µs 20µs 20µs NOTE: The following waveforms were measured at the point of the corresponding balloon number in the schematic diagram.
-
Page 41: Mechanical Exploded Views
MECHANICAL EXPLODED VIEW 102C 102B PCB110 (CRT PCB ASS'Y) 102A 102B PCBDH0 (DIGITAL PCB ASS'Y) PCB070 101H (TV MT PCB ASS'Y) 101H 101G 101F 101H 101D 101B 101E 101C 101A... - Page 42 MECHANICAL EXPLODED VIEW (PACKING DIAGRAM) 123, 124, 125, TM101...
-
Page 43: Mechanical Replacement Parts List
MECHANICAL REPLACEMENT PARTS LIST Location No. TSB P/N Reference No. Description 75006496 7A701A848A FRONT CABI ASS'Y 101A 75006497 701WPJD390 CABINET FRONT 101B 72783245 711WPAA131 PLATE,FRONT 101C 72783246 712WPBA147 DOOR 101D 72783247 713WPAA229 GLASS,LED 101E 72783552 7235490075 AV,LABEL 101F 72783248 735WPBB468 BUTTON,ASS'Y 101G 72795625 800WQ0A041 FELT SHEET 101H... -
Page 44: Electrical Replacement Parts List
ELECTRICAL REPLACEMENT PARTS LIST Location No. TSB P/N Reference No. Description RESISTORS R002 72794621 R3X28B010J R,METAL OXIDE OHM 3W R004 72796002 R3X28BR22J R,METAL OXIDE 0.22 OHM 3W R408 72794614 R65582010J R,FUSE OHM 1/2W R410 72795502 R3X18A470J R,METAL OXIDE OHM 2W R411 72781752 R655811R2J... - Page 45 ELECTRICAL REPLACEMENT PARTS LIST Location No. TSB P/N Reference No. Description DIODES D504 72794473 D2WTRM11C0 DIODE SILICON RM11C-EIC D505 72783906 D2LXSR2900 DIODE SCHOTTKY SR290-F D506 75003522 D2LXN49370 DIODE,FAST RECOVERY 1N4937-F D507 72794491 D1VT001330 DIODE,SILICON 1SS133T-77 D508 72795542 D97U03R91B DIODE,ZENER MTZJ3.9B T-77 D509 72794477 D97U01501B...
- Page 46 ELECTRICAL REPLACEMENT PARTS LIST Location No. TSB P/N Reference No. Description TRANSISTORS Q505 72795474 TC3T029090 TRANSISTOR,SILICON 2SC2909(S,T)-AA Q506 72794558 TNAAD05001 COMPOUND TRANSISTOR KRC104SRTK Q507 72794577 TCATC31980 TRANSISTOR,SILICON KTC3198-AT(Y,GR) Q508 72798324 TAAT012714 TRANSISTOR, SILICON KTA1271_Y-AT Q509 72794577 TCATC31980 TRANSISTOR,SILICON KTC3198-AT(Y,GR) Q510 72794558 TNAAD05001 COMPOUND TRANSISTOR...
- Page 47 ELECTRICAL REPLACEMENT PARTS LIST Location No. TSB P/N Reference No. Description MISCELLANEOUS B401 72794356 024HT03564 CORE,BEADS W4BRH3.5X6X1.0 B402 72794356 024HT03564 CORE,BEADS W4BRH3.5X6X1.0 B405 72794356 024HT03564 CORE,BEADS W4BRH3.5X6X1.0 B501 72794355 024HT03563 CORE,BEADS W4BRH3.5X6X1.0X2 B504 72794357 024HT03553 CORE,BEADS W5RH3.5X5X1.0 B2401 72783357 024HC51513 CORE,BEADS FCM1608KF-151T06 B2402...
- Page 48 ELECTRICAL REPLACEMENT PARTS LIST RESISTOR RC....CARBON RESISTOR CAPACITORS CC....CERAMIC CAPACITOR CE....ALUMI ELECTROLYTIC CAPACITOR CP....POLYESTER CAPACITOR CPP....POLYPROPYLENE CAPACITOR CPL....PLASTIC CAPACITOR CMP....METAL POLYESTER CAPACITOR CMPL.... METAL PLASTIC CAPACITOR CMPP... METAL POLYPROPYLENE CAPACITOR J2-5...
- Page 49 TOSHIBA CORPORATION 1-1, SHIBAURA 1-CHOME, MINATO-KU, TOKYO 105-8001, JAPAN...
Need help?
Do you have a question about the 27D47 and is the answer not in the manual?
Questions and answers