Table of Contents
Advertisement
Quick Links
Advertisement
Table of Contents

Related Manuals for Sonim XP5


Summary of Contents for Sonim XP5
- Page 1 USER GUIDE SONIM XP English...
- Page 2 Copyright © 2015 Sonim Technologies, Inc. SONIM and the Sonim logo are trademarks of Sonim Technologies, Inc. Other company and product names may be trademarks or registered trademarks of the respective owners with whom they are associated. Disposal of Old Electrical and Electronic Equipment...
-
Page 3: Table Of Contents
Managing Security Settings What Is In the Box? Locking Your Screen Phone Specifications Encrypting Phone Data Locking Your SIM Card Your Sonim XP5———————— 16 Managing Credential Certificates Switching On Protecting Your Phone from Harmful Applications Setting Up Your Phone Managing Home Screen Managing Phone Security Settings————————... - Page 4 Exporting Phone Contacts to Storage Creating EPTT Contacts———————— 48 Managing Contact Settings Adding Contacts from Native Phonebook Managing Phonebook Settings Adding Contacts by Manual Input Searching Contacts Creating New EPTT Groups———————— 51 Deleting a Contact Making EPTT Calls to Individuals and Managing Calls————————...
- Page 5 Sound Recorder Music Player End User License Agreement———————— 74 License Comprehensive 3-Year Warranty Warranty Registration Application Our Warranty What We Will Do Phone Care Conditions Accessories Federal Communication Commission Interference (FCC) Statement———————— 78 FCC Statement FOR PORTABLE DEVICE USAGE (<20cm from body/ SAR) Industry Canada (IC) Statement————————...
- Page 6 Please register your phone at www.sonimtech.com/register, to receive product information and updates. Sonim devices are covered by a 3-year comprehensive warranty. The removable battery is covered by a 1-Year limited warranty. For more information related to the warranty, please refer to the warranty section...
-
Page 7: Phone Models Covered
104 dB, which enable clear communication in the loudest environments. Phone Models Covered This user guide covers the Sonim XP5 phone with the model number XP5700. The model name can be read on the phone label under the battery. - Page 8 Use hands-free microphone while you are driving. Avoid using the phone in close proximity to personal medical devices, such as pacemakers and hearing aids. Use only Sonim XP approved charging equipment to charge your phone and avoid damage to your phone.
- Page 9 The Sonim XP is dust-resistant, rugged and shock-resistant. However, it is not dust-proof or unbreakable if subjected to overwhelming impact. For best results and long product life, one should protect the Sonim XP from salt water, dust and strong impacts.
-
Page 10: Sar Information
SAR Information HAC Rating The Sonim XP5 has been certified in compliance with the Government’s requirements for exposure to Radio The FCC has created a rating system for cellular phones Waves. regarding their HAC-related performance. This rating... -
Page 11: Avoid High Temperatures
Contact your cardiologist for more information. For compatibility and complies with the Federal other medical devices, consult your physician and the Communications Commission (FCC) requirements. Sonim manufacturer of the device. Comply with instructions to is rated M3/T4. switch off the device or deactivate the RF transmitter... -
Page 12: Emergency Calls
detached and create a choking hazard. Emergency Calls Mobile phones operate using radio signals, which cannot guarantee connection under all conditions. Therefore you should never rely solely upon any mobile phone for essential communications (e.g. medical emergencies). Emergency calls may not be possible in all areas, on all cellular networks, or when certain network services and/ or mobile phone features are in use. -
Page 13: Battery Usage
Battery Usage Sonim XP phone comes with a removable battery. For Charging Animation/Icon any battery related queries contact Sonim customer If the battery is being charged when the support. phone is switched off, a battery charging animation with charged percentage is Charging the Battery displayed. -
Page 14: Tips To Extend The Battery Life
Tips to Extend the Battery Life Follow these tips to extend your phone’s battery life. • If you are not using Wi-Fi, Bluetooth or GPS, use the Settings to turn them off. The GPS setting is located in Settings > Location. Set screen brightness to Low and set a shorter •... -
Page 15: What Is In The Box
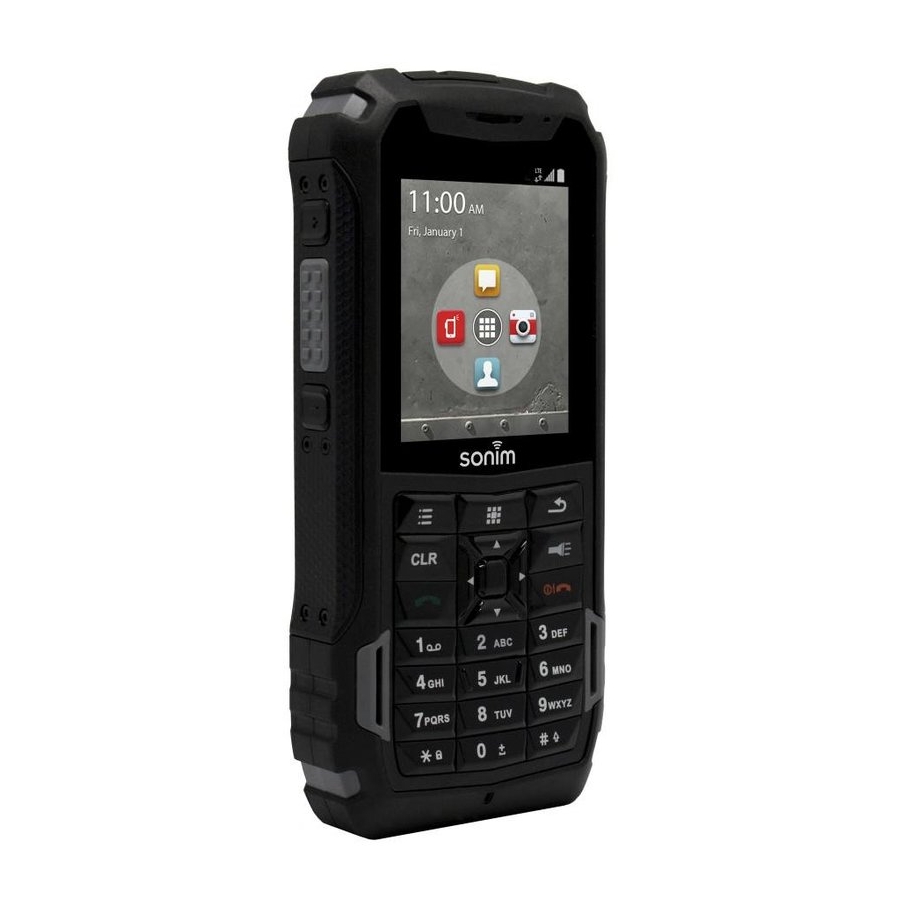
What Is In the Box? The list of items in the Sonim XP phone box are: • Sonim XP phone with removable battery • Quick Start Guide • USB Data Cable • Wall Charger Phone Specifications Feature Description Memory Total Memory: 4 GB Total User Storage: 1.8 GB... - Page 16 Sonim XP Phones Headset port Loudspeaker ON/OFF Notification LED Receiver Volume Up button Display screen EPTT button Volume Down button Menu Navigation keys Options Back Torch Clear Call End/Reject Call/Accept Long press for Power ON/OFF Press and hold to access voicemail...
-
Page 17: Switching On
Switching On Notifications Press and hold ON/OFF red key for 2 seconds. Service indicator and Signal When the phone is switched on, it tries to register with strength indicator the network. After successful registration, the name of the service provider is displayed. Battery charge indicator Ensure that a valid SIM card is inserted in your... -
Page 18: Notification Bar Icons
Description Icon Description Options - displays the Notification icon options for the currently active screen. Battery level indicator Clear - Clears the entered text and delets the selected file. Torch - Enables the flashlight. Battery charging in progress The Menu Option ( ) is always positioned in the No signal center of the favorites tray. - Page 19 Icon Description Icon Description HSPA or UMTS network connected Silent mode activated Vibration mode activated GPRS network connected Airplane mode activated EDGE network connected Error/information notification - attention Wi-Fi connected required Screenshot captured Bluetooth activated Music is played Call in progress Device storage space is running out Missed call PTT Available status icon...
-
Page 20: Phone Operations Without Sim Card
Press and hold * key. • Icon Description • PIN: When enabled, enter you own PIN value. PTT Do Not Disturb status icon When the phone is locked, unlock it using the PIN. When the phone is locked, you can answer an incoming call, without unlocking the phone. -
Page 21: Text Entry Options
To Insert a Number: Text Entry Options Press the key labeled with the number you want and When you enter the text message, you can change the use the navigation key to scroll to that number as text entry options by pressing the # key. The current text above. -
Page 22: Keypad Functions
Keypad Functions The following table displays the various keys and the corresponding functions they perform: Keypad key Operations • Press to end a call. • Press to wake up display. Press to reject an incoming call. • Press and hold to power ON/OFF the device. CALL END/REJECT/ON/OFF •... - Page 23 • Press and hold to enable the flashlight. TORCH Press to see the list of operations that can be done on current application. • OPTION • Press to perform a specific operation on a selected application. OK KEY (CENTER) • Press to navigate in up, down, left and right directions.
- Page 24 • Press or press and hold to change the language, while entering the text. • Press and hold to lock/unlock the keypad. • While entering text, press to switch between various input modes. • Press and hold to list various input modes while entering the text.
-
Page 25: Time And Date Settings
Time and Date Settings Language and Input Settings You can set and display the date and time on the phone. You can set the phone’s language to either US Spanish You can also select the display format. or English. From Home screen, select Menu > Settings ( From Home screen, select Menu >... -
Page 26: Display Settings
Media device (MTP): Select this to use the phone displayed in the screen. as Media device (MTP) to transfer data such as music, pictures, and videos between your Sonim Pulse Notification Light: Check/Uncheck to set the phone and your computer. - Page 27 USB Tethering • Transfer files that would be required later to your computer. To perform USB Tethering: Select Settings > More > Tethering and Portable Hotspot > Enable USB Tethering. The user should activate mobile data or get connected to Wi-Fi network.
-
Page 28: Connecting To Wi-Fi Network
Enable Advanced Settings to set the Proxy details Connecting to Wi-Fi Network and IP settings. Wi-Fi is a wireless network technology that can provide Editing a Network Internet access at distances up to 100 Feet, depending on the Wi-Fi router and surroundings, when you connect Press and hold your preferred network. - Page 29 • Use Bluetooth connected headphones for playing Optimizing Data Usage media file. Data usage refers to the amount of data utilized by your Pairing a Bluetooth Device phone during data transfers through the Internet. The data usage charges are dependent of the wireless plan To activate Bluetooth and pair your XP phone with other provided by your service provider.
- Page 30 Enable Portable Wi-Fi hotspot. Setting Up Tethering & Portable Hotspot Using tethering and portable hotspot you can share your Activating Bluetooth Tethering device’s network connection with a computer or other devices, via USB, Wi-Fi, or Bluetooth. To activate USB When you activate Bluetooth tethering, you can share Tethering: your phone’s Internet connection with other Bluetooth paired devices.
- Page 31 provider. From Home screen, select Menu > Settings ( Select More located under Wireless & Networks settings. Select Emergency alerts. Enable the emergency alert message types such as extreme threats, severe threats and amber alerts that you would wish to receive.
-
Page 32: Managing Security Settings
phone is fully charged before you encrypt it. Managing Security Settings If data encryption is interrupted, you might lose your You can activate and protect your phone from phone data. unauthorized access by configuring the security settings. From Home screen, select Menu > Settings ( Locking Your SIM Card Select Security located under Personal settings. -
Page 33: Location Access
Accept the End User Licence Agreement when the Location Access device is turned ON for the first time. You can enable and configure the Location settings. Enhanced Location mode is automatically turned From Home screen, select Menu > Settings ( Select Location located under Personal settings. -
Page 34: Backup And Restore Data
To backup your data, From the Home screen, select Menu > Sonim apps Select Backup & restore. To prevent installation of application from unknown... -
Page 35: Add A New Contact
You can use the phonebook to maintain phone numbers Type the message and select Send. of your contacts. This feature enables you to add, dial phone numbers and send SMS and MMS messages. If you attach a media file or a contact to your SMS message it is converted to an MMS To access the contacts: message automatically. -
Page 36: Exporting Phone Contacts To Sim Card
multimedia message to any mobile phone. The contact is imported to the phone address book. Managing Contact Settings You can edit and modify ringtone and call receiving Exporting Phone Contacts to SIM Card settings for individual contacts. From Home screen, select Contacts ( From Home screen, select Contacts ( Select Options key >... -
Page 37: Searching Contacts
Searching Contacts From Home screen, select Contacts ( Select Options key > Search and enter the first few letters/numbers of the contact name/phone number to be searched. All the contacts containing the search text are displayed. Deleting a Contact From Home screen, select Contacts ( Scroll to the required contact and select the contact to view the contact details. -
Page 38: Making A Call
Making a Call Viewing Call History From Home screen, select Menu > Phone ( From Home screen, select Menu > Phone ( Select the Call history icon ( ) to view all recently The Phone screen with last dialed number, called, received, and missed calls. -
Page 39: Editing Quick Responses
In the Call settings, select Phone ringtone. Setting TTY Mode Select the ringtone from the Phone ringtone list and If you enable TTY mode, hearing-impaired individuals can select Ok. send and receive phone calls as text over the phone. EPTT incoming calls, instant personal In the Call settings screen, select TTY mode to alerts, missed call alerts, tones, vibration view and modify TTY mode settings. -
Page 40: Sip Accounts
Enable Receive incoming calls to answer incoming Forward when Forward calls when you do not Internet calls. unanswered answer incoming calls. This might reduce your phone’s battery life. Forward when Forward calls when your phone is Select Add account to configure a new SIP unreachable switched off or is out of coverage account. - Page 41 when a number is selected to dial, a dialog is displayed to select either cell phone call or Internet call.
-
Page 42: Sending Sms/Mms Messages
SMS and MMS are convenient and inexpensive means the size of <=1 MB. To add an attachment, select Options key > Attach. Select the attachment type of communication. You can send a text message to other people via SMS service. MMS allows you to send from the options in the next step. -
Page 43: Deleting Messages
To view and modify the message settings, Notification Enable notification alert for To edit message settings, from the Home screen, incoming messages. select Menu > Messaging ( Sound Set the default alert tone for Select Options key > Settings. incoming messages. View and edit the following settings: Vibrate Enable vibrate alert for incoming... -
Page 44: Emergency Alerts
Select Options key > Select > Select Multiple threads > Option key > Delete All threads. All the message threads are deleted after confirmation. Emergency Alerts You receive active alerts and emergency alerts from the service provider. -
Page 45: Enter And Edit Text
You can view and modify the language and dictionary Add a required word and respective shortcut which setting using the Phone Settings. is optional. Enter and Edit Text You can use the phone keypad to enter the text quickly and easily. Type faster and more accurately on your device with Keypad’s word recognition and next-word predictions. -
Page 46: Services
Your Sonim phone comes with pre-loaded EPTT application. AT&T SIM Subscription The user can be provisioned with any of the below mentioned variants. For subscription plans, contact the Service provider. Variant SIM Provisioning SIM provisioned with PHONE plan: • No EPTT service •... -
Page 47: Enhanced Ptt Users Advanced Setting
The screen prompts you to enter the activation Home: Displays your EPTT code provided by the corporate administrator in the calls and conversation specified text box. Enter the activation code and history. You can also change click Yes to activate the EPTT over Wi-Fi network. your presence status here. - Page 48 Favorites: Displays your favorite contacts and groups. You can easily start EPTT calls to your favorites.
-
Page 49: Adding Contacts From Native Phonebook
The EPTT contacts directory is different from the phone’s Select the Native Phonebook. The following screen native contacts directory. There are three ways to add is displayed. EPTT contacts: • Add from Native Phonebook: Select Native Phone Book from + New Contact. It opens phone’s native contact list, and the user can select the contact from contact list and can modify the selected contact or save the same contact as it is. -
Page 50: Adding Contacts By Manual Input
If you want a contact to be added as a favorite, then Adding Contacts by Manual Input check Set as Favorite before pressing Save. Use the numeric keyboard to input text and numbers, special characters, such as *, # and space bar can only be found by pressing the numeric key 1 multiple times until you find the special character or use the select screen to input special characters. - Page 51 If you want a contact to be added as a favorite, then check Set as Favorite before pressing Save. Once you save a contact’s information, it is added to the EPTT contact list. The contact is added successfully.
- Page 52 Groups can be added by creating manually or can be pushed to the phone by the corporate administrator. The groups pushed by the corporate administrator (Corporate groups) cannot be changed or deleted from the handset. Go to the Groups screen and select + New Group to add a new group.
-
Page 53: Making An Eptt Call To An Individual
Making an EPTT Call to an Individual Go to the Contacts screen and select the contact you desire to call. A call to an individual can also be initiated from Call option present after selecting the Options key on the phone. When you finish speaking, release the EPTT button. -
Page 54: Making An Eptt Call To A Group
Select End Call option to end the call or press Red key to end the call. Select Options key to get the options. Select Call from the Options. Making an EPTT Call to a Group Go to the Groups screen and select the group you desire to call. -
Page 55: Making A Quick Group Call
Making a Quick Group Call Go to the Contacts screen and mark the contacts you would like to include in your quick group EPTT call. When other party has taken the floor below UI is displayed. Press the EPTT button or select Call from Options Menu to initiate the call to the selected members. - Page 56 Press and hold the EPTT button to start the call. The call is initiated to all the selected contacts. Start speaking after you hear the chirp. Select End Call option to end the call or press Red key to end the call.
-
Page 57: Editing Eptt Contact
Edit the contact name and favorite setting if required Editing EPTT Contact and press Save. Select a Contact from the list. Select Options key or long press on the contact and select Edit Contact. The contact modifications are updated. -
Page 58: Deleting Eptt Contact
Select Options key or long press on the contact and select Delete Contact. Deleting EPTT Contact A confirmation message is displayed. Select Yes to delete the selected contact. The selected contact is Select a Contact from the list. deleted from the contact list. -
Page 59: Editing Eptt Group
Select Edit Group to edit the Group Name, Favorite. The user can add members and remove members. Editing EPTT Group Select a group from the list and select the Options The other ways to edit the group are: key. Long press on the Group and select Edit •... -
Page 60: Deleting Eptt Group
A confirmation message is displayed. Select Yes to delete the group. Deleting EPTT Group A pop-up message is displayed confirming that the Press and hold a selected group name which has selected group is getting deleted. to be deleted. Select Options key to select Delete Group. -
Page 61: Adding A Favorite Contact
displayed Group successfully deleted. The selected contacts gets added as a favorite and is displayed under the favorites contact tab. In all PTT tabs, C key present in keypad can be used for deleting Contacts, Groups, History, Favorites. Adding a Favorite Contact The user can add contacts as favorites. -
Page 62: Adding A Favorite Group
The selected groups gets added as a favorite and is displayed under the favorite groups tab. Adding a Favorite Group The user can add groups as favorites. The favorite groups are listed under Favorites tab. Selected group is added to Favorites successfully. To set a group as favorite: Go to Favorites Groups tab and select + Add Group. -
Page 63: Eptt Presence Status Change
Select My Status from Conversation history screen. EPTT Presence Status Change • Available ( The EPTT Presence can be set in two ways: • Do Not Disturb ( Select Options key > My Presence. Select one of the following options: My Presence status can be changed from Available to Do Not Disturb and vice versa. - Page 64 • Do Not Disturb: You are not available to accept calls, but alerts can be received.
-
Page 65: Sending Personal Alert
Sending Personal Alert Select the desired contact from the contact list and select Send Alert from the menu. The personal alert is sent to the selected contact by pressing * or #. The personal alert can also be sent using the * or # keys: On EPTT Home screen, select Options key. -
Page 66: Receiving Personal Alert
Receiving Personal Alert Missed call Alert If an EPTT call comes in while you are on a regular phone When a personal alert is received, the user is notified with the sender’s details such as Name, Date and Time. call or on another EPTT call, you will receive a Missed call alert. - Page 67 To view the EPTT call history screen, go to the Home screen and see a list of the most recent EPTT calls. You can make a call to a contact and group from the conversation history. Also send and receive alerts from the conversation history.
- Page 68 • When there is a network error while connecting to the EPTT service and EPTT is in offline status, the EPTT icon is displayed grey ( ) in color in the notification bar.
- Page 69 You can customize the application through the Settings to repeat, like once, repeat and continuous. tab. The following are the most commonly used settings • Alert Frequency: Choose frequency for alerts options. like 5, 10, 15, and 20 Seconds. Select Options key > Settings. •...
- Page 70 Information: The information such as Display name and EPTT Number are displayed. To view the following options, select Options key > Settings > INFORMATION. • Instant Personal Alert: Alert when Instant personal Alert is received. • Missed Call Alert: Alert for when a missed call is received.
- Page 71 Actions: The actions such as Configure Alert like Alert1, Alert2, Alert3 & Alert4. Options, Show Tutorial, and Restore Default • Wi-Fi: Allow EPTT to use Wi-Fi connection Settings can be performed from the following when available. screen. To view the following options, select Options key > •...
- Page 72 To logout of the EPTT application, go to EPTT setting and select Logout option. The EPTT application is logged out and goes to the Home screen. Confirm the logout screen by selecting Yes on the confirmation screen.
-
Page 73: Camera
Search: You can search for a particular event. Camera • Settings: Displays the General settings of the The Sonim XP has a back camera with 5MP fixed focus calendar. for taking pictures. The pictures are saved in the Gallery ) in your phone memory. You can access the Gallery From any of the calendar views, from the Menu screen. -
Page 74: Calculator
• The local time in the home city is displayed in the • To exit without saving, select Options key > Discard. upper half of the screen. • Select World clock icon ( ) located on the top of • To play the recorded file instantly select Play ( the screen. -
Page 75: License
• Once all the mandatory details are submitted, an in and to the Software. Sonim, and, to the extent that the e-mail confirmation will be sent. Software contains material or code of a third party, such •... -
Page 76: Our Warranty
Conditions at the sole discretion of Sonim, with the same or better model in the same or better condition. The warranty is valid whether or not the product has Sonim and its service partners reserve the right to charge been registered. -
Page 77: Accessories
All device batteries both embedded and removable are peripheral devices which are not Sonim-branded warrantied for a period of one (1) year under Sonim’s original accessories intended for use with the 1-Year limited warranty. - Page 78 LIMITATION THE IMPLIED WARRANTIES OF accessory (hereinafter referred to as “Product”). Subject MERCHANTABILITY OR FITNESS FOR A to the conditions of this limited 1-Year Warranty Sonim PARTICULAR PURPOSE, ARE LIMITED TO THE warrants this product to be free from major defects in DURATION OF THIS LIMITED WARRANTY.
-
Page 79: Fcc Statement
WARNING: Changes or modifications made to circuit different from that to which the receiver this equipment not expressly approved by Sonim is connected. Technologies, Inc. for compliance could void the user’s • Consult the dealer or an experienced radio/TV authority to operate the equipment. - Page 80 FOR PORTABLE DEVICE USAGE (<20cm from body/SAR) Radiation Exposure Statement: The product complies with the Canada portable RF exposure limit set forth for an uncontrolled environment and are safe for intended operation as described in this manual. The further RF exposure reduction can be achieved if the product can be kept as far as possible from the user’s body or set the device to lower output power if such function is available.
-
Page 81: For Portable Device Usage (<20Cm From Body/Sar)
IC Statement This device complies with RSS-310 of Industry Canada (IC ID: 8090A-L15V013BA). Operation is subject to the following two conditions: This device does not cause harmful interference. This device must accept any interference, including interference that may cause undesired operation of the device. -
Page 82: Règlement Ic
Règlement IC Le présent appareil est conforme aux CNR d’Industrie Canada applicables aux appareils radio exempts de licence (IC ID: 8090A-L15V013BA). L’exploitation est autorisée aux deux conditions suivantes: L’appareil ne doit pas produire de brouillage, et L’utilisateur de l’appareil doit accepter tout brouillage radioélectrique subi, même si le brouillage est susceptible d’en compromettre le fonctionnement. - Page 83 Clock 69 Contacts Actions 66 Importing contacts to phone 34 Add 34 Adding a contact from phone Information 66 Send message 34 screen 37 Internet calls 39 Add new contact 34 Alarm 69 Data backup and restore 33 Keypad Alerts and Sounds 65 Deleting a contact 36 Accept/Send 22 All applications icon 18...
- Page 84 System icons 18 Power saving settings 26 Viewing battery life 26 Vibrate mode 38 Viewing contact details 34 Quick Responses 38 XP5 Phone 16 Restore data 33 Ringtones 37 Safety guidelines for mobile usage SAR information 10 Searching contacts/people 36...
Need help?
Do you have a question about the XP5 and is the answer not in the manual?
Questions and answers
Where to find qr code for provision sonim xp5700 wizard
Were to gate qr code for sonim xp5700