Advertisement
Quick Links
Advertisement

Related Manuals for Action Fitness X510MAG


Summary of Contents for Action Fitness X510MAG
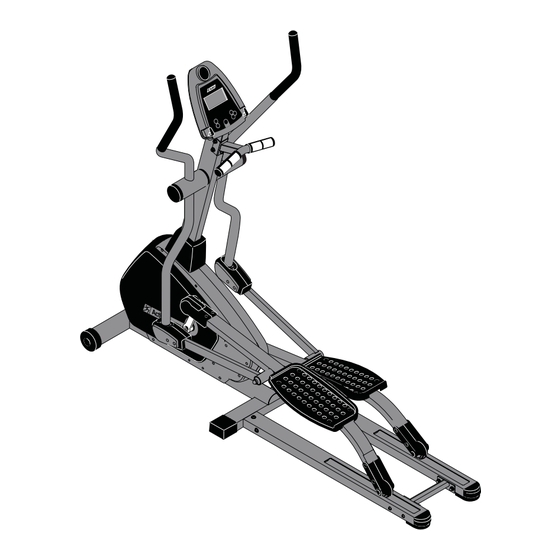
- Page 1 OWNER’S MANUAL X510 MAG ELLIPTICAL TRAINER ATN0002...
-
Page 2: Table Of Contents
Table of Contents Page Important Safety Information _____________ Before You Start _____________________ Assembly Instruction _________________ __ Console ___________________________ Monitoring Your Heart Rate ____________ Exploded View _____________________ Parts List __________________________ Warranty / Service___________________... -
Page 3: Important Safety Information
Important Safety Information WARNING! Before using this unit or starting any exercise program, consult your physician. This is espe- cially important for persons over the age of 35 and/or persons with pre-existing health prob- lems. The manufacturer or distributor assumes no responsibility for personal injury or property damage sustained by or through the use of this product. -
Page 4: Before You Start
Before You Start Thank you for purchasing this new Action Elliptical Trainer! This quality product you have chosen was designed to meet your needs for cardiovascular exercise. Before you start, please read the Owner's Manual and become familiar with the operation of your new unit. Remember to take the time to perform the stretching exercises provided to avoid injury. -
Page 5: Assembly Instruction
Assembly Instruction REMOVE ALL SECURITY TAPE AND WRAPPING BEFORE BEGINNING 1. Attach the Aluminum Extrusions(9&93) to the Main Frame Assembly (1) with Screws (4 & 100), Flat Washers (49), Locknuts (55). Connect the Aluminum Extension Plate (82) between the Aluminum Extrusions(9&93) with Screws (19), Flat Washers (49),Locknuts (55). - Page 6 Assembly Instruction 3. First connect the pins of the Extension Wire (58) in Console Tube (2) to the Gear Box Wire(8) from the Main Frame Assembly(1). Then slide the Console Tube (2) onto the Main Frame Assembly (1) and secure with Screws (56 & 21), Flat Washers (49) and Locknuts (55).
- Page 7 Assembly Instruction 5. Push the switch to select KM or ML KM/ML 6. Connect the Extension Wire (58) and Hand Pulse Wires (91) to the wires on the back side of Monitor (15). Then Secure the Moni- tor (15) to the Console Tube (2) with Screws (39).
- Page 8 Assembly Instruction 7. Assemble the left and right handlebars (5,6) as shown above onto the Console Tube(2). 8. Secure the Connecting Arms (95&23) to the left and right handlebars (6,5) with Screws (67), Washers (79), Spacers (68) , and Nuts (78). Attach Left and Right Handle Covers (64,60) to Left and Right Connecting Arms (95 &23) with Screws (71)
- Page 9 Assembly Instruction 9. The monitor is powered by using the AC adaptor input, make sure the AC adapter has already been pluged into the adapter jack on the bottom housing. Adapter...
-
Page 10: Console
Console Button Functions MODE To dislay value for TIME, DIST, CAL, PULSE RESET Return to main function in stop mode and reset all values to zero. START/STOP To start or stop training RECOVERY To test heart rate recovery status. UP & DOWN To select training mode and adjust function value KM/ML (in the back of console) To select Metric or English of SPEED/DISTANCE. - Page 11 Console BODY FAT You may test and have the BODY FAT advice when the computer is in STOP mode. Please follow the steps as below: 1. Make sure the personal data have been input accurately (prefer to Entering user profile). 2.
- Page 12 Console Enter time and date The console will prompt to enter time and date when it’s first turned. Use MODE and UP/DOWN buttons to enter time and date Entering user profie When U1 shows use MODE and UP/DOWN buttons to enter age, gender, height and weight.
- Page 13 Console Training in MANUAL mode When MAN (manual mode) blinks, press MODE to select Press UP and DOWN button to select load level from 1 to 16 You may set your exercise goal for TIME, DIS- TANCE, CALORIES,and PULSE by pressing UP/DOWN button and press MODE to confirm Pressing START button to start training.
- Page 14 Console Training in H.R.C. (Hear Rate Control) mode: AGE 25 is flashing after enter H.R.C. mode, you Set your age by pressing UP/DOWN buttons. The monitor will calculate preset heart rate value auto- matically according to your age setting. Screen will display heart rate percentage 55%, 75%, 90% and TARGET.
-
Page 15: Monitoring Your Heart Rate
Monitoring Your Heart Rate To obtain the greatest cardiovascular benefits from your exercise workout, it is important to work within your target heart rate zone. The American Heart Association (AHA) defines this target as 60%-75% percent of your maximum heart rate. Your maximum heart rate may be roughly calculated by subtracting your age from 220. - Page 16 Monitoring Your Heart Rate...
-
Page 17: Exploded View
Exploded View... -
Page 18: Parts List
Part List ITEM Q’TY PART NAME ITEM Q’TY PART NAME Main Frame Assembly 1 1/4” Ball Plug Console Tube M8x20mm Hex Head Screw Handlebar Sleeve 8mm Locknut(thick) M8x15mm hex Screw M8 x60mm Hex Head Screw Right Foam Handle M8x57mm Hex Head Screw Left Foam Handle Extension Wire Mag Brake... -
Page 19: Warranty / Service
IMPORTANT Please read and retain this manual as it will assist with identification for parts and service. ACTION FITNESS warrants their magnetic cycle to be free from defects in material and workman- ship under normal use and service conditions. Lifetime Warranty on frame 5 Year Warranty on all other parts and components All warranty coverage extends only to the original retail purchaser from the date of purchase.
Need help?
Do you have a question about the X510MAG and is the answer not in the manual?
Questions and answers