Table of Contents
Advertisement
Quick Links
Optikinetics Ltd.
38 Cromwell Road Luton LU3 1DN England
Phone
+44 (0)1582 411413
Fax
+44 (0)1582 400613
e-mail
optiuk@optikinetics.com
Website www.optikinetics.co.uk
OPERATING INSTRUCTIONS
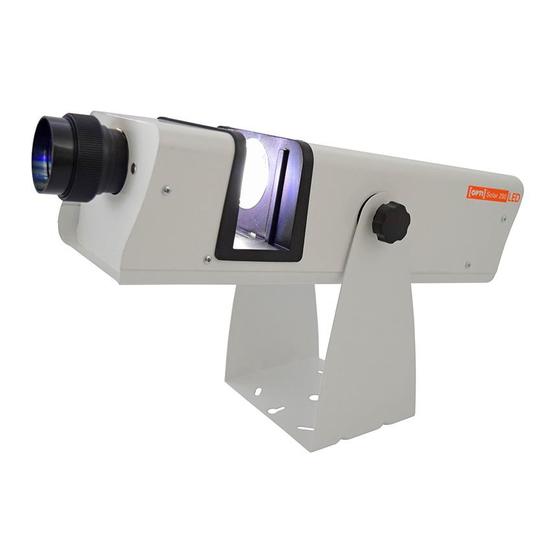
PACKED BOX CONTENTS
Solar 250 Projector with 85mm Lens
2 metre IEC Lead
POWER RATING
350W MAX
OPERATING VOLTAGE
220-240V~ 50-60Hz or 110-120V~ 50-60Hz
FUSES
Mains: 220-240V~ T2A/250V (20 x 5mmØ)
110-120V~
T4A/250V (20 x 5mmØ)
12V~ :
T4A/250V
IMPORTANT NOTES
ALL FAN INLET GRILLES MUST BE CLEAR WHEN THE
PROJECTOR IS IN USE. NEVER OBSTRUCT.
Failure will cause the projector to overheat, may cause
damage, and the thermal cut-out to switch projector off*.
AN EFFECT MUST ALWAYS BE IN THE GATE OF THE
PROJECTOR WHEN IN USE.
Failure may cause the plastic parts of the focussing lens
to melt.
THE PROJECTOR MUST ONLY BE USED WITHIN 90°
OF HORIZONTAL.
DO NOT TOUCH THE LAMP WITH BARE HANDS AND
NEVER TOUCH HOT LAMP .
Wear gloves or use a soft cloth or tissue.
DO NOT AT TEMPT TO SERVICE THE PROJECTOR
UNLESS YOU ARE QUALIFIED AND WORKING UNDER
THE DIRECTION OF THE MANUFACTURER.
MOUNTING
The first step is to position the projector in a place from
which images can be projected onto the desired surface.
The projector must always be mounted using its bracket
and the air inlet grilles must be clear to allow airflow.
There are 4 methods of mounting:
1. Suspended from above
with its hanging bracket
firmly fixed to a strong
beam or Trilite truss.
A safety chain should be
fitted and secured, to an
immovable object, with a
maximum drop of 30cm (12"). All nuts, bolts, hanging
bracket knobs and other fixings must be securely tightened.
* If the thermal cut out engages, allow to cool, check and clear air inlets and outlets, and switch projector back on.
Solar 250
2. Fixed with the hanging
bracket under the
projector onto an
immovable flat surface.
3. Mounted on top of a
flat surface by using
the hanging bracket as
an adjustable stand.
4. Fixed with the hanging
bracket behind the
projector, at an angle,
bolted to an immovable
vertical surface.
ADJUSTING THE BRACKET
When setting up the projector, to
project the image where required,
it may be necessary to adjust
the hanging bracket.
1. Loosen central knobs on
both sides and rotate
the bracket or projector into
the desired position.
2. Tighten knobs securely.
MAINS CONNECTION
Before use check the voltage
selector switch, on the back of
the projector, is set to the
same voltage as your local
mains supply. If incorrect,
move to the correct voltage
position using a flat ended screw driver.
Switching On
Simply plug in the IEC lead
to the back of the projector
and switch to the ON
position.
1
Advertisement
Table of Contents

Related Manuals for OPTi Solar 250


Summary of Contents for OPTi Solar 250
-
Page 1: Operating Instructions
+44 (0)1582 411413 +44 (0)1582 400613 e-mail optiuk@optikinetics.com Website www.optikinetics.co.uk OPERATING INSTRUCTIONS PACKED BOX CONTENTS Solar 250 Projector with 85mm Lens 2. Fixed with the hanging bracket under the 2 metre IEC Lead projector onto an POWER RATING immovable flat surface. -
Page 2: Lens Cleaning
OPERATION LAMP DISPOSAL This Effects Projector is designed exclusively for use with Dispose of the old lamp in accordance with the local the OPTI Solar Range of Effects Accessories and OPTI regulations. Effects. Ask your dealer for a demonstration. CLEANING... -
Page 3: Important Safety Instructions
Optikinetics Ltd. 38 Cromwell Road Luton LU3 1DN England Solar 250 Phone +44 (0)1582 411413 +44 (0)1582 400613 e-mail optiuk@optikinetics.com Website www.optikinetics.co.uk IMPORTANT SAFETY INSTRUCTIONS When using your projection equipment basic safety precautions should be followed, including the following: Read and understand all instructions before using the equipment.
Need help?
Do you have a question about the Solar 250 and is the answer not in the manual?
Questions and answers