Table of Contents
Advertisement
Advertisement
Table of Contents

Related Manuals for OPTi Aura


Summary of Contents for OPTi Aura
- Page 1 Product Manual Designed and Manufactured in the UK by Optikinetics...
-
Page 2: Table Of Contents
Aura Contents Product Overview ..............Getting Started ..............Mounting the Projector ............Inserting the Effect Wheel ............ Focussing the Image ............. Cleaning the Focussing Lens ..........Operating the Projector ............Switching On/Switching Off ..........Dimming the Image ............... Using the Timer .............. -
Page 3: Product Overview
Aura Product Overview The [Opti] Aura LED is an ideal home sensory projector with Wi-Fi Connectivity, a dimmer function and off timer capabilities. Packed Box Contents: 1x [Opti] Aura LED Projector 1x Power Supply 1x Effect Wheel* 1x Table Stand 1x Wall Mount (with xtures and ttings) -
Page 4: Getting Started
Aura Getting Started Mounting the Projector The projector can be mounted using the provided table stand (foam ring) or wall mount. The wall mount should be screwed to a wall in a vertical position so that it supports the bottom and top of the projector. Fixtures and ttings are provided. -
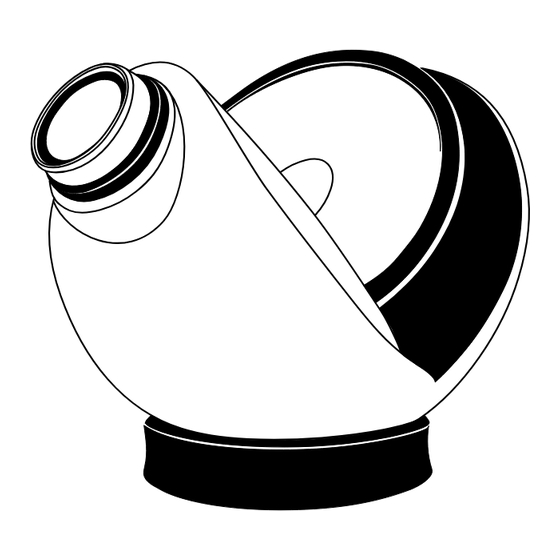
Page 5: Inserting The Effect Wheel
Aura Inserting the Effect Wheel The [Opti] Aura has been designed to accommodate 4” and 6” effect wheels. For 6” effect wheels the slide on the left of the magnetic adaptor should be at the top as per the image left. - Page 6 Bossed Push On Effect Wheels For this projector Optikinetics recommend that customers use magnetic wheels. The Aura does also allow the use of bossed push on wheels. To use these wheels you will be required to remove the magnetic adapter from the projector. To do this, use the small allen key provided and place this in the hole on top of the magnetic adapter.
- Page 7 Aura To attach plastic bossed push on effect wheels, simply push the wheels onto the shaft of the wheel rotator as per the image left. Note: A slight twist when attaching the plastic bossed push on effect wheel will help.
-
Page 8: Focussing The Image
The Aura projects a moving image of any size, however it is recommended that the maximum image projected is 4m in diameter. An image can be projected onto any medium. For best results, use the projector in a dark environment. -
Page 9: Operating The Projector
Aura Operating the Projector Switching On/Switching Off To turn the projector on simply connect the power supply cable to the inlet DIM - OFF - TIMER socket on the right hand side of the projector. The projector will turn on as 9V AC 750Ma CE you power up the projector. -
Page 10: Dimming The Image
Aura Dimming the Image The projector has a bright dimmable light that is perfect in a bedroom. To dim the image without the app, press and hold down the 'DIM - OFF - TIMER' button until you reach your desired light output level. -
Page 11: Using The App
Close the App. Re-connect your mobile device to your normal home network. If there is no home network, it is possible to directly control the Aura via its own Wi-Fi hotspot. Just follow the instructions above, skipping steps 6 to 10. - Page 12 Aura Using the App to control the Aura To control the projector using the 'Opti Aura' App, click on the 'control' page of the app. Turn on/Turn Off To turn the projector on, move the slider to the right towards full brightness.
- Page 13 If the app is freezing or is not working correctly, force the app to close. Check that the web enabled device is fully charged before restarting the app. If the app still does not work, reset the Aura projector to factory settings.
-
Page 14: Important Safety Instructions
Aura Important Safety Instructions When using your projection equipment basic safety precautions should be followed: Do not attempt to service the projector unless you are qualied and working under the direction of the manufacturer. Do not operate the appliance with a damaged cord, or if the appliance has been dropped, or damaged, until it has been examined by a qualied engineer. -
Page 15: Additional Accessories
Aura Additional Accessories The [Opti] Aura has been manufactured by Optikinetics Ltd. Formed in 1970, Optikinetics is the leading innovators of effects lighting and has a plethora of products suitable for any occasion. Each [Opti] Aura projector comes with one 6” effect wheel. - Page 16 Optikinetics Ltd 38 Cromwell Road Luton Bedfordshire LU3 1DN England +44 (0) 1582 411 413 UKAdmin@optikinetics.co.uk www.optiaura.co.uk...
Need help?
Do you have a question about the Aura and is the answer not in the manual?
Questions and answers