Table of Contents
Advertisement
Advertisement
Table of Contents

Related Manuals for Pulse fitness 225F

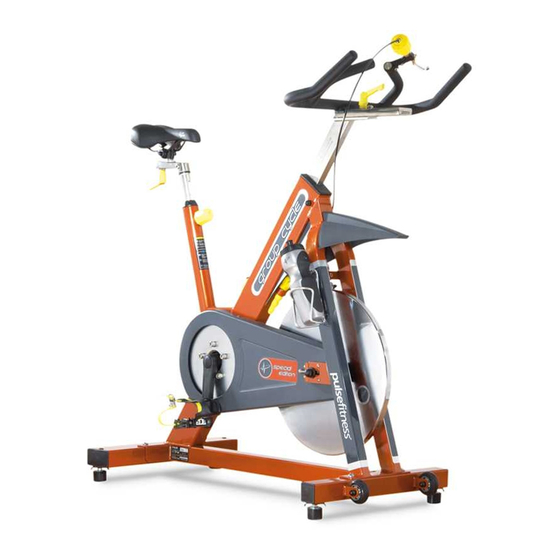
Summary of Contents for Pulse fitness 225F
- Page 1 G R O U P C Y C L E MAINTENANCE...
-
Page 3: Table Of Contents
Contents Saddle 1. Contents of 225F Exercise Cycle Pack and Assembly 4 2. Introduction 2.1 Features 2.2 Technical Data Emergency Stop Brake Lever 3. Installation 3.1 Location 3.2 Installation Procedure Handlebars 3.3 Correct Fitment of the Saddle 3.4 Check the Brake Cable 3.5 Free Wheel Test (12-Revolutions) -
Page 4: Contents Of 225F Exercise Cycle Pack And Assembly
1 225F Cycle Flat Pack The Pulse 225F Exercise Cycle will have to be assembled from the flat pack. The contents of the pack are as follows: This Manual Main Body Saddle Pedals and Foot Straps Rear Foot Strut Front Foot Strut... - Page 5 1 Assembly of the 225F Place the main body onto the feet struts, making sure the front and rear feet struts are the correct way around (this is a two person procedure). Then secure tightly with feet strut bolts and washers.
- Page 6 Attach the handlebars to the main frame using the handlebar adjuster knob and adjuster knob washer, (ensure the knob is tight and secure). Attach the emergency stop brake lever/tension barrel using an allen key and secure tightly. NOTE: Ensure that all bolts are securely tightened.
- Page 7 Check the crank arms daily for any signs of stress fatigue and check the pedals for spindle wear as shown in Section 5. The correct use of Pulse Fitness machines is of paramount importance. The machines should be adjusted to suit each individual and care should be taken when starting and completing an exercise session.
-
Page 8: Introduction
All safety guards must be properly secured before using this machine. Use only genuine Pulse Fitness spare parts, to order quote the part number and quantity required, order from, Pulse Fitness, Tel: +44 (0)1260 294600 Fax: + 44 (0)1260 299282 2.1 Features... -
Page 9: Technical Data
2.2 Technical Data Dimensions: 225F Group Exercise Cycle Length: 1.05 m Width: 0.505 m Height: 1.03 m Weight: 70 kg Note: The Pulse 225F Group Exercise Cycle uses a patented speed independent braking system. -
Page 10: Installation
A flat, level and clean surface. Well away from sources of water (or other liquids) or in an area that is subject to condensation. NOTE: The 225F Group Exercise Cycle is not suitable for outdoor use. CAUTION This equipment is heavy! We do not recommend attempting to lift it without assistance;... -
Page 11: Correct Fitment Of The Saddle
3.3 Correct Fitment of the Saddle The clamps are positioned along the saddle rails, (see Figure C). When in position ensure the clamp is fully seated onto the post and the saddle is level, then tighten the clamp nuts equally on both sides to secure the saddle to the seat post. -
Page 12: Operational Information
ADJUST HEIGHT OF SADDLE 4.1 Operational Information TO JUST BELOW NAVEL Before using the Pulse 225F Exercise Cycle, familiarise yourself with the bike to ensure that you understand the basic principles of the cycle. Inspect the cycle for any damaged or worn parts and for general smooth / safe operation. -
Page 13: Maintenance
Prior to use, apply a coat of silicone sealant to all painted areas LOCK NUT of the Pulse 225F Group Exercise Cycle, excluding the flywheel. Make sure all tension is released from the brake pads after each use, for the comfort of the next user. -
Page 14: Maintenance - Daily
FOOT STRAPS 5.2 Maintenance - Daily WARNING Failure to follow the Daily and Monthly inspections detailed in this manual, could result in serious injury. General - Inspect for any loose parts, nuts, bolts, etc. Check Footstraps - for any signs of wear or damage, replace footstraps if required, (see Figure I). - Page 15 Check Pedals - for any damage and especially wear in the spindle. To check the spindle hold the pedal firmly and try to move the pedal up and down and back and forwards for any signs of movement or clicking, (see Figure K). If there is any movement replace immediately.
-
Page 16: Maintenance - Monthly
5.3 Maintenance - Monthly Clean the Frame and Flywheel - Re-apply a coat of silicone polish to all the painted frame areas of the Exercise Cycle including the flywheel, except where the brake pads come into contact with it, (see Figure L). NOTE: For best results use a good quality automotive polish. -
Page 17: Brake Pad Adjustment
ANTI CLOCKWISE 5.4 Brake Pad Adjustment MOVEMENT For minor adjustment of the brake pads, use the Adjustment Barrel (B). Firstly slacken the Brake Adjustment Lock Nut (A), and rotate the Adjustment Barrel (B) in the direction of the arrow (anti- ADJUSTMENT clockwise). -
Page 18: Maintenance - Tension Stem Locknut
TENSION STEM LOCKNUT HANDLE BARS COLLAR 5.5 Maintenance - Tension Stem Locknut The Tension Stem Locknut should always be tight up against the collar and brake lever. If it is found loose then tighten up immediately to allow the Exercise Cycle to function properly (see BRAKE LEVER Figure P). -
Page 19: Maintenance - Drive Belt
FLYWHEEL SECURING NUT 5.7 Maintenance - Drive Belt Check for belt slip: this is done by firmly applying the brake lever, stand on the pedals and apply a heavy load. If the belt slips adjustment is required, (you may have to remove the belt guard to adjust the belt tension). -
Page 20: Emergency Stop Brake Lever / Tension Barrel
BRAKE LEVER 6.1 Emergency Stop Brake Lever Whilst operating the 225F Group Exercise Cycle the brake can be used at any time to produce an emergency stop. Simply pull back the brake lever, (see Figure S) to apply the brake, once applied the lever must be returned back to its original position to free the flywheel. -
Page 21: Troubleshooting
7 Troubleshooting Fault Probable Cause Cure Loud squeaking when tension is Dirty flywheel. Clean the flywheel with a silicon sealant ensuring NOT to get applied. any silicone of the hub assembly, leave a thin coat on the flywheel. Worn brake pads. Renew the brake pads if necessary. -
Page 22: Spare Parts List
Washer (M10) 35/261 Rotary Bearing 26/085 35/262 Full Nut (M10) Seat Clamp Knob 26/611-2 Nylon Washer (M10) 35/263 225F Front Sweat Guard 70-468 Hex Socket Cap Head Screw (M10) 25/264 Saddle 26/514 Grub Screw (M16) 26/309 Brake Cable 26/605 Full Nut (M5) 35/266 Pedals LH &... - Page 23 Rotary Ball Bearing 26-096 Grub Screw Lubrication Decal 115-490 Handle Bar Clamping Handle 26/510-2 Handle Bar Adjuster Stem 26/936 225F Middle Sweat Guard 70-467 Steel Belt Guard 26/938 Left Hand Brake Lever Assembly 26/930 Injection Moulded Tension Knob Assembly 26/931 225 Cleaning &...
-
Page 24: Spare Parts Illustration
9 Spare Parts Illustration... -
Page 25: Declaration Of Conformity
10 Declaration of Conformity EC Declaration of Conformity Standards Route to Compliance 225F PULSE GROUP EXERCISE CYCLE Designed to conform with BS EN 957 Part 1 : 2005 BS EN 957 Part 5 : 1997... - Page 26 Date Description of fault/ Signed Date Description of fault/ Signed maintenance carried out maintenance carried out...
- Page 27 12 User’s Notes...
-
Page 28: User's Notes
User’s Notes... - Page 29 User’s Notes...
- Page 30 User’s Notes...
- Page 33 Pulse Fitness Pulse Fitness GmbH Pulse Fitness Scandinavia AB The Bromley Centre, Bromley Road, Rombacher Hütte 10 Box 70, 25054 Helsingborg, Sweden Congleton, Cheshire, CW12 1PT, D - 44795 Bochum, Germany Tel: +46 (0) 164075 Tel: +44 (0)1260 294600 Phone: +49 (0) 234-43623...
Need help?
Do you have a question about the 225F and is the answer not in the manual?
Questions and answers