
Related Manuals for ADLY MOTO GTA 50


Summary of Contents for ADLY MOTO GTA 50
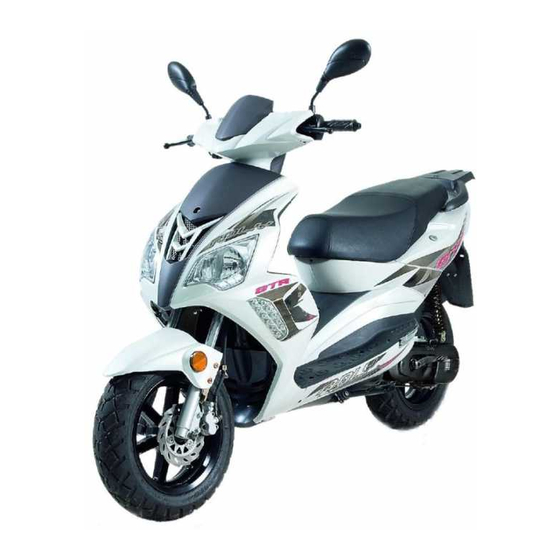
- Page 1 E x c l u s i v e l y D i s t r i b u t e d b y B i n t e l l i S c o o t e r s Owner’s Manual GTA 50 Bullseye 50...
- Page 2 PREFACE We would like to take this opportunity to thank you for choosing ADLY. The purpose of this owner’s manual is to prepare you for the safe operation and maintenance necessary of your new scooter. It is highly recommended you read over the entire manual prior to driving.
-
Page 3: Table Of Contents
CONTENTS Page Welcome ………………………………………………………………………..……. Operation Warnings...……………..………………………………….……….……. Safety Information ………………………..…………………………….……..….. Warranty Information ……………………………………………………….………. Specifications ………………………………………………………………………... Periodic Checks and Services ……………………………………….……………. Pre Operating Inspection …………………………………………………..………. Operation …………………………………………………………………….………. Maintenance ……………………………………………………………….…..…… Proper Driving Technique ………………………………………………..……… Troubleshooting …………………….. ……………………………………………… Vehicle Identification Number ……………………………………………………… Pre-Delivery Inspection (PDI) ……………………………………….……...……… Maintenance &... -
Page 4: Operation Warnings
OPERATION WARNINGS THIS VEHICLE IS NOT A TOY AND CAN BE HAZARDOUS TO OPERATE. NEVER OPERATE THIS VEHICLE WITHOUT PROPER INSTRUCTION. THIS VEHICLE IS NOT INTENDED FOR CHILDREN. ALWAYS WEAR A HELMET WHEN OPERATING THE VEHICLE. READ ENTIRE OWNER’S MANUAL CAREFULLY BEFORE USE. THIS VEHICLE IS DESIGNED FOR ON-ROAD USE ONLY. -
Page 5: Safety Information
SAFETY INFORMATION Don’t allow your child to ride. Read all warning stickers on vehicle and follow the instructions. Always maintain a safe distance between your vehicle and other vehicles. If you are new to scooters, we recommend enrolling in a safety training course. -
Page 6: Warranty Information
WARRANTY INFORMATION Regular servicing and maintenance must be performed on your vehicle. Please read the following carefully to insure your vehicle remains covered under warranty: Vehicle MUST BE INSPECTED by an authorized Adly dealership within 500 miles or 90 days from the date of purchase, whichever comes first. -
Page 7: Specifications
SPECIFICATIONS MODEL AS-50 AS-50LC LENGTH 7 6 . 7 i n c h e s WIDTH 2 7 . 9 i n c h e s HEIGHT 4 4 . 5 i n c h e s WHEEL BASE 5 0 . 8 i n c h e s NET WEIGHT 1 9 1 . - Page 8 SPECIFICATIONS MODEL GTA-50 GTA-50LC LENGTH 7 6 . 7 i n c h e s WIDTH 2 7 . 9 i n c h e s HEIGHT 4 4 . 5 i n c h e s WHEEL BASE 5 0 . 8 i n c h e s NET WEIGHT 1 9 1 .
- Page 9 SPECIFICATIONS MODEL GTC-50 BULLSEYE LENGTH 6 8 . 9 i n c h e s WIDTH 2 7 i n c h e s HEIGHT 4 4 . 9 i n c h e s WHEEL BASE 4 8 i n c h e s NET WEIGHT 1 7 8 .
- Page 10 SPECIFICATIONS AS-50 GTA-50 Headlight 12V 35W/35W 12V 35W/35W Position light 12V LED 12V LED Rear / Brake light 12V LED 12V LED Signal light 12V LED 12V LED Speedometer indicator 12V 3.4W Signal indicator 12V 1.7W High beam indicator 12V 1.7W Safety fuse Battery 12V 5A...
- Page 11 SPECIFICATIONS GTC-50 12V 35W/35W 12V 35W/35W Headlight Position light 12V 5W Rear / Brake light 12V 21/5W 12V 21/5W 12V 10W 12V 21W Signal light Speedometer indicator 12V 3.4W Signal indicator 12V 1.7W High beam indicator 12V 1.7W Safety fuse Battery 12V 4A Engine oil capacity...
-
Page 12: Periodic Checks And Services
PERIODIC CHECKS & SERVICES Regular Service Mileage ITEM 1000 2000 3000 4000 5000 6000 7000 8000 9000 Fuel Filter Brake System Drive Belt Check every 3000 miles, replace if showing signs of wear or cracking Air Filter Replace air filter every 3000 miles or as needed Nuts, Bolts Gear Oil Carburetor... -
Page 13: Pre Operating Inspection
PRE OPERATING INSPECTION CHECK STEERING HANDLE 1. Check ease of turning to the left and right. 2. Check brake cables. 3. Check for abnormalities, if there is damage please contact your local dealer for inspection and adjustment. 4. Check brake lever for normal operation. Braking free play should be between 1-2 cm after brake adjustment. - Page 14 PRE OPERATING INSPECTION Adjusting Adjust screw Brake cable inspection: Verify brake cable functioning and engaging properly prior to use CHECK BRAKE LIGHT 1. Turn main switch to “ ON ” position. 2. Apply left and right brake lever separately to see if brake light functions normally.
- Page 15 PRE OPERATING INSPECTION CHECK TURN SIGNAL LIGHTS 1. Turn ignition switch to “ON” position. 2. Turn on signal lights, check to ensure all are functioning. CHECK TIRE PRESSURE. STANDARD TIRE PRESSURE One passenger Two passenger Front ………………………… 18 psi 25 psi Rear …………………………...
- Page 16 PRE OPERATING INSPECTION Check for gravel and other debris in the tread grooves, along with signs of punctures. Remove debris as needed. If the tire is punctured or losing air DO NOT DRIVE. Contact your local dealer to arrange for servicing. Check for any signs of cracking or heavy wear.
-
Page 17: Operation
OPERATION Ignition Switch (GTA) At this position, the power is off and the engine is not running. The key can be removed from this position. At this position, power is on and the engine can be started. The key cannot be removed from this position. At this position, handlebar is locked to prevent theft. - Page 18 OPERATION Ignition Switch (GTC) * To turn off the engine. * The Key can be removed. To start the engine. * The Key can be taken out. * CAUTION IF OIL INDICATOR LIGHT IS ON, OIL LEVEL IS INSUFFICIENT AND SHOULD BE *...
- Page 19 OPERATION STEERING LOCK Turn handlebar to the left, then press and turn the key from “OFF” to “LOCK”. Handlebars will lock and the key can be removed. Handlebars will be unlocked immediately when the key is returned to “OFF” position. CAUTION 1.
- Page 20 OPERATION ELECTRIC STARTER With the ignition in the “ON” position, hold a brake lever and press the red starter button to start the engine. Once the engine turns on, immediately stop pressing the ignition button. STARTING TIPS 1. Ensure brake lever is fully engaged while pressing the electric start button. 2.
- Page 21 OPERATION ELECTRIC STARTER With the ignition in the “ON” position, hold a brake lever and press the red starter button to start the engine. EMERGENCY STOP SWITCH (US) : E NGINE RUNNING (ON) E NGINE STOP (OFF) : *NOTE: The engine will only operate in the (ON) position.
- Page 22 OPERATION HEADLIGHT SWITCH High Beam Use this setting for High/Low maximum headlight range when Switch you are not near other motorists. Low beam Use for normal driving. HORN BUTTON With the ignition switch “ON”, press Horn the horn button to use the horn. Button...
- Page 23 OPERATION TURN SIGNAL SWITCH Right light flashing indicates turning to the right. Left light flashing indicates turning to the left. Turn signal release button CAUTION 1. Always use your turn signals. 2. The turn signal lights will not stop automatically, press the center button to turn the signal lights off after completing your turn.
- Page 24 OPERATION INSTRUMENT PANEL(GTA) Hi-Beam Indicator Light Speedometer Fuel Gauge Odometer Turn Signal Indicators Low Oil Warning Light...
- Page 25 OPERATION INSTRUMENT PANEL(GTC BULLSEYE) Turn Signal Fuel Gauge Indicator Hi-Beam Oil Warning Signal Light Speedometer Odometer pointer...
- Page 26 OPERATION SPEEDOMETER Indicates the vehicle speed by in Miles per hour and Kilometers per hour ODOMETER The total mileage is indicating by kilometer (KM) HIGH BEAM INDICATOR LIGHT When the high beam light is turned on, this indicator light illuminates. TURN SIGNAL INDICATOR LIGHT When the turn signals are operating, this indicator light will illuminate.
- Page 27 OPERATION HELMET BOX The helmet box is under the seat. Open the seat by key and lift the seat to gain access. Make sure to place the helmet in the upright position for best fit. CAUTION 1. Do not exceed 20lbs in stored materials in the helmet box. 2.
-
Page 28: Maintenance
MAINTENANCE GEAR OIL CHANGE Change gear oil (SAE 90W) at 300 miles and then every 6 months or 4000 miles. The total capacity is 100c.c. (3.4 fluid ounces) Refill Plug Gear Oil Change Procedure : 1. Place vehicle on main stand on level ground. 2. - Page 29 MAINTENANCE AIR FILTER The air filter is a foam based element that requires inspection every 3000 miles. Replace the air filter if you notice deterioration or excessive dirt build up. CAUTION 1. Clean the air filter more frequently if riding in rainy areas and dusty conditions.
- Page 30 MAINTENANCE FRONT BRAKE FLUID LEVEL Checking Brake Fluid Level : Ensure the handlebars are straight and check the brake master cylinder’s fluid level. Always keep between the upper and lower limits. Brake Fluid Level Window Brake Fluid Refilling : 1. Ensure the handlebars are straight. Remove screws on the brake master cylinder to take off the cover.
- Page 31 MAINTENANCE BRAKE CHECK Inspect Brake Pads: 1. Remove the brake caliper to inspect pads and rotor.. 2. Check the surface of rotor and pads for even wear. 3. If there is uneven wear or thickness of rotor, replace if out of specified limits. CAUTION 1.
- Page 32 MAINTENANCE REAR WHEEL BRAKE ADJUSTMENT Check that rear brakes enage when using rear brake lever. There should be 1-2 centimeters of free play. CAUTION Screw groove must be aligned with lock position after adjustment, any slight deviation may result in braking change and cause an unsafe braking condition. FRONT / REAR SHOCK ABSORBERS Apply downward pressure on front handlebar and seat to check the function of front and rear absorbers.
- Page 33 MAINTENANCE BRAKE LIGHT Turn ignition switch to “ON” position. Apply both brake levers separately for front and rear wheels to ensure the brake light is functioning normally. TURN SIGNAL LIGHTS Turn ignition switch to “ON”, use the turn signal switch to activate both left and right side lights.
- Page 34 MAINTENANCE BATTERY This vehicle is equipped with a maintenance free battery. Visually inspect battery terminals for corrosion and clean as necessary. Remove battery during cleaning. CAUTION 1. If the vehicle is not to be used for extended periods, remove the negative t erminal.
-
Page 35: Proper Driving Technique
PROPER DRIVING TECHNIQUE ENGINE START-UP – Using the electric start Check engine oil and gasoline levels before starting the vehicle. 1. Turn ignition switch to “ON”. 2. Verify emergency stop switch is in “ON” position 2. Squeeze brake lever and press the electric start button until the engine turns on. 3. - Page 36 PROPER DRIVING TECHNIQUE ENGINE START-UP - Using the Kick Starter Place vehicle on main kickstand, rotate kick start lever out and kick downward with steady force. Allow the kick start to return to starting position between kicking attempts. Do not open (twist) throttle grip while starting. CAUTION After the engine has started, make sure to allow the kick start to return to its original position to avoid damage.
- Page 37 PROPER DRIVING TECHNIQUE MAINTENANCE OF VEHICLE PERFORMANCE AND LIFT EXPECTANCY 1. New vehicle should be operated under limited speed enabling engine parts to function for an initial revolution. 2. A new vehicle should be operating at a speed below 50KM/H within 1000KM. 3.
- Page 38 PROPER DRIVING TECHNIQUE SHUTTING OFF THE VEHICLE AND PARKING 1. The engine will shut off when the ignition is turned to “OFF” position. CAUTION 1. DO NOT TURN THE IGNITION SWITCH TO “OFF” WHILE DRIVING 2. ONLY TURN THE IGNITION SWITCH TO “OFF WHILE THE VEHICLE IS COMPLETELY STOPPED.
-
Page 39: Trouble Shooting
TROUBLE SHOOTING If the scooter fails to start, or the engine is unable to stay running, a quick diagnosis may reveal the cause. Check the list below for some common fixes. * Confirm the ignition is in the “ON” position. * Confirm the engine kill switch is in correct position. -
Page 40: Vehicle Identification Number
VEHICLE IDENTIFICATION NUMBER Please record the frame and engine number for reference. The vehicle identification number (VIN) The engine number is engraved on the is engraved on the steering tube, open left front side of crankcase. the plastic cover to reveal it. VIN NUMBER ENGINE NUMBER FRAME NO. -
Page 41: Pre-Delivery Inspection (Pdi)
Pre-Delivery Inspection (PDI) 1. Record the VIN and engine number into the owner’s manual 2. Check that all tires have correct pressure as specified in the owner’s manual 3. Engine oil ( SAE 20W 2 Stroke Synthetic Oil Only ) is full 4. - Page 42 MAINTENANCE & SERVICE RECORDS P . D . I . 3 0 0 M i l e s 5 0 0 M i l e s NOTES:_________________ NOTES:_________________ NOTES:_________________ ________________________ ________________________ ________________________ ________________________ ________________________ ________________________ ________________________ ________________________ ________________________ ________________________ ________________________ ________________________ DEALER: DEALER:...
-
Page 43: Maintenance & Service Records
MAINTENANCE & SERVICE RECORDS 4 0 0 0 M i l e s 5 0 0 0 M i l e s 6 0 0 0 M i l e s NOTES:_________________ NOTES:_________________ NOTES:_________________ ________________________ ________________________ ________________________ ________________________ ________________________ ________________________ ________________________ ________________________ ________________________... - Page 44 MAINTENANCE & SERVICE RECORDS 1 0 , 0 0 0 M i l e s 1 1 , 0 0 0 M i l e s 1 2 , 0 0 0 M i l e s NOTES:_________________ NOTES:_________________ NOTES:_________________ ________________________ ________________________ ________________________...
- Page 45 TAMPERING Federal law prohibits any modification to the exhaust system which causes the motorcycle to exceed the federal noise standard. Use of the vehicle with such a modified exhaust system is prohibited. Acts likely to constitute tampering include removal or puncturing the muffler, baffles, header pipe, or any other component, relating to the exhaust system.
Need help?
Do you have a question about the GTA 50 and is the answer not in the manual?
Questions and answers