Table of Contents
Advertisement
Available languages
Available languages
Quick Links
Advertisement
Table of Contents

Subscribe to Our Youtube Channel
Related Manuals for Lindy Smart


Summary of Contents for Lindy Smart
- Page 1 User Manual Benutzerhandbuch Manuel Utilisateur Manuale d’uso © LINDY ELECTRONICS LIMITED & LINDY-ELEKTRONIK GMBH - FIRST EDITION (March 2005) KVM Extender SMART LINDY No. 32397 www.lindy.com English Deutsch Français Italiano...
- Page 2 User Manual Benutzerhandbuch Manuel Utilisateur Manuale d’uso...
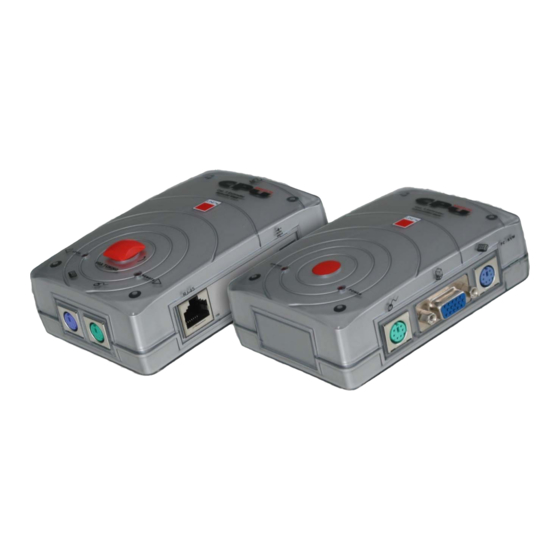
- Page 3 150 metres (500 feet) away using low cost CAT5 or higher cable. The KVM Extender SMART consists of a Transmitter (Local) unit and a Receiver (Remote) unit. The Transmitter connects to a computer or KVM switch. The Receiver unit is located at a remote location and connects to a keyboard, monitor and mouse console.
-
Page 4: Package Contents
For optimum signal integrity and to simplify the layout, we strongly recommend that you use high quality LINDY 3-in-1 KVM cables. The following lengths are available: For connecting the local and remote units, Category 5 UTP, STP, FTP or PIMF cable is the minimum requirement. -
Page 5: User Manual
User Manual Product Information Local Transmitter unit Remote Receiver unit VGA Tuning Control Console Keyboard & Mouse Ports Computer/KVM Switch Connection Ports RJ-45 Connection DIP Switches Power Adapter Connection RJ-45 Connection Console Video Port English Console Connection Ports Computer Connection Ports... -
Page 6: Installation
1. Power on the PC connected to the Remote Receiver unit and then power on the PC / KVM Switch installation connected to the Local Transmitter unit. 2. Check the display quality at the Remote Receiver console. Rotate the VGA Tuning control to adjust the picture quality. -
Page 7: Led Status Indicators
KVM access: You can switch console control at the Remote Receiver unit from PC port (connected workstation) to RJ-45 port (the PC / KVM switch connected to the Local Transmitter) using this simple hotkey command:... -
Page 8: Troubleshooting
User Manual Troubleshooting There are no LED’s illuminated on the Remote Receiver unit Ensure that the AC Adapter is plugged into the mains and the jack is plugged into the socket on the Remote Receiver. Verify that the connected PC is switched on. Otherwise it may result in display problems. - Page 9 Dieser KVM-Extender erlaubt Ihnen Monitor-, Maus- und Tastatursignale zu Ihrem PC oder KVM-Switch über günstiges Cat.5 Netzwerkkabel über eine Entfernung bis zu 150m zu senden. Der KVM Extender SMART besteht aus einem Transmitter (Local Unit) und einem Receiver (Remote) Unit. Der Local Unit (Transmitter) wird am fernzubedienenden PC oder KVM Switch angeschlossen, der Receiver (Remote Unit) befindet sich (wie eine Fernbedienung: Remote Control) beim User.
- Page 10 KVM-Switch / PC benötigen Sie je ein Monitor-, Maus- und Tastaturkabel. Ein 2m Kabel ist bereits im Lieferumfang enthalten. Für das andere Kabel können Sie auf ein LINDY 3-in-1 KVM- Kombikabel in der passenden Länge aus der folgenden Tabelle zurückgreifen: Zur Verbindung von Local und Remote Unit wird ein günstiges Netzwerkkabel Cat.5 oder höher...
- Page 11 Benutzerhandbuch Produktinformation Local Transmitter Unit Remote Receiver Unit VGA Tuning Konsolenports Tastatur & Maus Computer/KVM Switch Ports RJ-45 Anschluss DIP Switches Netzteil- anschluss RJ-45 Anschluss Konsolen- Monitoranschluss Deutsch Konsolenports Computer Anschlüsse...
- Page 12 4. Sollte dies alles nicht die gewünschten Ergebnisse erbringen, versuchen Sie eventuell noch ein anderes Netzwerkverbindungskabel oder kontaktieren Sie den Techniksupport von LINDY. Starke Farbsäume auf dem Monitor deuten darauf hin, dass im RJ-45 Verbindungskabel die einzelnen Paare unterschiedlich lang sind und daher Laufzeitunterschiede für die Einzelfarben Rot, Grün und Blau bewirken, da jedes dieser...
-
Page 13: Bedeutung Der Led Anzeigen
REMOTE Tastatur Hotkey Kommandos ( nur Remote Receiver ) Beide Konsolen können gemeinsamen Zugriff auf den ferngesteuerten KVM-Switch / Server / PC haben und sehen das Monitorbild gleichzeitig. Aktiver Maus- und Tastaturzugriff ist nur von einer Seite möglich, wird aber über kurzen Timeout für die jeweils andere Konsole freigegeben, so dass auch gemeinsame Wartungsarbeiten durchgeführt werden können. -
Page 14: Problemlösung
Versuchen Sie ob das Bildsignal bei einer geringeren Auflösung besser übertragen wird. Sollten alle Maßnahmen nicht das gewünschte Resultat erbringen so kontaktieren Sie bitte den LINDY-Support. Ziehen Sie eventuell den Erwerb eines höherwertigen (und teureren) Cat.5 KVM Extender in Betracht. Deutsch... -
Page 15: Manuel Utilisateur
(comme un contrôle distant à portée de l’utilisateur) et se connecte à un clavier, souris et moniteur. Le KVM Extender SMART convertit les signaux PS/2 et VGA dans un signal pouvant être véhiculé par du câble CAT5 Ethernet. -
Page 16: Caractéristiques
LINDY 3-en-1. Les longueurs suivantes sont disponibles: Pour la connexion des boîtiers local et distant, du câble Cat. 5 UTP, STP, FTP ou PIMF est le besoin minimum. -
Page 17: Information Produit
Manuel Utilisateur Information Produit Transmetteur (local) Récepteur (distant) Réglage VGA Port console clavier & souris PC/Commutateur KVM Ports de connexion Connection RJ-45 DIP Switches Connexion Alimentation Connexion RJ-45 Port vidéo de la console Français Ports de connexion Console Ports de connexion de l’ordinateur... - Page 18 Manuel Utilisateur Installation Important: Assurez-vous d’avoir éteint tous les ordinateurs et périphériques pendant l’installation du matériel. Transmetteur Si la distance entre le transmetteur local et le récepteur distant est supérieure à 90 mètres (300 pieds) vous devez régler les DIP switches 1 & 2 du coté transmetteur sur ON. 1.
- Page 19 Manuel Utilisateur Statut des afficheurs LED STATUT LOCAL ROUGE LOCAL ROUGE CL. REMOTE ROUGE REMOTE FIXE STATUT POWER ETEINT POWER ROUGE STATUS ROUGE CL. REMOTE ETEINT Commandes de raccourci clavier (Récepteur distant uniquement) Les deux consoles de l’extender peuvent accéder simultanément aux serveurs ou aux commutateurs KVM connectés.
-
Page 20: Problèmes Rencontrés
Manuel Utilisateur Problèmes Rencontrés Aucune LED n’est allumée sur le Récepteur (distant) Assurez-vous d’avoir l’adaptateur secteur sous tension et le jack connecté au port du Récepteur. Vérifiez que le PC connecté est allumé. Dans le cas contraire, vous rencontrerez des problèmes d’affichage. Il n’y a pas de signal vidéo affiché... - Page 21 SMART converte i segnali PS/2 e VGA in un formato trasmettibile tramite economici cavi Ethernet Cat.5. Il KVM Extender SMART è la soluzione ideale per gli amministratori di rete e dei server – una workstation può essere collegata all’unità ricevente (remota) permettendo all’operatore di lavorare localmente sul proprio PC e, all’occorrenza, passare all’utilizzo del computer o KVM...
- Page 22 Se volete connettere una workstation all’unità remota (ricevente) dovrete acquistare un cavo KVM 3-in-1 (venduto separatamente). Per migliorare la qualità dei segnali e semplificare l’installazione raccomandiamo l’utilizzo dei cavi ad alta qualità LINDY 3-in-1 KVM . Sono disponibili le seguenti lunghezze: Per connettere l’unità...
-
Page 23: Informazioni Sul Prodotto
Manuale d’uso Informazioni sul Prodotto Unità Locale (Trasmittente) Unità Remota (Ricevente) Controllo VGA Tuning Porte Tastiera & Mouse della consolle Porte di connessione Computer/ KVM Switch Porta RJ-45 DIP Switches Connettore Alimentatore Porta RJ-45 Porta Video Consolle Italiano Porte di connessione... -
Page 24: Installazione
VGA per migliorare la qualità dell’immagine visualizzata. Se non riuscite ad ottenere una qualità soddisfacente ripetete l’installazione modificando l’ipostazione dei Dip Switch presenti sul lato dell’unità locale (trasmittente) e ripetete la regolazione fino ad ottenere la migliore qualità possibile. - Page 25 Quando accedete al KVM switch eventualmente connesso all’unità locale dell’extender potete continuare a controllarlo tramite le combinazioni hotkey previste dall’apparecchio. Quando utilizzate la consolle remota avrete altre due sequenze di Hotkeys per commutare fra l’utilizzo...
-
Page 26: Risoluzione Dei Problemi
Manuale d’uso Risoluzione dei problemi Non ci sono LED accesi sull’Unita Remota Assicuratevi che l’alimentatore sia correttamente collegato all’unità remota e inserito nella presa di corrente. Verificate che il PC connesso sia accesso. In caso contrario potrebbero sorgere problemi di visualizzazione. Sullo schermo non viene visualizzato alcun segnale Controllate che i cavi VGA e il cavo CAT. -
Page 27: Fcc Statement
Consult the dealer or an experienced technician for help You are cautioned that changes or modifications not expressly approved by the party responsible for compliance could void your authority to operate the equipment. LINDY No. 32397 Edition March 2005 www.lindy.com...
Need help?
Do you have a question about the Smart and is the answer not in the manual?
Questions and answers