Table of Contents
Advertisement
Quick Links
Advertisement
Table of Contents

Subscribe to Our Youtube Channel
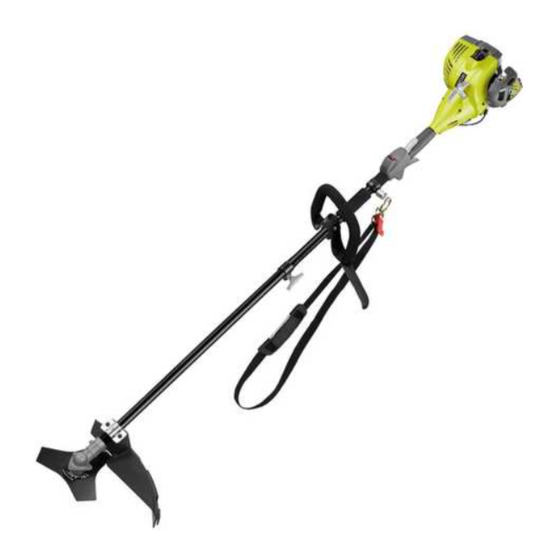
Summary of Contents for Ryobi RBC26SES
- Page 1 RBC26SES STRING TRIMMER / BRUSHCUTTER OPERATOR'S MANUAL (Original Instructions) It is essential that you read the instructions in this manual before assembling, Important! maintaining and operating this machine. Subject to technical modifications.
- Page 2 English (Original Instructions) SYMBOLS Important: Some of the following symbols may be used on your tool. Please study them and learn their meaning. Proper interpretation of these symbols will allow you to operate the tool better and more safely. SYMBOL NAME EXPLANATION Indicates danger, warning or caution.
-
Page 3: Intended Use
English (Original Instructions) Secure long hair so it is above shoulder level to Thank you for buying a Ryobi trimmer/brushcutter. ■ Your new trimmer/brushcutter has been engineered and prevent entanglement in any moving parts. manufactured to Ryobi’s high standard for dependability, Keep all bystanders, children and pets at least 15 m ■... -
Page 4: Specific Safety Rules For Brushcutter And Blade Use
English (Original Instructions) Blade thrust can occur without warning if the blade SPECIFIC SAFETY RULES FOR TRIMMER USE snags, stalls, or binds. This is more likely to occur in areas where it is difficult to see the material being Replace string head if cracked, chipped, or damaged ■... -
Page 5: Specifications
English (Original Instructions) SPECIFICATIONS RBC26SES Weight (kg) - Without fuel, cutting attachment and guard 4.87 - Without fuel, with string head 5.52 - Without fuel, with blade 5.36 [cm 3 or (L)] Fuel tank volume 250 or (0.25) Cutting swath... -
Page 6: Operation
English (Original Instructions) DESCRIPTION OPERATION Please refer to Fig.1 WARNING Primer Bulb Read the operation manual and follow all Choke Lever warnings and safety instructions. Fuel Cap Starter Grip WARNING Wear eye, hearing, and head protection. Throttle Lock On / Off Switch Throttle Trigger WARNING Rear Handle... - Page 7 English (Original Instructions) To start a warm engine: 1. Press the primer bulb 10 times. 2. Set the choke lever to position. 3. Squeeze the throttle trigger completely and pull the starter grip until the engine starts. 1 Litre 20 ml 2 Litres 40 ml To stop the engine:...
-
Page 8: Maintenance
English (Original Instructions) contact with the blade. LINE REPLACEMENT (Fig.9) Exercise extreme caution when using the blade Ensure the unit is in the off position. ■ ■ with this unit. Blade thrust is the reaction which Remove the spark plug lead to prevent accidental may occur when the spinning blade contacts starting. - Page 9 English (Original Instructions) CLEANING THE AIR FILTER SCREEN (Fig. 12) For proper performance and long life, keep air filter screen clean. Remove the air filter cover by pushing down on the latch ■ with your thumb while gently pulling on the cover. Brush the air filter screen lightly to clean.
-
Page 10: Troubleshooting
English (Original Instructions) TROUBLESHOOTING If these solutions do not solve the problem, contact your authorised service dealer. PROBLEM POSSIBLE CAUSE SOLUTION Engine will not start. 1. Power switch is off. 1. Make sure Switch is in the ON or “I” position. 2. - Page 11 English (Original Instructions) PROBLEM POSSIBLE CAUSE SOLUTION Turn idle speed screw clockwise to increase idle speed. Engine starts, runs, Idle speed screw on carburetor (Fig.14) Ensure that after adjustment the cutting head does and accelerates but will requires adjustment not rotate at idle. Contact servicing dealer if the problem not idle.
-
Page 12: Limited Warranty
FOR SPECIAL, INCIDENTAL, CONSEQUENTIAL OR INCIDENTAL DAMAGES. OUR MAXIMUM LIABILITY SHALL NOT EXCEED THE ACTUAL PURCHASE PRICE PAID BY YOU FOR THE PRODUCT. This warranty is valid only in the European Union, Australia and New Zealand. Outside these areas, please contact your authorized Ryobi dealer to determine if another warranty applies.


Need help?
Do you have a question about the RBC26SES and is the answer not in the manual?
Questions and answers