Sony CCD-TRV138 Service Manual
Video hi8 video camera recorder
Hide thumbs
Also See for CCD-TRV138:
- Operation manual (139 pages) ,
- Manual (49 pages) ,
- Specifications (2 pages)
Table of Contents
Advertisement
CCD-TRV138/TRV238E/TRV338/TRV438E
SERVICE MANUAL
Ver 1.0 2004. 11
Revision History
Revision History
How to use
How to use
Acrobat Reader
Acrobat Reader
M2100/M2101 MECHANISM
Link
Link
SPECIFICATIONS
SPECIFICATIONS
SERVICE NOTE
SERVICE NOTE
DISASSEMBLY
DISASSEMBLY
NTSC MODEL: CCD-TRV138/TRV338
PAL MODEL: CCD-TRV238E/TRV438E
• For ADJUSTMENTS (SECTION 6), refer to SERVICE MANUAL, ADJ (9-876-779-51).
• INSTRUCTION MANUAL is shown at the end of this document.
• For MECHANISM ADJUSTMENTS, refer to the "8mm Video MECHANICAL ADJUSTMENT MANUAL
M2000 MECHANISM " (9-929-861-11).
• Reference No. search on printed wiring boards is available.
• Table for differences of function of each model.
• TO TAKE OUT A CASSETTE WHEN NOT EJECT (FORCE EJECT)
• HELP: Sheet attachment positions and procedures of processing the flexible boards/harnesses are shown.
CCD-TRV138/TRV238E/TRV338/TRV438E
9-876-779-11
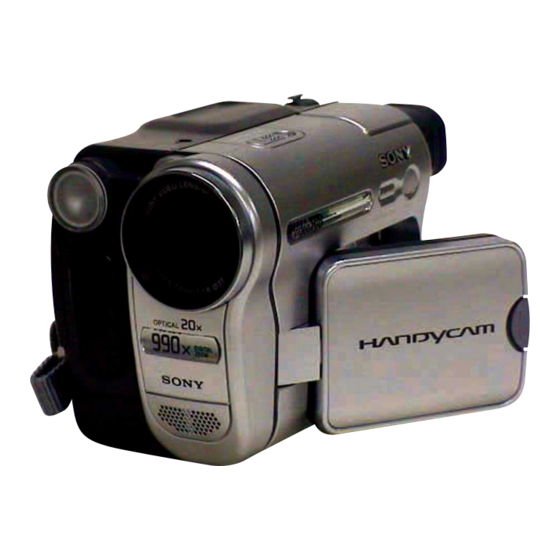
Photo: CCD-TRV438E
BLOCK DIAGRAMS
BLOCK DIAGRAMS
FRAME SCHEMATIC DIAGRAMS
FRAME SCHEMATIC DIAGRAMS
SCHEMATIC DIAGRAMS
SCHEMATIC DIAGRAMS
Sony EMCS Co.
CCD-TRV138/TRV338
CCD-TRV238E/TRV438E
CCD-TRV138/TRV238E/
PRINTED WIRING BOARDS
PRINTED WIRING BOARDS
REPAIR PARTS LIST
REPAIR PARTS LIST
VIDEO CAMERA RECORDER
Published by DI Technical Support Section
RMT-833
US Model
CCD-TRV-138
Canadian Model
Argentine Model
Brazilian Model
CCD-TRV238E
AEP Model
UK Model
East European Model
North European Model
TRV338/TRV438E
E Model
CCD-TRV438E
Australian Model
Tourist Model
IX
2004K0500-1
©2004.11
Advertisement
Chapters
Table of Contents

Related Manuals for Sony CCD-TRV138


Summary of Contents for Sony CCD-TRV138
- Page 1 DISASSEMBLY SCHEMATIC DIAGRAMS DISASSEMBLY SCHEMATIC DIAGRAMS NTSC MODEL: CCD-TRV138/TRV338 PAL MODEL: CCD-TRV238E/TRV438E • For ADJUSTMENTS (SECTION 6), refer to SERVICE MANUAL, ADJ (9-876-779-51). • INSTRUCTION MANUAL is shown at the end of this document. • For MECHANISM ADJUSTMENTS, refer to the “8mm Video MECHANICAL ADJUSTMENT MANUAL M2000 MECHANISM ”...
-
Page 2: Specifications
(CCD-TRV238E/438E: using 90 min. Hi8/ 890 g (1 lb 15 oz) including the Digital8 video cassette) NP-FM30 rechargeable battery pack, Hi8/ (CCD-TRV138/338: using 120 min. Digital8 cassette, lens cap, and shoulder strap Hi8/Digital8 video cassette) Supplied accessories Approx. 5 min... - Page 3 MARK 0 ON THE SCHEMATIC DIAGRAMS AND IN THE PARTS CRITIQUES POUR LA SÉCURITÉ DE FONCTIONNEMENT. NE LIST ARE CRITICAL TO SAFE OPERATION. REPLACE THESE REMPLACER CES COMPOSANTS QUE PAR DES PIÈSES SONY COMPONENTS WITH SONY PARTS WHOSE PART NUMBERS DONT LES NUMÉROS SONT DONNÉS DANS CE MANUEL OU APPEAR AS SHOWN IN THIS MANUAL OR IN SUPPLEMENTS DANS LES SUPPÉMENTS PUBLIÉS PAR SONY.
-
Page 4: Table Of Contents
4-3. Printed Wiring Boards ··················································· 4-39 CD-465 ·········································································· 4-41 VC-341 ·········································································· 4-43 PD-204 ··········································································· 4-47 SI-039, FP-792 FLEXIBLE ·········································· 4-49 FP-228, FP-299, FP-300, FP-301, FP-302, FP-802 FLEXIBLE ···································································· 4-51 4-4. Waveforms ····································································· 4-53 4-5. Mounted Parts Location ················································ 4-59 CCD-TRV138/TRV238E/TRV338/TRV438E — 4 —... -
Page 5: Service Note
In this unit, about 10 seconds after power is supplied to the battery terminal using the regulated power supply (8.4V), the power is shut off so that the unit cannot operate. The following method is available to prevent this. Method 1. Use the AC power adaptor (AC-L10, AC-VQ800 etc.). CCD-TRV138/TRV238E/TRV338/TRV438E... -
Page 6: To Take Out A Cassette When Not Eject (Force Eject)
[DC power supply] Pincette (+5V) Timing belt 5 Let go your hold the cassette compartment and rise the cassette compartment to take out a cassette. Loading motor Disconnect CN401 of VC-341 board. Adjust the bending of a tape Timing belt CCD-TRV138/TRV238E/TRV338/TRV438E... -
Page 7: Self-Diagnosis Function
[6] : Occurred the last time End of Display Turning OFF the power supply will end the service mode display. Note: The “self-diagnosis display” data will not be erased (reset), when the lithium battery (CONTROL KEY BLOCK (CF- 5100): BT001) is removed. CCD-TRV138/TRV238E/TRV338/TRV438E... -
Page 8: Self-Diagnosis Code Table
PG fault during normal drum Remove the battery or power cable, connect, and perform operations. operations from the beginning. Phase fault during normal drum Remove the battery or power cable, connect, and perform operations. operations from the beginning. CCD-TRV138/TRV238E/TRV338/TRV438E... - Page 9 (With pitch angular velocity sensor output peripheral circuits. *1 stopped.) Steadyshot function does not work well. Inspect yaw angular velocity sensor (SE751 of SI-039 board) (With yaw angular velocity sensor output peripheral circuits. *1 stopped.) *1: STEADYSHOT model (CCD-TRV338/TRV438E) CCD-TRV138/TRV238E/TRV338/TRV438E 1-5E...
-
Page 10: Disassembly
1 Tapping (P2) x4 2 VC-341: CN402, CN403, CN481 6 Open the VC-341. 1 Screw (M1.7) x3 2 Claw x2 3 VC-341: CN401 7 VC-341: CN404 2 CS frame 3 P Cabi (C) 4 Screw (M1.7) x2 8 VC-341 CCD-TRV138/TRV238E/TRV338/TRV438E... -
Page 11: Mechanism Deck Service Position
When exiting the "Forced Power ON" mode, connect the control key block (SS-5100) to the CN006 of VC-341 board. Or, when ejecting the cassette, connect the control key block (SS-5100) to the CN006 of VC-341 board. and press the Eject switch. CCD-TRV138/TRV238E/TRV338/TRV438E... -
Page 12: Lcd Service Position
Conductor side CN007 LCD panel Back light unit CPC jig connector (J-6082-539-A) PD-204 board L serices Info LITHIUM battery (7.2Vdc) AC adaptor AC IN AC adaptor AC IN LANC jack Adjustment remote commander (RM-95) I/F unit for LANC control (J-6082-521-A) CCD-TRV138/TRV238E/TRV338/TRV438E... -
Page 13: Circuit Boards Location
A/D CONVERTER, TIMING GENERATOR, CAMERA/VTR PROCESS, LENS CONTROL, LENS DRIVE, REC/PB AMP, SERVO, CAMERA/MECHA CONTROL, HI CONTROL, AUDIO, VIDEO, DC CONTROL, STEADYSHOT, CONNECTOR PD-204 LCD DRIVE, BACKLIGHT DRIVE SI-039 STEADYSHOT, JACK 2-5. FLEXIBLE BOARDS LOCATION SS-5100 FP-797 FP-794 CF-5100 FP-792 FP-795 SB-9000 PR-5100 CCD-TRV138/TRV238E/TRV338/TRV438E 2-6E... - Page 14 HELP Sheet attachment positions and procedures of processing the flexible boards/harnesses are shown. Harness (PD-124) Claw Claw Note: Close the LCD panel, when you work. CCD-TRV138/TRV238E/TRV338/TRV438E HELP...
-
Page 15: Block Diagrams
OVERALL BLOCK DIAGRAM (2/5) POWER BLOCK DIAGRAM (1/2) OVERALL BLOCK DIAGRAM (2/5) POWER BLOCK DIAGRAM (1/2) OVERALL BLOCK DIAGRAM (3/5) POWER BLOCK DIAGRAM (2/2) OVERALL BLOCK DIAGRAM (3/5) POWER BLOCK DIAGRAM (2/2) OVERALL BLOCK DIAGRAM (4/5) OVERALL BLOCK DIAGRAM (4/5) CCD-TRV138/TRV238E/TRV338/TRV438E... - Page 16 OVERALL (2/5) (PAGE 3-3) A/V OUT AV JACK IN AV JACK IN SIRCS PWM SIRCS SIG XF TALLY LED OVERALL (4/5) CONTROL KEY BLOCK (CF-5100) (1/2) CN008 (PAGE 3-8) SP901 SP (+), (–) SPEAKER : VIDEO SIGNAL : AUDIO SIGNAL CCD-TRV138/TRV238E/TRV338/TRV438E...
- Page 17 : VIDEO SIGNAL VC SO, VC SI, XVC SCK VC SO, VC SI, XVC SCK (PAGE 3-5) : AUDIO SIGNAL XCS LCD DA XCS LCD : VIDEO/SERVO SIGNAL BL CONT BL CONT OVERALL (4/5) : VIDEO/AUDIO/SERVO SIGNAL (PAGE 3-8) CCD-TRV138/TRV238E/TRV338/TRV438E...
- Page 18 XCS EEP EEPROM CN007 (6/10) EEP SI, EEP SO, EEP SCK (2/3) XCS EEP XCS EEP 2 5 6 CAP FG SWP DIR (FOR CHECK) EEP SI, EEP SO, EEP SCK EEP SI, EEP SO, EEP SCK : SERVO SIGNAL CCD-TRV138/TRV238E/TRV338/TRV438E...
- Page 19 IC 701 SO, IC 701 SI, IC 701 SCK, XCS IC 701 Q002 OSD V OSD V D002 OVERALL (3/5) CUSTOM LED ON (PAGE 3-5) EASY DRIVE LI 3V ZOOM VR AD ZOOM VR AD BT001 LITHIUM CUSTOM LED ON CUSTOM LED ON BATTERY CCD-TRV138/TRV238E/TRV338/TRV438E...
- Page 20 OVERALL (2/5) (PAGE 3-3) C-SYNC/XHD C-SYNC/XHD T6001, Q6002 PANEL XVD PANEL XVD INVERTER CN6003 TRANSFORMER BL HIGH BL REG BACKLIGHT PANEL HOLD PANEL HOLD DRIBE ND901 BACKLIGHT D6004 BL CONT BL CONT BL DET BL LOW : VIDEO SIGNAL CCD-TRV138/TRV238E/TRV338/TRV438E 3-10...
-
Page 21: Power Block Diagram (1/2)
13.5V REG Q068, 074 CN002 –15.3V REG PANEL 2.8V PANEL 4.6V BL REG PANEL –15.3V T6001, Q6002 CN6003 INVERTER PANEL 13.5V L6002 L6003 ND901 BL REG TRANSFORMER BL HIGH BACK LIGHT BL CONT BACKLIGHT BL CONT CN6001 DRIVE CCD-TRV138/TRV238E/TRV338/TRV438E 3-11 3-12... -
Page 22: Power Block Diagram (2/2)
CN951 CD-465 L951 BOARD T REEL, VIDEO TAPE CAPSTAN ZOOM IRIS HU, HV, HW S REEL, HEAD SENSOR METER SENSOR IC951 D001 H001,002 FOCUS TEMP SENSOR SENSOR IMAGER M2100: TRV138/TRV338 M2100/M2101 MECHA DECK M2101: TRV238E/TRV438E LENS BLOCK CCD-TRV138/TRV238E/TRV338/TRV438E 3-13 3-14E... -
Page 23: Printed Wiring Boards And Schematic Diagrams
HARNESS LCD UNIT SP901 CONTROL CN6005 ND901 SPEAKER BACKLIGHT SE_GND CONTROL KEY BLOCK SE_GND N.C. BLOCK N.C. (PR-5100) PANEL_REV (CF-5100) PANEL_REV CN6006 PD-204 REG_GND CONTROL KEY BLOCK TELE BOARD WIDE (SB-9000) LCD DRIVER, SEIDEN_GND (N.C.) BACKLIGHT DRIVE SEIDEN_GND CCD-TRV138/TRV238E/TRV338/TRV438E FRAME... -
Page 24: Schematic Diagrams
CONTROL KEY BLOCK (SB-9000) (HI CONTROL) (SB-9000) (HI CONTROL) VC-341 BOARD (8/10) CONTROL KEY BLOCK VC-341 BOARD (8/10) CONTROL KEY BLOCK (AUDIO, VIDEO) (CF-5100) (AUDIO, VIDEO) (CF-5100) COMMON NOTE FOR SCHEMATIC DIAGRAMS WAVEFORMS COMMON NOTE FOR SCHEMATIC DIAGRAMS WAVEFORMS CCD-TRV138/TRV238E/TRV338/TRV438E... - Page 25 0 are critical for safety. dusts nor exposed to strong light. Replace only with part number specified. Les composants identifiés par une marque 0 sont critiques pour la sécurité. Ne les remplacer que par une pièce portant le numéro spécifie. CCD-TRV138/TRV238E/TRV338/TRV438E...
- Page 26 IC951 CCD IMAGER IC951 ICX437AKA-43: TRV138 /TRV338 ICX433AKA-43: TRV238E VC-341 /TRV438E (1/10) CN151 THROUGH THE FP-794 FLEXIBLE (PAGE 4-9) CAM_15V VSHT CAM-7.5V CCD_OUT C955 0.1u R16.1/P0 L951 C951 Q951 100uH 2SC4178-F13F14-T1 BUFFER R11.2 R952 R10.5 C953 C952 R953 CCD-TRV138/TRV238E/TRV338/TRV438E CD-465...
- Page 27 (5/10) XSHD R2.3/P0 C179 XSHD R2.8/P0 6.3V CLPDM CMLEVEL C176 AVDD 0.1u C155 25 26 27 28 29 30 31 32 33 34 35 36 R1.5/P0.5 C173 470p PB_C_RF C172 0.22u (4/10) C171 IC_801_Y_OUT 0.1u (8/10) CCD-TRV138/TRV238E/TRV338/TRV438E VC-341 (1/10) 4-10...
- Page 28 R314 15k R336 D302 C330 C334 C338 KV1870RTL-G R332 R310 0.1u 3300 6.3V CK_CONT2 (1/10) CK_CONT2 C303 (6/10) 0.1u XRST_VTR (1/10) CK_CONT1 XRST_VTR (5/10) (6/10) C336 XCS_OSD XCS_OSD XOSD_SCK XOSD_SCK OSD_SO (6/10) OSD_SO LCD_HOLD VIVDO (8/10) CCD-TRV138/TRV238E/TRV338/TRV438E VC-341 (2/10) 4-11 4-12...
- Page 29 LENS BLOCK is replaced as block, so that there PRINTED WIRING BOARD and SCHEMATIC DIAGRAM are omitted. L201 10uH C208 0.01u IRIS_COM ZM_RST IC201 FC_RST C210 DIR1B FOCUS/ZOOM 6.3V DIR1A MOTOR DRIVE IC201 (2/10) UPD16877MA-6A5-E2 10 11 12 DIR0A DIR0B CCD-TRV138/TRV238E/TRV338/TRV438E VC-341 (3/10) 4-13 4-14...
- Page 30 AFC_F0_ADJ (1/10) FRQ_TUNE XMP/ME FRQ_TUNE CFG_DUTY REC_BIAS C252 AFC_F0_ADJ 1.5M_DEV 4.7u AFC_F0_ADJ 1.5M_DEV MT_Q (9/10) AU_BPF HALL_REF (2/10) AU_BPF HALL_REF HALL_GAIN BEEP_EVR HALL_GAIN A_FADE HALL_OFFSET FB251 A_FADE HALL_OFFSET AU_2.8V D_3.2V(VDD1) SWP(SEL) DA_STRB STB(LD) C251 REG_GND CCD-TRV138/TRV238E/TRV338/TRV438E VC-341 (4/10) 4-15 4-16...
- Page 31 XREEL_HALL_ON T_REEL_- T_REEL(-) TAPE_LED_ON T_REEL_+ T_REEL(+) MECHANISM R403 R409 BLOCK SENSOR_VCC S_REEL_+ (SENSOR) S_REEL(+) CAP_FG S_REEL_- (PAGE 4-33) (10/10) S_REEL(-) REG_GND TAPE_LED(A) TAPE_LED(K) TAPE_END_C R405 TEPE_END(C) TAPE_TOP_C TAPE_TOP(C) Q401 RN1110FV(TL3SONY) C405 C406 0.1u LED DRIVE CCD-TRV138/TRV238E/TRV338/TRV438E VC-341 (5/10) 4-17 4-18...
- Page 32 (4/10) EEP_SI RB612 EEP_SO CS_CH (10/10) EEP_SO RB601 CS_CH EEP_SCK 100k CH_SCK EEP_SCK CH_SCK CH_SO CH_SO (1/10) CK_CONT1 CK_CONT1 (1/10) CK_CONT2 (2/10) CK_CONT2 MD2 (REG_GND) MD2 (REG_GND) XCS_MC_FLASH XCS_MC_FLASH (10/10) XCS_EEP XCS_EEP SWP_DIR SWP_DIR (10/10) CCD-TRV138/TRV238E/TRV338/TRV438E VC-341 (6/10) 4-19 4-20...
- Page 33 SIRCS_SIG (10/10) SIRCS_SIG IC_701_SCK IC_701_SCK 10 11 12 13 14 15 16 17 18 19 20 IC_701_SO IC_701_SO IC_701_SI IC_701_SI (6/10) XCS_IC_701 XCS_IC_701 RB705 OSD_V OSD_V XPOWER_SW (6/10) XMODE_SW R714 4700 XBATT_INFO_SW XEJECT_SW XCC_DOWN RB706 CCD-TRV138/TRV238E/TRV338/TRV438E VC-341 (7/10) 4-21 4-22...
- Page 34 C821 RB801 C837 L802 0.47u 0.01u S_Y_I/O C845 R802 C846 XX S_C_I/O (10/10) C847 VIDEO_I/O IC_801_Y_OUT R810 R812 CL802 (1/10) 4700 C848 100u C838 C816 C849 6.3V 0.01u 6.3V C814 C835 0.1u IC_301_Y_OUT IC_301_C_OUT (2/10) CCD-TRV138/TRV238E/TRV338/TRV438E VC-341 (8/10) 4-23 4-24...
- Page 35 Les composants identifiés par une marque 0 sont line with mark 0 are critical for safety. critiques pour la sécurité. Ne les remplacer que Replace only with part number specified. par une piéce portant le numéro spécifié. CCD-TRV138/TRV238E/TRV338/TRV438E VC-341 (9/10) 4-25 4-26...
- Page 36 11 12 13 14 15 16 17 18 19 20 S_Y_I/O (N.C.) C281 REG_GND 0.1u XS_JACK_IN 6.3V XS_JACK_IN (N.C.) REG_GND VST_C_RESET S_C_I/O S_C_I/O (N.C.) YAW_AD R271 C283 C276 REG_GND 0.047u LANC_DC RFU_DC (N.C.) R272 RFU_DC (N.C.) DCOUT_JACK_IN DCOUT_JACK_IN (N.C.) TRV338/TRV438E CCD-TRV138/TRV238E/TRV338/TRV438E VC-341 (10/10) 4-27 4-28...
- Page 37 Les composants identifiés par une marque 0 sont line with mark 0 are critical for safety. critiques pour la sécurité. Ne les remplacer que Replace only with part number specified. par une piéce portant le numéro spécifié. CCD-TRV138/TRV238E/TRV338/TRV438E PD-204 4-29 4-30...
-
Page 38: Steadyshot, Jack
4 BR A/V OUT S_Y_I/O (N.C.) 5 SW REG_GND D755 D752 D751 XS_JACK_IN (N.C.) RSE6.8XN-TR RSE6.8XN-TR REG_GND S_C_I/O (N.C.) REG_GND LND751 RFU_DC (N.C.) STATIC_GND RFU_DC (N.C.) LND752 DCOUT_JACK_IN (N.C.) STATIC_GND J753 4 BR FB752 1 GND CCD-TRV138/TRV238E/TRV338/TRV438E SI-039, FP-792 4-31 4-32... -
Page 39: Control Key Block
(START/STOP) SEIDEN_GND LND001 PANEL_REV SEIDEN_GND (N.C.) LND002 S002 PANEL_REV PD-204 LND003 PD-204 CN6006 WIDE LND004 (PAGE 4-29) CN6005 (ZOOM) (PAGE 4-29) LND005 TELE SE_GND S001 LND006 REG_GND SE_GND 4-34 CCD-TRV138/TRV238E/TRV338/TRV438E FP-228, FP-299, FP-300, FP-301, FP-302, FP-802, SS-5100, PR-5100, SB-9000 4-33... -
Page 40: Control Key Block (Cf-5100)
EXPOSURE TITLE EASY DUB R004 1200 1500 2200 DIAL_A DIAL_B 1 A1 REG_GND XRESET 3 A2 3 A2 3 A2 3 A2 S002 RESET LND025 CH GND VC-341 (8/10) SP(+) SP901 CN008 SPEAKER SP(-) (PAGE 4-23) CCD-TRV138/TRV238E/TRV338/TRV438E CF-5100 4-35 4-36... -
Page 41: Printed Wiring Boards
FLEXIBLE BOARDS LOCATION Board Name Function CD-465 CCD IMAGER VC-341 A/D CONVERTER, TIMING GENERATOR, CAMERA/VTR PROCESS, LENS CONTROL, LENS DRIVE, REC/PB AMP, SERVO, CAMERA/MECHA CONTROL, HI CONTROL, AUDIO, VIDEO, DC CONTROL, STEADYSHOT, CONNECTOR PD-204 LCD DRIVE, BACKLIGHT DRIVE SI-039 STEADYSHOT, JACK CCD-TRV138/TRV238E/TRV338/TRV438E... -
Page 42: Flexible
1 layer – FP-228 Flexible – 1 layer – FP-299 Flexible – 1 layer – FP-300 Flexible – 1 layer – FP-301 Flexible – 1 layer – FP-302 Flexible – 1 layer – FP-802 Flexible – 1 layer – CCD-TRV138/TRV238E/TRV338/TRV438E 4-39... - Page 43 CD-465 Note for Printed Wiring Board (See page 4-39). : Uses unleaded solder. CD-465 BOARD L951 R952 C952 R953 C954 Note: IC951 is not included in CD-465 complete board. IC951 C955 LND951 1-860-933- 12 22 CCD-TRV138/TRV238E/TRV338/TRV438E CD-465 4-41 4-42...
- Page 44 Q052 L063 Q001 Q002 C097 C846 CL803 CL804 R003 L057 L052 L053 L054 R010 L064 C099 R062 D001 R007 CN008 F002 Q053 2 3 1 CN002 C104 L066 Q051 1-860-932- L059 R001 C095 Q054 CCD-TRV138/TRV238E/TRV338/TRV438E VC-341 (SIDE A) 4-43 4-44...
- Page 45 Q073 C813 C830 R091 R088 Q067 R101 C828 Q066 Q061 R083 R817 C831 Q070 C106 C059 Q059 C826 R087 C058 Q072 C086 Q068 R094 R107 R108 R111 R109 C111 R089 C108 R090 1-860-932- R095 CCD-TRV138/TRV238E/TRV338/TRV438E VC-341 (SIDE B) 4-45 4-46...
- Page 46 T6001 CL6007 FB6001 R6047 RB6003 R6046 D6006 CN6006 C6027 R6020 C6015 D6008 CL6014 C6026 C6016 R6026 CL6015 Q6009 RB6002 RB6001 C6024 R6029 R6040 L6004 R6039 R6001 D6004 D6002 CL6013 Q6001 CN6004 R6002 CN6003 D6003 1-860-938- D6005 CCD-TRV138/TRV238E/TRV338/TRV438E PD-204 4-47 4-48...
- Page 47 A/V OUT LND759 LND760 LND756 D753, 754 D753 (IR EMITTER) R759 C754 C752 C757 R762 J753 R763 D754 SE752 (PITCH) D759 (TALLY) C755 R761 FB751 R754 C759 FB753 FB752 VDR757 J751 LND752 MIC901 MICROPHONE 1-860-940- 1-860-940- CCD-TRV138/TRV238E/TRV338/TRV438E SI-039, FP-792 4-49 4-50...
- Page 48 DEW SENSOR 11 12 1-677-049- FP-228 FLEXIBLE BOARD FP-301 FLEXIBLE BOARD S901 (CONDUCTOR SIDE) MODE SWITCH H002 FP-302 FLEXIBLE BOARD S REEL (CONDUCTOR SIDE) SENSOR 1-689-290- Q002 1-680-438- TAPE END SENSOR CCD-TRV138/TRV238E/TRV338/TRV438E FP-228, FP-299, FP-300, FP-301, FP-302, FP-802 4-51 4-52...
-
Page 49: Waveforms
IC951 2 REC IC951 qd REC 2.4 Vp-p 7.6 Vp-p NTSC: 9.54 MHz PAL: 9.46 MHz IC951 3 REC IC951 qs REC 22 Vp-p 23 Vp-p IC951 4 REC IC951 q; REC 1.2 Vp-p IC951 7 REC CCD-TRV138/TRV238E/TRV338/TRV438E CD-465 4-53... - Page 50 IC151 qa REC/PB IC301 4 REC/PB 3.0 Vp-p 390 mVp-p NTSC: 14.318 MHz NTSC: 33.3 msec PAL: 14.187 MHz PAL: 40 msec IC151 qs REC/PB IC301 7 REC 1.2 Vp-p 470 mVp-p IC152 e; REC IC301 qf REC/PB CCD-TRV138/TRV238E/TRV338/TRV438E VC-341 (1/4) 4-54...
- Page 51 IC301 ef REC/PB 150 mVp-p 6.1 Vp-p NTSC: 33.3 msec PAL: 40 msec IC301 rl PB IC481 wj, ef PB 150 mVp-p 380 mVp-p NTSC: 33.3 msec PAL: 40 msec IC301 ta PB IC481 qa PB CCD-TRV138/TRV238E/TRV338/TRV438E VC-341 (2/4) 4-55...
- Page 52 20 MHz PAL: 150 Hz IC401 yd, yg, yk REC/PB IC601 1 (X601) REC/PB 2.8 Vp-p 2.9 Vp-p NTSC: 180 Hz NTSC: 33.3 msec PAL: 150 Hz PAL: 40 msec IC401 td REC/PB IC601 <zb, REC/PB CCD-TRV138/TRV238E/TRV338/TRV438E VC-341 (3/4) 4-56...
- Page 53 32.768 kHz IC701 ta (X702) REC/PB 2.0 Vp-p IC801 ql REC/PB (AV JACK IN) 8.4 Vp-p NTSC: 512 kHz PAL: 485 kHz IC051 ys REC/PB 8.4 Vp-p NTSC: 512 kHz PAL: 485 kHz IC051 ya REC/PB CCD-TRV138/TRV238E/TRV338/TRV438E VC-341 (4/4) 4-57...
- Page 54 IC6001 wg REC/PB 470 mVp-p 3.5 Vp-p IC6001 el REC/PB IC6001 wa REC/PB 470 mVp-p 3.5 Vp-p IC6001 r; REC/PB IC6001 w; REC/PB 2.8 Vp-p 3.5 Vp-p IC6001 rs REC/PB IC6001 ql REC/PB 2.8 Vp-p IC6001 rd REC/PB CCD-TRV138/TRV238E/TRV338/TRV438E PD-204 4-58...
-
Page 55: Mounted Parts Location
* CN404 A-3 Q054 * R103 * R490 * C215 C508 CN481 A-5 * Q056 * R104 * R491 * C217 C509 * Q057 * R105 * R492 * C218 * C513 D001 * Q058 * R106 R493 CCD-TRV138/TRV238E/TRV338/TRV438E VC-341 4-59... - Page 56 R6013 B-2 RB708 D-3 R6014 D-3 RB801 F-2 R6030 B-3 R6039 C-3 * X151 R6040 C-3 X601 R6041 B-3 X701 R6043 B-2 X702 R6044 B-2 R6045 B-2 R6046 B-2 RB6001 C-2 RB6002 C-2 RB6003 B-2 T6001 CCD-TRV138/TRV238E/TRV338/TRV438E VC-341, PD-204, SI-039 4-60E...
-
Page 57: Repair Parts List
FP-302 FLEXIBLE BOARD SI-039 BOARD FP-228 FLEXIBLE BOARD FP-302 FLEXIBLE BOARD SI-039 BOARD FP-299 FLEXIBLE BOARD FP-792 FLEXIBLE BOARD VC-341 BOARD FP-299 FLEXIBLE BOARD FP-792 FLEXIBLE BOARD VC-341 BOARD FP-300 FLEXIBLE BOARD FP-802 FLEXIBLE BOARD FP-300 FLEXIBLE BOARD FP-802 FLEXIBLE BOARD CCD-TRV138/TRV238E/TRV338/TRV438E... - Page 58 , µPB... , uPC... , µPC... , uPD..., µPD... • Abbreviation AR : Argentine model AUS : Australian model BR : Brazilian model CND : Canadian model : East European model : Tourist model NE : North European model CCD-TRV138/TRV238E/TRV338/TRV438E...
- Page 59 3-087-811-11 CABINET (UPPER) (51) 2-580-024-21 LABEL (90) (TRV338/TRV438E) 3-078-889-11 SCREW (M1.7) 3-080-204-21 SCREW, TAPPING, P2 CAUTION : For the part of 8 : RETAINER (51), EVF FLEXIBLE (3-088-616-01), cut WOVEN (T0.25), FABRIC NON CCD-TRV138/TRV238E/TRV338/TRV438E (3-076-631-01) into the desired length and use it.
- Page 60 8-719-078-24 DIODE DAC3825 (IR EMITTER) (Note1) 3-087-742-01 RING (51), FRONT D754 8-719-078-24 DIODE DAC3825 (IR EMITTER) (Note1) 3-080-204-21 SCREW, TAPPING, P2 IC751 6-704-975-01 IC RPM7240-V4 (TRV238/TRV438E) (Note1) A-1082-749-A SI-039 BOARD, COMPLETE J752 1-778-040-11 JACK, SMALL TYPE (A/V OUT) (Note1) (TRV138/TRV238E) (Note1) MIC901 1-542-567-11 MICROPHONE CCD-TRV138/TRV238E/TRV338/TRV438E...
-
Page 61: Lens Block
3-080-204-21 SCREW, TAPPING, P2 1-758-865-11 FILTER BLOCK OPTICS IC951 A-7013-219-A CCD BLOCK ASSY (CCD IMAGER) 3-053-973-01 RUBBER (W), SEAL (TRV138/TRV338) (Note1, 2) A-7111-944-A CD-465 BOARD, COMPLETE IC951 A-7013-276-A CCD BLOCK ASSY (CCD IMAGER) (TRV238E/TRV438E) (TRV238E/TRV438E) (Note1, 2) A-7111-945-A CD-465 BOARD, COMPLETE (TRV138/TRV338) CCD-TRV138/TRV238E/TRV338/TRV438E... -
Page 62: Lcd Block
Description 2-349-776-01 CABINET (M (905)), P 3-078-889-11 SCREW (M1.7) 3-087-781-01 FRAME (51), PANEL 1-479-063-11 KEY BLOCK, CONTROL (SB-9000) A-1081-089-A PD-204 BOARD, COMPLETE LCD901 1-805-137-51 INDICATOR MODULE LIQUID CRYSTAL 0 ND901 3-080-204-21 SCREW, TAPPING, P2 1-518-951-11 TUBE, FLUORESCENT, COLD CATHODE CCD-TRV138/TRV238E/TRV338/TRV438E... -
Page 63: Cabinet R Block
3-087-825-21 COVER (C) (51), HINGE (including BT001) 3-078-889-11 SCREW (M1.7) 3-080-206-11 SCREW, TAPPING, P2 1-478-418-11 KEY BLOCK, CONTROL (PR-5100) 3-080-205-21 SCREW, TAPPING, P2 X-3953-962-1 HINGE (51) ASSY 1-962-648-11 HARNESS (PD-124) X-2024-890-1 CABINET (R (905)) ASSY 3-087-826-11 COVER (M) (51), HINGE CCD-TRV138/TRV238E/TRV338/TRV438E... -
Page 64: Evf Block
X-3951-166-1 LENS (M) ASSY, VF 1-860-928-12 FP-797 FLEXIBLE BOARD X-2025-533-1 CABINET (LOWER (905)) ASSY, EVF LCD902 1-805-465-61 INDICATOR MODULE LIQUID CRYSTAL 3-080-204-21 SCREW, TAPPING, P2 (MD0301S-61) (TRV138/TRV338) X-2048-474-1 BASE (910) ASSY, SLIDE LCD902 1-805-465-81 INDICATOR MODULE LIQUID CRYSTAL (MD0301S-81) (TRV238E/TRV438E) CCD-TRV138/TRV238E/TRV338/TRV438E... -
Page 65: Battery Panel Block
5-1-7. BATTERY PANEL BLOCK ns: not supplied BT901 Ref. No. Part No. Description Ref. No. Part No. Description 3-087-799-01 SHEET METAL (LOWER) (51), STRAP 3-072-305-11 LID (2500), JACK 3-078-889-11 SCREW (M1.7) BT901 1-694-772-11 TERMINAL BOARD, BATTERY X-2024-899-1 PANEL (905) ASSY, BATTERY CCD-TRV138/TRV238E/TRV338/TRV438E... -
Page 66: Md Frame Block
A-1093-407-A VC-341 BOARD, COMPLETE (SERVICE) 2-548-266-01 LABEL (L (90)) (TRV138) (TRV138) 2-548-266-11 LABEL (L (90)) (TRV238E) A-1093-408-A VC-341 BOARD, COMPLETE (SERVICE) 2-548-266-21 LABEL (L (90)) (TRV338) (TRV238E) 2-548-266-41 LABEL (L (90)) (TRV438E) A-1093-409-A VC-341 BOARD, COMPLETE (SERVICE) 3-080-204-11 SCREW, TAPPING, P2 (TRV338) CCD-TRV138/TRV238E/TRV338/TRV438E... -
Page 67: Cassette Compartment Assembly, Drum Assembly
X-3951-298-1 CASSETTE COMPARTMENT ASSY 7-624-101-04 STOP RING 1.2 (E TYPE) X-3951-302-1 DAMPER ASSY M901 A-7048-988-A DRUM (DGH-0F3B-R) (SERVICE) (MDX-M2100) (TRV138/TRV338) X-3951-297-1 GEAR ASSY, R DRIVE 3-065-840-01 CUT (0.98X3X0.13), LUMILER (W) M901 A-7048-990-A DRUM (DGH-0F4B-R) (SERVICE) (MDX-M2101) 3-065-935-01 HLC CUT 1.8X4X0.5 (TRV238E/TRV438E) CCD-TRV138/TRV238E/TRV338/TRV438E 5-10... -
Page 68: Ls Chassis Block Assembly
Q002 8-729-907-25 PHOTO TRANSISTOR PT4850F (TAPE END) 3-065-832-01 PLATE, LS CAM S001 1-692-614-11 SWITCH, PUSH (3 KEY) (REC PROOF) 3-065-828-01 ARM, S RATCHET S002 1-572-688-11 SWITCH, PUSH LEVER (1 KEY) (C. C. LOCK) 3-065-829-01 PLATE, S RATCHET (RE) CCD-TRV138/TRV238E/TRV338/TRV438E 5-11... -
Page 69: Mechanical Chassis Block Assembly-1
1-677-049-11 FP-228 FLEXIBLE BOARD (DEW SENSOR) 3-065-882-01 ARM, EJECT 1-680-434-11 FP-299 FLEXIBLE BOARD M902 8-835-701-01 MOTOR, DC SCE13A/C-NP (CAPSTAN) 3-065-877-01 PLATE (T), GUIDE LOCK M903 A-7096-420-A MOTOR ASSY, LD (LOADING) X-3951-301-1 PLATE ASSY, PINCH PRESSURE S901 1-786-096-11 SWITCH, ROTARY (MODE SWITCH) CCD-TRV138/TRV238E/TRV338/TRV438E 5-12... -
Page 70: Mechanical Chassis Block Assembly-2
3-065-901-01 ROLLER, LS ARM 3-065-915-01 GEAR (1), CAM 3-065-916-01 GEAR (2), CAM 3-065-878-01 PLATE (S), GUIDE LOCK 3-065-919-01 ARM, T1 LIMITTER 3-065-932-01 PAN (2 MAIN M1.4X1.6), CAMERA X-3951-308-1 ARM ASSY, GL A-7096-413-A GEAR (S) ASSY, GUIDE X-3951-300-2 CHASSIS ASSY, MECHANICAL CCD-TRV138/TRV238E/TRV338/TRV438E 5-13... -
Page 71: Electrical Parts List
8-719-988-42 DIODE GL453S (TAPE LED) Note1: Be sure to read “Precautions for Replacement of CCD Imager” on page 4-5 when changing the CCD imager. Note2: FP-300, FP-301, FP-302 and FP-802 flexible boards are included in CHASSIS ASSY, LS (A- CCD-TRV138/TRV238E/TRV338/TRV438E 7096-426-A). 5-14... - Page 72 Les composants identifiés par une mark 0 or dotted line with marque 0 sont critiques pour la mark 0 are critical for safety. sécurité. CCD-TRV138/TRV238E/TRV338/TRV438E Replace only with part num- Ne les remplacer que par une pièce ber specified. portant le numéro spécifié.
- Page 73 C103 1-127-760-11 CERAMIC CHIP 4.7uF 6.3V C303 1-125-777-11 CERAMIC CHIP 0.1uF C304 1-164-392-11 CERAMIC CHIP 390PF C104 1-119-750-11 TANTAL. CHIP 22uF 6.3V C306 1-125-777-11 CERAMIC CHIP 0.1uF C105 1-127-760-11 CERAMIC CHIP 4.7uF 6.3V C307 1-125-777-11 CERAMIC CHIP 0.1uF CCD-TRV138/TRV238E/TRV338/TRV438E 5-16...
- Page 74 1-107-819-11 CERAMIC CHIP 0.022uF C808 1-124-778-00 ELECT CHIP 22uF 6.3V C487 1-107-819-11 CERAMIC CHIP 0.022uF C810 1-125-837-91 CERAMIC CHIP 6.3V C811 1-127-760-11 CERAMIC CHIP 4.7uF 6.3V Note: Resistors are mounted to the location where C617, C618 are printed. CCD-TRV138/TRV238E/TRV338/TRV438E (TRV138/TRV238E only) 5-17...
- Page 75 Les composants identifiés par une mark 0 or dotted line with marque 0 sont critiques pour la mark 0 are critical for safety. sécurité. CCD-TRV138/TRV238E/TRV338/TRV438E Replace only with part num- Ne les remplacer que par une pièce ber specified. portant le numéro spécifié.
- Page 76 8-729-054-48 TRANSISTOR UP04601008S0 R091 1-218-969-11 RES-CHIP 1/16W R092 1-218-961-11 RES-CHIP 4.7K 1/16W Q484 6-550-234-01 TRANSISTOR UNR32A300LS0 R093 1-218-969-11 RES-CHIP 1/16W Q485 6-550-240-01 TRANSISTOR DTA114TMT2L R094 1-218-969-11 RES-CHIP 1/16W Q701 8-729-041-43 TRANSISTOR HN1L02FU (TE85R) R095 1-218-977-11 RES-CHIP 100K 1/16W CCD-TRV138/TRV238E/TRV338/TRV438E 5-19...
- Page 77 2.7K 1/16W R495 1-208-939-11 METAL CHIP 150K 0.5% 1/16W R316 1-218-966-11 RES-CHIP 1/16W R601 1-218-941-81 RES-CHIP 1/16W R317 1-218-949-11 RES-CHIP 1/16W R602 1-218-965-11 RES-CHIP 1/16W R318 1-218-945-11 RES-CHIP 1/16W R319 1-218-962-11 RES-CHIP 5.6K 1/16W R616 1-218-953-11 RES-CHIP 1/16W CCD-TRV138/TRV238E/TRV338/TRV438E 5-20...
- Page 78 1-234-375-21 RES, NETWORK 1K (1005 x4) RB706 1-234-375-21 RES, NETWORK 1K (1005 x4) RB708 1-234-381-21 RES, NETWORK 100K (1005 x4) RB801 1-234-702-11 RES, NETWORK 68 (1005 x4) < VIBRATOR > X151 1-760-320-11 VIBRATOR, CRYSTAL (28.636363MHz) (TRV138/TRV338) X151 1-760-321-11 VIBRATOR, CRYSTAL (28.375MHz) (TRV238E/TRV438E) CCD-TRV138/TRV238E/TRV338/TRV438E 5-21...
-
Page 79: Checking Supplied Accessories
Les composants identifiés par une mark 0 or dotted line with marque 0 sont critiques pour la mark 0 are critical for safety. sécurité. Replace only with part num- Ne les remplacer que par une pièce ber specified. portant le numéro spécifié. CCD-TRV138/TRV238E/TRV338/TRV438E 5-22E... - Page 80 2-515-260-11(1) Camera Operations Guide Read this first Video Camera Recorder/Digital Video Camera Recorder CCD-TRV238E/TRV438E DCR-TRV270E/TRV285E © 2005 Sony Corporation...
-
Page 81: Read This First
If you should lose the fuse cover, please process and do not affect the recording in any way. contact your nearest Sony service station. • Exposing the LCD screen, the viewfinder, or the lens to direct sunlight for long periods of time may cause malfunctions. - Page 82 Note on connecting other device • Be careful not to press buttons on the LCD frame accidentally when you open or close the LCD panel, Before connecting your camcorder to other device or when you adjust the angle of the LCD panel. such as a VCR or a computer with an USB or i.LINK •...
- Page 83 Table of Contents CCD-TRV238E: TRV238E DCR-TRV270E: TRV270E CCD-TRV438E: TRV438E DCR-TRV285E: TRV285E Read this first ..................... 2 Quick Start Guide Recording movies ..................8 Recording/Playing back with ease ............10 Getting started Step 1: Checking supplied items.............. 11 Step 2: Charging the battery pack............12 Using an outside power source .................
- Page 84 Recording a picture using various effects ..........30 Fading in and out of a scene – FADER ..............30 Superimposing a title................31 Searching for the last scene of the most recent recording – END SEARCH ................. 32 Playback Viewing pictures recorded on a tape............33 Playing back in various modes .................
- Page 85 Advanced operations Using with your computer Customizing Your Features ( TRV270E/285E) ....72 Camcorder Installing the software and “First Step Changing the menu settings ....42 Guide” on a computer TRV270E/285E) ......74 Using the (MANUAL SET) menu – PROGRAM AE/P EFFECT, Using “First Step Guide”...
-
Page 87: Quick Start Guide
Quick Start Guide Recording movies Attach the charged battery pack to the camcorder. To charge the battery, see page 12. Lift up the viewfinder. Slide the battery pack in the direction of the arrow until it clicks. Insert a cassette into the camcorder. Slide the OPEN/ Insert the cassette with... -
Page 88: Start Recording While Checking The Subject On The Lcd Screen
Start recording while checking the subject on the LCD screen. The date and time is not set up in the default setting. To set the date and time, see page 17. Remove the lens cap. Lens cap is not attached when you purchase your camcorder (p. -
Page 89: Recording/Playing Back With Ease
Recording/Playing back with ease By switching to Easy Handycam operation, recording/playback operation becomes even easier. Easy Handycam operation allows easy recording/playback for even first time users by providing only the basic functions for recording/playback. Press EASY when recording/ playing back. EASY lights up in blue (1) and screen font size increases (2) during Easy Handycam operation. -
Page 90: Step 1: Checking Supplied Items
Getting started RMT-830: ( TRV285E) Step 1: Checking supplied items A/V connecting cable (1) Make sure you have following items supplied Monaural: ( TRV238E/438E) with your camcorder. The number in parentheses indicates the number of that item supplied. AC Adaptor (1) Stereo: ( TRV270E/285E) USB cable (1) ( TRV270E/285E) -
Page 91: Step 2: Charging The Battery Pack
Step 2: Charging the Lift up the viewfinder. battery pack You can charge the battery by attaching the “InfoLITHIUM” battery pack (M series) to your camcorder. b Notes • You cannot use batteries other than the “InfoLITHIUM” battery pack (M series) (p. 96). •... - Page 92 To check the remaining battery – Battery Slide the POWER switch up to (CHG) Info OFF. The CHG (charge) lamp lights up and DISPLAY/BATT INFO charging starts. After charging the battery POWER switch OPEN The CHG (charge) lamp turns off when the battery is fully charged.
- Page 93 at 25°C (77°F). (10 – 30°C (50 – 86°F) Battery pack Continuous Typical* recommended.) recording recording time time Battery pack NP-FM50 NP-FM30 (supplied) NP-QM71D NP-FM50 NP-QM91D 1010 NP-QM71D NP-QM91D TRV270E/285E: Recording time when recording with the Battery pack Continuous Typical* recording recording LCD screen on...
-
Page 94: Using An Outside Power Source
b Notes Step 3: Turning the • The power will not be supplied from the battery pack when the AC Adaptor is connected to the DC IN jack of your camcorder, even if its mains lead is power on disconnected from the wall socket. •... -
Page 95: Step 4: Adjusting The Lcd Panel And Viewfinder
Turn the SEL/PUSH EXEC dial to select Step 4: Adjusting the [LCD BRIGHT], then press the dial (p. 52). LCD panel and Adjust the brightness of the LCD screen viewfinder with the SEL/PUSH EXEC dial, then press the dial. Press MENU. Adjusting the LCD panel z Tips •... -
Page 96: Step 5: Setting The Date And Time
Step 5: Setting the Press MENU. date and time MANUAL SET STBY PROGRAM AE P EFFECT AUTO SHTR Set the date and time when using this camcorder for the first time. If you do not set [ MENU ] : END the date and time, the [CLOCK SET] screen appears every time you turn on your camcorder. -
Page 97: Step 6: Inserting A Cassette Tape
To check the preset date and time Step 6: Inserting a TRV238E/438E: Press DATE to display the date indicator. cassette tape Press TIME to display the time indicator. Press DATE (or TIME) and then press TIME (or DATE) to simultaneously display the date You can use standard 8 mm and Hi8 and time indicator. -
Page 98: Step 7: Setting The Screen Language
Step 7: Setting the Insert a cassette with its window-side facing up. screen language Window-side You can select the language to be used on the LCD screen. MENU Push the center of the back of the cassette lightly. Press The cassette compartment automatically slides back in. - Page 99 Turn the SEL/PUSH EXEC dial to select [ LANGUAGE], then press the dial. SETUP MENU STBY CLOCK SET USB STREAM DEUTSCH LTR SIZE LANGUAGE ENGL I SH DEMO MODE ENG [ S I MP ] ESPAÑOL FRANÇA I S I TAL I ANO [ MENU ] : END Turn the SEL/PUSH EXEC dial to select the desired language, then press...
-
Page 100: Recording
Recording Press OPEN and open the LCD panel. Recording movies Slide the POWER switch until the CAMERA lamp lights up. Before recording, follow steps 1 to 7 in Your camcorder is set to the standby mode. “Getting started” (p. 11 - p. 19). TRV238E/438E: Slide the POWER switch while... -
Page 101: Recording For A Longer Time
TRV270E/285E: z Tips • You can also use REC START/STOP on LCD frame Date/time and camera settings data (p. 36) will to record moving pictures. It is useful when you not be displayed during recording. record from a low-angle or record by yourself in the mirror mode. -
Page 102: Using Zoom
To use the zoom buttons on LCD frame Using zoom Keep W pressed to record wider range of view, and keep T pressed to record closer view. b Notes • You cannot change the zoom speed with the zoom When the CAMERA mode is selected, you buttons on LCD frame. -
Page 103: Recording In Mirror Mode
• The battery pack discharges quickly while the built- b Notes in light is turned on. TRV238E/438E: • When you do not use your camcorder, turn the built- • appears in the viewfinder and on the LCD in light off and remove the battery pack to avoid screen. -
Page 104: ( Trv270E/285E)
Recording still Slide the POWER switch to select the CAMERA mode. images – Tape photo recording Slide the POWER ( TRV270E/285E) switch while pressing the green button. You can record still images. Before recording, follow steps 1 to 7 in “Getting started”... -
Page 105: Recording With Ease
Recording with ease Easy Handycam operation – Easy Handycam With this Easy Handycam operation, most of the camera settings are set to automatic mode, only basic functions become available, Press REC START/STOP. and screen font size increases for easy Recording starts. [REC] appears on the viewing. -
Page 106: Adjusting The Exposure
Adjusting the exposure manually Adjusting the exposure You can fix the brightness of a picture at the The exposure is adjusted automatically in the best exposure. When recording indoors on a default setting. clear day, for instance, you can avoid backlight shadows on people next to the Adjusting the exposure for backlit window by manually fixing the exposure to... - Page 107 z Tip Recording in dark • If you record subjects in complete darkness, set [N.S. LIGHT] to [ON] in the menu settings. The places maximum shooting distance using the NightShot Light is about 3 meters (10 feet). If you record subjects in dark places (such as night scene or in –...
-
Page 108: Adjusting The Focus Manually
Tips for focusing manually Adjusting the focus • It is easier to focus on the subject when you use the zoom function. Move the manually power zoom lever towards T (telephoto) to adjust the focus, and then, towards W (wide angle) to adjust the zoom for The focus is adjusted automatically in the recording. -
Page 109: Recording A Picture Using Various Effects
[STRIPE FADER] Recording a picture This feature is for TRV238E/438E only. using various effects FADER [MONOTONE FADER] When fading in, the picture gradually changes from black-and-white to color. When fading out, the picture gradually changes from color to black-and-white. Slide the POWER switch to select the CAMERA mode. -
Page 110: Superimposing A Title
Turn the SEL/PUSH EXEC dial to select Superimposing a title the desired character, then press the dial. STBY TITLE SET S_ _ _ _ _ _ _ _ _ _ _ _ _ _ _ _ _ _ _ You can insert a title when recording. ABCDE 1 2 3 4 5 $ ¥DM£... -
Page 111: Searching For The Last Scene Of The Most Recent Recording
[POSITION] (position) Searching for the last You can select from 8 to 9 choices. scene of the most Turn the SEL/PUSH EXEC dial to recent recording select [OK], then press the dial. The title appears. – END SEARCH Press REC START/STOP. This function is handy when you have played back the tape, for example, but want to start Press TITLE at the scene you want to... -
Page 112: Playback
Playback Press (rewind) to go to the point you want to view. Viewing pictures recorded on a tape Press (play) to start playback. Make sure you have a recorded cassette To adjust the volume inserted into your camcorder. Press either of the two buttons on VOLUME. When you want to play back the recorded When you close the LCD panel, sound is turned picture on your TV, see page 38. -
Page 113: Playing Back In Various Modes
To view pictures at slow speed (slow TRV270E/285E: playback)* TRV238E/438E/ TRV285E: Press SLOW y on the Remote Commander 60min 0:00:00:00 during playback. To resume normal playback, press PLAY. * For TRV285E: Pictures output from the DV Interface cannot be played back smoothly in the slow mode. b Notes •... - Page 114 Playing back with Play back a tape. The following buttons can be operated. ease (play)/ (stop)/ (pause)/ (fast forward)/ (rewind) – Easy Handycam TRV238E/438E/ TRV285E: You can operate those operations and SLOW y on the Remote Commander. Easy Handycam operation allows easy playback for even first time users by providing only the basic functions for To cancel Easy Handycam operation...
-
Page 115: Various Playback Functions
Displaying the date/time and Various playback camera settings data – Data code functions ( TRV270E/285E) During playback, you can view the date/time You can display the recorded date on the data ([DATE/TIME]) and the camera settings screen. data ([CAM DATA]) that are automatically recorded while recording pictures on a tape. - Page 116 To hide the date/time or the camera settings data Follow steps 2 to 4, and select [OFF] in step 5. Camera settings data display In the date/time data display, the date and time is displayed in the same area. If you record the picture without setting the clock, [-- -- ----] and [--:--:--] will appear.
-
Page 117: Playing The Picture On A Tv
Connect your camcorder to a TV using the Playing the picture on supplied A/V connecting cable as shown in the following illustration. a TV Connect the supplied AC Adaptor to the wall socket for the power supply (p. 12). Refer also to the instruction manuals supplied with the devices to be connected. -
Page 118: Locating A Scene On A Tape For Playback ( Trv285E)
When your TV is connected to a VCR Locating a scene on a Connect your camcorder to the LINE IN input on the VCR using the A/V connecting cable. Set tape for playback the input selector on the VCR to LINE. ( TRV285E) When your TV is stereo TRV238E/438E:... -
Page 119: Searching For A Scene By Date Of Recording - Date Search
b Notes • The Date search will not function correctly when there is a blank section between recorded sections on • There may be a discrepancy of several seconds the tape. between the time code and the tape counter. • Zero set memory will not function correctly if there is a blank section between recorded sections on the Searching for a still image tape. -
Page 120: Playing Back Still Images In Sequence - Photo Scan
Playing back still images in sequence – Photo scan You can also locate still images one after another and display each image for 5 seconds automatically. SEARCH M. . / > STOP Slide the POWER switch repeatedly to select the PLAY/EDIT mode. Press SEARCH M. -
Page 121: Advanced Operations
Advanced operations OTHERS (p. 58) Customizing Your Camcorder STBY TAPE SET REC MODE AUDIO MODE REMAIN FRAME REC Changing the menu IN T. REC RETURN settings [ MENU ] : END You can change various settings or make Turn the SEL/PUSH EXEC dial to detailed adjustments using the menu items select the desired item, then press the displayed on the screen. -
Page 122: Using The (Manual Set) Menu
The default settings are marked with G. The Using the settings you can adjust vary depending on the power mode of your camcorder. The screen (MANUAL SET) menu shows the items you can operate at the moment. Unavailable items will be grayed out. –... - Page 123 **Your camcorder is adjusted to focus only on distant subjects. Note • When you set the NIGHTSHOT PLUS switch to ON, [PROGRAM AE] does not work. P EFFECT TRV238E/438E: You can add special effects (such as films) to a picture before recording. appears when each effect is selected.
- Page 124 • For TRV270E/285E: You can copy pictures edited using picture effects to another tape (p. 62). AUTO SHTR Select to automatically activate the electronic shutter to adjust the shutter speed when recording in bright conditions. Select when recording without using the electronic shutter. Customizing Your Camcorder...
-
Page 125: Using The (Camera Set) Menu
The default settings are marked with G. The Using the settings you can adjust vary depending on the power mode of your camcorder. The screen (CAMERA SET) menu shows the items you can operate at the moment. Unavailable items will be grayed out. –... - Page 126 16:9 WIDE TRV238E/438E: You can record a cinema-like picture ([CINEMA] mode) or a 16:9 wide picture ([16:9 FULL] mode) to watch on the 16:9 wide-screen TV. Refer also to the manuals supplied with your TV. In [CINEMA] mode When viewed on the LCD screen/viewfinder When viewed on a 16:9 wide screen TV* When viewed on a standard TV** In [16:9 FULL] mode...
- Page 127 Tips • When you record in the [16:9 FULL], the date or time indicator will be widened on wide- screen TVs. • For TRV438E: The SteadyShot does not work. If you set [16:9 FULL] in the menu settings when the SteadyShot is working, flashes and the SteadyShot does not function.
- Page 128 STEADYSHOT TRV438E/ TRV270E/285E: You can select this function to compensate for camera-shake. Standard setting (enable the SteadyShot function). If you select a function that STEADYSHOT cannot work with, appears. OFF ( Select to deactivate the SteadyShot function. Select to shoot a stationary subject with a tripod, or when using a conversion lens (optional).
-
Page 129: Using The - Lcd B.l./Lcd Color, Etc
items, see “Changing the menu settings” Using the (PLAYER (p. 42). The default settings are marked with . The SET)/ (VCR SET) settings you can adjust vary depending on the power mode of your camcorder. The screen menu shows the items you can operate at the moment. –... -
Page 130: Audio Mix
TRV238E/438E: Select to correct jitter (horizontal picture shake during playback). Select to not compensate picture distortion when playing back a tape on which you have dubbed repeatedly or recorded TV game signals. TRV238E/438E: Select to eliminate color noise in the picture. Select to minimize picture artifacts in a picture containing lots of movement. - Page 131 The default settings are marked with . The Using the (LCD settings you can adjust vary depending on the power mode of your camcorder. The screen SET) menu shows the items you can operate at the moment. – LCD B.L./LCD Unavailable items will be grayed out.
-
Page 132: (Tape Set) Menu - Frame Rec/Int.rec, Etc
TRV238E/438E, 1.5 times longer for TRV270E/ 285E) (Long Play). The use of Sony cassettes is recommended to get the most out of your camcorder. Notes • If you record in the LP mode, a mosaic-like noise may appear or sound may be interrupted when you play back the tape on other camcorders or VCRs. - Page 133 • When you set [ORC TO SET], a non-recorded section of about 0.1 second appears on the tape. However, note that this non-recorded section disappears from the tape when you continue recording from this section. • To check if you have already set this setting, select [ORC TO SET] in the menu settings. [ORC ON] is displayed if it is already set.
- Page 134 INT.REC TRV270E/285E: You can achieve excellent recordings of flowers blooming, etc., with this function. Connect your camcorder to the wall socket using the supplied AC Adaptor during the operation. a. [REC TIME] b. [INTERVAL] Turn the SEL/PUSH EXEC dial to select [SET], then press the dial. Turn the SEL/PUSH EXEC dial to select [INTERVAL], then press the dial.
-
Page 135: Using The (Setup Menu)
The default settings are marked with . The Using the (SETUP settings you can adjust vary depending on the power mode of your camcorder. The screen MENU) shows the items you can operate at the moment. – CLOCK SET/USB STREAM/ Unavailable items will be grayed out. -
Page 136: Demo Mode
LANGUAGE You can select or change the language used for the on-screen display (p. 19). You can select from English, Simplified English, Traditional-Chinese, Simplified- Chinese, French, Spanish, Portuguese, German, Dutch, Italian, Greek, Russian, Arabic, or Persian. DEMO MODE When you remove a cassette from your camcorder, and select the CAMERA mode, you can view the demonstration in about 10 minutes. -
Page 137: Using The (Others) Menu
power mode of your camcorder. The screen Using the shows the items you can operate at the moment. Unavailable items will be grayed out. (OTHERS) menu – WORLD OTHERS WORLD TIME TIME/VIDEO EDIT, etc. BEEP A. SHUT OFF COMMANDER DISPLAY REC LAMP You can select items listed below in the OTHERS menu. -
Page 138: Rec Lamp
Note • When you connect your camcorder to the wall socket, [A.SHUT OFF] is automatically set to [NEVER]. COMMANDER TRV238E/438E/ TRV285E: Select when using the Remote Commander supplied with your camcorder. Select to deactivate the Remote Commander to prevent your camcorder from responding to a command sent by another VCR remote control unit. -
Page 139: Dubbing/Editing
Dubbing/Editing You can create a copy of the picture recorded on your camcorder on other recording Connecting to a VCR devices (p. 62). TRV285E, you can also record the picture from a VCR to a tape on your camcorder (p. 67). Connect your camcorder to a VCR as shown in the following illustration. - Page 140 TRV270E/285E: A/V OUT jack Connecting with an i.LINK cable i.LINK cable (optional) i.LINK jack DV Interface Yellow White A/V connecting cable (supplied) VCRs Signal flow To use an i.LINK cable for connection * For TRV270E: Your camcorder does not accept input data from the TRV270E/285E: connected device.
-
Page 141: Dubbing To Another Tape
• For TRV270E/285E: Dubbing to another When your camcorder is connected to the VCR via DV Interface, you cannot record the title or indicators. tape • For TRV270E/285E: Pictures edited with Picture effect ([P EFFECT] p. 44) cannot be output via the DV Interface. -
Page 142: Dubbing A Tape Easily - Easy Dubbing ( Trv238E/438E)
Dubbing a tape easily Turn the SEL/PUSH EXEC dial to select [SETUP], then press the dial. – Easy Dubbing ( TRV238E/438E) E A S Y D U B B I N G S E T U P I R SETUP PAUSE MODE I R TEST You can control VCR for dubbing with your... - Page 143 VCR, from about 30 cm (12 the default setting.) in.) away, with no obstructions. Manufacturing [IR SETUP] code Remote sensor company Infrared ray Sony 1, 2, 3, 4, 5, 6 emitter Aiwa 47, 53, 54 Akai 50, 62, 74 Alba...
- Page 144 Manufacturing [IR SETUP] code Turn the SEL/PUSH EXEC dial to company select the desired title, then press the Roadstar dial. SABA 21, 76, 91 The title flashes. Salora B B I NG C O L O R Samsung 22, 32, 52, 93, 94 S I Z E B A C K C O L HELLO!
- Page 145 • The background color changes as follows: Step 4: Performing Easy Dubbing [FADE] y [WHITE] y [YELLOW] y [VIOLET] y [RED] y [CYAN] y [GREEN] y [BLUE] y [BLACK] Step 3: Selecting the dubbing Make sure that your camcorder and VCR are mode connected, and that the VCR is set to recording pause.
-
Page 146: Recording Pictures From A Vcr ( Trv285E)
Recording pictures Dubbing selected from a VCR scenes from a tape ( TRV285E) – Digital program editing You can record and edit pictures from a VCR ( TRV270E/285E) on a tape inserted in your camcorder. Insert a cassette for recording in your You can select up to 20 scenes (programs) camcorder. - Page 147 Prepare your VCR. Turn the SEL/PUSH EXEC dial to select [i.LINK] or [IR], then press the • Insert a cassette for recording. dial. • Set the input selector to input mode, if your VCR has one. When connecting with an i.LINK cable After selecting [i.LINK], go on to “Step 2: Prepare your camcorder (playing...
- Page 148 Point the infrared ray emitter of your Turn the SEL/PUSH EXEC dial to camcorder towards the remote sensor on select [ADJ TEST], then press the dial. your VCR, from about 30 cm (12 in.) away, with no obstructions. 0 : 08 : 55 : 06 VIDEO EDIT Insert a cassette into your VCR, and set EDIT SET...
- Page 149 Turn the SEL/PUSH EXEC dial to Turn the SEL/PUSH EXEC dial to select the average numerical value of select (OTHERS), then press the [IN], then press the dial. dial. The calculated start position for recording is set. Turn the SEL/PUSH EXEC dial to select [VIDEO EDIT], then press the Turn the SEL/PUSH EXEC dial to dial.
- Page 150 To end Digital program editing Press the SEL/PUSH EXEC dial. Press MENU. The ending point of the first program is set, To save a program without using it to and the lower part of the program mark changes to light blue. record Press MENU in step 11.
-
Page 151: Using With Your Computer
Using with your computer Music Video/Slideshow Producer You can select your favorite movies and still Features images from pictures saved on your computer and easily create a short original video or slide show with added music and visual styles. ( TRV270E/285E) Automatic Music Video Producer When you install the Picture Package software You can easily create a short original video with... -
Page 152: System Requirements
• CPU: Intel Pentium III 500 MHz or faster About “First Step Guide” (800 MHz or faster recommended) (For using ImageMixer VCD2, Intel Pentium II 800 MHz or faster recommended) • Application: DirectX 9.0c or later (this product is based on DirectX technology. It is “First Step Guide”... -
Page 153: Installing The Software And "First Step Guide" On A Computer ( Trv270E/285E)
• Display: Minimum 1 024 × 768 dots, 32 000 Installing the colors (this product will not operate correctly at less than 1 024 × 768 dots or 256 colors.) software and “First • Application: QuickTime 4 or later (QuickTime 5 recommended) Step Guide”... - Page 154 For Windows 2000/Windows XP Select the language for the application Log on as Administrators for installation. to be installed, then click [Next]. Confirm that your camcorder is not connected to the computer. Turn on the computer. Close all applications running on the computer before installing the software.
- Page 155 Click [Install] on the [Ready to Install If the [Installing Microsoft (R) the Program] screen. DirectX(R)] screen is displayed, follow the steps below to install DirectX 9.0c. The installation of Picture Package starts. If not, skip to step 14. Read [License Agreement], then click [Next].
- Page 156 (and “First Step Guide,” if installed by steps Double-click [IMXINST.SIT] in the 11-12) appear on the desktop. folder it was copied to. Double-click the unzipped [ImageMixerVCD2_Install]. When the user acceptance screen is displayed, enter your name and Remove the CD-ROM from the disc password.
-
Page 157: Using "First Step Guide" ( Trv270E/285E)
• Adobe, the Adobe logo, and Adobe Acrobat are either registered trademarks or trademarks of Adobe Systems Incorporated in the United States and/or other countries. • Picture Package is a trademark of Sony Corporation. • Microsoft, Windows and Windows Media are either registered trademarks or trademarks of Microsoft Corporation in the United States and/or other countries. -
Page 158: Creating A Dvd (Direct Access To "Click To Dvd") ( Trv270E/285E)
“Click to DVD” via an i.LINK cable (optional). The picture is automatically copied and written to a DVD. * Note that you need a Sony VAIO computer equipped with a DVD drive that can be used to write DVDs. You also need the computer with “Click to DVD Ver.1.2”... - Page 159 – Europe switch repeatedly to select the PLAY/ http://www.vaio-link.com/ EDIT mode. – USA Use the supplied AC Adaptor as the power http://www.ita.sel.sony.com/support/ source since it takes a few hours to create a dvimag/ DVD. – Asia Pacific Regional http://www.css.ap.sony.com/ Insert a recorded cassette into your –...
- Page 160 WRITING: The picture is being written • You cannot operate your camcorder in the following situations: onto the DVD. – While playing back a tape – When “Click to DVD” is started up from the computer • If you use a DVD-RW/+RW which has other •...
-
Page 161: Troubleshooting
AC Adaptor from the wall socket and contact your Sony dealer. The battery pack may be damaged. (p. 12) The battery pack is quickly • The temperature of the environment is too low, or the battery pack has discharged. -
Page 162: Cassette Tapes
Symptom Cause and/or Corrective Actions The remaining battery time indicator • The temperature of the environment is too high or too low, or the battery does not indicate the correct time. pack has not been charged enough. This is not a malfunction. cFully charge the battery again. - Page 163 Symptom Cause and/or Corrective Actions cUse the viewfinder lens adjustment lever to adjust the lens. (p. 16) The picture in the viewfinder is not clear. cClose the LCD panel. The picture is not displayed in the viewfinder The picture in the viewfinder has disappeared.
- Page 164 • There is a blank section in the beginning or middle of the tape. This is correctly. not a malfunction. cPress LIGHT repeatedly to select The built-in light does not function. cIf the problem persists, contact your Sony dealer or local authorized Sony service facility. Playback Symptom Cause and/or Corrective Actions cIf the tape has reached the end, rewind the tape.
- Page 165 Digital program editing does not between your camcorder and the VCR. (p. 60) cWhen your camcorder is connected to a DV device that is not a Sony function. product via an i.LINK cable, select [IR] in step 9 of “Step 1: Preparing your camcorder and VCR for operation.”...
-
Page 166: Connecting To A Computer
Connecting to a computer Symptom Cause and/or Corrective Actions cDisconnect the cable from the computer and camcorder, then connect it TRV270E/285E: The computer does not recognize again firmly. cDisconnect the USB device other than the keyboard, the mouse, and the your camcorder. - Page 167 Symptom Cause and/or Corrective Actions cThe USB driver has been registered incorrectly as the computer was TRV270E/285E: The image does not appear on the connected to your camcorder before the installation of the USB driver screen of the Windows computer was completed.
- Page 168 Symptom Cause and/or Corrective Actions For Windows 2000 TRV270E/285E: The image does not appear on the Log on as Administrators. screen of the Windows computer Check that your camcorder is connected to a computer. when using the USB cable. Right-click [My Computer], then click [Properties]. The [System Properties] screen appears.
- Page 169 Symptom Cause and/or Corrective Actions For Windows XP TRV270E/285E: The image does not appear on the Log on as Administrators. screen of the Windows computer Check that your camcorder is connected to a computer. when using the USB cable. Click [Start]. Right-click [My Computer], then click [Properties].
- Page 170 Symptom Cause and/or Corrective Actions cChange the settings for your computer environment as described in the TRV270E/285E: There is no sound when the following procedures: camcorder is connected to the Select [Start], [Programs] ([All Programs] for Windows Windows computer via a USB cable. XP), [Picture Package], [Handycam Tools], and [USB Streaming Tool], then start up [USB Streaming Tool].
-
Page 171: Warning Indicators And Messages
C:ss : ss/E:ss : ss (Self- Some symptoms can be fixed by yourself. If the problem persists even after diagnosis display) you tried a couple of times, contact your Sony dealer or local authorized Sony service facility. C:04:ss cA battery pack that is not an “InfoLITHIUM” battery pack is being used. -
Page 172: Warning Messages
Indication Cause and/or Corrective Actions Z (Eject cassette warning)* Slow flashing: • The write-protect tab on the cassette is set to lock. (p. 95) Fast flashing: • Moisture condensation has occurred. (p. 99) • The self-diagnosis display code is displayed. (p. 92) * You hear a melody or beep sound when the warning indicators appear on the screen. -
Page 173: Additional Information
Additional Information Simple setting of clock by time difference Using your camcorder You can easily set the clock to the local time by setting a time difference when using your abroad camcorder abroad. Select [WORLD TIME] in (OTHERS) menu, then set the time difference (p. -
Page 174: Usable Cassette Tapes
control signals for copyright protection Usable cassette of software. [Cannot record due to copyright protection.] tapes appears on the LCD screen, or on the TV screen if you try to record such software. Your camcorder does not record copyright You can use standard 8 mm and Hi8 control signals on the tape when it records. -
Page 175: About The "Infolithium" Battery Pack
– Put the battery pack in a pocket to warm it About the up, and insert it in your camcorder right before you start taking shots. “InfoLITHIUM” – Use a large capacity battery pack: NP- QM71D/QM91D (optional). battery pack • Frequent use of the LCD screen or a frequent playback, fast forward or rewind operation wears out the battery pack faster. -
Page 176: About I.link
Tips • i.LINK is a more familiar term for the IEEE 1394 data transport bus proposed by Sony, and is a trademark approved by many corporations. • IEEE 1394 is an international standard standardized by the Institute of Electrical and Electronics Engineers. -
Page 177: Maintenance And Precautions
This unit can also be connected to other i.LINK properly. (DV Interface) compatible device made by – Near AM receivers and video equipment. Sony (e.g. a VAIO series personal computer) as Noise may occur. well as to video device. – Sandy beach or anywhere dusty. If sand or... - Page 178 If moisture condensation has occurred If the following problem occurs, clean the None of the functions except cassette ejection video heads for 10 seconds with the Sony will work. Eject the cassette, turn off your V8-25CLD cleaning cassette (optional). camcorder, and leave it for about one hour with –...
- Page 179 • Wipe the surface of the lens clean with a soft If the following problem occurs, clean the cloth in the following instances: video heads for 10 seconds with the Sony – When there are fingerprints on the lens V8-25CLD cleaning cassette (optional).
-
Page 180: Specification
270E/285E: Specification 3.0 mm (1/6 type) CCD (Charge Coupled Device) Gross: Approx. 540 000 pixels Effective: Approx. 350 000 pixels Video camera recorder Lens Combined power zoom lens Filter diameter: 37 mm (1 1/2 in.) 20 × (Optical), 990 × (Digital) F=1.6 - 2.4 System Focal length... - Page 181 General Rechargeable battery pack (NP-FM30) Power requirements Maximum output voltage DC 7.2 V (battery pack) DC 8.4 V DC 8.4 V (AC Adaptor) Output voltage Average power consumption (when using the DC 7.2 V battery pack) Capacity TRV238E/438E: 5.0 Wh (700 mAh) During camera recording using the viewfinder Dimensions (approx.) 1.8 W...
- Page 182 Types of differences Model CCD- DCR- TRV238E TRV438E TRV270E TRV285E Recording system Digital8 Digital8 Playback system Hi8/8 Hi8/8 Digital8 Digital8 Audio recording Monaural Monaural Stereo Stereo AUDIO/VIDEO jack DV Interface — — IN/OUT USB jack — — SteadyShot — Remote sensor —...
-
Page 183: Quick Reference
Quick Reference Identifying parts and controls Camcorder A Lens cap (p. 21, 25) L FADER button (p. 30) B LCD screen (p. 2, 16) M BACK LIGHT button (p. 27) C OPEN button (p. 16) N FOCUS button (p. 29) D REC START/STOP button on LCD O SEL/PUSH EXEC dial (p. - Page 184 A Built-in light (p. 23) E Microphone B Lens F NIGHTSHOT PLUS switch (p. 28) C Infrared ray emitter (p. 63, 68)/ G EASY button (p. 26, 35) TRV238E/438E/ TRV285E: H DISPLAY/BATT INFO button (p. 13, Remote sensor D Camera recording lamp (p. 21, 26) A Jack cover E For TRV238E/438E:...
- Page 185 A RESET button (p. 82) H CAMERA mode lamp (p. 15) B For I PLAY/EDIT mode lamp (p. 15) TRV270E/285E: BURN DVD/VCD J For TRV285E: You can easily take a picture recorded on Rec buttons (p. 67) the tape and burn it onto a DVD or CD-R. REC (rec) For details on BURN DVD, see “Creating a K For...
- Page 186 A Viewfinder lens adjustment lever (p. 16) E Tripod receptacle Make sure that the length of the tripod B Eyecup screw is less than 5.5 mm (7/32 inch). C Cassette lid Otherwise, you cannot attach the tripod OPEN/EJECT lever (p. 18) securely, and the screw may damage your camcorder.
-
Page 187: Remote Commander
Remote Commander Remove the insulation sheet before using the Remote Commander. To remove the insulation sheet TRV238E/438E: Insulation sheet To change the button-type battery While pressing on the tab, inset your fingernail into the slit to pull out the battery case. TRV285E: Remove the button-type lithium battery. - Page 188 CAUTION Danger of explosion if battery is incorrectly replaced. Replace only with the same or equivalent type recommended by the manufacturer. Discard used batteries according to the manufacturer's instructions. b Notes on the Remote Commander • A button-type lithium battery (CR2025) is used in the Remote Commander.
-
Page 189: Indicators For The Lcd Screen And Viewfinder
Indicators for the LCD screen and viewfinder Following indicators will appear on the LCD Indicators Meanings screen and viewfinder to indicate the state of Q E Z Warning (p. 92) your camcorder. Indicators and their on-screen/viewfinder Manual exposure (p. 27) positions vary depending on your camcorder Manual focus (p. -
Page 190: Index
Index Data code i.LINK ....... 97 (DATA CODE)..36, 58 i.LINK cable ... 61, 67, 72, 79 Date search ......40 ImageMixer VCD2 ... 74 Numerics Date/time ......36 “InfoLITHIUM” 16:9 WIDE mode ....48 DEMO MODE ....57 battery pack ....96 21-pin adaptor ....39 Digital program editing Infrared ray emitter .. - Page 191 On-line help....77, 78 Tape counter ......21 Operation confirmation beep Tape photo recording ..25 See BEEP TBC........51 ORC........53 Telephoto See Zoom Time code ......21 Title........31 PAL ........94 TV color systems ....94 Photo scan ......41 Photo search ...... 40 Picture effect (P EFFECT)....
- Page 195 Printed in Japan...
- Page 196 [Description of main button functions on toolbar of the Adobe Acrobat Reader Ver5.0 (for Windows)] Toolbar Printing a text Reversing the screens displayed once • To reverse the previous screens (operation) one by one, click 1. Click the Print button 2.
-
Page 197: Revision History
Reverse 987677911.pdf Revision History S.M. Rev. Ver. Date History Contents issued 2004.11 Official Release — — CCD-TRV138/TRV238E/TRV338/TRV438E...
Need help?
Do you have a question about the CCD-TRV138 and is the answer not in the manual?
Questions and answers
Hi , my sony ccd-Trv138 won't play a tape,when I put the tape in it plays for a second then it flashes please insert tape ,?
The manual does not specifically mention the "please insert tape" error for the Sony CCD-TRV138. However, general troubleshooting steps for playback issues include:
1. Ensure the tape is properly inserted and not at the end. Try rewinding the tape.
2. Clean the video heads using a cleaning cassette if the tape is not being read correctly.
3. Check if the cassette is damaged or defective. Try using a different tape.
4. If the issue persists, the camcorder may require servicing.
If none of these steps resolve the issue, consider contacting a Sony service center.
This answer is automatically generated