Advertisement
Installation and Operation Manual
This device meets the requirements of
IMPORTANT: This product is not a life saving device but an aid to a
multi-level program of pool safety including but not limited to, adult
supervision, knowledge of CPR, gate alarms, fences and swimming
instruction for all persons using the pool
IMPORTANT: Read this manual completely prior to operating the
PoolEye Alarm. Keep this manual.
Important Safety Information..............................................2
List of Components ............................................................3
Installation ..........................................................................4
Winterization ......................................................................8
Troubleshooting .................................................................8
Warranty...........................................................................10
Model: PE24
ASTM Standard F 2208.
TABLE OF CONTENTS
1
®
PE24 Manual Version 1.0
Advertisement
Table of Contents

Related Manuals for SmartPool Pool Eye PE24


Summary of Contents for SmartPool Pool Eye PE24
-
Page 1: Table Of Contents
® Installation and Operation Manual Model: PE24 This device meets the requirements of ASTM Standard F 2208. IMPORTANT: This product is not a life saving device but an aid to a multi-level program of pool safety including but not limited to, adult supervision, knowledge of CPR, gate alarms, fences and swimming instruction for all persons using the pool IMPORTANT: Read this manual completely prior to operating the... -
Page 2: Important Safety Information
Layers of protection add to the security of the pool. A barrier fence should always be used around a pool in conjunction with a gate or door alarm, such as SmartPool’s YardGard to alert the responsible party that an unwanted intrusion to the pool area has occurred. -
Page 3: List Of Components
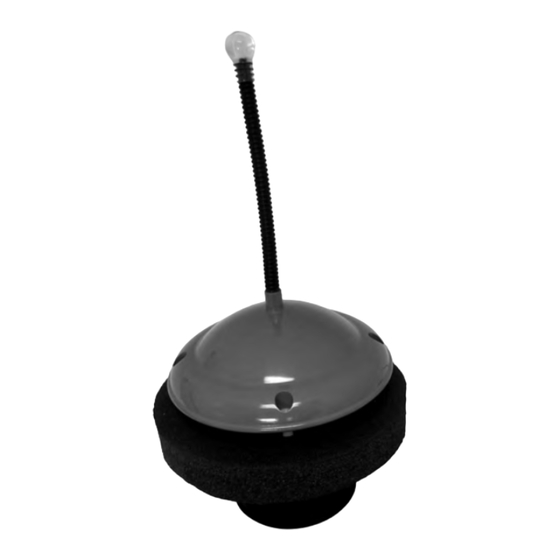
LIST OF COMPONENTS ITEM DESCRIPTION Alarm Body w/ Tether String Magnetic Key Tether Clip Alarm Stand Remote Receiver Remote AC Power Adaptor PE24 Manual Version 1.0... -
Page 4: Installation
INSTALLATION POSITIONING OF THE ALARM WARNING: Every pool is different. The alarm must be tested immediately upon installation to ensure the positioning of the alarm fits its specific environment. Improper positioning of the alarm or return fitting may result in under-performance or false alarms, potentially leading to personal injury or death. - Page 5 INSTALLING THE BATTERIES Two 9V batteries are required to operate the alarm. One battery will be installing the floating alarm and one battery will be installing in the remote receiver as a backup in a case where power is lost to the outlet. Remote Receiver Figure 2 1)Remove the battery cover on the back of...
- Page 6 MOUNTING THE ALARM IMPORTANT: Do not attach the Tether String to a pool ladder, a handle or any other object in or near the pool. NOTE: The Tether Clip is supplied with an adhesive backing which can be applied to smooth, clean surfaces such as metal or plastic.
- Page 7 2)The light on the alarm will flash GREEN once approximately every 10 seconds indicating the alarm is armed. 3)Ensure the Remote Receiver is within 100 linear feet (30 M) of the pool alarm and is positioned where it can be heard from Figure 9 anywhere in the house.
- Page 8 TESTING THE ALARM To test the alarm, you can make a simple device that will simulate the size and weight of a young child. See Figure 11 and Fig 12. The materials needed are: • (4) 1.5L bottles • Duct tape •...
-
Page 9: Winterization
WINTERIZATION 1)Remove the alarm from the pool and place on the Alarm Stand. 2)Release the Tether String from the clip. 3)Remove the batteries from the remote and alarm. 4)Store the remote, AC adapter and alarm in an area that remains above freezing temperatures. -
Page 10: Warranty
(if applicable); damage due to or related to improper draining, winterizing, storage or Acts of God; SmartPool LLC will not honor any claims for damage to any products in transit unless damage to the shipping container is noted at the time of delivery on the transfer company’s delivery bill.
Need help?
Do you have a question about the Pool Eye PE24 and is the answer not in the manual?
Questions and answers