
Related Manuals for True TUR-24-R/L-SS-B


Summary of Contents for True TUR-24-R/L-SS-B
- Page 1 TRUE RESIDENTIAL REFRIGER ATION 1 5 I N C H A N D 2 4 I N C H U N D E R C O U N T E R I N S T A L L G U I D E...
-
Page 2: Thank You
THANK YOU FOR YOUR PURCHA SE... -
Page 3: Table Of Contents
INSTAL LING ANTI -TIP BR ACK E TS INSTAL LING THE D O OR STOP INSTAL L ATION OF CA STORS TRUE PRECISION C ONTROL OPER ATION AND CABINE T 3 9 - 47 C OMP ONENTS HOME AL ARM SYSTEM - ( DUAL ZONE WINE CABINE T ONLY ) -
Page 4: Instal L Ation Check List
Have stainless steel surfaces been inspected for any imperfections? This is to be done by the authorized True dealer or installer with the customer, upon completion of installation. Stainless steel doors, handles and shelves are covered by a limited 30-day warranty for cosmetic defects. -
Page 5: Ownership
3 - 6 w n e r s h i p a f e t y r e c a u t i O n s i s p O s a l O f t h e e f r i g e r a t O r c f c D i s p O s a l n c r a t i n g... -
Page 6: Cfc Disp Osal
Cabinet, carefully inspect it for freight damage. If accidents. damage is discovered, immediately file a claim with the delivery freight carrier. True is not responsible for BEFORE YOU THROW AWAY YOUR OLD REFRIGERATOR OR damage incurred during shipment. FREEZER: Any questions about the installation please •... -
Page 7: Uncr Ating
UNCR ATING INSPECT FOR CONCEALED DAMAGE. AGAIN, Required Tools: • IMMEDIATELY FILE A CLAIM WITH THE FREIGHT Cutting utensil (utility knife) • CARRIER IF THERE IS DAMAGE. Hammer • Crowbar • B. IMPORTANT: Cut green polyband and remove Phillips head screwdriver styrofoam block before removing refrigerator from pallet. -
Page 8: El Ectrical Specifications
If the outlet is a standard 2-prong outlet, it is your personal responsibility and obligation to have it replaced with the properly grounded 3 prong wall outlet. Do not use an extension cord or two prong adaptor. Electrical ground is required on this appliance. TRUE RESIDENTIAL LINE... -
Page 9: Instal L Ation Specifications
7 - 12 n s t a l l a t i O n p e c i f i c a t i O n s 15 INCH & 24 INCH INSTALL GUIDE... - Page 10 INS TALL ATION SPECIFIC ATIONS - S TAINLESS SOLID & G L A SS DOOR True’s Stainless Solid and Glass Door units are designed to be inserted into a cabinet opening or free standing. Below are recommended dimensions for rough opening.
- Page 11 24 INCH ALL REFRIGERATOR TUR-24-R/L-SS-B TUR-24-R/L-SG-B TUR-24-D-SS-B BEVERAGE CENTER WINE CABINET DUAL ZONE WINE CABINET TBC-24-R/L-SG-B TWC-24-R/L-SG-B TWC-24DZ-R/L-SG-B " " " " " " " " " D IM EN SI O N S M AY VA RY BY ±...
- Page 12 O R (1) SL IM 1/ 4 B A R R EL A ND (1) 1/ 6 B A R R EL . " " " " " " " " " " " " " " D IM EN SI O N S M AY VA RY BY ± ” TRUE RESIDENTIAL LINE...
- Page 13 1 5 INCH ALL REFRIGERATOR WINE CABINET TUR-15-R/L-SS-B TUR-15-R/L-SG-B TWC-15-R/L-SG-B " " " " " " " " " D IM EN SI O N S M AY VA RY BY ± ” 15 INCH & 24 INCH INSTALL GUIDE...
- Page 14 B A R R EL O R (1) 1/ 6 B A R R EL . " " " " " " " " " " " " " " D IM EN SI O N S M AY VA RY BY ± ” TRUE RESIDENTIAL LINE...
- Page 15 13 - 25 n s t a l l a t i O n p e c i f i c a t i O n s f O r O l i D a n e l e a D y a n D l a s s r a m e D...
- Page 16 INS TALL ATION SPECIFIC ATIONS - SOLID (OP) AND G L A SS FR A MED PANEL (OG) True’s units with Solid and Glass Framed Panels are designed to be inserted into a cabinet opening or free standing. Below are recommended dimensions for rough opening.
- Page 17 24 INCH ALL REFRIGERATOR TUR-24-R/L-OP-B TUR-24-R/L-OG-B TUR-24-D-OP-B BEVERAGE CENTER WINE CABINET TBC-24-R/L-OP-B TBC-24-R/L-OG-B TWC-24-R/L-OP-B TWC-24-R/L-OG-B BEVERAGE DISPENSER DUAL ZONE WINE CABINET TWC-24DZ-R/L-OP-B TWC-24DZ-R/L-OG-B TUR-24BD-R/L-OP-B TUR-24DD-R/L-OP-B 15 INCH & 24 INCH INSTALL GUIDE...
- Page 18 IN C L UD IN G 3 / 4” T HI C K PA N E L ( P R O V ID E D BY O T H E R S ) D IM EN SI O N S M AY VA RY BY ± ” TRUE RESIDENTIAL LINE...
- Page 19 1 5 INCH ALL REFRIGERATOR TUR-15-R/L-OP-B TUR-15-R/L-OG-B WINE CABINET TWC-15-R/L-OP-B TWC-15-R/L-OG-B BEVERAGE DISPENSER TUR-15BD-R/L-OP-B 15 INCH & 24 INCH INSTALL GUIDE...
- Page 20 IN C L UD IN G 3 / 4” T HI C K PA N E L ( P R O V ID E D BY O T H E R S ) D IM EN SI O N S M AY VA RY BY ± ” TRUE RESIDENTIAL LINE...
- Page 21 CUS TOM PANEL INS TALL ATION - SOLID DOOR S O L ID D O O R 24 INCH 15 INCH ” DOOR PANEL WIDTH ” 5 / 8 ” DOOR PANEL HEIGHT ” 23/32 23 /32 DOOR PANEL DEPTH 3/4”...
- Page 22 " 29/32 29/32 " " BACK VIEW OF GLASS BACK VIEW OF DOOR OVERLAY PANEL GLASS DOOR OVERLAY PANEL " 23/32 " " viewable area " " " " 23/32 23/32 " " viewable viewable area area TRUE RESIDENTIAL LINE...
- Page 23 CUS TOM PANEL INS TALL ATION - DR AWER D R AW E R 24 INCH DRAWER PANEL WIDTH ” 5 / 8 DRAWER PANEL HEIGHT ” 11/16 DRAWER PANEL DEPTH 3/4” max " " 23/32 " 29/32 " 29/32 "...
- Page 24 The clamp ensures the overlay panel and door stay aligned with each other while installing. Once panel is clamped in place, pilot holes may be drilled into the panel from the rear side of the door. TRUE RESIDENTIAL LINE...
- Page 25 6. Once all holes are pre drilled use the appropriate specified screws to secure the overlay panel onto the front of the refrigerator door. 7. Reinstall all components in reverse order. Door gasket snaps back into place. Overlay panel and door stay aligned with each other while installing.
- Page 26 Secure overlay panel to drawer panel using appropriate size screws. Reattach drawer gasket by pressing and snapping back into place in gasket channel. Reattach drawer panel front to the drawer using four screws. TRUE RESIDENTIAL LINE...
- Page 27 Back of drawer D R AW E R O V E R L AY PA N E L 24 IN CH 15 INCH & 24 INCH INSTALL GUIDE...
-
Page 28: Instal L Ation Specifications For Be V Er Age Dispenser Units
O n p e c i f i c a t i O n s f O r e v e r a g e i s p e n s e r n i t s TRUE RESIDENTIAL LINE... - Page 29 TAPPER UNIT INS TALL ATION UNDER COUNTER TOPS Required Tools: • 2” Diameter PVC pipe (12” long). Will need to be cut down to size when refrigeration unit is installed • Silicone Caulk When installing under counter tops use the dimensions in the diagrams for cutting into the counter top. Silicone caulk around the edge of the PVC pipe after it has been installed.
- Page 30 " 3/32 " 15/16 " 9/32 " 5/16 "O.D. " 11/16 " Drip " tray 9/32 24 IN CH " 31/32 " 11/16 " " " 23/32 5/32 " "O.D. " 11/16 " Drip tray 13/32 " TRUE RESIDENTIAL LINE...
- Page 31 INS TALLING DR AF T S TANDARD AND HOOK UP Required Tools: • Phillips Head Screwdriver • Adjustable Wrench • 3/8” I.D. plastic tubing (3’) • (2) Hose clamps PARTS IN KIT: 1. CO2 Tank (Shipped empty. Fill before use) 2.
- Page 32 DI SENG A G ED ENG A G ED FINAL ASSEMBLY TRUE RESIDENTIAL LINE...
- Page 33 PRESSURE DISPENSING PRESSURES DIFFER ACCORDING TO: • The type of draft dispensing system • The length of draft dispensing line • The actual product - some require more, some require less • The temperature of the product • The pressurizing agent: air pressure, CO2 or special blended gases HELPFUL HINT S ON M AINTAINING THE CORREC T PRESSURE •...
- Page 34 4. Close regulator shut-off “C” and set pressure by turning regulator key clockwise. Check setting by opening and closing valve “C”. 5. Close tap head “D”. (Put in “OFF” position). 6. Tap barrel at “D” and open regulator shut-off “C”. TRUE RESIDENTIAL LINE...
- Page 35 CLE ANING INS TRUC TIONS FOR DR AF T TOWERS Draught dispensers, regardless of design, must be cleaned on a regular basis. Flushing your draught dispenser with water only is not enough. Cleaning is recommended whenever changing to a fresh keg. BEER TAP CLEANING KIT NO T E : U SE CL E A NER S A P P R O V ED BY YOUR BEER SUP P L IER REQUIRED TOOLS...
-
Page 36: Instal Ling Toe K Ick
O O r t O p n s t a l l a t i O n O f a s t O r s TRUE RESIDENTIAL LINE... - Page 37 Set unit in its final location. Be sure there is adequate ventilation in your room. Proper leveling of your True unit is critical to operating success (for non-mobile models). Effective condensate removal and door operation will be effected by leveling. Adjust leg levelers on the front and back of the cabinet if it needs to be lowered or raised.
- Page 38 C. Move unit into final position making sure rear of floor covering. leveling legs slide into the anti-tip brackets. ANTI-TIP BRACKET LOCATOR (TOP VIEW) 27/32” 27/32” Back of the unit Overlay 3/16” 1/2” Panel 25/32” 1/32 ” Cabinet Front TRUE RESIDENTIAL LINE...
- Page 39 INS TALLING THE DOOR S TOP All units are provided with an optional door stop. When installed, the door stop will restrict the door from opening past approximately 120º to prevent damage to surrounding cabinets. To install the door stop, use the 2 screws provided and secure the bracket to the bottom of the door on the same side as the hinge.
- Page 40 (See image 3). BETWEEN THE CASTOR AND FRAME RAIL LOWER RAIL ASSEMBLY RAIL END SNUG FIT HERE BEARING RACE LEVELING SHIM CASTOR USE THE TOOL PROVIDED TO TIGHTEN THE CASTOR INTO PLACE TRUE RESIDENTIAL LINE...
-
Page 41: C Omp Onents
39 - 47 r u e r e c i s i O n O n t r O l p e r a t i O n a n D a B i n e t O m p O n e n t s 15 INCH &... - Page 42 5. Changes color of TruLumina Lighting System = Showroom Mode Power + Mode 6. Enables Alarm for Door Ajar TRUE ALL REFRIGERATOR COMPONENTS LOCATION OF SERIAL TAG ADJUSTABLE STAINLESS STEEL GLASS SHELVES (2) REMOVABLE KICK PLATE FOR EASY CLEANING DOOR LOCK...
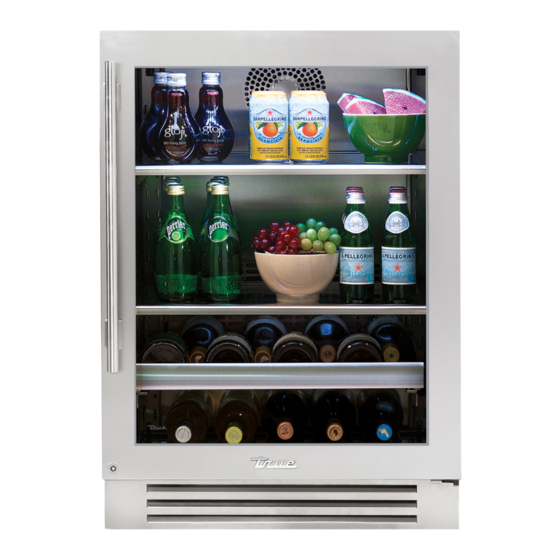
- Page 43 TRUE BEVERAGE CENTER COMPONENTS LOCATION OF SERIAL TAG ADJUSTABLE STAINLESS STEEL GLASS SHELVES (2) SLIDE OUT WINE SHELF (1) FLOOR WINE CRADLE (1) REMOVABLE KICK PLATE FOR EASY CLEANING DOOR LOCK TRUE WINE CABINET COMPONENTS LOCATION OF SERIAL TAG ADJUSTABLE SLIDE OUT...
- Page 44 TRUE BEVERAGE DISPENSER TUR-24BD DRAFT TOWER SPILL GRATE (TOP) DRIP PAN (BOTTOM) BLACK GROMMET FOR CHILL HOSE LOCATION OF SERIAL TAG SHELF (1) FOR USE WITH 1/4 SHORT KEG ONLY REMOVABLE KICK PLATE FOR EASY CLEANING DOOR LOCK TRUE RESIDENTIAL LINE...
- Page 45 TRUE DUAL BEVERAGE DISPENSER TUR-24DD DOUBLE DRAFT TOWER SPILL GRATE (TOP) DRIP PAN (BOTTOM) BLACK GROMMET FOR CHILL HOSE LOCATION OF SERIAL TAG SHELF (1) FOR USE WITH 1/4 SHORT KEG ONLY REMOVABLE KICK PLATE FOR EASY CLEANING DOOR LOCK...
- Page 46 6. Enables Alarm for Door Ajar Power = Toggle ºF / ºC (Upper) and Temperature Power = Showroom Mode + Mode TRUE WINE CABINET - DUAL ZONE COMPONENTS TWC-DZ LOCATION OF SERIAL TAG FULLY ADJUSTABLE WINE SHELF (1) NON-ADJUSTABLE SHELF (1) FULLY ADJUSTABLE...
- Page 47 24 INCH DR AWERS 1. Power Button 2. Controls the Temperature 3. Display for Temperature 4. Activates Accent Light 5. Color TruLumina 6. Enables Alarm for Drawer Ajar TRUE REFRIGERATED DRAWERS TUR-24-D TWO HEAVY DUTY LEXAN ORGANIZERS PER DRAWER EXCLUSIVE TRUE -GLIDE ®...
- Page 48 = Sabbath Mode + Light = Color Change Power + Light = Showroom Mode Power = Alarm TRUE BEVERAGE DISPENSER TUR-15BD DRAFT TOWER SPILL GRATE (TOP) DRILL PAN (BOTTOM) LOCATION OF SERIAL TAG BLACK GROMMET FOR CHILL HOSE REMOVABLE KICK PLATE...
- Page 49 TRUE ALL REFRIGERATOR COMPONENTS LOCATION OF SERIAL TAG ADJUSTABLE SPILL PROOF GLASS SHELVES (2) DOOR LOCK REMOVABLE KICK PLATE FOR EASY CLEANING TRUE WINE CABINET COMPONENTS LOCATION OF SERIAL TAG ADJUSTABLE SLIDE OUT WINE SHELVES (5) FLOOR WINE CRADLE (1)
- Page 50 48-49 O m e l a r m y s t e m u a l O n e i n e a B i n e t n l y TRUE RESIDENTIAL LINE...
-
Page 51: Home Al Arm Sys Tem - Dual Zone Wine C Abine T Only
HOME AL ARM SYS TEM - DUAL ZONE WINE C ABINE T ONLY Dual Zone wine units are provided with three wires located behind the kick-plate that may be connected to a home alarm system. These connections are for low voltage, low current circuits similar to those used as signals for alarms on doors and windows. -
Page 52: Shelv Ing Adjustment
50 - 51 h e l v i n g D j u s t m e n t TRUE RESIDENTIAL LINE... - Page 53 SID E O F T HE C A BINE T A S T HE D O O R HING E . WINE SHELVING ADJUS TMENT W HEN R EIN S TA L L ING T HE W INE R A CK , BE SUR E T H AT T HE B A CK O F T HE R A CK HO O K S The glide out wine shelves in TBC, TWC and TWZ-DZ UND ER NE AT H T HE TA B ON T HE G L ID E .
-
Page 54: Stack Ing K It Instructions
52-58 t a c k i n g n s t r u c t i O n s TRUE RESIDENTIAL LINE... - Page 55 INS TALL ATION SPECIFIC ATIONS - S TACKED UNIT S (SOLID AND G L A SS DOOR AND OVERL AY PANEL S True’s stacked units are designed to be inserted into a cabinet opening or free standing. Below are recommended dimensions for rough opening.
- Page 56 TRUE S TACKING KIT REQUIRED TOOLS: • 1/4 inch socket and ratchet • Level • Floor protector KIT: • (1) Louver Grill IM A G E 1 • (2) Stacking Brackets • (4) 1/4” Hex Head Screws STACKING BRACKETS 1. Lay floor protectant down.
- Page 57 10. Install the new louver grill on top cabinet. IM A G E 4 NO T E : M A K E SUR E A N Y P L A S T IC P R O T EC T I V E M AT ER I A L I S R EMO V ED F R OM L OU V ER G R IL L BEF O R E IN S TA L L ING.
- Page 58 TRUE S TACKING KIT FOR UNIT S WITH OVERL AY PANEL S REQUIRED TOOLS: • 1/4 inch socket and ratchet • Level • Floor protector KIT: • (2) Stacking Brackets • (4) 1/4” Hex Head Screws 1. Lay floor protectant down.
- Page 59 P L E A SE NO T E W HEN A D DING A PA NEL T O T HE G R IL L O R D O O R , A IR F L O W NEED S T O BE TA K EN IN T O C ON SID ER AT ION. SEE IM A G E S 3 A ND 4 IM A G E 3 IM A G E 4 Air Flow Out...
- Page 60 D E TA IL A D E TA IL B " " 13/32 13/32 " " " " " " 5/32 5/32 SCALE 2:3 SCALE 2:3 Notch here for a Notch here for a left hinged unit right hinged unit TRUE RESIDENTIAL LINE...
- Page 61 59- 64 e n e r a l a i n t e n a n c e e p l a c e m e n t a r t s r e c u e n t l y s k e D u e s t i O n s a r r a n t y...
- Page 62 REPL ACEMENT PART S True maintains a record of the cabinet serial number for your unit If at any time during the life of your unit, a part is needed, you may obtain that part by furnishing the model number and serial number to the company from whom you purchased the cooler.
- Page 63 FREQUENTLY A SKED QUES TIONS Q. HOW DO I ADJUST THE TEMPERATURE? A. Refer to True Precision Control Operation on pages 40, 44, 45 and 46. Q. WHY DOES THE EVAPORATOR FAN MOTOR RUN CONSTANTLY? A. This is a normal operation. The evaporator fan motor will run continuously to ensure even temperature throughout your cabinet.
- Page 64 Q. DOES MY REFRIGERATOR HAVE TO BE COVERED OUTDOORS? A. No. True units are able to be installed free standing. If left exposed to the elements throughout winter months, a cover will help preserve the life and beauty of your True product.
- Page 65 BE VER AG E DISPENSER QUES TIONS Q. WHAT TYPE OF TAP SYSTEM CAN BE USED WITH A TRUE UNIT? A. Different tap systems can be used on ¼ barrel short kegs, but low profile taps are not available in the non- sankey variety, and therefore will probably not fit in our dispensers when used with tall kegs.
- Page 66 THREE-YEAR PARTS & LABOR WARRANTY *For units purchased after Feb 1, 2013. TRUE warrants to the original purchaser of every new TRUE refrigerated unit, the cabinet and all parts thereof, to be free from defects in material or workmanship under normal and proper use and maintenance as specified by TRUE and upon proper installation and start-up in accordance with the instruction packet supplied with each TRUE unit.
- Page 67 CONTACT US w w w.t r ue -r e siden tial.com ( 6 36) 24 0 -24 0 0 • toll free ( 8 8 8 ) 616 - 878 3 975557 AD / 8.14 / 60...
Need help?
Do you have a question about the TUR-24-R/L-SS-B and is the answer not in the manual?
Questions and answers