Table of Contents
Advertisement
Advertisement
Table of Contents

Related Manuals for LORCH MicorStick


Summary of Contents for LORCH MicorStick
- Page 1 Operation Manual Page 17 MicorStick 909.2049.9-00...
- Page 2 Easy Go 1 Easy Go 3 Order no. 570.7595.1 Order no. 570.7595.3 Easy Go 2 Weld Backpack Order no. 570.7595.2 Order no. 570.7595.4 01.14 909.2049.9-00 - 2 -...
- Page 3 MicorStick + MobilePower 01.14 909.2049.9-00 - 3 -...
- Page 4 N(MP) - 4 - 909.2049.9-00 01.14...
- Page 5 VIII - 5 - 909.2049.9-00 01.14...
- Page 6 This documentation including all its parts is protected by copyright. Any use or modification outside the strict limits of the copyright law without the permission of LORCH Schweißtechnik GmbH is prohibited and liable to prosecution. This particularly applies to reproductions, translations, microfilming and storage and processing in electronic systems.
-
Page 7: General Regulation Of Use
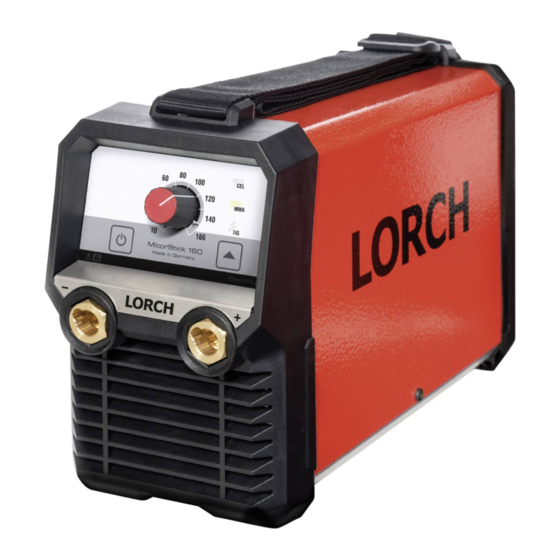
General regulation of use Machine elements Carrying belt Danger of death through electrocution! Control panel See chapter “12.3 Connecting the power supply” on Page 21. Negative terminal socket Some of the options and accessories shown Positive terminal socket or described may not be a part of the scope Air intake of delivery. -
Page 8: Safety Precautions
Safety precautions Safety precautions Hazard-free working with the machine is only The machine must be transported or set up possible if you read the operating and safety only on firm, level surfaces. The maximum instructions completely and strictly observe admissible angle of inclination for setting up them. -
Page 9: Unit Protection
Electromagnetic compatibility (EMC) Ambient conditions carried out in accordance with EN 60974-4. Lorch recom- mends inspections at 12 month intervals. Temperature range of ambient air: A safety inspection must also be carried out if modifica- tions or repairs have been made to the system. -
Page 10: Before Start-Up
Before start-up 12 Before start-up caused by electromagnetic fields (possibly with technical assistance by the manufacturer). 12.1 Fastening the transportation 10 Setup and transport belt II Danger of injury due to the device falling  Thread the transportation belt 1 into the welding ma- over and crashing. -
Page 11: Electrode Welding Process
 Connect the electrode holder to the positive terminal For mobile use, the machine can be used in battery opera- 4 of the machine and secure it by turning the plug to tion with a Lorch MobilePower battery pack. the right.  Connect the battery cable. -
Page 12: Control Panel
Commissioning  Briefly open the gas cylinder valve 61 several times LED On in order to blow out any dirt particles that are present. Lights up when switched on flashes every 3 sec. in Standby mode  Connect the pressure reducer 64 to the inert gas cyl- inder 60. -
Page 13: Arc Ignition
Commissioning 14.2 Electrode welding process  Briefly touch the workpiece with the tip of the elec- trode at the point to be welded. Switch on the system  Lift the electrode a little.  If necessary, switch the system on by pressing button 9 The arc burns between the workpiece and the elec- 17 for 2 sec. -
Page 14: Technical Data
Dimensions and weights Input power S (60%/40°C) 360 x 130 Dimensions (LxWxH) x 215 Input power S (max. current) Weight MicorStick 160 Current input I Weight MicorStick 160 14,2 (100%/40°C) Accu-ready Current input I *) measured at 40° C environmental temperature 15,6 (60%/40°C) -
Page 15: Troubleshooting
Troubleshooting 17 Troubleshooting Fault Possible cause Rectification Displays remain Defective mains fuse Replace the fuse dark Neutral conductor, mains phase Check mains cable / mains extension missing cable Battery discharged Check and charge/replace battery No welding cur- Ground line not connected or defec- Check ground line and replace if neces- rent tive... -
Page 16: Declaration Of Conformity
19.1 Check regularly 21 Service ‰ Check the following points for damage before starting Lorch Schweißtechnik GmbH up the welding machine: Im Anwänder 24 - 26 – Mains plug and cable D-71547 Auenwald – Welding torch and connections Germany –... - Page 17 Ersatzteilliste/Schaltplan / spare parts list/schematic / Список деталей/Схематический 990.4477.3-00 MicorStick 160/160 Accu-ready Gültigkeit / Validity / действительность Type Serial no. from Serial no. to Variante MicorStick 160 2009-0000-0000-0 2009-9999-9999-9 MicorStick 160 Accu-ready 2013-0000-0000-0 2013-9999-9999-9 05.12.2013 Lorch Schweißtechnik GmbH Im Anwänder 24 - 26...
- Page 18 01.14 - 117 - 909.2049.9-00...
- Page 19 990.4477.3-00 MicorStick 160/160 Accu-ready L1 PE L1 PE X2/1 X2/1 X2/1 X2/2 Stromlaufplan / shematic-diagram MicorStick 160 /MicorStick Accu-Ready erstellt am/von provided to/of 990.4477.3-00 geändert am/von changed to/of Lorch Schweißtechnik GmbH Im Anwänder 24 - 26 D-71549 Auenwald Germany 05.12.2013...
- Page 20 LORCH-Профиль 606.2027.0 Aufkleber Netzstecker sticker pull mains plug 30 Наклейка Вытащить вил- ziehen 30mm blau mm blue ку 30mm синяя Frontfolie MicorStick 160 front foil MicorStick 160 Передняя пленка 608.0884.0 MicorStick 160 CEL Schaumstoffeinlage 610.3060.0 foam inset 108x105x15 Вставка 108x105x15...
- Page 21 Lorch Schweißtechnik GmbH Im Anwänder 24 - 26 D-71549 Auenwald Germany Tel. +49 (0)7191 503-0 Fax +49 (0)7191 503-199 info@lorch.biz www.lorch.biz...
Need help?
Do you have a question about the MicorStick and is the answer not in the manual?
Questions and answers