Table of Contents
Advertisement
Quick Links
Notes: This model's CD mechanism changer unit is CRS1. Please refer to the original Service Manual
(Order No. MD0509368C0) for this mechanism.
Specifications
n AMPLIFIER SECTION
RMS Output Power
THD 10%, both channels driven
1 kHz
(Low channel)
10 kHz
(High channel)
Total Bi-Amp power
n FM/AM TUNER, TERMINALS SECTION
Preset station
Frequency Modulation (FM)
Frequency range
Sensitivity
S/N 26dB
Antenna terminals
Amplitude Modulation (AM)
Frequency range
Sensitivity
S/N 20dB (at 999 kHz)
Music Port input jack
Terminal
Sensitivity
105 W per channel (3 Ω)
105 W per channel (3 Ω)
420 W
FM 15 stations
AM 15 stations
87.50 to 108.00 MHz (50 kHz
steps)
4.0 µV (IHF)
2.2 µV
75 Ω (unbalanced)
522 to 1629 kHz (9 kHz step)
560 µV/m
Stereo, 3.5 mm jack
100 mV, 4.7 kΩ
SA-AK340E
SA-AK340EB
SA-AK340EG
Colour
(S)... Silver Type
Phone jack
Terminal
n CASSETTE DECK SECTION
Track system
Heads
Record/playback
Erasure
Motor
Recording system
Erasing system
Tape speed
Overall frequency response (+3, -6 dB) at DECK OUT
NORMAL
S/N ratio
Wow and flutter
Fast forward and rewind time
n DISC SECTION
Disc played [8 cm or 12 cm]
(1) CD-Audio (CD-DA)
(2) CD-R/RW (CD-DA, MP3, WMA formatted disc)
(3) MP3/WMA
Bit rate
© 2006 Matsushita Electric Industrial Co. Ltd.. All
rights
reserved.
distribution is a violation of law.
ORDER NO. MD0512471C2
CD Stereo System
Stereo, 3.5 mm jack
4 track, 2 channel
Solid permalloy head
Double gap ferrite head
DC servo motor
AC bias 100 kHz
AC erase 100 kHz
35 Hz to 14 kHz
50 dB (A weighted)
0.18 % (WRMS)
Approx. 120 seconds with
C-60 cassette tape
Unauthorized
copying
4.8 cm/s
and
Advertisement
Table of Contents

Related Manuals for Panasonic SA-AK340E


Summary of Contents for Panasonic SA-AK340E
-
Page 1: Specifications
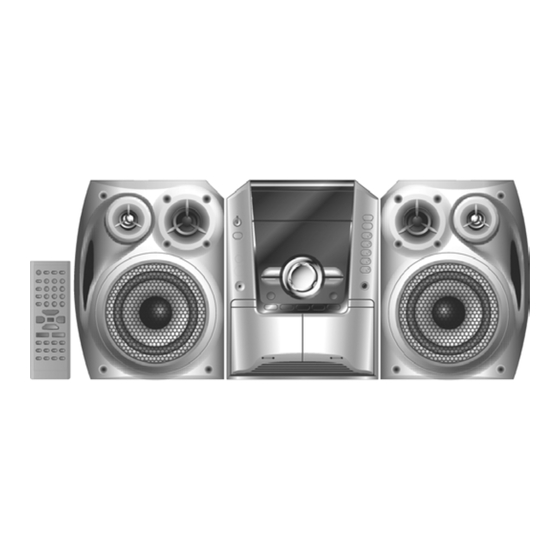
ORDER NO. MD0512471C2 CD Stereo System SA-AK340E SA-AK340EB SA-AK340EG Colour (S)... Silver Type Notes: This model’s CD mechanism changer unit is CRS1. Please refer to the original Service Manual (Order No. MD0509368C0) for this mechanism. Specifications n AMPLIFIER SECTION Phone jack... -
Page 2: Table Of Contents
SA-AK340E / SA-AK340EB / SA-AK340EG MP3, WMA 32 kbps to 320 kbps Power consumption in standby 0.5 W mode Sampling frequency Dimensions (W x H x D) 250 x 330 x 343 mm MP3/WMA 32 kHz, 44.1 kHz, 48 kHz Mass 6.9 kg... - Page 3 SA-AK340E / SA-AK340EB / SA-AK340EG 17 Schematic Diagram 18.4. (D) Transformer P.C.B. 17.1. Notes of Schematic Diagrams 18.5. (E) Power P.C.B. 17.2. (A) CD Servo Circuit 18.6. (F) Deck P.C.B. & (G) Deck Mechanism P.C.B. 17.3. (B) Main (Tuner) Circuit 19 Illustration of ICs, Transistors and Diodes 17.4.
-
Page 4: Safety Precautions
SA-AK340E / SA-AK340EB / SA-AK340EG 1 Safety Precautions 1.1. General Guidelines 1. When servicing, observe the original lead dress. If a short circuit is found, replace all parts which have been overheated or damaged by the short circuit. 2. After servicing, ensure that all the protective devices such as insulation barriers and insulation papers shields are properly installed. -
Page 5: Caution For Ac Mains Lead
SA-AK340E / SA-AK340EB / SA-AK340EG 1.2. Caution for AC Mains Lead 1.3. Before repair and adjustment Disconnect AC power, discharge Power Capacitors C5101, C5104, C5171, C5172, C5920, C5940 and C5950 through a 10Ω, 5W... -
Page 6: Protection Circuitry
SA-AK340E / SA-AK340EB / SA-AK340EG resistor to ground. DO NOT SHORT-CIRCUIT DIRECTLY (with a screwdriver blade, for instance), as this may destroy solid state devices. After repairs are completed, restore power gradually using a variac, to avoid overcurrent. Current consumption at AC 240V, 50 Hz in NO SIGNAL mode (volume min at CD mode) should be ~ 350mA. -
Page 7: Handling Precautions For Traverse Deck
SA-AK340E / SA-AK340EB / SA-AK340EG 3 Handling Precautions For Traverse Deck The laser diode in the traverse deck (optical pickup) may break down due to potential difference caused by the static electricity of clothes or our human body. So, be careful of electrostatic breakdown during repair of the traverse deck (optical pickup). -
Page 8: Precaution Of Laser Diode
SA-AK340E / SA-AK340EB / SA-AK340EG 4 Precaution of Laser Diode Caution : This product utilizes a laser diode with the unit turned "ON", invisible laser radiation is emitted from the pick up lens. Wavelength : 780 nm Maximum output radiation power from pick up : 100 µW/VDE Laser radiation from pick up unit is safety level, but be sure the followings: 1. -
Page 9: Handling The Lead-Free Solder
SA-AK340E / SA-AK340EB / SA-AK340EG 5 Handling the Lead-free Solder 5.1. About lead free solder (PbF) Distinction of PbF P.C.B.: P.C.B.s (manufactured) using lead free solder will have a PbF stamp on the P.C.B. Caution: · Pb free solder has a higher melting point than standard solder; Typically the melting point is 50 - 70°F (30 - 40°C) higher. Please use a high temperature soldering iron. -
Page 10: New Features
SA-AK340E / SA-AK340EB / SA-AK340EG 6 New Features 6.1. CRS1 Mechanism Overview 6.1.1. General Feature · This is a five disc changer mechanism for CD/DVD. The outline figure is shown below. - Page 11 SA-AK340E / SA-AK340EB / SA-AK340EG · The mechanism has "CHANGE WHILE PLAY" function. It open other trays for disc exchanging while one tray is at PLAY position performing recording or reproducing. · The mechanism can quickly change all trays with "CHANGE ALL" function. All trays can be move to OPEN position with one operation.
-
Page 12: Music Port
SA-AK340E / SA-AK340EB / SA-AK340EG Note: * represent tray number (from 1 ~ 5) 6.1.4. New CD Mechanism (CRS1) Note: This service manual does not contain the following information for the mention CD Mechanism drive: · Schematic Diagram, Block Diagram and P.C.B. layout of CD Loading P.C.B. -
Page 13: Accessories
SA-AK340E / SA-AK340EB / SA-AK340EG 7 Accessories Remote Control FM Antenna Wire AC Cord (For E/EG only) AC Cord (For EB only) AM Loop Antenna Antenna Adaptor (For EB only) -
Page 14: Operating Instructions Procedures
SA-AK340E / SA-AK340EB / SA-AK340EG 8 Operating Instructions Procedures... - Page 15 SA-AK340E / SA-AK340EB / SA-AK340EG...
-
Page 16: Self Diagnosis And Special Mode Setting
SA-AK340E / SA-AK340EB / SA-AK340EG 9 Self diagnosis and special mode setting This unit is equipped with functions for checking and inspecting namely: Self-Diagnostic and Test Mode. 9.1. Special Mode Table Item FL Display Key Operation Mode Name Description Front Key... - Page 17 SA-AK340E / SA-AK340EB / SA-AK340EG Item FL Display Key Operation Mode Name Description Front Key FL Display Test To check In doctor mode: segments display (All 1. Press [PROGRAM] button on remote segments will light up and control. LED will blink at 0.5...
-
Page 18: Error Code Table
SA-AK340E / SA-AK340EB / SA-AK340EG 9.2. Error code Table Self-Diagnosis Function (refer Section 9.1) provides information on any problems occuring for the unit and its respective components by displaying the error codes. These error code such as U**, H** and F** are stored in memory and held unless it is... - Page 19 SA-AK340E / SA-AK340EB / SA-AK340EG The error code is automatically display after entering into self-diagnostic mode. Error Code Diagnosis Contents Description of error Automatic FL Display Remarks Mode SW, plunger For deck mechanism unit (For deck 1/2). and capstan motor...
- Page 20 SA-AK340E / SA-AK340EB / SA-AK340EG Error Code Diagnosis Contents Description of error Automatic FL Display Remarks ITOP UD assembly UD Rack does For CD changer unit (CRS1). move to front direction. Press [SINGLE CHANGE] on main unit This lead to UD base for next error.
- Page 21 SA-AK340E / SA-AK340EB / SA-AK340EG Error Code Diagnosis Contents Description of error Automatic FL Display Remarks F2NG Fail - safe mode. (For When the tray close For CD changer unit (CRS1). Press [SINGLE CHANGE] on main unit open/close tray operation is performed, unit(s)) it fails to close.
-
Page 22: Assembling And Disassembling
SA-AK340E / SA-AK340EB / SA-AK340EG 10 Assembling and Disassembling 10.1. Caution Special Note: This model uses a new CD changer unit CRS1. In this following section does not contain the necessary disassembly & assembly information for the CD changer unit (CRS1) except the disasembly & assembly of traverse unit. Kindly refer to the original service manual for the CD changer unit. -
Page 23: Disassembly Flow Chart
SA-AK340E / SA-AK340EB / SA-AK340EG 10.2. Disassembly flow chart The following chart is the procedure for disassembling the casing and inside parts for internal inspection when carrying out the servicing. To assemble the unit, reverse the steps shown in the chart as below. -
Page 24: Main Parts Location
SA-AK340E / SA-AK340EB / SA-AK340EG 10.3. Main Parts Location... -
Page 25: Disassembly Of Top Cabinet
SA-AK340E / SA-AK340EB / SA-AK340EG 10.4. Disassembly of Top Cabinet Step 1 Remove 3 screws at each side and 5 screws at rear panel. Step 2 Lift up both sides of the top cabinet, push the top cabinet towards the rear to remove the top cabinet. - Page 26 SA-AK340E / SA-AK340EB / SA-AK340EG Step 2 Detach the FFC cables (CN2801 & CN2805). Step 3 Release the claws on both ends. Step 5 Remove 2 screws. Step 6 Remove the Mecha Chassis. Note: For disassembly & assembly of traverse unit, please refer to section 10.14 of this service manual.Please refer to original...
-
Page 27: Disassembly Of Main P.c.b
SA-AK340E / SA-AK340EB / SA-AK340EG 10.7. Disassembly of Main P.C.B. · Follow the (Step 1) - (Step 2) of Item 10.4 - Disassembly of Top Cabinet · Follow the (Step 1) - (Step 4) of Item 10.6 - Disassembly of CD Changer Unit ·... -
Page 28: Disassembly Of Power P.c.b
SA-AK340E / SA-AK340EB / SA-AK340EG 10.9. Disassembly of Power P.C.B. · Follow the (Step 1) - (Step 2) of Item 10.4 - Disassembly of Top Cabinet · Follow the (Step 1) - (Step 4) of Item 10.6 - Disassembly of CD Changer Unit ·... -
Page 29: Disassembly Of Front Panel Unit
SA-AK340E / SA-AK340EB / SA-AK340EG 10.10. Disassembly of Front Panel Unit · Follow the (Step 1) - (Step 2) of Item 10.4 - Disassembly of Top Cabinet · Follow the (Step 1) - (Step 4) of Item 10.6 - Disassembly of CD Changer Unit Step 1 Disconnect connectors (CN2803, CN2806, CN2951, Step 3 Release 2 claws outwards. - Page 30 SA-AK340E / SA-AK340EB / SA-AK340EG Step 2 Remove 11 screws. Step 3 Release 2 catches. Step 4 Remove Panel P.C.B.. 10.11.1. Disassembly of Lid Step 1 Lift the spring sideward. Step 2 Remove Lid. Note: Do not misplace the spring.
-
Page 31: Disassembly Of Deck Mechanism Unit
SA-AK340E / SA-AK340EB / SA-AK340EG 10.12. Disassembly of Deck mechanism unit · Follow the (Step 1) - (Step 2) of Item 10.4 - Disassembly of Top Cabinet · Follow the (Step 1) - (Step 4) of Item 10.6 - Disassembly of CD Changer Unit ·... - Page 32 SA-AK340E / SA-AK340EB / SA-AK340EG Step 3: Remove the traverse unit as arrow shown. · Assembly of Traverse Unit Step 1: Press and hold the plunger lever and rotate the gear as arrows shown until it stop. Step 1: Turn over the unit and install the traverse unit.
-
Page 33: Disassembly Of Optical Pickup Unit (Cd Mechanism)
SA-AK340E / SA-AK340EB / SA-AK340EG Step 2: Push the traverse slide plate as arrow shown to lock the traverse unit. 10.15. Disassembly of optical pickup unit (CD mechanism) · Follow the (Step 1) - (Step 2) of Item 10.4 - Disassembly of Top Cabinet ·... - Page 34 SA-AK340E / SA-AK340EB / SA-AK340EG Step 8 Remove the catch of the drive rack, and take out the drive rack. Step 4 Remove the traverse deck. Note: As floating springs (4 pieces) come off at the same time, be careful not to lose them.
- Page 35 SA-AK340E / SA-AK340EB / SA-AK340EG...
-
Page 36: Disassembly Of Deck Mechanism
SA-AK340E / SA-AK340EB / SA-AK340EG 10.16. Disassembly of Deck Mechanism · Follow the (Step 1) - (Step 2) of Item 10.4 - Disassembly of Top Cabinet · Follow the (Step 1) - (Step 4) of Item 10.6 - Disassembly of CD Changer Unit ·... - Page 37 SA-AK340E / SA-AK340EB / SA-AK340EG Step 6 Remove the flywheel R. Step 7 Release the claw and remove the winding lever and spring. [Installation of the belt] Step 1 The boss and marking should be positioned horizontally. Step 2 Put the winding belt on the pulley temporarily.
-
Page 38: Replacement For Cassette Lid
SA-AK340E / SA-AK340EB / SA-AK340EG tighten screws. Step 7 Put the capstan belt A temporarily as shown below. Step 10 Install 3 screws. Step 11 Put the capstan belt B as shown below. Step 8 Put the capstan belt B on the motor ass’y pulley. -
Page 39: Rectification For Tape Jam Problem
SA-AK340E / SA-AK340EB / SA-AK340EG Step 2 Push up the cassette lid (L/R) in the direction of arrow. (For DECK1 and DECK2). 10.18. Rectification for tape jam problem · Follow the (Step 1) - (Step 2) of Item 10.4 - Disassembly of Top Cabinet... -
Page 40: Service Fixture And Tools
SA-AK340E / SA-AK340EB / SA-AK340EG 11 Service Fixture and Tools Service Tools Extension FFC (A) Deck P.C.B. - Main P.C.B. REEX0485 (14 Pins) (B) Panel P.C.B. - Deck Mechanism P.C.B. REEX0484 (10 Pins) 12 Service Positions Note: For description of the disassembly procedures, see the Section 10. -
Page 41: Checking And Repairing Of Transformer P.c.b
SA-AK340E / SA-AK340EB / SA-AK340EG 12.2. Checking and Repairing of Transformer P.C.B. -
Page 42: Checking And Repairing Of Panel, Deck & Deck Mechanism P.c.b
SA-AK340E / SA-AK340EB / SA-AK340EG 12.3. Checking and Repairing of Panel, Deck & Deck Mechanism P.C.B. -
Page 43: Checking And Repairing Of Power P.c.b
SA-AK340E / SA-AK340EB / SA-AK340EG 12.4. Checking and Repairing of Power P.C.B. -
Page 44: Adjustment Procedures
SA-AK340E / SA-AK340EB / SA-AK340EG 13 Adjustment Procedures 13.1. Cassette Deck Section 13.1.2. Bias Voltage Check · Measurement Condition 1. Set the unit “AUX” position. − − − − Reverse-mode selector switch: 2. Insert the Normal blank tape (QZZCRA) into DECK 2 and −... -
Page 45: Tuner Section
SA-AK340E / SA-AK340EB / SA-AK340EG 13.2. Tuner Section This section include details on the alignment of AM-IF and AM RF adjustment. 13.2.1. AM-IF Alignment 1. Set up the equipments as shown in Fig. 5. 2. Select [TUNER] mode on selector and set to [AM] mode. -
Page 46: Adjustment Point
SA-AK340E / SA-AK340EB / SA-AK340EG Fig. 7 13.2.3. Adjustment Point Below is the locations of alignment points on the Main (Tuner) P.C.B. -
Page 47: Voltage And Waveform Chart
SA-AK340E / SA-AK340EB / SA-AK340EG 14 Voltage and Waveform Chart Note: Circuit voltage and waveform described herein shall be regarded as reference information when probing defect point, because it may differ from an actual measuring value due to difference of Measuring instrument and its measuring condition and product itself. - Page 48 SA-AK340E / SA-AK340EB / SA-AK340EG...
-
Page 49: Power P.c.b. And Transformer P.c.b
SA-AK340E / SA-AK340EB / SA-AK340EG 14.2. Power P.C.B. and Transformer P.C.B. -
Page 50: Waveform Chart
SA-AK340E / SA-AK340EB / SA-AK340EG 14.3. Waveform Chart... - Page 51 SA-AK340E / SA-AK340EB / SA-AK340EG...
-
Page 52: Wiring Connection Diagram
SA-AK340E / SA-AK340EB / SA-AK340EG 15 Wiring Connection Diagram FM ANT AM ANT H5104/ W5104 JK2601 CN5103 (To Fan) CN2810 POWER P.C.B MAIN P.C.B SOLDER SIDE SOLDER SIDE Z2620 CN2801 (TUNER PACK) CN5102 BLACK CN2809 MOTOR CN2808 CN2805 JK5101 JK5102... -
Page 53: Block Diagram
SA-AK340E / SA-AK340EB / SA-AK340EG 16 Block Diagram OPTICAL PICKUP SEMICONDUCTOR LASER Q7601 LASER POWER DRIVE X7201 PHOTO DETECTOR 69 67 68 51 53 52 54 NTEST2 NTEST NSRVMONON /RST TIMING MICRO COMPUTER TXTCK NRST DSL/PLL/VCO GENERATOR INTERFACE [DSLPLL] [GEN]... - Page 54 SA-AK340E / SA-AK340EB / SA-AK340EG IC1001 AN7348 P.B EQ AMANT FMANT ALC/T Z2620 CF2601 CF2602 24(23) RF AMP Q2601 (DECK 1) P.B. HEAD 1(2) MIXER IF AMP 22(3) D2602 L2602 L2601 21(4) BUFFER 17(8) FROM POWER (DECK 2) FL6602 TRANSFORMER...
- Page 55 SA-AK340E / SA-AK340EB / SA-AK340EG IC2803 C1BB00001121 AUDIO SOUND PROCESSOR IC2804 3(4) IN-L2(R2) C0AABB000125 IC OP-AMP IC1001 Q2142(Q2242) Q2317 (Q AN7348S-E1 42(37) 2(6) P.B EQ/REC AMP/ L-OUT(R-OUT) CONTROL 1(7) MUTIN FILTER SWITCH ALC/TPS AMP 3(5) CONTR Q2411(Q2311) 24(23) (DECK 1) MUTING P.B.
- Page 56 SA-AK340E / SA-AK340EB / SA-AK340EG IC2804 IC5301 IC5401 C1BA00000407 C1BA00000407 C0AABB000125 IC OP-AMP 2-CH DIGITAL AMP 2-CH DIGITAL AMP Q2142(Q2242) Q2317 (Q2417) 2(6) CONTROL 1(7) MUTING FILTER IN1+ IN1+ SWITCH 3(5) CONTROL Q2411(Q2311) MUTING CONTROL IN1- IN1- IN2+ IN2+ IN2-...
-
Page 57: Schematic Diagram
SA-AK340E / SA-AK340EB / SA-AK340EG 17 Schematic Diagram (All schematic diagrams may be modified at any time with the development of the new technology) 17.1. Notes of Schematic Diagrams S951 : MODE Switch S952 : HALF Switch S971 : MODE Switch... - Page 58 SA-AK340E / SA-AK340EB / SA-AK340EG...
-
Page 59: A) Cd Servo Circuit
SA-AK340E / SA-AK340EB / SA-AK340EG 17.2. (A) CD Servo Circuit SCHEMATIC DIAGRAM - 1 OPTICAL CD SERVO CIRCUIT PICKUP CIRCUIT : +B SIGNAL LINE : CD-DA SIGNAL LINE : CD SIGNAL LINE W7022 W7020 LASER DIODE CP701 R7601 C7232 W7006... - Page 60 SA-AK340E / SA-AK340EB / SA-AK340EG...
-
Page 61: B) Main (Tuner) Circuit
SA-AK340E / SA-AK340EB / SA-AK340EG 17.3. (B) Main (Tuner) Circuit SCHEMATIC DIAGRAM - 2 : +B SIGNAL LINE : FM SIGNAL LINE : AM SIGNAL LINE : FM/AM SIGNAL LINE : FM OSC SIGNAL LINE : AM OSC SIGNAL LINE... - Page 62 SA-AK340E / SA-AK340EB / SA-AK340EG...
-
Page 63: B) Main Circuit
SA-AK340E / SA-AK340EB / SA-AK340EG 17.4. (B) Main Circuit SCHEMATIC DIAGRAM - 3 : +B SIGNAL : FM/AM SIGNAL LINE : TAPE RECORD SIGNAL LINE : CD SIGNAL LINE MAIN CIRCUIT : TAPE PLAYBACK SIGNAL LINE : -B SIGNAL : MAIN SIGNAL LINE... - Page 64 SA-AK340E / SA-AK340EB / SA-AK340EG SA-AK340E/EB/EG MAIN CIRCUIT W2511 C2701 0.01 R2701 C2702 16V100 C2705 R2705 50V1 3.3K Q2142 B1ABCF000176 AGC CONTROL SWITCH R2702 C2315 C2331 R2315 R2316 R2335 4700P 16V22 2.2K R2145 R2146 Q2311,Q2411 C2333 B1ABGC000005 R2331 W2510 R2334...
- Page 65 SA-AK340E / SA-AK340EB / SA-AK340EG R2121 W2526 3.3K R2674 R2675 TUNER RCH 4.7K MAIN PLLCE PLLCE_UP CIRCUIT TUNER LCH IC2871 (1B) ON PLL_DA PLL_DA E-EPROM IC SCHEMATIC (NOT SUPPLIED) TUNER DQ/ST R2676 STIDO DIAGRAM-2 PLL CLK PLL_CLK IC2871 TUNER SD...
- Page 66 SA-AK340E / SA-AK340EB / SA-AK340EG W2526 F_HOP T_GND C2940 IC2871 MUTE-D-AMP E-EPROM IC R2940 (NOT SUPPLIED) +15V 820K IC2871 Q2942 B1ACKD000006 EE_CS FAN MOTOR ON/OFF SWITCH TO FAN MOT_12V EE_CLK EE.DAT CN2810 SW5V SW5V R2945 C2945 C2944 R2944 4.7K 16V47...
-
Page 67: C) Panel Circuit
SA-AK340E / SA-AK340EB / SA-AK340EG 17.5. (C) Panel Circuit SCHEMATIC DIAGRAM - 4 TRANSFORMER CIRCUIT (CN5951) PANEL CIRCUIT ON SCHEMATIC DIAGRAM-5 : +B SIGNAL LINE : -B SIGNAL LINE : MAIN SIGNAL LINE H6555/W6555 1 2 3 4 5 6... - Page 68 SA-AK340E / SA-AK340EB / SA-AK340EG...
-
Page 69: D) Transformer Circuit
SA-AK340E / SA-AK340EB / SA-AK340EG 17.6. (D) Transformer Circuit SCHEMATIC DIAGRAM - 5 TRANSFORMER CIRCUIT : +B SIGNAL LINE : -B SIGNAL LINE FP5940 D5950-D5953 B0EAMM000038 VCC+ D5950 D5952 VCC- C5960 POWER FP5920 CIRCUIT C5920 C5940 AC GND D5953 D5951... - Page 70 SA-AK340E / SA-AK340EB / SA-AK340EG...
-
Page 71: H) Power Circuit
SA-AK340E / SA-AK340EB / SA-AK340EG 17.7. (H) Power Circuit SCHEMATIC DIAGRAM - 6 POWER CIRCUIT : -B SIGNAL LINE : +B SIGNAL LINE : MAIN SIGNAL LINE SA-AK340E/EB/EG POWER CIRCUIT IC5301 IC5401 C1BA00000407 C1BA00000407 2-CH DIGITAL AMP 2-CH DIGITAL AMP... - Page 72 SA-AK340E / SA-AK340EB / SA-AK340EG C5405 330P C5305 C5302 C5402 330P 330P R5308 330P R5408 W5505 R5307 R5407 C5304 C5306 C5301 C5303 C5404 C5406 C5401 C5403 0.47 0.47 0.47 0.47 0.47 0.47 0.47 0.47 L5301 L5401 G0C220Z00002 G0C220Z00002 R5301 R5403...
-
Page 73: F) Deck Circuit & (G) Deck Mechanism Circuit
SA-AK340E / SA-AK340EB / SA-AK340EG 17.8. (F) Deck Circuit & (G) Deck Mechanism Circuit SCHEMATIC DIAGRAM - 7 MAIN CIRCUIT (CN2803) ON : +B SIGNAL : PLAYBACK SIGNAL SCHEMATIC DIAGRAM-3 DECK CIRCUIT : RECORD SIGNAL LINE CN1001 C1038 R1055 C1057... - Page 74 SA-AK340E / SA-AK340EB / SA-AK340EG...
-
Page 75: Printed Circuit Board
SA-AK340E / SA-AK340EB / SA-AK340EG 18 Printed Circuit Board Note: Circuit board diagrams may be modified at any time with the development of new technology. -
Page 76: A) Cd Servo P.c.b
SA-AK340E / SA-AK340EB / SA-AK340EG 18.1. (A) CD Servo P.C.B. CD SERVO P.C.B (REPX0494A) TP51(RF) C7227 W7014 TP19 C7225 C7204 TP14 W7015 C7226 TP50 C7228 TP18 TP17 C7216 C7230 C7231 TP24 TP13 W7019 R7221 CN7002 C7233 W7006 TP16 C7232 W7007... -
Page 77: B) Main
SA-AK340E / SA-AK340EB / SA-AK340EG 18.2. (B) Main P.C.B. MAIN P.C.B (REPX0516E) Q2942 CN2810 C2964 C2941 C2948 W2573 (TO FAN) W2304 W2567 W2568 R2925 C2971 W2291 L2962 L2961 Q2907 R2964 W2565 Q2906 CN2805 R2942 W2290 R2963 R2943 W2293 Q2948 Q2949... -
Page 78: C) Panel P.c.b
SA-AK340E / SA-AK340EB / SA-AK340EG 18.3. (C) Panel P.C.B. PANEL P.C.B (REPX0517C) S6103 D6458 OPEN/ R6102 CLOSE S6102 S6101 POWER SINGLE DISC CHANGE S6308 DISC S6104 CHECK FL6602 W6007 W6402 CN6601 W6055 R6458 S6105 C6635 C6632 R6604 W6004 C6604 R6603... -
Page 79: D) Transformer P.c.b
SA-AK340E / SA-AK340EB / SA-AK340EG 18.4. (D) Transformer P.C.B. -
Page 80: E) Power P.c.b
SA-AK340E / SA-AK340EB / SA-AK340EG 18.5. (E) Power P.C.B. POWER P.C.B (REPX0533A) C5102 W5205 W5144 W5206 W5207 W5208 C5114 D5121 H5104/W5104 Q5201 K5511 C5115 Q5108 K5512 W5119 Q5202 W5200 W5197 W5121 D5101 W5122 C5332 C5330 W5143 W5142 C5106 C5152 C5107... -
Page 81: F) Deck P.c.b. & (G) Deck Mechanism P.c.b
SA-AK340E / SA-AK340EB / SA-AK340EG 18.6. (F) Deck P.C.B. & (G) Deck Mechanism P.C.B. DECK P.C.B DECK MECHANISM P.C.B. (REPX0331G) (REPX0321A) R1024 IC1004 C1006 C1009 R1027 CS1002 TO R/P HEAD TP10 Q1003 TP4 x J1002 L1002 TP3 x TP11 R1004... - Page 82 SA-AK340E / SA-AK340EB / SA-AK340EG...
-
Page 83: Illustration Of Ics, Transistors And Diodes
SA-AK340E / SA-AK340EB / SA-AK340EG 19 Illustration of ICs, Transistors and Diodes C1BA00000407 C1AA00000612 AN7348S-E1 (24P) C1BB00001121 (100P) C0JBAB000011 (14P) C2CBYY000053 (100P) C1BB00000962 (24P) C0HBB0000057 (44P) C1BB00000987 (16P) MN6627954MA (100P) C1CB00001937 (20P) B1GCCFJJ0016 2SB0621AHA CNB13030R2AU (4P) B1AAKD000014 C0AABB000125 BA5948FPE2 B1GACFJJ0018... -
Page 84: Terminal Function Of Ic's
SA-AK340E / SA-AK340EB / SA-AK340EG 20 Terminal Function of IC's 20.1. IC7001 (MN6627954MA) Servo Processor,Digital Signal Processor/Digital filter and D/A Converter Pin No. Mark Function Pin No. Mark Function DRAM address signal O/P 11 IREF Reference I/P DRAM address signal O/P 9... -
Page 85: Ic7002 (Ba5948Fpe2) Ic 4Ch Drive
SA-AK340E / SA-AK340EB / SA-AK340EG 20.2. IC7002 (BA5948FPE2) IC 4CH Drive Pin No. Mark Function Pin No. Mark Function Motor Driver 92 Input Motor Drive (3) reverse - action output Turntable Motor Drive Signal (“L”:ON) Motor Drive (3) forward - action... - Page 86 SA-AK340E / SA-AK340EB / SA-AK340EG Pin No. Mark Function OPEN_SW Open_Sw for CRS1 CHG_CW CRS1 motor CW CHG_CCW CRS1 motor CCW ST_SW Stock_Sw for CRS1 PLAY_SW Play_Sw for CRS1 CHG_PLR Plunger for CRS1 BOTTOM_SW Bottom_SW for CRS1 UP_SENSOR UD-Sensor for CRS1...
-
Page 87: Exploded Views
SA-AK340E / SA-AK340EB / SA-AK340EG 21 Exploded Views 21.1. Cabinet Parts Location... - Page 88 SA-AK340E / SA-AK340EB / SA-AK340EG...
- Page 89 SA-AK340E / SA-AK340EB / SA-AK340EG...
-
Page 90: Packaging
SA-AK340E / SA-AK340EB / SA-AK340EG 21.2. Packaging... -
Page 91: Replacement Parts List
SA-AK340E / SA-AK340EB / SA-AK340EG 22 Replacement Parts List Notes: · Important safety notice: Components identified by mark have special characteristics important for safety. Furthermore, special parts which have purposes of fire-retardent (resistors), high-quality sound (capacitors), low noise (resistors), etc are used. - Page 92 SA-AK340E / SA-AK340EB / SA-AK340EG Ref. No. Part No. Part Name & Description Remarks Ref. No. Part No. Part Name & Description Remarks RML0371 FR LEVER RML0372-2 WINDING LEVER TRANSISTORS RML0374-2 EJECT LEVER RMM0131-1 BRAKE ROD Q1003 B1AAGC000007 TRANSISTOR RMM0133-1...
- Page 93 SA-AK340E / SA-AK340EB / SA-AK340EG Ref. No. Part No. Part Name & Description Remarks Ref. No. Part No. Part Name & Description Remarks D2583 B0BC9R000008 DIODE S6202 EVQ21405RJ SW DISPLAY/DEMO D2601 B0BC5R000009 DIODE S6203 EVQ21405RJ SW DECK 1/2 D2602 B0CDBB000015...
- Page 94 SA-AK340E / SA-AK340EB / SA-AK340EG Ref. No. Part No. Part Name & Description Remarks Ref. No. Part No. Part Name & Description Remarks CF2601 J0B1075AA006 CERAMIC CAPACITOR A1-1 RKK-HTR0283H R/C BATTERY COVER CF2602 J0B1075AA006 CERAMIC CAPACITOR K2CQ2CA00002 AC CORD [M]EG/E...
- Page 95 SA-AK340E / SA-AK340EB / SA-AK340EG Ref. No. Part No. Part Name & Description Remarks Ref. No. Part No. Part Name & Description Remarks R2131 D0GB332JA007 3.3K 1/16W R2423 D0GB393JA007 39K 1/16W R2132 D0GB332JA007 3.3K 1/16W R2426 ERJ3GEY0R00V 0 1/16W R2145...
- Page 96 SA-AK340E / SA-AK340EB / SA-AK340EG Ref. No. Part No. Part Name & Description Remarks Ref. No. Part No. Part Name & Description Remarks R2638 D0GB332JA007 3.3K 1/16W R2902 ERDS1FVJ330T 33 1/2W R2639 D0GB223JA041 22K 1/16W R2907 ERJ3GEYJ102V 1K 1/16W R2640...
- Page 97 SA-AK340E / SA-AK340EB / SA-AK340EG Ref. No. Part No. Part Name & Description Remarks Ref. No. Part No. Part Name & Description Remarks R5138 ERJ8GEYJ100V 10 1/8W R6207 D0GB472JA041 4.7K 1/16W R5139 ERJ8GEYJ100V 10 1/8W R6208 D0GB393JA007 39K 1/16W R5140...
- Page 98 SA-AK340E / SA-AK340EB / SA-AK340EG Ref. No. Part No. Part Name & Description Remarks Ref. No. Part No. Part Name & Description Remarks W2534 ERJ3GEY0R00V CHIP JUMPER W7024 ERJ3GEY0R00V CHIP JUMPER W2535 ERJ3GEY0R00V CHIP JUMPER W7025 ERJ3GEY0R00V CHIP JUMPER W2536...
- Page 99 SA-AK340E / SA-AK340EB / SA-AK340EG Ref. No. Part No. Part Name & Description Remarks Ref. No. Part No. Part Name & Description Remarks C2192 F1H1C104A041 0.1 16V C2611 ECA1HAK4R7XB 4.7 50V C2193 ECJ1VB1A105K 1 10V C2612 F1H1H103A219 0.01 50V C2194 F1H1A154A001 0.15 10V...
- Page 100 SA-AK340E / SA-AK340EB / SA-AK340EG Ref. No. Part No. Part Name & Description Remarks Ref. No. Part No. Part Name & Description Remarks C2965 F1H1H102A219 1000P 50V C5333 F1H2A221A009 220P 100V C2966 F1H1C104A041 0.1 16V C5334 ECJ1VB1H153K 0.015 50V C2967...
- Page 101 SA-AK340E / SA-AK340EB / SA-AK340EG Ref. No. Part No. Part Name & Description Remarks C6751 F1H1H103A219 0.01 50V C6752 F1H1H103A219 0.01 50V C6753 F1H1H103A219 0.01 50V C7102 ECJ1VB1A474K 0.47 10V C7107 ECJ1VB1H223K 0.022 50V C7142 ECJ1VB1H332K 3300P 50V C7154 ECJ1VB1C104K 0.1 16V...
Need help?
Do you have a question about the SA-AK340E and is the answer not in the manual?
Questions and answers