Table of Contents
Advertisement
Quick Links
Download this manual
See also:
User Manual
Advertisement
Table of Contents

Related Manuals for LightSpeed Technologies 705iR


Summary of Contents for LightSpeed Technologies 705iR
- Page 1 705iR PORTABLE INFRARED WIRELESS AMPLIFICATION SYSTEM U S E R ’ S M A N U A L...
-
Page 2: Table Of Contents
705iR Components Overview/Top Panel Controls Power & Signal Indicators/Rear Panel Controls LT-70 LightMic™ Transmitter Controls and Connections 705iR Receiver/Amplifier Positioning/Power Options/Charging LT-70 LightMic™ Transmitter Charging Instructions LT-70 LightMic™ Transmitter Operating Instructions HM-70 Handheld Microphone Overview and Controls HM-70 Handheld Microphone Operating Instructions Input from External Audio Equipment/Output to Personal FM Transmitter Tips on Using Classroom Amplification... -
Page 3: Quick-Start Guide
705iR. Plug one end of power cable into battery charger/power supply and the other end into AC outlet. To turn 705iR on, rotate CH A POWER knob clockwise. Switch LT-70 LightMic (confirm LT-70 is set to CH A.) Clip LT-70 to black lavaliere cord. Loop cord around neck. -
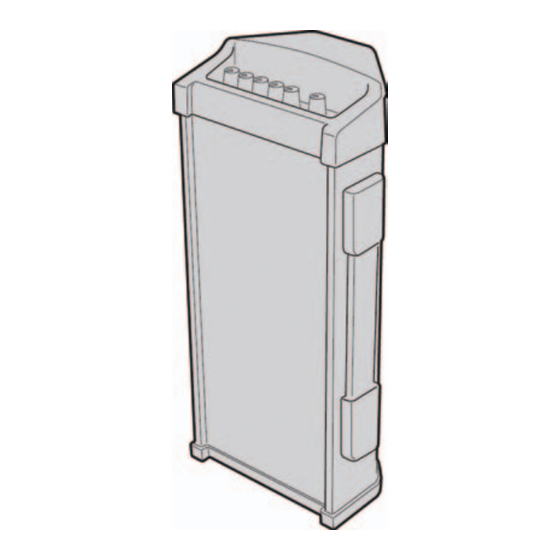
Page 4: 705Ir Components
Greetings! Congratulations on your purchase of the 705iR Portable Infrared Wireless Amplification System! Please take a moment to review this manual, as it will help you operate this easy-to-use system, and maximize your investment by caring for and maintaining each component. -
Page 5: Overview/Top Panel Controls
The 705iR comes standard with the LT-70 LightMic™ pendant-style transmitter/ microphone. The system may be used with two microphones accommodating team teaching or student interaction. -
Page 6: Rear Panel Connections
Jacks 1. DC POWER INPUT JACK: This input connects to the 16 V AC/DC adaptor that comes with the 705iR. The adaptor is used to either charge the internal battery pack or power the 705iR with AC power. 2. EXTERNAL IR SENSOR JACK:... -
Page 7: Lightmic™ Transmitter Controls And Connections
CONNECTOR: Use the 3.5 mm MIC jack for the optional TK-250 headset microphone. 5. CHARGER CONNECTOR: Use the jack labeled CHARGER to connect the charging cable from the 705iR to the LightMic for daily battery recharging. On/Off Switch Channel Select... -
Page 8: 705Ir Receiver/Amplifier Positioning/Power Options/Charging
When Using Battery Power: Charging the 705iR a. Ensure the power switch (CH A POWER) on top of the 705iR is turned off. b. Plug the power supply/charger cable into a standard AC outlet. c. Plug the other end of the power supply/ charger into the DC power jack on the back of 705iR. -
Page 9: Charging The Lightmic
Charging the LightMic a. Ensure the LightMic and the 705iR are turned OFF. The 705iR must be connected to AC power in order to charge the LightMic. b. The LightMic’s rechargeable batteries are factory installed. -
Page 10: Operating The Lightmic
Ensure the LightMic is switched ON and the triangle-shaped LED on the front of the LightMic is glowing red. The LED next to the CH A knob on the 705iR will also glow, indicating that the 705iR is receiving the LightMic signal and is ready for use. -
Page 12: Handheld Microphone Operating Instructions
3.5 mm AUX IN jack next to the AUX IN volume knob on the top of the 705iR. 2. With the 705iR turned on, adjust the AUX IN volume to a desired level. Output to Personal FM Transmitter 1. -
Page 13: Tips On Using Classroom Amplification
(This type of damage is not covered under warranty.) • Connecting the 705iR into a standard electrical socket using the supplied 16 V DC power supply/charger charges the batteries. It can also be used as a direct power source for the amplifier. -
Page 14: Overall System Specifications
Overall System Specifications: Carrier Frequencies (IR) Maximum Deviation Dynamic Range Signal-to-Noise Ratio Total Harmonic Distortion Frequency Response Receiver/Amplifier Specifications: Receiver Type Receiver Sensitivity Image and Spurious Rejection Amplifier Specifications: Total Harmonic Distortion Power Output Speaker Type Speaker Load Impedance Adjustable Tone Controls Power Supply (UL Listed) Battery Power (1-year warranty) Dimensions... -
Page 15: Components And Accessories
Rechargeable AA Battery (Nickel Metal Hydride) Charging Cable for LT-70 and HM-70 to be used with 705iR Lavaliere cord for LT-70 Power Supply/Battery Charger for 705iR Carrying Case for 705iR Optional Noise-canceling Headset Microphone to be used with LT-70 Optional External Infrared Sensor to expand the range for large or odd-shaped rooms. -
Page 16: Warranty Information
Five-Year Limited Warranty to Original Purchaser The LightSPEED 705iR Portable Infrared Wireless Amplification System is warranteed against malfunction due to defects in materials and workmanship for a period of five years beginning at the date of the purchase. Batteries and the optional TK-250 Headset Microphone are guaranteed for one year. -
Page 17: User Notes
User Notes Record your system serial numbers and purchase information. This is helpful when ordering additional components, accessories, and/or warranty service. standard serial number components 705iR LT-70 LightMic Power Supply optional serial number components HM-70 Handheld Microphone TK-250 Headset Microphone... - Page 18 L I G H T S P E E D T E C H N O L O G I E S , I N C . 1 1 5 0 9 S W H E R M A N R D T U A L A T I N , O R 9 7 0 6 2 8 0 0 .
Need help?
Do you have a question about the 705iR and is the answer not in the manual?
Questions and answers