Table of Contents
Advertisement
Available languages
Available languages
WARNING: If the information in this manual is not
followed exactly, a fire or explosion may result causing
property damage, personal injury or loss of life.
— Do not store or use gasoline or other flammable va-
pors and liquids in the vicinity of this or any other
appliance.
— WHAT TO DO IF YOU SMELL GAS
• Do not try to light any appliance.
• Do not touch any electrical switch; do not use any
phone in your building.
• Immediately call your gas supplier from a neighbor's
phone. Follow the gas supplier's instructions.
• If you cannot reach your gas supplier, call the fire
department.
— Installation and service must be performed by a quali-
fied installer, service agency or the gas supplier.
WARNING: This appliance is equipped for Natural and
Propane gas. Field conversion is not permitted other than
between natural or propane gases.
Before returning to your retailer, call our customer service department at
Questions, problems, missing parts?
1-800-229-5647, 8:00 am - 4:30 pm EST, Monday through Friday
VENT-FREE GAS WALL
HEATER
OWNER'S OPERATION AND
INSTALLATION MANUAL
INFRARED MODELS
IWH10NLTC
IWH16NLTC
IWH26NLTC
PFS
®
US
Advertisement
Chapters
Table of Contents

Related Manuals for ReddyHeater IWH10NLTC


Summary of Contents for ReddyHeater IWH10NLTC
- Page 1 VENT-FREE GAS WALL HEATER OWNER’S OPERATION AND INSTALLATION MANUAL INFRARED MODELS IWH10NLTC IWH16NLTC IWH26NLTC ® WARNING: If the information in this manual is not followed exactly, a fire or explosion may result causing property damage, personal injury or loss of life.
-
Page 2: Table Of Contents
TABLE OF CONTENTS Safety ............3 Operation ..........17 Specifications ..........4 Inspecting Heater ........19 Qualified Installing Agency ......5 Care And Maintenance ......20 Product Features ........5 Troubleshooting ........21 Local Codes..........5 Replacement Parts ........24 Preparing For Installation ...... -
Page 3: Safety
SAFETY NATURAL AND PROPANE/LP GAS: Natural IMPORTANT: Read this owner’s and Propane/LP gas are odorless. An odor- manual carefully and completely making agent is added to the gas. The odor before trying to assemble, op- helps you detect a gas leak. However, the erate, or service this heater. -
Page 4: Specifications
4,500 feet could cause pilot outage. used or stored. 12. To prevent performance problems, do • Under dusty conditions. not use propane/LP fuel tank of less than 100 lbs. capacity. SPECIFICATIONS MODEL IWH10NLTC IWH16NLTC IWH26NLTC Ignition Electric Piezo Electric Piezo Electric Piezo Gas Type... -
Page 5: Qualified Installing Agency
QUALIFIED INSTALLING AGENCY Only a qualified agency should install and a) Installing, testing, or replacing gas piping replace gas piping, gas utilization equipment or accessories, and repair and equipment ser- b) Connecting, installing, testing, repairing, vicing. The term “qualified agency” means any or servicing equipment;... -
Page 6: Preparing For Installation
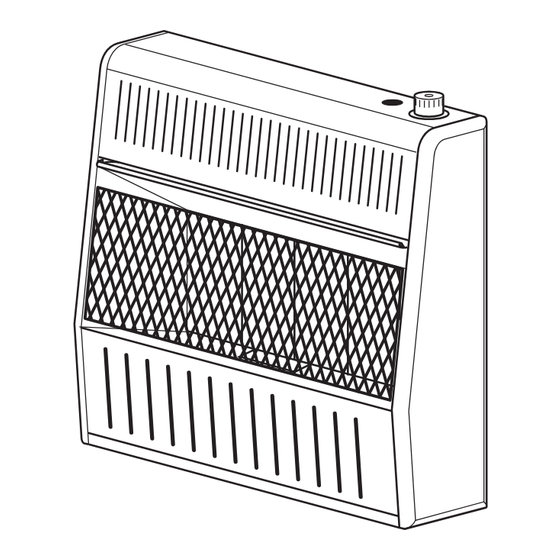
PREPARING FOR INSTALLATION Before beginning assembly or operation of the Ignitor Control Knob product, make sure all parts are present. Com- Button pare parts with package contents list. If any part is missing or damaged, do not attempt to assemble, install or operate the product. Con- tact customer service for replacement parts. -
Page 7: Air For Combustion And Ventilation
AIR FOR COMBUSTION AND VENTILATION WARNING: This heater shall WARNING: If the area in which not be installed in a confined space the heater may be operated is or unusually tight construction smaller than that defined as unless provisions are provided an unconfined space or if the for adequate combustion and building is of unusually tight... - Page 8 AIR FOR COMBUSTION AND VENTILATION Ventilation Air From Outdoors Provide extra fresh air by using ventilation IMPORTANT: Do not provide openings grills or ducts. You must provide two perma- for inlet or outlet air into attic if attic has a nent openings: one within 12"...
-
Page 9: Installation
INSTALLATION NOTICE: This heater is intended CAUTION: This heater cre- for use as supplemental heat. ates warm air currents. These Use this heater along with your currents move heat to wall sur- primary heating system. Do not faces next to heater. Installing install this heater as your pri- heater next to vinyl or cloth wall mary heat source. -
Page 10: Gas Supply
INSTALLATION GAS SELECTION For changing from propane to This appliance is factory natural gas supply: preset for propane/LP gas. 1. Remove 2 screws from cover plate located No changes are required for on back of heater to expose fuel selection connecting to propane/LP. -
Page 11: Fastening Heater To Wall
INSTALLATION For changing from natural gas supply to propane supply: Fuel Selector 1. Remove 2 screws from cover plate located Knob on back of heater to expose fuel selection device (see Figure 6). 2. For propane gas, press in knob using a flat screwdriver with a blade the thickness of a quarter and turn knob counterclockwise until the knob locks into the LP posi-... - Page 12 (concrete or masonry): Floor 1. Drill holes at marked locations using 5/16" drill bit. For solid walls (concrete or masonry), drill at least 1" deep. Model: IWH10NLTC 2. Fold wall anchor as shown in Figure 10. " " Min. Only Insert Mounting "...
- Page 13 INSTALLATION 3. Insert wall anchor (wings first) into hole. 4. Remove heater from mounting bracket. Tap anchor flush to wall. 5. If installing bottom mounting screws into hol- 4. For thin walls (1/2" or less), insert red low or solid wall, install wall anchors. Follow key into wall anchor.
- Page 14 INSTALLATION CONNECTING TO GAS SUPPLY CAUTION: For natural gas, WARNING: A qualified ser- check your gas line pressure vice technician must connect before connecting heater to gas heater to gas supply. Follow all line. Gas line pressure must be local codes. no greater than 10.5”...
-
Page 15: Checking Gas Connections
INSTALLATION Apply pipe joint sealant lightly to male threads. the vent pointing down as shown in Figure This will prevent excess sealant from going 15. Pointing the vent down protects it from into pipe. Excess sealant in pipe could result freezing rain or sleet. - Page 16 INSTALLATION 4. Check all joints of gas supply piping sys- 5. Correct all leaks at once. tem. Apply a noncorrosive leak detection 6. Reconnect heater and equipment shutoff fluid to all joints. If bubbles form, there may valve to gas supply. Check reconnected be a leak.
-
Page 17: Operation
OPERATION FOR YOUR SAFETY READ BEFORE LIGHTING not use any phone in your building. WARNING: If you do not fol- • Immediately call your gas supplier low these instructions exactly, a from a neighbor’s phone. Follow the fire or explosion may result caus- gas supplier’s instructions. -
Page 18: To Turn Off Gas To Appliance
Set control knob to any heat NG, make sure NG pilot burner ig- level between 1 and 5. nites. If input gas type is LP, make sure LP pilot burner ignites. IWH10NLTC IWH16NLTC IWH26NLTC Burners Control Knob Figure 20 - Burner Patterns THERMOSTAT CONTROL OPERATION The thermostat used on this heater senses the room temperature. -
Page 19: Inspecting Heater
INSPECTING HEATER IMPORTANT: Owner’s should check pilot flame pattern and burner flame pattern often. Incorrect flame patterns indicate the need for cleaning (see Care and Maintenance, page 20) or service. WARNING: Only a qualified service person should service and repair heater. This includes maintenance requiring replacement or alteration of components. -
Page 20: Care And Maintenance
CARE AND MAINTENANCE WARNING: Turn off heater and let cool before servicing. CAUTION: You must keep control areas, burner, and circulating air passageways of heater clean. Inspect these areas of heater before each use. Have heater inspected yearly by a qualified service techni- cian. -
Page 21: Troubleshooting
TROUBLESHOOTING WARNING: If you smell gas: • Shut off gas supply. • Do not try to light any appliance. • Do not touch any electrical switch; do not use any phone in your building. • Immediately call your gas supplier from a neighbor’s phone. Fol- low the gas supplier’s instructions. - Page 22 TROUBLESHOOTING Problem Possible Cause Corrective Action ODS/pilot lights but flame 1. Control knob is not fully 1. Press in control knob fully. goes out when control pressed in. knob is released. 2. Control knob is not pressed 2. After ODS/pilot lights, keep in long enough.
- Page 23 TROUBLESHOOTING Problem Possible Cause Corrective Action Slight smoke or odor 1. Residues from manufactur- 1. Problem will stop after a few during initial operation. ing process. hours of operation. Heater produces a whis- 1. Turning control knob to high 1. Turn control knob to low (1) tling noise when burner (5) position when burner is position and let warm up for...
-
Page 24: Replacement Parts
REPLACEMENT PARTS Note: Use only original replacement parts. Usually, we will ask you to return the defective This will protect your warranty coverage for part to the factory parts replaced under warranty. PARTS NOT UNDER WARRANTY PARTS UNDER WARRANTY C a l l C u s t o m e r S e r v i c e t o l l f r e e a t C a l l C u s t o m e r S e r v i c e t o l l f r e e a t 1-800-229-5647 to order parts not under 1-800-229-5647 to order parts under war-... -
Page 25: Service Hints
SERVICE HINTS When Gas Pressure Is Too Low • pilot will not stay lit • burners will have delayed ignition • fireplace will not produce specified heat • propane/LP gas supply might be low (propane/LP units only) You may feel your gas pressure is too low. If so, contact your local gas supplier. TECHNICAL SERVICE You may have further questions about installation, operation, or troubleshooting. -
Page 26: Parts
PARTS MODEL IWH10NLTC www.sureheat.com 200041-01B... - Page 27 PARTS MODEL IWH10NLTC This list contains replaceable parts for your heater. When ordering replacement parts, follow the instructions listed under Replacement Parts on page 24 of this manual. ITEM PART # DESCRIPTION MB10053-2DP-W Cabinet Assembly ML161-03 Reflector MB29003 Grill Guard...
- Page 28 PARTS MODEL IWH16NLTC www.sureheat.com 200041-01B...
- Page 29 PARTS MODEL IWH16NLTC This list contains replaceable parts for your heater. When ordering replacement parts, follow the instructions listed under Replacement Parts on page 24 of this manual. ITEM PART # DESCRIPTION MB10052-3DP-W Cabinet Assembly MB11052-3DP Reflector MB29002 Grill Guard MB09002 Lower Front Panel DFPB-3B...
- Page 30 PARTS MODEL IWH26NLTC www.sureheat.com 200041-01B...
- Page 31 PARTS MODEL IWH26NLTC This list contains replaceable parts for your heater. When ordering replacement parts, follow the instructions listed under Replacement Parts on page 24 of this manual. ITEM PART # DESCRIPTION MB10051-5DP-W Cabinet Assembly MB11051-5DP Reflector MB29001 Grill Guard MB09051 Lower Front Panel DFPB-5B-MB...
-
Page 32: Warranty
WARRANTY KEEP THIS WARRANTY Model _______________________________ Serial No. ____________________________ Date Purchased _______________________ Keep receipt for warranty verification. IMPORTANT: We urge you to fill out your warranty information above. Complete with the entire serial number which can be found on the rating plate. Retain this manual for future reference. Always specify model and serial numbers when communicating with customer service. - Page 33 CALENTADOR DE GAS DE PARED SIN VENTILAS MANUAL DE FUNCIONAMIENTO E INSTALACIÓN DEL PROPIETARIO INFRARROJO MODELOS IWH10NLTC IWH16NLTC IWH26NLTC ADVERTENCIA: Este aparato está equipado para funcionar con gas (natural y propano). No se permite convertir más que a gas ®...
- Page 34 TABLA DE CONTENIDOS Seguridad ..........35 Instalación ..........42 Especificaciones ........37 Funcionamiento ........51 Agencia de Instalación Calificada.... 37 Inspección del calentador ......54 Características del Producto ....38 Cuidado y mantenimiento ......55 Normas Locales........38 Solución de problemas ......56 Preparación Para la Instalación....
-
Page 35: Seguridad
SEGURIDAD nando correctamente. ¡Respire aire fresco IMPORTANTE: Lea este manual del inmediatamente! Haga que le den servicio propietario cuidadosa y completa- al calentador. El monóxido de carbono afecta mente antes de intentar ensamblar, más algunas personas que a otras. Las más operar o dar servicio a este calen- afectadas son mujeres embarazadas, perso- nas con enfermedades del corazón, de los... - Page 36 SEGURIDAD 5. Si el calentador se apaga, no lo vuelva ADVERTENCIA: Este calen- a encender hasta que se le haya pro- tador alcanza temperaturas muy porcionado aire fresco del exterior. Si el altas cuando el calentador está calentador continua apagando se debera ser revisado por personal calificado.
-
Page 37: Especificaciones
ESPECIFICACIONES MODELO IWH10NLTC IWH16NLTC IWH26NLTC Encendido Piezoeléctrico Piezoeléctrico Piezoeléctrico Tipo de gas Con gas natural Con gas natural Con gas natural BTU (disponible) 12,000 20,000 30,000 Ajuste del regulador de 6" de c.a. 6" de c.a. 6" de c.a. presión: Presión del gas de entra-... -
Page 38: Características Del Producto
CARACTERÍSTICAS DEL PRODUCTO PILOTO DE SEGURIDAD a gas natural, el instalador calificado debe seguir las instrucciones de la página 44 y las El calentador posee un piloto que cuenta indicaciones que aparecen en el calentador con un sistema de apagado de seguridad PIEZO SISTEMA DE ENCENDIDO por medio de un sensor de agotamiento de oxígeno (ODS). -
Page 39: Preparación Para La Instalación
PREPARACIÓN PARA LA INSTALACIÓN Antes de ensamblar u operar el producto, ase- Perilla de Botón de control gúrese de tener todas las piezas. Compare las encendido piezas con la lista del contenido del paquete. Si hay piezas dañadas o si faltan piezas, no intente armar, instalar ni usar el producto. -
Page 40: Aire Para Combustión Y Ventilación
AIRE PARA COMBUSTIÓN Y VENTILACIÓN ADVERTENCIA: Este calen- ADVERTENCIA: Este calen- tador no debe instalarse en un tador no se debe instalar en una espacio confinado ni en una habitación o espacio a menos construcción inusualmente que el volumen requerido de aire sellada, a menos que se hayan de combustión en el interior es tomado las medidas necesarias... - Page 41 AIRE PARA COMBUSTIÓN Y VENTILACIÓN Aire del exterior para ventilación Proporcione aire fresco adicional mediante Gas Combustible, ANSI Z223.1/NFPA 54, Aire el uso de rejillas o conductos de ventilación. para combustión y ventilación para conocer Debe haber dos aberturas permanentes: una el tamaño requerido de las rejillas o los con- a 30.48 cm (12") del techo y otra a 30.48 cm ductos de ventilación.
-
Page 42: Instalación
INSTALACIÓN AVISO: Este calentador está ADVERTENCIA: Nunca ins- diseñado para utilizarse como tale el calentador calefacción adicional. Use este • en un dormitorio o baño calentador junto con su sistema • en un vehículo recreativo de calefacción principal. No • donde cortinas, muebles, ropa instale este calentador como u otros objetos inflamables fuente de calefacción principal. - Page 43 INSTALACIÓN DISTANCIA DE SEPARACIÓN DE COMBUSTIBLES Siga con atención las siguientes instruc- TECHO ciones. Este calentador es una unidad de Un mínimo montaje en la pared diseñada para apoyarse 20.3 cm de 91.5 cm directamente sobre el suelo o una base de (8") (36") repisa.
- Page 44 INSTALACIÓN Para cambiar de gas propano a gas natural: 1. Retire los 2 tornillos de la placa de la cubierta situados en la parte posterior Perilla de selección de del calentador para exponer dispositivo combustible de selección de combustible (consulte la Figura 5).
- Page 45 INSTALACIÓN UBICACIÓN DEL CALENTADOR Este calentador está diseñado para montarse • Donde haya fácil acceso para la operación, en la pared. Para mayor comodidad y eficien- inspección y servicio. cia, instale el calentador: • En el lugar más frío de la habitación. COLOCACIÓN DEL CALENTADOR EN LA PARED Soporte de montaje Métodos para fijar el soporte de...
- Page 46 7. Apriete los tornillos hasta que el soporte de montaje esté asegurado firmemente a la pared. Piso Modelo: IWH10NLTC 27 cm (10 ") Min. Figura 10 - Cómo doblar el anclaje Inserte los tornillos 47 cm de montaje s ólo a...
- Page 47 INSTALACIÓN Colocación del calentador en el 3. Marque la ubicación de los tornillos en la soporte de montaje pared. 1. Localice las dos ranuras horizontales en 4. Quite el calentador del soporte de montaje. el panel posterior del calentador (consulte 5.
- Page 48 INSTALACIÓN CONEXIÓN AL SUMINISTRO DE GAS ADVERTENCIA: Una per- PRECAUCIÓN: Para gas sona de servicio capacitada propano/LP, nunca conecte el debe conectar el calentador al calentador directamente al sumi- suministro de gas. Siga todas nistro de gas propano/LP. Este las normas locales. calentador requiere un regulador externo (no se incluye).
- Page 49 INSTALACIÓN Antes de instalar el calentador, asegúrese IMPORTANTE: instale una válvula de cierre de tener los elementos que se indican a del equipo en un lugar que sea accesible. La continuación. válvula de cierre del equipo es para abrir o •...
- Page 50 INSTALACIÓN REVISIÓN DE LAS CONEXIONES DE GAS 6. Vuelva a conectar el calentador y la ADVERTENCIA: Después válvula de cierre del equipo al suministro de instalar el calentador o de de gas. Revise las conexiones que se darle servicio, pruebe todas las volvieron a conectar en caso de fugas.
-
Page 51: Funcionamiento
INSTALACIÓN Comprobación de la presión de las conexiones de gas del calentador 1. Abra la válvula de cierre del equipo (con- 7. Apague el calentador (consulte Cómo sulte la figura 16, página 50). cerrar el suministro de gas al aparato, página 53). - Page 52 FUNCIONAMIENTO INSTRUCCIONES DE ENCENDIDO 1. ¡ALTO! Lea la información de seguridad en contacto con un técnico de servicio en la página 51. calificado o proveedor de gas para las reparaciones. Encienda el piloto con un 2. Asegúrese de que la válvula de cierre del fósforo hasta que se realicen las repara- equipo esté...
- Page 53 FUNCIONAMIENTO IWH10NLTC IWH16NLTC IWH26NLTC Quemadors Perilla de control Figura 20 - Patrón del quemador FUNCIONAMIENTO DEL CONTROL CON TERMOSTATO El termostato que se usa en este calentador volverá a encenderse cuando la temperatura detecta la temperatura de la habitación. Al- de la habitación disminuya por debajo de la...
-
Page 54: Inspección Del Calentador
INSPECCIÓN DEL CALENTADOR IMPORTANTE: El propietario debe revisar frecuentemente los patrones de la llama del piloto y de la llama del quemador. Patrones de llama incorrectos indican la necesidad de limpieza o servicio de mantenimiento (consulte Cuidado y mantenimiento, página 55). ADVERTENCIA: Sólo una persona de servicio capacitada debe repararlo o darle servicio. -
Page 55: Cuidado Y Mantenimiento
CUIDADO Y MANTENIMIENTO ADVERTENCIA: Apague el calentador y deje que se enfríe antes de darle mantenimiento. PRECAUCIÓN: Debe mantener limpias las áreas de control, el quemador y las vias de circulación de aire del calentador. Inspec- cione estas áreas del calentador antes de cada uso. Haga que una persona de servicio calificada inspeccione el calentador una vez al año. -
Page 56: Solución De Problemas
SOLUCIÓN DE PROBLEMAS ADVERTENCIA: Si percibe olor a gas • Cierre el suministro de gas. • No intente encender ningún aparato. • No toque ningún interruptor eléctrico; no use ningún teléfono en el edificio. • Llame inmediatamente a su proveedor de gas desde el teléfono de algún vecino. - Page 57 SOLUCIÓN DE PROBLEMAS Problema Causa Posible Acción correctiva Cuando se presiona el 1. El suministro de gas está 1. Abra el suministro de gas o la botón del encendedor, cerrado o la válvula de cie- válvula de cierre del equipo. hay chispa en el piloto/ rre del equipo está...
- Page 58 SOLUCIÓN DE PROBLEMAS Problema Causa Posible Acción correctiva El quemador no se en- 1. El orificio del quemador 1. Limpie el quemador (consulte ciende después de que el está tapado. Cuidado y mantenimiento, en piloto/ODS se enciende. la página 55) o remplace el quemador.
- Page 59 SOLUCIÓN DE PROBLEMAS Problema Causa Posible Acción correctiva El calentador produce un 1. Se giró la perilla de control 1. Gire la perilla de control a la silbido cuando el quema- a la posición alto (5) cuan- posición bajo (1) y deje que se dor está...
-
Page 60: Piezas De Repuesto
SOLUCIÓN DE PROBLEMAS Problema Causa Posible Acción correctiva El calentador se apaga 1. No hay suficiente aire fres- 1. Abra la ventana y/o la puerta mientras se está usando para proporcionar ventilación. (el ODS funciona). 2. Hay poca presión en la 2. -
Page 61: Accesorios
ACCESORIOS Adquiera estos accesorios con su distribuidor local. Si no pueden proporcionarle estos acce- sorios, comuníquese SHM International, Corp. al 1-800-229-5647 para obtener información. VÁLVULA DE INTERRUPCIÓN DE EQUIPOS RMH-120-00088 Para todos los modelos. Válvula de interrupción de equipos con 1/8". Llave de paso del TNP. CONSEJOS PARA SERVICIO Cuando la presión del gas de entrada sea muy baja •... -
Page 62: Piezas
PIEZAS MODELO IWH10NLTC www.sureheat.com 200041-01B... - Page 63 PIEZAS MODELO IWH10NLTC Esta lista contiene las piezas remplazables utilizadas en el calentador. Al hacer un pedido de piezas, siga las instrucciones listadas en Piezas de repuesto en la página 60 de este manual. Art. Piezo # Descripción Cant. MB10053-2DP-W Asamblea de gabinete...
- Page 64 PIEZAS MODELO IWH16NLTC www.sureheat.com 200041-01B...
- Page 65 PIEZAS MODELO IWH16NLTC Esta lista contiene las piezas remplazables utilizadas en el calentador. Al hacer un pedido de piezas, siga las instrucciones listadas en Piezas de repuesto en la página 60 de este manual. Art. Pieza # Descripción Cant. MB10052-3DP-W Asamblea de gabinete MB11052-3DP Reflector MB29002...
- Page 66 PIEZAS MODELO IWH26NLTC www.sureheat.com 200041-01B...
- Page 67 PIEZAS MODELO IWH26NLTC Esta lista contiene las piezas remplazables utilizadas en el calentador. Al hacer un pedido de piezas, siga las instrucciones listadas en Piezas de repuesto en la página 60 de este manual. Art. Pieza # Descripción Cant. MB10051-5DP-W Asamblea de gabinete MB11051-5DP Reflector MB29001...
-
Page 68: Garantía
GARANTÍA GUARDE ESTA GARANTÍA Modelo __________________________________ Número de serie __________________________ Fecha de compra _________________________ Conserve su recibo para la verificación de la garantía. IMPORTANTE: Le pedimos que complete la información de su garantía antes mencionada. Completo con todo el número de serie que se puede encontrar en la placa de características. Conserve este manual para futuras consultas.
Need help?
Do you have a question about the IWH10NLTC and is the answer not in the manual?
Questions and answers