Moxa Technologies OnCell G3100 Series User Manual
Cellular ip-modem
Hide thumbs
Also See for OnCell G3100 Series:
- User manual (217 pages) ,
- Quick installation manual (2 pages) ,
- User manual (204 pages)
Table of Contents
Advertisement
Quick Links
Download this manual
See also:
User Manual
Advertisement
Table of Contents

Related Manuals for Moxa Technologies OnCell G3100 Series


Summary of Contents for Moxa Technologies OnCell G3100 Series
- Page 1 OnCell G3100 Series User’s Manual First Edition, April 2008 www.moxa.com/product Moxa Inc. Tel: +886-2-8919-1230 Fax: +886-2-8919-1231 Web: www.moxa.com Moxa Technical Support Worldwide: support@moxa.com The Americas support@usa.moxa.com...
-
Page 2: Copyright Notice
OnCell G3100 Series User’s Manual The software described in this manual is furnished under a license agreement and may be used only in accordance with the terms of that agreement. Copyright Notice Copyright © 2008 Moxa Inc. All rights reserved. -
Page 3: Table Of Contents
Table of Contents Chapter 1 Introduction ....................1-1 Overview ..........................1-2 Package Checklist......................... 1-2 Product Features ........................1-3 Product Specifications ......................1-3 Chapter 2 Getting Started ..................2-1 Panel Layout......................... 2-2 OnCell G3110/G3150....................2-2 Connecting the Hardware ..................... 2-4 Wiring Requirements....................2-4 SIM Card Installation .................... - Page 4 Trusted Site Settings ..................... 5-3 Opening the Web Console .................... 5-5 Web Console Navigation ...................... 5-7 Basic Settings ........................5-7 Server Settings......................5-7 Time Settings........................ 5-8 Network Settings ........................5-9 Basic Network Settings....................5-9 Advanced Network Settings ..................5-11 Auto IP Report Settings ....................5-11 Chapter 6 Cellular Network Settings.................6-1 GSM GPRS Settings......................
- Page 5 Load Factory Defaults ....................9-12 Change Password......................9-13 Certificate ........................... 9-14 Ethernet SSL Certificate Import ................. 9-14 Certificate/Key Delete ....................9-14 System Monitoring ......................9-15 Serial to Network Connections ................... 9-15 Serial Port Status ......................9-15 Serial Port Error Count ....................9-16 Serial Port Settings .....................
- Page 6 Appendix C Dynamic Domain Name Server ............... C-1 Overview ..........................C-1 Configuration........................C-3 Appendix D Well Known Port Numbers ..............D-1 Appendix E Auto IP Report Protocol................E-1 Appendix F GSM Alphabet....................F-1...
-
Page 7: Chapter 1 Introduction
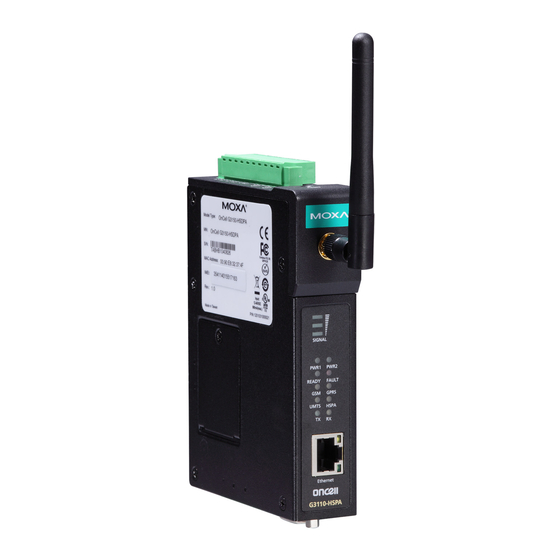
The OnCell G3100 series of cellular IP-modem have many exceptional features. There are currently two models in the OnCell G3100 series of IP-modem. The main differences between the models are the serial interface types. Cellular IP-modems give you an easy way to connect your serial devices to cellular mobile networks. -
Page 8: Overview
Moxa sales representative if any of the items are missing or appear to be damaged. OnCell G3100 Series cellular IP Modems are shipped with the following items: Standard Accessories Document &... -
Page 9: Product Features
OnCell G3100 Series User’s Manual Introduction Product Features All models in the OnCell G3100 series have the following features: Quad-band 900/1800, 850/1900 MHz GSM/GPRS/EDGE GPRS Class 12 Versatile operating modes, including Real COM, RFC2217, TCP Server, TCP Client, UDP, Ethernet Modem, and SMS Tunnel Port buffering function to prevent loss of serial data when communication is disrupted Port speeds of up to 921.6 Kbps... - Page 10 OnCell G3100 Series User’s Manual Introduction RS-485-2w: Data+, Data-, GND I/O Interface Alarm Contact 1 relay output with current carrying capacity of 1A@24 VDC Digital Input 2 inputs electrically isolated from the electronics DIN OFF: 0 to 3.3 VDC, DIN ON : 10 to 48 VDC (I1 to COM_1/I2 to COM_2)
-
Page 11: Chapter 2 Getting Started
Getting Started Chapter 2 This chapter covers the hardware installation of the OnCell G3100. Software installation is covered in the next chapter. The following topics are covered in this chapter: Panel Layout OnCell G3110/G3150 Connecting the Hardware Wiring Requirements SIM Card Installation Connecting the Power Connecting the I/O Port Connecting to the Network... -
Page 12: Panel Layout
OnCell G3100 Series User’s Manual Getting Started Panel Layout OnCell G3110/G3150 Front View SMA Bulkhead Jack SIGNAL PWR 2 PWR 1 FAULT READY GPRS Ethernet Top View DI 2/DI 1 Relay PWR 2/PWR 1 RESET Bottom Views OnCell G3110 OnCell G3150... -
Page 13: Rear View
OnCell G3100 Series User’s Manual Getting Started Rear View DIN-rail Support Side Views Right Side Left Side SIM card Cover... -
Page 14: Connecting The Hardware
OnCell G3100 Series User’s Manual Getting Started Connecting the Hardware This section describes how to connect the OnCell G3100 cellular IP-modem to a host PC or serial devices for first time testing purposes. We cover Wiring Requirements, SIM Installation, DIN-Rail Mounting, Connecting the Power, Connecting to a Serial Device, Adjustable Pull High/Low Resistors for the RS-485 Port, and LED Indicators. -
Page 15: Connecting The Power
OnCell G3100 Series User’s Manual Getting Started Follow these steps to remove or install the SIM card: 1. Remove the screw holding the outer SIM card cover. 2. Push the outer SIM card cover to the left to remove it. -
Page 16: Connecting The I/O Port
OnCell G3100 Series User’s Manual Getting Started Power Input Connecting the I/O Port Six terminals on the terminal block are reserved for the I/O ports, with 2 terminals used for each input, and 2 terminals used for the output. Digital Input Digital ON and OFF determine which power input is used:DIN OFF: 0 to 3.3 VDC;... -
Page 17: Connecting To The Network
OnCell G3100 Series User’s Manual Getting Started Connecting to the Network Connect one end of the Ethernet cable to the OnCell G3100's 10/100M Ethernet port and the other end of the cable to the Ethernet network. If the cable is properly connected, the OnCell G3100 will indicate a valid connection to the Ethernet as follows: The Ethernet LED glows a solid green when connected to a 100 Mbps Ethernet network. - Page 18 OnCell G3100 Series User’s Manual Getting Started Pull High Pull Low Terminator 1 KΩ 1 KΩ 120 KΩ 150 KΩ 150 KΩ...
-
Page 19: Led Indicators
OnCell G3100 Series User’s Manual Getting Started LED Indicators The LED indicators on the front panel of the OnCell G3100 are described in the following table. LED Name LED Color LED Function Green DC Power is active. Power is off, or power error condition exists. -
Page 20: Initial Ip Address Configuration
Initial IP Address Configuration Chapter 3 When setting up the OnCell G3100 for the first time, the first thing you should do is configure its IP address. This chapter introduces the different methods that can be used. Please refer to Chapter 9, System Management Settings, for more details about network settings. -
Page 21: Static And Dynamic Ip Addresses
OnCell G3100 Series User’s Manual Initial IP Address Configuration Static and Dynamic IP Addresses Determine whether your OnCell G3100 needs to use a static IP address or dynamic IP address (either DHCP or BOOTP application). If your OnCell G3100 is used in a static IP environment, you must assign a specific IP address using one of the tools described in this chapter. -
Page 22: Telnet Console
OnCell G3100 Series User’s Manual Initial IP Address Configuration ATTENTION In order to use the ARP setup method, both your computer and the OnCell G3100 must be connected to the same LAN. You may use a Ethernet cable to connect the OnCell G3100 directly to your computer’s Ethernet card. - Page 23 OnCell G3100 Series User’s Manual Initial IP Address Configuration 1. From the Windows desktop, select Start Run, and then type the following content in the Run window: telnet 192.168.127.254 If your IP address is different from the default setting, use your IP address instead. Click OK.
- Page 24 OnCell G3100 Series User’s Manual Initial IP Address Configuration 4. Press N or use the arrow keys to select Network, and then press ENTER. 5. Press B or use the arrow keys to select Basic, and then press ENTER. 6. Use the arrow keys to move the cursor to IP address. Use the DELETE, BACKSPACE, or SPACE keys to erase the current IP address, and then type in the new IP address and press ENTER.
- Page 25 OnCell G3100 Series User’s Manual Initial IP Address Configuration 7. Press ESC twice to return to the previous page. Press Y to confirm. 8. Press ESC to return to the previous page. 9. Press A or use the arrow keys to select Save and then press ENTER. Press ENTER again to...
- Page 26 OnCell G3100 Series User’s Manual Initial IP Address Configuration 10. Press R or use the arrow keys to select Restart and then press ENTER. 11. Press S or use the arrow keys to select System and then press ENTER to restart the OnCell...
-
Page 27: Serial Console
OnCell G3100 Series User’s Manual Initial IP Address Configuration Serial Console The OnCell G3100 supports configuration through the serial console, which is the same as the Telnet console but accessed through the RS-232 console port rather than over the network. Once you have entered the serial console, the configuration options and instructions are the same as if you were using the Telnet console. - Page 28 OnCell G3100 Series User’s Manual Initial IP Address Configuration 6. If you are using the OnCell G3100, you may power it up at this hold down the “grave accent key” (`) while powering it up, as shown below. Note that the grave accent key (sometimes called “backwards apostrophe”) is NOT the apostrophe key—it is the key usually found next to the...
- Page 29 OnCell G3100 Series User’s Manual Initial IP Address Configuration 8. The main menu should appear. Once you are in the console, you may configure the IP address through the Network menu item, just as with the Telnet console. Please refer to steps 4 to 11 in the Telnet Console section to complete the initial IP configuration.
-
Page 30: Introducing Serial Port Operation Modes
Introducing Serial Port Operation Chapter 4 Modes In this chapter, we describe the various operation modes of the OnCell G3100. OnCell G3100 modes are grouped by type of application, such as Device Control. The options include an operation mode that relies on a driver installed on the host computer, and operation modes that rely on TCP/IP socket programming concepts. -
Page 31: Overview
OnCell G3100 Series User’s Manual Introducing Serial Port Operation Modes Overview The OnCell G3100 cellular IP modem enables traditional serial (RS-232/422/485) devices for transmitting data over the cellular network. The IP modem is a tiny computer equipped with a CPU and TCP/IP protocols that can bi-directionally translate data between the serial and IP formats. -
Page 32: Types Of Real Com Connection
OnCell G3100 Series User’s Manual Introducing Serial Port Operation Modes Types of Real COM Connection This section illustrates the types of RealCOM connections you can use, depending on the service you obtain from your local cellular service provider. 1. Fixed Public IP for OnCell. -
Page 33: Rfc 2217 Mode
OnCell G3100 Series User’s Manual Introducing Serial Port Operation Modes RFC 2217 Mode RFC-2217 mode is similar to Real COM mode in that a driver is used to establish a transparent connection between a host computer and a serial device by mapping the serial port on the OnCell G3100 to a local COM port on the host computer. -
Page 34: Types Of Tcp Server Connection
OnCell G3100 Series User’s Manual Introducing Serial Port Operation Modes Types of TCP Server Connection 1. Fixed Public IP for the OnCell. If your cellular service provider offers a fixed public IP address after you connect to the cellular network, you can access the OnCell G3100 from a host PC using either a private IP or public IP. -
Page 35: Tcp Client Modes
OnCell G3100 Series User’s Manual Introducing Serial Port Operation Modes TCP Client Modes In TCP Client mode, the OnCell G3100 can actively establish a TCP connection to a pre-defined host computer when serial data arrives. After the data has been transferred, the OnCell G3100 can automatically disconnect from the host computer by using the Inactivity time settings. -
Page 36: Udp Mode
OnCell G3100 Series User’s Manual Introducing Serial Port Operation Modes 3. Connecting TCP client and TCP server within the same cellular service provider. In order to connect properly, the IP addresses of the two OnCell devices must belong to the same subnetwork. -
Page 37: Types Of Udp Connection
OnCell G3100 Series User’s Manual Introducing Serial Port Operation Modes Types of UDP Connection 1. Fixed Public IPs for both OnCell and Host PC. If your cellular service provider offers a fixed public IP address after you connect to the cellular network, you can access the OnCell G3100 from a host PC that has a fixed public IP. -
Page 38: Sms Tunnel Mode
OnCell G3100 Series User’s Manual Introducing Serial Port Operation Modes SMS Tunnel Mode A major benefit of GSM technology is that it supports short messages (SMS) for easy communication over the mobile network. Moxa’s proprietary SMS Tunnel Mode allows you to expand your applications and reduce cost. -
Page 39: Using The Web Console
Using the Web Console Chapter 5 The web console is the most user-friendly method available to configure the OnCell G3100. With a standard web browser, you have easy and intuitive access to all settings and options. In this chapter, we introduce the web console and go through the basic configuration options. The same configuration options are also available through the Telnet and serial console. -
Page 40: Using Your Web Browser
OnCell G3100 Series User’s Manual Configuration with the Web Console Using Your Web Browser Browser Cookie Settings Verify that cookies are enabled for your browser. If the cookies are disabled, you will not be able to use the web console. (Cookies are only used for password transmission.) 1. -
Page 41: Trusted Site Settings
OnCell G3100 Series User’s Manual Configuration with the Web Console ATTENTION If you are not using Internet Explorer, cookies are usually enabled through a web browser setting such as “allow cookies that are stored on your computer” or “allow per-session cookies.”... - Page 42 OnCell G3100 Series User’s Manual Configuration with the Web Console You may also access the list of trusted sites directly through Internet Options in the Tools menu of Internet Explorer. Select the Security tab, click on the Trusted Sites icon, and then...
-
Page 43: Opening The Web Console
OnCell G3100 Series User’s Manual Configuration with the Web Console 2. In either case, the window below should appear, showing the list of sites that you have configured Internet Explorer to trust. Add the IP address of your OnCell G3100 here (the factory default IP address is 192.168.127.254). - Page 44 OnCell G3100 Series User’s Manual Configuration with the Web Console ATTENTION If you forget your password, the ONLY way to configure the OnCell G3100 is by using the reset button to reset all settings and load the factory defaults. If you have disabled the reset button in your OnCell G3100 configuration, you may still use it to load the factory defaults within the first 60 seconds that the OnCell G3100 is powered on.
-
Page 45: Web Console Navigation
OnCell G3100 Series User’s Manual Configuration with the Web Console Web Console Navigation The left panel of the OnCell G3100’s web console is the navigation panel, and contains an expandable menu tree for navigating among the various settings and categories. When you click on a menu item in the navigation panel, the main window will display the corresponding options for that item. -
Page 46: Time Settings
OnCell G3100 Series User’s Manual Configuration with the Web Console Time Settings The OnCell G3100 has a built-in Real-Time Clock for time calibration functions. Functions such as Auto Warning Email or SNMP Trap can add real-time information to messages. Before making any adjustments to the time, first select the correct time zone and submit the change. -
Page 47: Network Settings
OnCell G3100 Series User’s Manual Configuration with the Web Console Network Settings Basic Network Settings You can access Basic Network Settings by expanding the Network Settings item in the navigation panel. Basic Network Settings is where you assign the OnCell G3100’s IP address, netmask, Gateway, and other parameters for the Ethernet interface. - Page 48 OnCell G3100 Series User’s Manual Configuration with the Web Console Gateway: Enter the IP address of the gateway if applicable. A gateway is a network computer that acts as an entrance to another network. Usually, the computers that control traffic within the network or at the local Internet service provider are gateway nodes.
-
Page 49: Advanced Network Settings
OnCell G3100 Series User’s Manual Configuration with the Web Console Advanced Network Settings Access Advanced Network Settings by expanding the Network Settings item in the navigation panel. Advanced Network Settings is where the gratuitous ARP is configured. Gratuitous ARP: In some applications, you may need the OnCell G3100 to send broadcast packets to update the ARP table on the server. - Page 50 OnCell G3100 Series User’s Manual Configuration with the Web Console Auto IP report to host: Reports generated by the Auto report function will be sent automatically to this IP address or host name. Report to UDP port (default=63100): This is the UDP port number assignment for the serial port on the OnCell G3100.
-
Page 51: Cellular Network Settings
Cellular Network Settings Chapter 6 In this chapter, we describe how to set up cellular networks, including GSM, GPRS, EDGE, and others. The configuration options discussed here are also available from the Telnet and serial consoles. This chapter covers the following topics: GSM GPRS Settings GSM Operation Mode GPRS Operation Mode... -
Page 52: Gsm Gprs Settings
OnCell G3100 Series User’s Manual Cellular Network Settings GSM GPRS Settings From the left navigation panel, click Network Settings GSM GPRS Settings to configure the GSM/GPRS/SMS Settings. The various configuration items are described below: Type: The OnCell G3100 supports 3 types of operation modes. You may choose from GSM, GPRS, and SMS. - Page 53 OnCell G3100 Series User’s Manual Cellular Network Settings PPP Mode: PPP provides standard PPP dial-out service. PPPD Mode: PPPD (PPP Daemon) is used for dial-in services, since it provides PPP services only when receiving a request from a remote PC.
-
Page 54: Gprs Operation Mode
OnCell G3100 Series User’s Manual Cellular Network Settings GPRS Operation Mode TCP/IP compression (default=Disable): The setting of this field depend on whether or not the remote user’s application requests compression. Inactivity time (default=0 ms): This field specifies the idle time setting for auto-disconnection. A setting of 0 ms will cause the port to remain connected even if idle. -
Page 55: Sms Operation Mode
OnCell G3100 Series User’s Manual Cellular Network Settings SMS Operation mode Short Message Service (SMS) is a telecommunications protocol that allows sending “short” (160 characters or less) text messages. It is available on most digital mobile phones and some personal digital assistants with built-in wireless capability. -
Page 56: Configuring Serial Port Operation Modes
Configuring Serial Port Operation Chapter 7 Modes In this chapter, we explain how to configure the individual serial port modes. This chapter covers the following topics: Port Setting Basics Device Control Applications Real COM Mode RFC2217 Mode Socket Applications TCP Server Mode TCP Client Mode UDP Mode Ethernet Modem Mode... -
Page 57: Port Setting Basics
OnCell G3100 Series User’s Manual Configuring Serial Port Operation Modes Port Setting Basics To configure the operation mode and settings for a port, expand Serial Port Settings in the navigation panel, and then expand the port that you would like to configure. Individual port settings are grouped into three categories in the navigation panel: Operation Modes, Communication Parameters, and Data Buffering/Log. - Page 58 OnCell G3100 Series User’s Manual Configuring Serial Port Operation Modes ATTENTION You should make sure the inactivity time value used here is less than the inactivity time value on the GSM/GPRS configuration page. The GSM/GPRS connection must be maintained in order to achieve the inactivity time behavior of the TCP connection.
- Page 59 OnCell G3100 Series User’s Manual Configuring Serial Port Operation Modes data in the buffer will be sent as soon it reaches the specified length. Delimiter 1 and Delimiter 2 (default=None): When Delimiter 1 is enabled, the serial port will queue the data in the buffer and send the data to the Cellular or Ethernet port when a specific character, entered in hex format, is received.
-
Page 60: Rfc2217 Mode
OnCell G3100 Series User’s Manual Configuring Serial Port Operation Modes RFC2217 Mode TCP alive check time (default=7 min): This field specifies how long the OnCell G3100 will wait for a response to “keep alive” packets before closing the TCP connection. The OnCell G3100 checks connection status by sending periodic “keep alive”... -
Page 61: Socket Applications
OnCell G3100 Series User’s Manual Configuring Serial Port Operation Modes ATTENTION In order to enable a delimiter, packet length must be set to 0. Delimiter 2 should only be enabled in conjunction with Delimiter 1 and never on its own; otherwise there may be data errors. Even when a delimiter is enabled, the OnCell G3100 will still pack and send the data when the amount of data exceeds 1 KB. - Page 62 OnCell G3100 Series User’s Manual Configuring Serial Port Operation Modes TCP alive check time (default=7 min): This field specifies how long the OnCell G3100 will wait for a response to “keep alive” packets before closing the TCP connection. The OnCell G3100 checks connection status by sending periodic “keep alive”...
- Page 63 OnCell G3100 Series User’s Manual Configuring Serial Port Operation Modes Max connection (default=1): This field is used if you need to receive data from different hosts simultaneously. When set to 1, only a single host may open the TCP connection to the serial port.
-
Page 64: Tcp Client Mode
OnCell G3100 Series User’s Manual Configuring Serial Port Operation Modes following the delimiter. Strip Delimiter: Data in the buffer is first stripped of the delimiter before being transmitted. Force transmit (default=0 ms): This parameter defines how large a gap in serial communication the OnCell G3100 will allow before packing the serial data in its internal buffer for network transmission. - Page 65 OnCell G3100 Series User’s Manual Configuring Serial Port Operation Modes TCP alive check time (default=7 min): This field specifies how long the OnCell G3100 will wait for a response to “keep alive” packets before closing the TCP connection. The OnCell G3100 checks connection status by sending periodic “keep alive”...
- Page 66 OnCell G3100 Series User’s Manual Configuring Serial Port Operation Modes ATTENTION Up to 4 connections can be established between the OnCell G3100 and hosts. The connection speed or throughput may be low if any one of the four connections is slow, since the one slow connection will slow down the other 3 connections.
-
Page 67: Udp Mode
OnCell G3100 Series User’s Manual Configuring Serial Port Operation Modes ATTENTION In order to enable a delimiter, packet length must be set to 0. Delimiter 2 should only be enabled in conjunction with Delimiter 1 and never on its own; otherwise there may be data errors. Even when a delimiter is enabled, the OnCell G3100 will still pack and send the data when the amount of data exceeds 1 KB. - Page 68 OnCell G3100 Series User’s Manual Configuring Serial Port Operation Modes Destination address 1 through 4 (default=None): In UDP mode, you may specify up to 4 ranges of IP addresses for the serial port to connect to. At least one destination range must be provided.
-
Page 69: Ethernet Modem Mode
OnCell G3100 Series User’s Manual Configuring Serial Port Operation Modes Delimiter process (default=Do Nothing): The Delimiter process field determines how the data is handled when a delimiter is received. Delimiter 1 must be enabled for this field to have effect. If Delimiters 1 and 2 are both enabled, both characters must be received for the delimiter process to take place. - Page 70 OnCell G3100 Series User’s Manual Configuring Serial Port Operation Modes The OnCell G3100 accepts the AT command ATD IP address:TCP port (for example, ATD 192.127.168.1:4001) from the serial port and then requests a TCP connection from the remote Ethernet Modem or PC. Here IP address is the IP address of the remote Ethernet modem or PC, and TCP port is the TCP port number of the remote Ethernet modem or PC.
- Page 71 OnCell G3100 Series User’s Manual Configuring Serial Port Operation Modes Dial-in The OnCell G3100 listens for a TCP/IP connection request from the remote Ethernet modem or host. The OnCell G3100’s response depends on the ATS0 value, as follows. ATS0=0: The OnCell G3100 will temporarily accept the TCP connection and then send the RING signal out through the serial port.
- Page 72 OnCell G3100 Series User’s Manual Configuring Serial Port Operation Modes AT Commands The OnCell G3100 supports the following common AT commands as used with a typical modem: AT command Description Remarks Answer manually ATD <IP>:<Port> Dial up the IP address : Port No.
-
Page 73: Sms Tunnel Mode
OnCell G3100 Series User’s Manual Configuring Serial Port Operation Modes S Registers S Register Description & default value Remarks Ring to auto-answer (default=0) Ring counter (always=0) no action applied Escape code character (default=43 ASCII “+”) Return character (default=13 ASCII) Line feed character (default=10 ASCII) - Page 74 OnCell G3100 Series User’s Manual Configuring Serial Port Operation Modes SMS IN enable (default=Disable): To allow forwarding incoming short message to the OnCell G3100’s serial port as data. Auth type (default=none): To allow Caller ID Authentication Caller ID (1 through 4): Phone number should be specified.
- Page 75 OnCell G3100 Series User’s Manual Configuring Serial Port Operation Modes Delimiter process (default=Do Nothing): The Delimiter process field determines how the data is handled when a delimiter is received. Delimiter 1 must be enabled for this field to have effect. If Delimiters 1 and 2 are both enabled, both characters must be received for the delimiter process to take place.
-
Page 76: Disabled Mode
OnCell G3100 Series User’s Manual Configuring Serial Port Operation Modes Disabled Mode When the Application is set to Disable, the relevant port will be disabled. 7-21... -
Page 77: Additional Serial Port Settings
Additional Serial Port Settings Chapter 8 In this chapter, we describe additional serial port settings for the OnCell G3100. The same configuration options are also available through the Telnet and serial consoles. This chapter covers the following topics: Port Communication Parameters Serial Parameters Port Data Buffering/Log... -
Page 78: Port Communication Parameters
OnCell G3100 Series User’s Manual Additional Serial Port Settings Port Communication Parameters Port alias: This optional field allows you to assign an alias to a port for easier identification. Serial Parameters ATTENTION The serial parameters for the each serial port on the OnCell G3100 should match the parameters used by the connected serial device. -
Page 79: Port Data Buffering/Log
OnCell G3100 Series User’s Manual Additional Serial Port Settings FIFO (default=Enable): This field enables or disables the 128-byte FIFO buffer. The OnCell G3100 provides FIFO buffers for each serial port, for both the Tx and Rx signals. Note, however, that you should disable the port’s FIFO setting if the attached serial device does not have a FIFO buffer of its... -
Page 80: System Management Settings
System Management Settings Chapter 9 In this chapter, we describe additional server settings on the OnCell G3100. The same configuration options are also available through the Telnet and serial console. This chapter covers the following topics: Misc. Network Settings System Monitoring Accessible IP List Serial to Network Connections SNMP Agent Settings... -
Page 81: Misc. Network Settings
OnCell G3100 Series User’s Manual System Management Settings Misc. Network Settings Accessible IP List The OnCell G3100 uses an IP address-based filtering method to control access to its serial ports. The Accessible IP list allows you restrict network access to the OnCell G3100. Access is controlled by IP address. -
Page 82: Snmp Agent Settings
OnCell G3100 Series User’s Manual System Management Settings SNMP Agent Settings SNMP: To enable the SNMP Agent function, select the Enable option, and enter a community name (e.g., public). Read community string (default=public): This is a text password mechanism that is used to weakly authenticate queries to agents of managed network devices. -
Page 83: Ddns
OnCell G3100 Series User’s Manual System Management Settings Password: Use this field to set the password for the specified level of access. Privacy: Use this field to define the encryption key for the specified level of access DDNS Please refer to Appendix C, Dynamic Domain Name Server, for information on setting up DDNS on... - Page 84 OnCell G3100 Series User’s Manual System Management Settings System Log Settings allows the administrator to customize which network events are logged by the OnCell G3100. Events are grouped into five categories, known as event groups, and the administrator selects which groups to log under Local Log. The actual system events that would be logged for each system group are listed under summary.
-
Page 85: Auto Warning Settings
OnCell G3100 Series User’s Manual System Management Settings Auto Warning Settings Event Settings On the Event Settings page, you may configure how administrators are notified of certain system, network, configuration, power, Din, and cellular module events. Depending on the event, different options for automatic notification are available, as shown above. -
Page 86: Serial Event Settings
OnCell G3100 Series User’s Manual System Management Settings send an e-mail, trigger the digital output, or send an SMS. Cell. module fail: When the cellular module fails to function, the OnCell G3100 will attempt to send an e-mail, or trigger the digital output to inform users. -
Page 87: E-Mail Alert
OnCell G3100 Series User’s Manual System Management Settings its status by selecting Acknowledge Event from the OnCell G3100 console, or by correcting the DSR signal. Please refer to the section on System Monitoring later in this chapter for more information. -
Page 88: Snmp Trap
OnCell G3100 Series User’s Manual System Management Settings SNMP Trap SNMP trap server IP: Use this field to indicate the IP address to use for receiving SNMP traps. Trap version (default=v1): Use this field to select the SNMP trap version. -
Page 89: Maintenance
OnCell G3100 Series User’s Manual System Management Settings Maintenance Console Setting On this screen, access to different OnCell G3100 configuration console options (HTTP, HTTPS, Telnet, SSH) can be enabled or disabled. Please refer to Change Password later in this chapter for more information on passwords. -
Page 90: Firmware Upgrade
OnCell G3100 Series User’s Manual System Management Settings Firmware Upgrade The OnCell G3100’s firmware can be upgraded though the web console, serial console, or through OnCell Search Utility. If you have made any changes to your configuration, remember to save the configuration first before upgrading the firmware. -
Page 91: Load Factory Defaults
OnCell G3100 Series User’s Manual System Management Settings Enter the configuration file path/name and click Submit. The OnCell G3100’s configuration settings will be updated according to the configuration file. If you also wish to import the IP configuration (i.e., the OnCell G3100’s IP address, netmask, gateway, etc.), make sure that Import all configurations including IP configurations is checked on. -
Page 92: Change Password
OnCell G3100 Series User’s Manual System Management Settings Change Password For all changes to the OnCell G3100’s password protection settings, you will first need to enter the old password. Leave this blank if you are setting up password protection for the first time. To set up a new password or change the existing password, enter your desired password under both New password and Confirm password. -
Page 93: Certificate
The OnCell G3100 series will generate a new SSL certificate whenever a new IP is used. However, the SSL certificate is issued by the OnCell itself. If you would like to import an SSL certificate issued by a primary CA, you can do it from the “Ethernet SSL Certificate Import”... -
Page 94: System Monitoring
OnCell G3100 Series User’s Manual System Management Settings System Monitoring Serial to Network Connections Go to Serial to Network Connections under Serial Status to view the operation mode and status of each connection for each serial port. All monitor functions will refresh automatically every 15 seconds. -
Page 95: Serial Port Error Count
OnCell G3100 Series User’s Manual System Management Settings Serial Port Error Count Go to Serial Port Error Count under Serial Status to view the error count for each serial port. Serial Port Settings Go to Serial Port Settings under Serial Status to view a summary of the settings for each serial port. -
Page 96: System Status
OnCell G3100 Series User’s Manual System Management Settings System Status Network Connections Go to Network Connections under System Status to view network connection information. Network Statistics Go to Network Statistics under System Status to view network statistics. 9-17... -
Page 97: Serial Data Log
OnCell G3100 Series User’s Manual System Management Settings Serial Data Log Data logs for the serial port can be viewed in ASCII or HEX format. After selecting the serial port and format, you may click Select all to select the entire log if you wish to copy and paste the contents into a text file. -
Page 98: Routing
OnCell G3100 Series User’s Manual System Management Settings Routing Go to Routing under System Status to display the routing information. Possible flags include: U: route is up D: route is down G: use gateway +: default gateway T: static route... -
Page 99: Din And Power Status
OnCell G3100 Series User’s Manual System Management Settings Din and Power Status Go to Din and Power status under System Status to display the power and digital input information. 9-20... -
Page 100: Save Configuration
OnCell G3100 Series User’s Manual System Management Settings Save Configuration Go to Save Configuration and then click Save to save your submitted configuration changes to the OnCell G3100’s flash memory. The configuration changes will be effective when the OnCell G3100 is restarted. -
Page 101: Restart Ports
OnCell G3100 Series User’s Manual System Management Settings Restart Ports Go to Restart Ports under Restart and then select the ports to be restarted. Click Select All to select all the ports. Click Submit to restart the selected ports. 9-22... -
Page 102: Software Installation/Configuration
Software Installation/Configuration Chapter 10 This chapter covers the following topics: Overview OnCell Windows Driver Manager Installing OnCell Windows Driver Manager Using OnCell Windows Driver Manager OnCell Search Utility Installing OnCell Search Utility Configuring OnCell Search Utility Moxa OnCell Linux Real TTY Driver Basic Procedure Hardware Setup Installing Linux Real TTY Driver Files... -
Page 103: Overview
OnCell G3100 Series User’s Manual Software Installation/Configuration Overview The Documentation & Software CD included with your OnCell G3100 is designed to make the installation and configuration procedure easy and straightforward. This auto-run CD includes OnCell Windows Driver Manager (for COM mapping), OnCell Search Utility (to broadcast search for all OnCell G3100’s accessible over the network), the OnCell G3100 User’s Manual, and the... - Page 104 OnCell G3100 Series User’s Manual Software Installation/Configuration 3. Click Next to install the program’s shortcuts in the appropriate Start Menu folder. 4. Click Next to proceed with the installation. The installer then displays a summary of the installation options. 10-3...
- Page 105 OnCell G3100 Series User’s Manual Software Installation/Configuration 5. Click Install to begin the installation. The setup window will report the progress of the installation. To change the installation settings, click Back and navigate to the previous screen. On Windows XP, the installer will display a message that the software has not passed Windows Logo testing.
-
Page 106: Using Oncell Windows Driver Manager
OnCell G3100 Series User’s Manual Software Installation/Configuration Using OnCell Windows Driver Manager After you install OnCell Windows Driver Manager, you can set up the OnCell G3100’s serial ports as remote COM ports for your PC host. Make sure that the serial port(s) on your OnCell G3100 are set to Real COM mode when mapping COM ports with OnCell Windows Driver Manager. - Page 107 OnCell G3100 Series User’s Manual Software Installation/Configuration Alternatively, you can select Input Manually and then manually enter the OnCell G3100’s IP Type, if you select LAN type, follow by 1st Data Port, 1st Command Port, and Total Ports for the COM ports that will be mapped to. Click OK to proceed to the next step. Note that the Add OnCell page supports FQDN (Fully Qualified Domain Name), in which case the IP address will be filled in automatically.
- Page 108 OnCell G3100 Series User’s Manual Software Installation/Configuration You can also select Enable Auto IP Report. Refer to the MAC address on the device lable and type in the MAC address in the MAC address line to update IP address for this mapping entry automatically whenever the IP address of the OnCell G3100 is changed.
- Page 109 OnCell G3100 Series User’s Manual Software Installation/Configuration 5. On Windows XP, a message is displayed during the activation of each port, indicating that the software has not passed Windows Logo certification. Click Continue Anyway to proceed. 6. Ports that have been activated will appear in black.
- Page 110 OnCell G3100 Series User’s Manual Software Installation/Configuration 7. In the Basic Setting tab, use the COM Number drop-down list to select a COM number to be assigned to the OnCell G3100’s serial port that is being configured. Note that ports that are “in use”...
- Page 111 OnCell G3100 Series User’s Manual Software Installation/Configuration 8. Click the Advanced Setting tab to modify Tx Mode, FIFO, and Fast Flush, and others. Tx Mode Hi-Performance is the default for Tx mode. After the driver sends data to the OnCell G3100, the driver immediately issues a “Tx Empty”...
- Page 112 If so, try enabling the Fast Flush function and see if there is a significant improvement in performance. Auto IP Report: When OnCell G3100 series products are used in a dynamic IP environment, users must spend more time with IP management tasks. For example, if OnCell works as a server, e.g., RealCom mode, TCP Server mode, or UDP mode, then the host, which acts as a...
-
Page 113: Oncell Search Utility
OnCell G3100 Series User’s Manual Software Installation/Configuration 10. To save the configuration to a text file, select Export from the COM Mapping menu. You will then be able to import this configuration file to another host and use the same COM Mapping settings in the other host. - Page 114 OnCell G3100 Series User’s Manual Software Installation/Configuration 3. Click Next to install program files to the default directory, or click Browse to select an alternate location. 4. Click Next to select additional tasks. 10-13...
- Page 115 OnCell G3100 Series User’s Manual Software Installation/Configuration 5. Click Next to proceed with the installation. The installer then displays a summary of the installation options. 6. Click Install to begin the installation. The setup window will report the progress of the installation.
-
Page 116: Configuring Oncell Search Utility
OnCell G3100 Series User’s Manual Software Installation/Configuration Configuring OnCell Search Utility The Broadcast Search function is used to locate all OnCell G3100 servers that are connected to the same LAN as your computer. After locating an OnCell G3100, you will be able to change its IP address. - Page 117 OnCell G3100 Series User’s Manual Software Installation/Configuration Click Locate to cause the selected device to beep. 10-16...
- Page 118 OnCell G3100 Series User’s Manual Software Installation/Configuration To modify the configuration of the highlighted OnCell G3100, click on the Console icon to open the web console. This will take you to the web console, where you can make all configuration changes. Please refer to Chapter 5, Using the Web Console, for information on how to use the web console.
- Page 119 OnCell G3100 Series User’s Manual Software Installation/Configuration 4. To change the configuration of the IP Address Report, click on the Settings icon to open the IP Location Settings. 5. Click the Go icon to complete the configuration. Please refer to Chapter 5, Configuration with the Web Console, for information on how to use the IP Address Report.
-
Page 120: Moxa Oncell Linux Real Tty Driver
OnCell G3100 Series User’s Manual Software Installation/Configuration Moxa OnCell Linux Real TTY Driver Basic Procedure To map an OnCell G3100 serial port to a Linux host’s tty port, follow these instructions: 1. Set up the OnCell G3100. After verifying that the IP configuration works and you can access the OnCell G3100 (by using ping, telnet, etc.), configure the desired serial port on the OnCell... -
Page 121: Mapping Tty Ports
OnCell G3100 Series User’s Manual Software Installation/Configuration Mapping TTY Ports Make sure that you set the operation mode of the desired OnCell G3100 serial port to Real COM mode. After logging in as a super user, enter the directory /usr/lib/oncell_realtty/driver and then execute mxaddsvr to map the target OnCell serial port to the host tty ports. -
Page 122: Removing Linux Driver Files
OnCell G3100 Series User’s Manual Software Installation/Configuration Removing Linux Driver Files A utility is included that will remove all driver files, mapped tty ports, and unload the driver. To do this, you only need to enter the directory /usr/lib/oncell_realtty/driver, then execute mxuninst to uninstall the driver. -
Page 123: Configuring The Unix Driver
OnCell G3100 Series User’s Manual Software Installation/Configuration Configuring the UNIX Driver Modify the configuration: The configuration used by the oncellttyd program is defined in the text file oncellttyd.cf, which is in the same directory that contains the program oncellttyd. You may use vi, or any text editor to modify the file, as follows: ttyp1 192.168.1.1 950... -
Page 124: Appendix A Pinouts And Cable Wiring
Pinouts and Cable Wiring Appendix A This Appendix covers the following topics: Port Pinout Diagrams RS-232 (male DB9) Pinouts 4W/2W RS-485/RS-422 (Terminal Block) Pinouts Power Input and Relay Output Pinouts Cable Wiring Diagrams Serial Cables Pin Assignments for DB9 and DB25 Connectors... -
Page 125: Rs-232 (Male Db9) Pinouts
OnCell G3100 Series User’s Manual Pinouts and Cable Wiring Port Pinout Diagrams RS-232 (male DB9) Pinouts RS-232 1 2 3 4 5 6 7 8 9 4W/2W RS-485/RS-422 (Terminal Block) Pinouts PIN RS-422/RS-485 RS-485 (4W) (2W) TxD+(B) TxD-(A) RxD+(B) Data+(B) -
Page 126: Cable Wiring Diagrams
OnCell G3100 Series User’s Manual Pinouts and Cable Wiring Cable Wiring Diagrams Serial Cables Female DB9 to Male DB9 Male DB9 Female DB9 Male DB9 Female DB9 RS-232 OnCell G3100 Device Cable Wiring 9 pins 9 pins Female DB9 to Male DB25... -
Page 127: Pin Assignments For Db9 And Db25 Connectors
OnCell G3100 Series User’s Manual Pinouts and Cable Wiring Pin Assignments for DB9 and DB25 Connectors Pin Assignments for DB9 Male and Female Connectors DB9 Male Connector DB9 Female Connector 1 DCD (in) DCD (in) 1 6 DTR (out) DSR (in) 6... -
Page 128: Rfc2217
RFC2217 Appendix B This appendix explains how to set up the environment to use RFC-2217 mode. RFC2217 defines general COM port control options based on the Telnet protocol and is used to allow the mapping of virtual COM ports to network ports. Any third party driver that supports RFC-2217 can be used to implement the virtual COM port on the OnCell G3100. - Page 129 Dynamic Domain Name Server Appendix C This appendix explains how to use the OnCell G3100 with DDNS. When the OnCell G3100 receive its IP address from a DHCP (Dynamic Host Configuration Protocol) server, remote servers will be unable to access it using a fixed IP address. With DDNS (Dynamic Domain Name Server), a remote server can access the OnCell G3100 using its domain name instead of its IP address.
- Page 130 OnCell G3100 Series User’s Manual Dynamic Domain Name Server DHCP Server DHCP Request Host name = OC3100 OC3100 Series DHCP Acknowledge Domain name = moxa.com My fully qualified domain name (FQDN) is OC3100.moxa.com DNS Server The above screenshot shows how DHCP can be set up to update the DNS.
- Page 131 OnCell G3100 Series User’s Manual Dynamic Domain Name Server Configuration DDNS (default=Disable):Use this field to enable or disable DDNS. Server address (default=DynDns.org): Currently, DynDns.org is the only option available for Server address. Host name: In this field, use the name that you created on www.dyndns.com. The OnCell G3100 will update the DynDNS server with this host name.
-
Page 132: Well Known Port Numbers
Well Known Port Numbers Appendix D In this appendix, we provide a list of well known port numbers that may cause network problems if you set the OnCell G3100 to one of these ports. Refer to RFC 1700 for well known port numbers or to the following introduction from the IANA: The port numbers are divided into three ranges: the Well Known Ports, the Registered Ports, and the Dynamic and/or Private Ports. - Page 133 OnCell G3100 Series User’s Manual Well Known Port Numbers TCP Socket Application Service Domain Name Server (domain) Finger protocol (finger) World Wide Web (HTTP) Network News Transfer Protocol (NNTP) Network Time Protocol 160 to 223 Reserved for future use UDP Socket...
- Page 134 Auto IP Report Protocol Appendix E OnCell Series provides several ways to configure Ethernet IP addresses. One of them is DHCP Client. When you set up the OnCell to use DHCP Client to configure Ethernet IP addresses, it will automatically send a DHCP request over the Ethernet to find the DHCP Server. And then the DHCP Server will send an available IP address to the OnCell.
- Page 135 OnCell G3100 Series User’s Manual Auto IP Report Protocol ID Value Description Length Note Server Name Variable ASCII char Hardware ID Little-endian MAC Address 6 bytes MAC address. If the MAC address is "00-90-E8-01-02-03", the MAC[0] is 0, MAC[1] is 0x90(hex), MAC[2] is 0xE8(hex), and so on.
-
Page 136: Gsm Alphabet
GSM Alphabet Appendix F Standard SMS can contain 160 characters. However, the characters typed must be part of the so-called 7-bit default alphabet as specified by GSM 3.38. As shown in the table below, this alphabet contains all ASCII characters and some accented characters. For example, u umlaut (ü) and e with grave (è) are in this set. - Page 137 OnCell G3100 Series User’s Manual GSM Alphabets Λ 0x14 GREEK CAPITAL LETTER LAMBDA Ω 0x15 GREEK CAPITAL LETTER OMEGA Π 0x16 GREEK CAPITAL LETTER PI Ψ 0x17 GREEK CAPITAL LETTER PSI Σ 0x18 GREEK CAPITAL LETTER SIGMA Θ 0x19 GREEK CAPITAL LETTER THETA Ξ...
- Page 138 OnCell G3100 Series User’s Manual GSM Alphabets 0x3B SEMICOLON 0x3C LESS-THAN SIGN < 0x3D EQUALS SIGN 0x3E GREATER-THAN SIGN > 0x3F QUESTION MARK ¡ 0x40 INVERTED EXCLAMATION MARK 0x41 LATIN CAPITAL LETTER A 0x42 LATIN CAPITAL LETTER B 0x43 LATIN CAPITAL LETTER C...
- Page 139 OnCell G3100 Series User’s Manual GSM Alphabets 0x6B LATIN SMALL LETTER K 0x6C LATIN SMALL LETTER L 0x6D LATIN SMALL LETTER M 0x6E LATIN SMALL LETTER N 0x6F LATIN SMALL LETTER O 0x70 LATIN SMALL LETTER P 0x71 LATIN SMALL LETTER Q...
Need help?
Do you have a question about the OnCell G3100 Series and is the answer not in the manual?
Questions and answers