Table of Contents
Advertisement
Advertisement
Table of Contents

Related Manuals for AJP PR5 250 Trail


Summary of Contents for AJP PR5 250 Trail
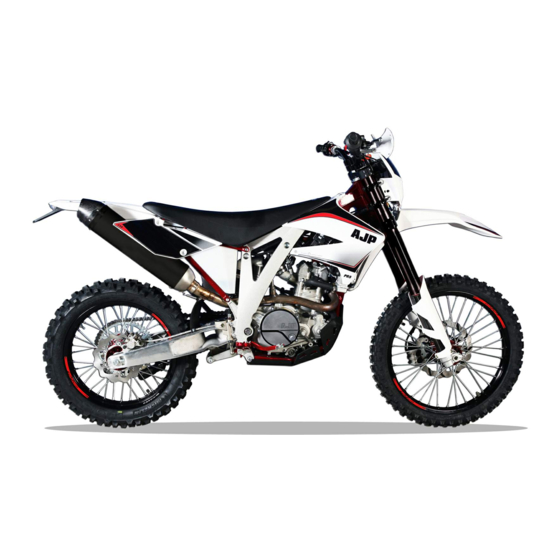
- Page 2 AJP PR5 250 TRAIL / ENDURO / SUPERMOTO / EXTREME OWNER’S MANUAL This manual should be considered a permanent part of the motorcycle and should remain with the motorcycle when resold or otherwise transferred to a new owner or operator. The manual contains important safety information and instructions that...
- Page 3 PERFORMED BY AN AUTHORIZED AJP DEALER. PLEASE DON`T FORGET TO WEAR A HELMET, EYE PROTECTION AND PROTECTIVE CLOTHING WHEN GOING FOR A RIDE. WE WISH YOU A LOT OF FUN RIDING YOUR AJP! AJP MOTOS, SA RESERVES THE RIGHT TO MODIFY ANY EQUIPMENT, TECHNICAL...
-
Page 4: Table Of Contents
TABLE OF CONTENTS CONSUMER INFORMATION COMPONENTS LOCATION CONTROLS LOCATION CONTROLS KEYS IGNITION SWITCH / STEERING LOCK DIGITAL SPEEDOMETER LEFT HANDLEBAR RIGHT HANDLEBAR FUEL FUEL TANK CAP GEARSHIFT LEVER REAR BRAKE PEDAL SIDE STAND SUSPENSION SET-UP ENGINE OIL RECOMMENDATION LIQUID COOLING BREAK-IN (RUNNING-IN) INSPECTIONS BEFORE RIDING RIDING TIPS... -
Page 5: Consumer Information
You should also wear suitable eye to purchase. The addition of unsuitable protection. accessories lead unsafe operating conditions. Please contact RIDING APPAREL your AJP dealer for assist you in Loose, fancy clothing selecting accessories and install them uncomfortable unsafe correctly. - Page 6 Frame number HOMOLOGATION PLATE Homologation plate is placed on the left side of the frame, between steering stem and left frontal cover. AJP PR5 User’s manual – 3 Edition – Rev 1 Page 2...
-
Page 7: Components Location
Air filter 9 Fuel tank Fuse 10 Fuel tank cap Spark plug 11 Gear lever Oil cap 12 Footpeg Rear brake pedal 13 Side rest Oil level glass AJP PR5 User’s manual – 3 Edition – Rev 1 Page 3... -
Page 8: Controls Location
LOCK will loose power consumption of the digital speedometer and headlight and taillight, if turned on. Don’t start engine with lights on to avoid download motorcycles battery. LOCK AJP PR5 User’s manual – 3 Edition – Rev 1 Page 4... -
Page 9: Digital Speedometer
Squeezing the lever disengages the clutch. 2 – Parking light on With the light knob in this position, parking lights in the headlight and taillight will be switched on. AJP PR5 User’s manual – 3 Edition – Rev 1 Page 5... -
Page 10: Fuel
Once fuel tank is transparent, there is not fuel indicator or light warning! Control visually fuel level when you start the motorcycle and when you are riding for some time! AJP PR5 User’s manual – 3 Edition – Rev 1 Page 6... -
Page 11: Gearshift Lever
Don’t side stand. motorcycle without first having the brake system checked by an AJP dealer! AJP PR5 User’s manual – 3 Edition – Rev 1 Page 7... -
Page 12: Suspension Set-Up
Front Fork Trail set-up stability. Adjust the right and left front legs to To adjust compression turn the inner the same settings. screw (1) on the left leg clockwise to AJP PR5 User’s manual – 3 Edition – Rev 1 Page 8... - Page 13 Spring length: Enduro 205mm; counter clockwise for less pre-charge. Supermoto 210mm Fast compression: turn all to close position (+) and then turn 12 clicks to open (-) AJP PR5 User’s manual – 3 Edition – Rev 1 Page 9...
-
Page 14: Engine Oil Recommendation
Trail Version the cover. If oil level is below the lower line, refill immediately. If your engine is PR5 Trail shock absorber only allows losing oil, contact an AJP dealer spring pre-load. immediately. To adjust spring pre-load, untighten fixation bolt (1) of adjusting nut and turn nut (2) left or right until obtain desired spring load. - Page 15 Engine may overheat and damage. Radiator fan If liquid level is below, fill with coolant AJP PR5 has a fan placed on the right liquid until the mentioned level. radiator. It is actuated once coolant liquid temperature reaches 95ºC and Quantity: 1 litre AJP PR5 User’s manual –...
-
Page 16: Break-In (Running-In)
80ºC. components. Observe your first and most critical service. The 1000 Kms service is the most important service your AJP will receive. Your motorcycle will checked carefully, injection system... - Page 17 Manage for the brake system to be same original profile type. checked by an AJP dealer, as complete failure of the system can be avoided. Also check status of the brake hoses ! WARNING !
-
Page 18: Riding Tips
Instructions for initial operation Always turn on the light to make sure that other drivers become - Verify if your AJP dealer performed a previous preparation of the motorcycle. aware of you as early as possible. - Read this manual carefully before you ride. -
Page 19: Starting Off
STARTING OFF operation-related noise while riding, stop immediately, shut the engine Pull the clutch lever and put the engine off and contact an authorized AJP into first gear. Slowly release the clutch dealer. lever and open the throttle at the same Never start your motorcycle without time. -
Page 20: Stopping And Parking
Never park your motorcycle in places where there is fire hazards, such as dry grass or other easily flammable materials. AJP PR5 User’s manual – 3 Edition – Rev 1 Page 16... -
Page 21: Inspection And Maintenance
If you are not sure how to do any of the jobs, have your AJP Your AJP dealer can provide you with dealer to do them. further guidelines. -
Page 22: Maintenance Schedule
Replace front fork oil; Check radiators and water tubes of Replace drive chain. engine cooling system; Check anti freezing liquid on the left radiator; Check radiator fan functioning; AJP PR5 User’s manual – 3 Edition – Rev 1 Page 18... -
Page 23: Maintenance Work
If you are not sure how to do any of the jobs, have your AJP dealer to do them. ! CAUTION ! When cleaning your motorcycle, do not use a high-pressure cleaning... -
Page 24: Drive Chain
5 - Re-tighten the axle nut securely and tighten fixing nuts (2). 6- Recheck the chain slack after tightening, lubricate adjust necessary. AJP PR5 User’s manual – 3 Edition – Rev 1 Page 20... -
Page 25: Brakes
If brake fluid level direction. drops below the minimum level, either the brake system has a leak or the brake pads are completely worn. AJP PR5 User’s manual – 3 Edition – Rev 1 Page 21... - Page 26 In this case, consult an authorized AJP Refilling front brake fluid reservoir dealer immediately. Brake fluid AJP fills the brake systems with DOT 4 brake fluid. Recommended brake fluid: AGIP Brake Fluid DOT4 ! WARNING ! Change brake fluid at least once each two years.
- Page 27 Checking rear brake fluid level The reservoir for the rear disc brake is integrated in brake pump, placed in the right side of the engine, near exhaust pipe. AJP PR5 User’s manual – 3 Edition – Rev 1 Page 23...
- Page 28 At their most worn point brake pad linings should not be thinner than 1mm, otherwise can lead to brake failure. ! WARNING ! Store brake fluid out of reach of AJP PR5 User’s manual – 3 Edition – Rev 1 Page 24...
-
Page 29: Front Wheel Removal
Do not operate hand brake lever To mount rear wheel, follow the above when front wheel been procedure in reverse order, being removed. careful to place the brake disc correctly AJP PR5 User’s manual – 3 Edition – Rev 1 Page 25... -
Page 30: Tires
! WARNING ! apply a new coat of grease to prevent thread from jamming. Do not mount tires that are not approved by AJP. Other tires could TIRES have adverse effects on the way your motorcycle behaves. Tires, air pressure Front and rear wheels may only be fitted with tires having same layout. -
Page 31: Spoke Tightness
Never disconnect battery while Plastic covers must be kept perfectly fitted at their holder to avoid losing a engine is running. This will destroy fuse. the rectifier-regulator. AJP PR5 User’s manual – 3 Edition – Rev 1 Page 27... -
Page 32: Light Bulb Replacement
(2). When placing a new lamp, do not touch the glass body of the lamp so it remains free from fat. Engage retaining clip and AJP PR5 User’s manual – 3 Edition – Rev 1 Page 28... -
Page 33: Throttle Cable
(1) turn adjusting screw accordingly (2). Tighten the counter nut and check whether the throttle grip can be actuated smoothly AJP PR5 User’s manual – 3 Edition – Rev 1 Page 29... -
Page 34: Clutch Cable
If engine is not warm, start engine and let it idle for 5 minutes; Engine oil quality AJP PR5 User’s manual – 3 Edition – Rev 1 Page 30... - Page 35 Oil draining plug: 25 N.m (2,5 Kgf.m); right crankcase and remove main oil Secondary oil filters plugs/covers: filter with a plier. 25 N.m (2,5 Kgf.m); Main oil filter cover bolts: 8 N.m (0,8 AJP PR5 User’s manual – 3 Edition – Rev 1 Page 31...
-
Page 36: Exhaust System
AJP PR5 User’s manual – 3 Edition – Rev 1 Page 32... -
Page 37: Storage Procedures
Engine would not get warmed enough developed water vapour would condensate when cooling, causing valve and exhaust corrosion RE-INITIATION AFTER STORAGE: - Mount the charged battery (check polarity). AJP PR5 User’s manual – 3 Edition – Rev 1 Page 33... -
Page 38: Technical Specifications
90/90 – 21 COMPETITION III 90/90 – 21 100/80 - 17 MICHELIN MICHELIN ENDURO MICHELIN T63 Rear tire 130/70 – 17 COMPETITION III 120/80 – 18 120/80 - 18 AJP PR5 User’s manual – 3 Edition – Rev 1 Page 34...
Need help?
Do you have a question about the PR5 250 Trail and is the answer not in the manual?
Questions and answers