Glow-worm Flexicom 24cx Installation And Servicing
Hide thumbs
Also See for Flexicom 24cx:
- Installation and servicing manual (68 pages) ,
- Installation and servicing (60 pages) ,
- Instructions for use manual (16 pages)

Related Manuals for Glow-worm Flexicom 24cx


Summary of Contents for Glow-worm Flexicom 24cx
-
Page 1: And Servicing
Installation and Servicing Condensing Boilers/ Flexicom cx 24cx G.C.No. 47-047-33 30cx G.C.No. 47-047-34 35cx G.C.No. 47-047-35... -
Page 2: Customer Service
Guarantee Registration Thank you for installing a new Glow-worm appliance in your home. Glow-worm appliances are manufactured to the very highest standard so we are pleased to offer our customers a Comprehensive Guarantee. This product is guaranteed for 24 months from the date of installation or 30 months from the date of manufacture, whichever is the shorter, for parts and labour. -
Page 3: Table Of Contents
Table of ConTenTS These instructions consist of, Installation, Servicing, fault finding, Replacement of Parts and Spares. The instructions are an integral part of the appliance and must, to comply with the current issue of the Gas Safety (Installation and Use) Regulations, be handed to the user on completion of the installation. -
Page 4: Warnings
- Grip the boiler at its base without permission, in writing, by Glow-worm. - Be physically capable Any alteration not approved by Glow-worm, could invalidate the - Use safety clothing where appropriate, e.g. gloves, safety certification, boiler warranty and may also infringe the current footwear. -
Page 5: Statutory Requirements
Building Regulations, approved document L1 ( in the UK) and the following current issues of: 1) Central heating system specification (CheSS) 2) Controls for domestic central heating system and hot water. BRECSU. 0020107232_00 - 02/11 - Glow-worm - 5 -... -
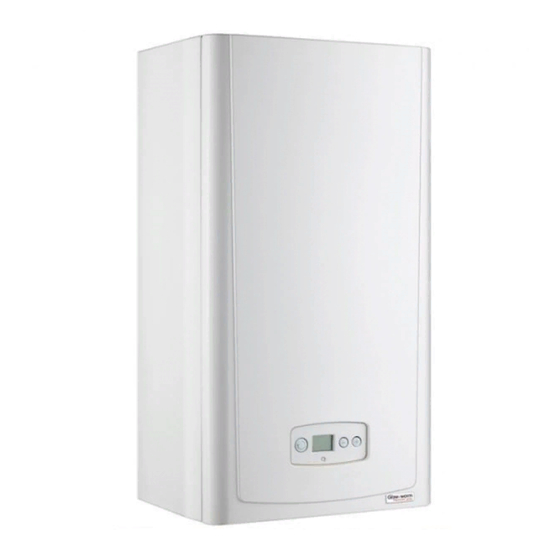
Page 6: Boiler Design
Please quote the name of the appliance, this infomation will be To obtain service, please call your installer or Glow-worm’s own on the name badge on the front of the appliance. service organisation using the telephone number on the inside If in doubt seek advice from the local gas company or Glow- front cover of this literature. -
Page 7: Boiler Specification
DHW max. 25.1 min. 9.3 DHW max. 30.0 min. 9.3 DHW max. 35.0 min. 9.3 CH max. 18.0 min. 9.3 CH max. 24.0 min. 9.3 CH max. 30.0 min. 9.3 SEDBUK rating % 2005 90.3 90.0 90.2 SEDBUK rating % 2009 88.4 88.3 89.1 0020107232_00 - 02/11 - Glow-worm - 7 -... -
Page 8: Boiler Dimensions And Hydraulic Schematic
The general arrangment of the boiler is shown in diagram 2.1 and the hydraulic and gas schematic, diagram 2.2. The data label is positioned on the front of the inner casing panel. Diagram 2.1 Diagram 2.2 0020107232_00 - 02/11 - Glow-worm - 8 -... -
Page 9: Boiler Location, Clearances And Ventilation
The boiler is room sealed so a permanent air vent is not required. 3.6 Cupboard or Compartment Ventilation Due to the high efficiency and hence low casing temperature of this boiler, cupboard or compartment ventilation is not necessary. Leave existing air vents. 0020107232_00 - 02/11 - Glow-worm - 9 -... -
Page 10: Evacuation Of Combustion Gas
4.1 Regulation homeowner to check the flue outlet and clear visible insects from the terminal end. Only flue accessories supplied by Glow-worm H* and J* See diagram 4.2. These dimensions comply with must be used. the building regulations, but they may need to be increased to Different flue outlet configurations can be carried out. - Page 11 (2) These dimensions comply with the building regulations, from surface or a boundary facing the terminal but they may need to be increased to avoid wall staining and nuisance from pluming depending on site conditions. 0020107232_00 - 02/11 - Glow-worm - 11 -...
- Page 12 20 m Type Max length Each time an additional 90° bend is necessary (or 2 at 45°), the Ø 60/100 length (L) must be reduced by 1 m. Ø 80/125 20 m 0020107232_00 - 02/11 - Glow-worm - 12 -...
- Page 13 4.30 4.30 4.30 Load (40C°/30°C) At Max Thermal 11.67 14.10 16.39 Load (80C°/60°C) exhaust temperature (ºC) At Min Thermal 33.2 33.2 36.0 Load (40C°/30°C) At Max Thermal 73.3 87.4 86.0 Load (80C°/60°C) 0020107232_00 - 02/11 - Glow-worm - 13 -...
-
Page 14: Water Systems
BS 5449 and BS 7593 on the use of inhibitors in central heating systems. Examples are Sentinel X100 Fernox Protector or Salamander corrosion guard inhibitor. Diagram 5.1 Diagram 5.2 0020107232_00 - 02/11 - Glow-worm - 14 -... -
Page 15: Water Pressure
5.7 Domestic Water flow Rate The water flow rate is restricted to a maximum 9.4 l/min for 24cx, 11.7 l/min for 30cx and 13.0l/min for 35cx by a restrictor factory fitted within the boiler. Diagram 5.3 0020107232_00 - 02/11 - Glow-worm - 15 -... -
Page 16: Expansion Vessel
In Gb, Guidance on vessel sizing is also given in the current issue of BS5449 and BS7074 Part 1. In IE, current edition of I.S.813 “Domestic Gas Installations”. Diagram 5.4 0020107232_00 - 02/11 - Glow-worm - 16 -... - Page 17 INSTALLATION H - Boiler Securing Screw Diagram 6.1 0020107232_00 - 02/11 - Glow-worm - 17 -...
-
Page 18: Installation Preparation
Mark, drill and plug at fixing points and secure the jig support Direct Rear flue only - The flue can now be pulled back plate, see diagram 6.3. through the hanging bracket and secured as shown in diagram 6.3. 0020107232_00 - 02/11 - Glow-worm - 18 -... -
Page 19: Gas/Water Connections
Fit ‘O’ ring seal to the Double Check Valve assembly. be inspected, tested for tightness and purged in accordance with the current issue of BS6891 and in IE the current edition of I.S.813 “Domestic Gas Installations”. Diagram 7.1 Diagram 7.2 0020107232_00 - 02/11 - Glow-worm - 19 -... -
Page 20: Boiler Fixing
D - Domestic Cold Water E - Washers (not shown) F - Condensate Connection G - Double check inlet valve H - Safety Discharge Valve Diagram 8.2 0020107232_00 - 02/11 - Glow-worm - 20 -... -
Page 21: Safety Discharge Valve And Condensate Connections
75mm high trap inside the boiler. Fitting an extra trap may cause the boiler siphon to work incorrectly. Refer to BS5546 or BS6798 for advice on disposal of boiler condensate. 0020107232_00 - 02/11 - Glow-worm - 21 -... - Page 22 INSTALLATION Diagram 9.2 0020107232_00 - 02/11 - Glow-worm - 22 -...
-
Page 23: Electrical Connection
● This appliance must be wired in accordance with these instructions. Any fault arising from incorrect wiring cannot be put right under the terms of the Glow-worm guarantee. ● All system components must be of an approved type. Electrical components have been tested to meet the equivalent requirements of the BEAB. -
Page 24: Commissioning
Test for gas tightness and purge air from the gas supply. drain point opened to enable a reading of the system pressure to be taken. If the manometer kit is not used caution should be taken not to overpressurise the system. 0020107232_00 - 02/11 - Glow-worm - 24 -... -
Page 25: Filling Domestic Water Circuit
‘E’ and pull the flexible hose from ● the gas service isolation valve, diagram 11.1, is open. the double check valve. As an option, a chargeable boiler performance and function Diagram 11.1 0020107232_00 - 02/11 - Glow-worm - 25 -... - Page 26 MODE Diagram 11.2 at maximum rate, it will be necessary to force it to maximum. service can be provided by Glow-worm Service by calling After a period of 10 minutes, with the boiler operating in C.H. telephone No. 01773 828100.
-
Page 27: Instruct The User
Commissioning and Service Record with the user. logbook. Ie: it is necessary to complete a “Declaration of Conformity” to indicate compliance to I.S.813. An example of this is given in the current edition of I.S.813. 0020107232_00 - 02/11 - Glow-worm - 27 -... -
Page 28: Servicing 12
35cx 8.8 to 9.8 +0.3 0.004 an ⅛ of a turn, waiting 1 minute to allow the appliance to - 0.3 stabilise before checking or making further adjustments. 0020107232_00 - 02/11 - Glow-worm - 28 -... -
Page 29: Combustion Ratio
CO/CO2 ratio is acceptable. Advice can be sought from the Glow-worm Technical Helpline. 12.1 Servicing noTe: If the Combustion CO2, CO/CO2 ratio & Gas rate checks did not require adjustment then it will not be necessary Diagram 12.4... -
Page 30: Spark Electrode
Carefully flush by spraying water into the heat exchanger, any remaining debris should pass through the condensate trap (Ensure the water is kept away from electrical components). Diagram 12.6 0020107232_00 - 02/11 - Glow-worm - 30 -... - Page 31 SCREW (3) SECURING SUPPORT BRACKET IGNITION LEAD SPADE CONNECTOR IGNITER EARTH CONNECTION UNIT Diagram 12.9 VALVE TUBING ELECTRICAL PIPE CONNECTION (removed) Diagram 12.7 RETAINING BRACKET SECURING Diagram 12.10 Diagram 12.8 Diagram 12.11 0020107232_00 - 02/11 - Glow-worm - 31 -...
-
Page 32: Service Completion
Re-check the combustion as described at the beginning of this section. On completion of the service the “Benchmark” Service Record should be completed. Diagram 12.12 SECURING SCREW SUMP SERVICE CONDENSE TRAP AND SIPHONIC DRAIN FILL LEVEL Diagram 12.13 0020107232_00 - 02/11 - Glow-worm - 32 -... -
Page 33: Fault Finding
See diagram 13.7 for available parameters. 13.5 Status Codes The status codes provide information about the current operating condition of the boiler and can be accessed through the diagnostic display, refer to diagram 13.8. Diagram 13.3 0020107232_00 - 02/11 - Glow-worm - 33 -... - Page 34 MAINTENANCE MODE Diagram 13.4 0020107232_00 - 02/11 - Glow-worm - 34 -...
-
Page 35: Central Heating
MAINTENANCE CenTRal HeaTInG Diagram 13.5 0020107232_00 - 02/11 - Glow-worm - 35 -... -
Page 36: Fault Codes
MAINTENANCE faUlT CoDeS Diagram 13.6 0020107232_00 - 02/11 - Glow-worm - 36 -... -
Page 37: Central Heating Mode
Flow / Return - sensor check is running, demand Check flow & return thermistor connections to pipes. (DHW or heating) is blocked. Check harness connection to thermistor. Check harness wires are not trapped between any internal components. Diagram 13.7 0020107232_00 - 02/11 - Glow-worm - 37 -... - Page 38 - buttons. Once the value has been changed it must be saved by holding the ‘MODE’ button for approximately 5 seconds. This will return to the diagnostic number selector. DIaGnoSTIC CoDeS - leVel 1 Installer Access Indicates read and write function - all other diagnostics are read only Diagram 13.8 0020107232_00 - 02/11 - Glow-worm - 38 -...
-
Page 39: Replacement Of Parts
14.3 Ignition lead For access, refer to section 15.1. Diagram 14.2 Pull the spark plug style connector off the spark electrode and the spade connector connected to the igniter unit, see diagram 12.6. 0020107232_00 - 02/11 - Glow-worm - 39 -... -
Page 40: Gas Valve
Pull Silencer rear away from fan/gas valve assembly. The rear silencer is a push fit so no tools or fixings are required Diagram 14.3 for its removal or fitting, see diagram 14.11. 0020107232_00 - 02/11 - Glow-worm - 40 -... -
Page 41: Condensate Trap
Remove the thermistor from the retaining clip. Note that the polarity of the wiring to thermistor is unimportant. Note that the polarity of the wiring to thermistor is unimportant. Diagram 14.4 Diagram 14.5 0020107232_00 - 02/11 - Glow-worm - 41 -... -
Page 42: Automatic Air Vent
Fit the new automatic air vent and ‘O’ ring ensuring the vent cap is left loose. Refill, vent and pressurise the boiler and check for leaks. Diagram 14.8 Diagram 14.9 Diagram 14.6 0020107232_00 - 02/11 - Glow-worm - 42 -... -
Page 43: Flow Sensor
(Ensure that the original o-ring has not been retained in the hydroblock.) Fit the new three-way valve assembly. Reassemble, refill, vent and pressurise the boiler and check for leaks. Diagram 14.11 0020107232_00 - 02/11 - Glow-worm - 43 -... - Page 44 Remove the heat exchanger by pulling forward and tilting backwards to ease removal complete with sump, return pipe and flanged elbows. Remove the return pipe then discard the Diagram 14.13 heat exchanger complete with sump and flanged elbows. 0020107232_00 - 02/11 - Glow-worm - 44 -...
- Page 45 After replacing parts, close the drain valve and remove the hose. Open the heating flow and return isolating valves and refill, vent and pressurise the heating circuit, refer to Section 11, Commissioning. 0020107232_00 - 02/11 - Glow-worm - 45 -...
- Page 46 14.28 fuse - Main PCb - Control box For access, refer to section 14.26. The fuse is located at the top left hand corner of the main PCB, see diagram 14.16. Diagram 14.17 Diagram 14.18 Diagram 14.16 0020107232_00 - 02/11 - Glow-worm - 46 -...
-
Page 47: Spare Parts
15 Spare Parts When ordering spare parts, contact Glow-worm’s own service organisation using the telephone number on the inside front cover of this booklet. Please quote the name of the appliance and serial number, to be found on the data label. If ordering from British Gas also quote the G.C. -
Page 48: Manual Handling
0020107232_00 - 02/11 - Glow-worm - 48 -... -
Page 49: Declaration Of Conformity
MAINTENANCE 17 Declaration of Conformity 0020107232_00 - 02/11 - Glow-worm - 49 -... -
Page 51: Service Interval Record
SERVICE INTERVAL RECORD It is recommended that your heating system is serviced regularly and that you complete the appropriate Service Interval Record Below . Service Provider. Before completing the appropriate Service Interval Record below, please ensure you have carried out the service as described in the boiler manufacturer’s instructions. - Page 52 0020107232 GLOW-WORM Nottingham Road, Because of our constant endeavour for Belper, Derbyshire. improvement, details may vary slightly DE56 1JT from those shown in these instructions. www.glow-worm.co.uk...
Need help?
Do you have a question about the Flexicom 24cx and is the answer not in the manual?
Questions and answers