Table of Contents
Advertisement
Quick Links
Download this manual
See also:
Instruction Manual
Advertisement
Table of Contents

Related Manuals for National 160 SERIES


Summary of Contents for National 160 SERIES
- Page 1 National Optical & Scientific Instruments Inc. 6508 Tri-County Parkway Schertz, Texas 78154 Phone (210) 590-9010 Fax (210) 590-1104 INSTRUCTIONS FOR 160 SERIES COMPOUND BIOLOGICAL MICROSCOPES Copyright © 1/2/01 National Optical & Scientific Instrument Inc.
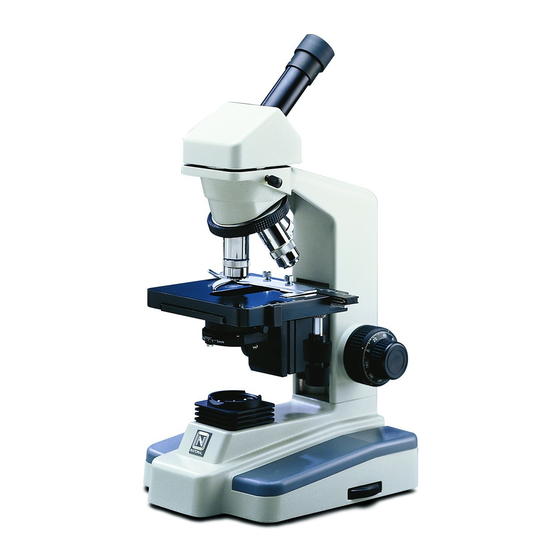
- Page 2 Models 160 (monocular head), 161 (dual head), 162 (binocular head), 163 (trinocular head), all have the same stand and stand features…only the head portion differs…illustrated is Model 162. Knurled diopter ring Sliding interpupillary adjustment, grips located on both left and right side of diopter scale Widefield 10x/18 eyepiece...
- Page 3 INTRODUCTION Thank you for your purchase of a National microscope. It is a well built, precision instrument carefully checked to assure that it reaches you in good condition. It is designed for ease of operation and years of carefree use. The information in this manual probably far exceeds what you will need to know in order to operate and maintain your microscope.
- Page 4 and carefully remove eyepieces, rubber eyeshields, vertical viewing eyepiece tube, filters, fuse and dust cover. Un-wrap the components, making certain that lens surfaces do not come in contact with dust, dirt, fingerprints. Damage to optical surfaces can result from such contaminants, and reduce image quality. ASSEMBLY Abbe Condenser: Pre-mounted in unit.
-
Page 5: Operation
Trinocular head provided with a three position sliding rod to direct light through microscope. The three position sliding rod (b) allows user to easily direct microscope image into desired path. Rod pushed completely into head; 100% of microscope image is directed to binocular eyepieces. - Page 6 C. Focusing the microscope. Position the 4x objective lens into the optical path, making sure that lens is properly indexed in its click- stop position. Place standard specimen slide (cover slip up) on top of stage surface. Swing moveable finger on slide holder outward. Place specimen slide against fixed side of slide holder.
- Page 7 Objective Specification Chart Objective N.A. Color Code Ring Field of View Magnification Din 4X 0.10 4.5mm Din 10X 0.25 Yellow 1.8mm 100X Din 40X 0.65 Blue 0.45mm 400X Din 100X 1.25 White 0.18mm 1000X When finished viewing, all parts that come in contact with oil must be cleaned. Failure to do so could permanently damage the 100x oil immersion objective lens.
-
Page 8: Maintenance
Proceed with operation of camera according to manufacturers directions. C. To mount a digital c-mount camera, optional accessory #930-005 video adaptor (d.) is required. This adaptor has a 0.5x lens which assures image parfocality when viewed through a video monitor. Observe that video adaptor has two black knurled rings. -
Page 9: Electrical Maintenance
Carefully clean lamp to assure that it is clean and free of all fingerprints. Close hinged door and tighten locking screw. Replacement of fuse (National #801-160). The fuse is located at right rear side of microscope base. To remove fuse from holder, insert a 6mm screwdriver blade into slot located in rear of fuse cap. -
Page 10: Troubleshooting
TROUBLESHOOTING ELECTRICAL PROBLEM REASON FOR PROBLEM SOLUTION Light fails to operate Outlet inoperative. Have qualified service technician repair outlet AC power cord not connected. Plug into outlet. Lamp burned out. Replace lamp. Fuse burned out. Replace fuse. Fuse burns out too soon. Replace with proper fuse (Time delay). -
Page 11: Optional Accessories And Parts
OPTIONAL ACCESSORIES AND PARTS: #610-160 WF10X Eyepiece #610-160R WF10X eyepiece w/reticle, 10mm/100div. #704-160 DIN 4X objective lens, 0.10 N.A. #710-160 DIN 10X objective lens, 0.25 N.A. #740-160 DIN 40X objective lens, 0.65 N.A. #799-160 DIN 100X objective lens, 1.25 N.A. #704-160ASC DIN 4X Super High Contrast objective lens, 0.10 N.A.
Need help?
Do you have a question about the 160 SERIES and is the answer not in the manual?
Questions and answers