Philips 220SW9 User Manual
Hide thumbs
Also See for 220SW9:
- User manual (106 pages) ,
- User manual (119 pages) ,
- User manual (111 pages)

Related Manuals for Philips 220SW9


Summary of Contents for Philips 220SW9
- Page 1 Philips LCD Monitor Electronic User’s Manual Downloaded from ManualMonitor.com Manuals...
-
Page 2: Safety And Troubleshooting Information
DC power cord for normal operation. Please use approved power cord provided by Philips all the time. If your power cord is missing, please contact with your local service center. (Please refer to Customer Care... - Page 3 In order to maintain the best performance of your monitor and use it for a longer lifetime, please use the monitor in a location that falls within the following temperature and humidity ranges. Temperature: 0-40°C 32-95°F Humidity: 20-80% RH IMPORTANT: Always activate a moving screen saver program when you leave your monitor unattended.
-
Page 4: Faqs (Frequently Asked Questions)
When I install my monitor what should I do if the screen shows 'Cannot display this video Peripherals mode'? LCD Panel Technology Ergonomics, Ecology Recommended video mode for Philips 22": 1680x1050 @60Hz. and Safety Standards Unplug all cables, then connect your PC to the monitor that you used Troubleshooting previously. - Page 5 What if I get lost when I am making monitor adjustments? Simply press the MENU button, the Setup button, then select 'Reset' to recall all of the original factory settings. What is the Auto function? The AUTO adjustment key restores the optimal screen position, phase and clock settings by pressing of a single button –...
- Page 6 This measurement is expressed in terms of absolute scale, (degrees Kelvin). Lower Kelvin temperatures such as 2004K are red; higher temperatures such as 9300K are blue. Neutral temperature is white, at 6504K. Can the Philips LCD Monitor be mounted on the wall? Downloaded from ManualMonitor.com Manuals...
-
Page 7: Screen Adjustments
Yes. Philips LCD monitors have this optional feature. For standard VESA mount holes on the rear cover allows the user to mount the Philips monitor on most of the VESA standard arms or accessories. We recommend to contact your Philips sales representative for more information. -
Page 8: Lcd Panel Technology
and Vista. What is USB (Universal Serial Bus)? Think of USB as a smart plug for PC peripherals. USB automatically determines resources (like driver software and bus bandwidth) required by peripherals. USB makes necessary resources available without user intervention. There are three main benefits of USB. - Page 9 What differentiates passive matrix LCDs from active matrix LCDs? An LCD is made with either a passive matrix or an active matrix display grid. An active matrix has a transistor located at each pixel intersection, requiring less current to control the luminance of a pixel. For this reason, the current in an active matrix display can be switched on and off more frequently, improving the screen refresh time (your mouse pointer will appear to move more smoothly across the screen, for example).
-
Page 10: Ergonomics, Ecology And Safety Standards
European 'Law' that relates to health, safety, environment and consumer protection, much the same as the U.S. National Electrical Code and UL Standards. Does the LCD monitor conform to general safety standards? Yes. Philips LCD monitors conform to the guidelines of MPR-II and TCO 99/03 Downloaded from ManualMonitor.com Manuals... - Page 11 After I change new PC, I found this information on screen, how can I do? Because you activate Theft Deterrence function in SmartControl II. Please contact IT manager or Philips Service Center. More information is provided in the Regulatory Information section.
-
Page 12: Troubleshooting
• FAQs This page deals with problems that can be corrected by a user. If the problem still persists after you have tried these • Common Problems solutions, contact Philips customer service representative. • Imaging Problems Common Problems • Regulatory Information •... - Page 13 Press the Auto button. Adjust the image position using the Phase/Clock of Setup in Display position is incorrect OSD Main Controls. Check that the signal cable is properly connected to the Image vibrates on the screen graphics board or PC. Vertical flicker appears Press the Auto button.
- Page 14 Adjust blue "power on" light using the power LED of Setup in Adjust blue "power on" light OSD Main Controls. For further assistance, refer to the Consumer Information Centers list and contact Philips customer service representative. RETURN TO TOP OF THE PAGE Downloaded from ManualMonitor.com Manuals...
-
Page 15: Regulatory Information
Ergonomie Hinweis (nur Deutschland) Good visual ergonomics and image quality in order to improve the working environment for the user and . Philips End-of-Life Disposal to reduce sight and strain problems. Important parameters are luminance, contrast, resolution, Information for UK only reflectance, colour rendition and image stability. - Page 16 Philips establishes technically and economically viable objectives to optimize the environmental performance of the organization's product, service and activities. From the planning, design and production stages, Philips emphasizes the important of making products that can easily be recycled. At Philips, end-of-life management primarily entails participation in national take-back initiatives and recycling programs whenever possible, preferably in cooperation with competitors.
- Page 17 RETURN TO TOP OF THE PAGE CE Declaration of Conformity Philips Consumer Electronics declare under our responsibility that the product is in conformity with the following standards - EN60950-1:2001 (Safety requirement of Information Technology Equipment) - EN55022:1998 (Radio Disturbance requirement of Information Technology Equipment)
- Page 18 Federal Communications Commission (FCC) Notice (U.S. Only) This equipment has been tested and found to comply with the limits for a Class B digital device, pursuant to Part 15 of the FCC Rules. These limits are designed to provide reasonable protection against harmful interference in a residential installation. This equipment generates, uses and can radiate radio frequency energy and, if not installed and used in accordance with the instructions, may cause harmful interference to radio communications.
- Page 19 THIS CLASS B DIGITAL APPARATUS MEETS ALL REQUIREMENTS OF THE CANADIAN INTERFERENCE- CAUSING EQUIPMENT REGULATIONS. RETURN TO TOP OF THE PAGE FCC Declaration of Conformity Trade Name: Philips Philips Consumer Electronics North America P.O. Box 671539 Responsible Party: Marietta , GA 30006-0026 1-888-PHILIPS (744-5477)
- Page 20 Toutes modifications n'ayant pas reçu l'approbation des services compétents en matière de conformité est susceptible d'interdire à l'utilisateur l'usage du présent équipement. N'utiliser que des câbles RF armés pour les connections avec des ordinateurs ou périphériques. CET APPAREIL NUMERIQUE DE LA CLASSE B RESPECTE TOUTES LES EXIGENCES DU REGLEMENT SUR LE MATERIEL BROUILLEUR DU CANADA.
- Page 21 The phasing conductor of the room's electrical installation should have a reserve short-circuit protection device in the form of a fuse with a nominal value no larger than 16 amperes (A). To completely switch off the equipment, the power supply cable must be removed from the power supply socket, which should be located near the equipment and easily accessible.
- Page 22 Paikka/Ilmankierto VAROITUS: SIJOITA LAITE SITEN, ETTÄ VERKKOJOHTO VOIDAAN TARVITTAESSA HELPOSTI IRROTTAA PISTORASIASTA. Plassering/Ventilasjon ADVARSEL: NÅR DETTE UTSTYRET PLASSERES, MÅ DU PASSE PÅ AT KONTAKTENE FOR STØMTILFØRSEL ER LETTE Å NÅ. RETURN TO TOP OF THE PAGE BSMI Notice (Taiwan Only) RETURN TO TOP OF THE PAGE Ergonomie Hinweis (nur Deutschland) Der von uns gelieferte Farbmonitor entspricht den in der "Verordnung über den Schutz vor Schäden durch...
- Page 23 Please find out about the local regulations on how to dispose of your old monitor from your local Philips dealer. (For customers in Canada and U.S.A.) This product may contain lead and/or mercury.
- Page 24 The wires in the mains lead are coloured in accordance with the following code: BLUE - "NEUTRAL" ("N") BROWN - "LIVE" ("L") GREEN & YELLOW - "GROUND" ("G") 1. The GREEN AND YELLOW wire must be connected to the terminal in the plug which is marked with the letter "G" or by the Ground symbol or coloured GREEN or GREEN AND YELLOW.
- Page 25 Philips is committed to develop, produce and market products that cause no adverse health effects. Philips confirms that if its products are handled properly for their intended use, they are safe to use Downloaded from ManualMonitor.com Manuals...
- Page 26 Philips plays an active role in the development of international EMF and safety standards, enabling Philips to anticipate further developments in standardization for early integration in its products. RETURN TO TOP OF THE PAGE...
-
Page 27: Other Related Information
Other Related Information Safety and Troubleshooting FAQs Information for Users in the U. S. Troubleshooting Regulatory Information For units set at 115 V : Information for Users in the U.S Use a UL Listed Cord Set consisting of a minimum 18 AWG, Type SVT or SJT three conductor cord a maximum of 15-feet long and a parallel blade, grounding type attachment plug rated 15 A, 125 V. -
Page 28: About This Manual
Notational Descriptions About This Guide This electronic user's guide is intended for anyone who uses the Philips LCD Monitor. It describes the LCD monitor's features, setup, operation and other important information. Its contents are identical to the information in our printed version. - Page 29 RETURN TO TOP OF THE PAGE ©2009 Koninklijke Philips Electronics NV All rights reserved. Reproduction, copying, use, modification, hiring, renting, public performance, transmission and/or broadcasting in whole or in part is prohibited without written consent of Philips Electronics NV Downloaded from ManualMonitor.com Manuals...
-
Page 30: Product Information
Your LCD Monitor Smartimage SmartContrast Your LCD monitor SmartSaturate SmartSharpness Congratulations on your purchase and welcome to Philips. To fully benefit from the support that Philips offers, register Lead-free Product your product at. www.philips.com/welcome Technical Specifications Resolution & Preset Modes... - Page 31 Press to launch the SmartImage on screen display; Keep press to toggle between Office Work, Image Viewing, Entertainment, Economy, and Off; The SmartImage on screen display will remain on screen for 5 seconds or you can also press ”OK” to make confirmation.
- Page 32 Office Work: Enhances text and dampens brightness to increase readability and reduce eye strain. This mode significantly enhances readability and productivity when you're working with spreadsheets, PDF files, scanned articles or other general office applications. Image Viewing: This profile combines color saturation, dynamic contrast and sharpness enhancement to display photos and other images with outstanding clarity in vibrant colors - all without artifacts and faded colors.
- Page 33 How does it work? When you active SmartContrast which will analysis the content you are displaying in real time to adjust colors and control backlight intensity. This function can obviously enhance contrast in dynamic for more entertainment fun when viewing videos or playing games. RETURN TO TOP OF THE PAGE SmartSaturate What is it?
-
Page 34: Technical Specifications
Philips eliminated toxic substances like lead from its displays. Lead-free display helps protect your health and promotes environmentally sound recovery and disposal of waste from electrical and electronic equipment.Philips complies with the European Community stringent RoHS Directive mandating restrictions on hazardous substances in electrical and electronic equipment. - Page 35 * This data is subject to change without notice. RETURN TO TOP OF THE PAGE Resolution & Preset Modes A. Maximum Resolution For 220SW9 1680 x 1050 at 60 Hz (analog input) 1680 x 1050 at 60 Hz (digital input) B. Recommended Resolution...
-
Page 36: Automatic Powersaving
H. freq (kHz) Resolution V. freq (Hz) 31.469 640*350 70.086 31.469 720*400 70.087 31.469 640*480 59.940 35.000 640*480 67.000 37.500 640*480 75.000 35.156 800*600 56.250 37.879 800*600 60.317 46.875 800*600 75.000 48.363 1024*768 60.004 60.023 1024*768 75.029 63.981 1280*1024 60.020 79.976 1280*1024 75.025... -
Page 37: Physical Specifications
Switch Off < 0.8 W RETURN TO TOP OF THE PAGE Physical Specifications Tilt -5°+2/-0 ~+ 20°+3/-0 100 ~ 240 VAC, 50/60 Hz Power supply 45W* (typ.) Power consumption 0° C to 40° C (operating) Temperature -20° C to 60° C (storage) 20% to 80% Relative humidity System MTBF... - Page 38 No connect No connect No connect DDC Clock +5V Power T.M.D.S. Clock Shield DDC Data Ground (for +5V) T.M.D.S. Clock+ No connect Hot Plug Detect T.M.D.S. Clock- 2.The 15-pin D-sub connector (male) of the signal cable: Assignment Assignment Pin No. Pin No.
-
Page 39: Product Views
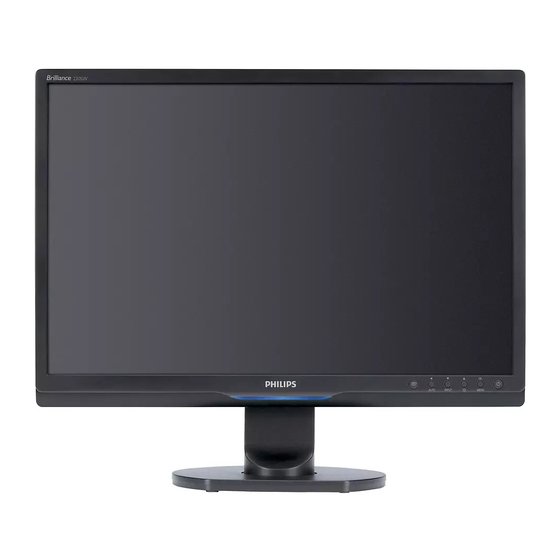
Product Views Follow the links to see various views of the monitor and its components. Front View Product Description RETURN TO TOP OF THE PAGE Physical Function Tilt RETURN TO TOP OF THE PAGE Downloaded from ManualMonitor.com Manuals... -
Page 40: Philips' Flat Panel Monitors Pixel Defect Policy
TFT LCD panels used in flat panel monitors are sometimes unavoidable. No manufacturer can guarantee that all panels will be free from pixel defects, but Philips guarantees that any monitor with an unacceptable number of defects will be repaired or replaced under warranty. This notice explains Pin Assignment the different types of pixel defects and defines acceptable defect levels for each type. - Page 41 Two or three adjacent dark sub pixels Proximity of Pixel Defects Because pixel and sub pixels defects of the same type that are near to one another may be more noticeable, Philips also specifies tolerances for the proximity of pixel defects. Downloaded from ManualMonitor.com Manuals...
- Page 42 In order to qualify for repair or replacement due to pixel defects during the warranty period, a TFT LCD panel in a Philips flat panel monitor must have pixel or sub pixel defects exceeding the tolerances listed in the following tables.
- Page 43 * 1 or 2 adjacent sub pixel defects = 1 dot defect RETURN TO TOP OF THE PAGE Downloaded from ManualMonitor.com Manuals...
- Page 44 Thus, Philips provide you a compact version of SmartManage, SmartManage Lite. You can use SmartManage Lite to manage your Philips Monitors via LAN. Please. refer to below comparison chart and determine if which one suit for your environment best.
-
Page 45: Installation
SmartManage Features and Benefits The Philips SmartManage is a working console for IT management to gather monitors assets information, run asset report, control assets security, monitor assets security, and issue instant messages to monitor users. Philips SmartManage includes the following major features: Provides an additional security measure that helps corporate users safeguard their investment. - Page 46 2. Installer – Install Shield Legal Choose "I accept" for installation process. Cancel prompts user if you want to cancel installation. Downloaded from ManualMonitor.com Manuals...
- Page 47 3. Installer – Install Shield Program Files Check the box if you wants to install SmartManage Lite Asset Management services. Personal user usually not need to active this function.Read SmartManage section in this manual before you choose SmartManage Lite function Downloaded from ManualMonitor.com Manuals...
- Page 48 4. Installer – Installation Process Follow the instruction and complete the installation. You can launch after installation complete. If you want to launch later, you can either click the shortcut on desktop or toolbar. Downloaded from ManualMonitor.com Manuals...
- Page 49 Downloaded from ManualMonitor.com Manuals...
- Page 50 Downloaded from ManualMonitor.com Manuals...
-
Page 51: Start To Use
Start to use: 1. First launch –Wizard The first time after installation of SmartControl II, it will automatically go to Wizard for first time launch. The wizard will guide you through adjustment your monitor performance step by step. You can go to Plug-in menu to launch wizard later on as well. You can adjust more options without wizard by Standard pane. - Page 52 2. Start with Standard pane: Adjust menu: Adjust Menu allow you to adjust Brightness, Contrast, Focus, Position and Resolution. You can follow the instruction and do the adjustment. Cancel prompts user if you want to cancel installation. Tab Heading Sub Menu Display in Analog Display in Digital Adjust...
- Page 53 Downloaded from ManualMonitor.com Manuals...
- Page 54 Color menu: Color Menu allow you to adjust RGB, Black Level, White Point, Color Calibration, and SmartImage (Please refer to SmartImage section). You can follow the instruction and do the adjustment. Refer to below table for sub-menu item base on your input. Example for Color Calibration Tab Heading...
- Page 55 "Show Me" starts color calibration tutorial. Start - starts the 6-step color calibration sequence. Quick View loads the before/after images. Downloaded from ManualMonitor.com Manuals...
- Page 56 To return to Color home pane, click the Cancel button. Enable color calibration - by default is on. If unchecked, does not allow for color calibration to happen, dimes out start and quick view buttons. Must have patent info in calibration screen. First color Calibration Screen: Previous button is disabled until the second color screen.
- Page 57 Plug-Ins - Asset Management Pane will only be active when selecting Asset Management from the drop-down Plug Ins menu. Displays Assent Management information on Managment, Description, Serial Number, Current Timing, Domain Name, and Asset Management Status. To return to Plug-in home pane select the plug-in tab. Plug-Ins - Theft Deterence Pane will only be active when selecting Theft from the drop-down Plug Ins menu.
- Page 58 User can enter PIN between 4 and 9 digits numbers only. After entering PIN, Accept button takes user to the pop-up dialog box on the following page. Minimum minutes set to 5. Slider set to 5 by default. Does not require the display be attached to a different host to go into theft mode. Once a PIN is entered and accepted, the following dialog box appears: Click on No button takes user to the following screen.
- Page 59 Click on Yes button takes user to secure web site landing page. After creating PIN, the Theft Deterrence pane will indicate Theft Deterrence Enabled and provide PIN Options button: Theft Deterrence Enabled is displayed. Disable Theft opens pane screen on next page. PIN Options button only available after user creates PIN, button opens secure PIN web site.
- Page 60 Options>Preferences - Will only be active when selecting Preferences from the drop-down Options menu. On a non-supported display capable of DDC/CI, only the Help and Options tabs are available. Displays current preference settings. A checked box enables the feature. The check box is a toggle. Enable Context Menu on desktop is checked (On) by default.
- Page 61 Display the Source instruction pane and current input source setting. On single input displays, this pane will not be visible. Options>Audio - Will only be active when selecting Volume from the drop-down Options menu. On a non-supported display capable of DDC/CI, only the Help and Options tabs are available. Option>Audio Pivot Downloaded from ManualMonitor.com Manuals...
- Page 62 Help>User Manual - Will only be active when selecting User Manual from the drop-down Help menu. On a non-supported display capable of DDC/CI, only the Help and Options tabs are available. Help>Version - Will only be active when selecting Version from the drop- down Help menu. On a non- supported display capable of DDC/CI, only the Help and Options tabs are available.
- Page 63 Context Sensitive menu The Context Sensitive menu is Enabled by default. If Enable Context Menu has been checked in the Options>Preferences pane, then the menu will be visible. The Context Menu has four entries: SmartControll II - When selected the About Screen is displayed. Select Preset - Provides a hierarchical menu of saved presets for immediate use.
- Page 64 The task tray menu can be displayed by right-clicking on the SmartControl II icon from the task tray. Left Click will launch the application. The task tray has five entries: Help - Access to User Manual file: opnes User Manual file using the default browser window. Technical Support - displays the tech support page.
- Page 65 Install the driver. Remove SmartControl, and re-install it once more. If it is still not working, we are sorry that the graphic adaptor is not supported. Please pay attention to Philips web site for any updated SmartControl driver available.
- Page 66 In a monitor with the Smartlmage feature, the sRGB scheme of color temperature function in SmartControl is not responding, why? When Smartlmage is enabled, the sRGB scheme is disabled automatically. To use sRGB, you need to disable Smartlmage with the button at the front bezel of your monitor.
-
Page 67: Installing Your Lcd Monitor
Installing Your LCD Monitor Front View Produt Description Connecting to Your PC Front View Product Description The Base Getting Started Optimizing Performance To switch monitor's power On and Off To access the OSD menu To adjust the OSD menu To adjust brightness of the display Input To change the signal input source Automatically adjust the horizontal position, vertical position, phase and... -
Page 68: Optimizing Performance
RETURN TO TOP OF THE PAGE Rear View VGA input DVI-D input (available for selective models) AC power input Kensington anti-thief lock RETURN TO TOP OF THE PAGE Optimizing Performance For best performance, ensure that your display settings are set at 1680x1050, 60Hz. Downloaded from ManualMonitor.com Manuals... - Page 69 Note: You can check the current display settings by pressing the 'OK' button once. The current display mode is shown in OSD main controls called RESOLUTION. RETURN TO TOP OF THE PAGE Downloaded from ManualMonitor.com Manuals...
-
Page 70: Connecting To Your Pc
Front View Product Connecting to Your PC Description Accessory Pack Connecting to Your PC Accessory Pack Getting Started Unpack all the parts. Optimizing Performance The base DVI cable (Optional) Power cord EDFU pack VGA cable RETURN TO TOP OF THE PAGE Connecting to Your PC Downloaded from ManualMonitor.com Manuals... - Page 71 Connect the power cord to the back of the monitor firmly. (Philips has pre-connected VGA cable for the first installation. *available for selective models *available for selective models Downloaded from ManualMonitor.com Manuals...
- Page 72 Connect to PC Turn off your computer and unplug its power cable. Connect the monitor signal cable to the video connector on the back of your computer. Plug the power cord of your computer and your monitor into a nearby outlet. Turn on your computer and monitor.
- Page 73 Front View Product The Base Description Accessory Pack Connecting to your PC Attach the Base Stand Getting Started Place the monitor face down on a smooth surface taking care to avoid scratching or Optimizing Performance damaging the screen. Attach the Base Stand Detach the Base Stand Remove the Base Hold the monitor base with both hands and firmly insert the base stand into the base...
- Page 74 Detach the Base Stand Place the monitor face on a safe surface, push down on the release button and pull the base stand away from the monitor body. RETURN TO TOP OF THE PAGE Remove the Base Condition: for VESA standard mounting applications Remove the 4 screws covers.
- Page 75 Remove the 4 screws and then remove the base from the LCD monitor. Downloaded from ManualMonitor.com Manuals...
- Page 76 Note: This monitor accepts a 100mmx100mm VESA-Compliant mounting interface. RETURN TO TOP OF THE PAGE Downloaded from ManualMonitor.com Manuals...
- Page 77 Downloaded from ManualMonitor.com Manuals...
-
Page 78: Your Lcd Monitor
Use the information file ( .inf) for Windows® 98/2000/XP/Vista or later Getting Started The built-in VESA DDC2B feature in Philips Monitors supports Plug & Play requirements for Optimizing Performance Windows® 98/2000/XP/Vista. This information file ( .inf) should be installed in order that your Philips monitor can be enabled from the 'Monitor' dialog box in Windows®... - Page 79 Click on the 'Finish' button then the 'Close' button. If you can see the 'Digital Signature Not Found' window, click on the 'Yes' button. For Windows® XP Start Windows® XP. Click on the 'Start' button and then click on 'Control Panel'. Select and click on the category 'Printers and Other Hardware' Click on the 'Display' Item.
- Page 80 RETURN TO TOP OF THE PAGE Downloaded from ManualMonitor.com Manuals...
-
Page 81: Description Of The On Screen Display
Description of the On Screen Display What is the On-Screen Display? On-Screen Display (OSD) is a feature in all Philips LCD monitors. It allows an end user to adjust screen performance or select functions of the monitors directly through an on-screen instruction window. - Page 82 The OSD Tree Below is an overall view of the structure of the On-Screen Display. You can use this as a reference when you want to work your way around the different adjustments later on. Downloaded from ManualMonitor.com Manuals...
- Page 83 Resolution notification This monitor is designed for optimal performance at its native resolution, 1680X1050@60Hz. When the monitor is powered on at a different resolution, an alert is displayed on screen: Use 1680x1050@60Hz for best results. Display of the native resolution alert can be switched off from Setup in the OSD (On Screen Display) menu.
- Page 84 Customer Care & Warranty PLEASE SELECT YOUR COUNTRY/AREA TO REVIEW DETAILS OF YOUR WARRANTY COVERAGE WESTERN EUROPE: Austria Belgium Denmark France Germany Greece Finland Ireland Italy Luxembourg the Netherlands Norway Portugal Sweden Switzerland Spain United Kingdom EASTERN EUROPE: Czech Republic Hungary Poland Russia Slovakia Slovenia Turkey LATIN AMERICA: Antilles Argentina Brasil Chile Colombia Mexico Paraguay Peru Uruguay Venezuela...
-
Page 85: Your Philips F1Rst Choice Warranty
Philips helpdesk directly to benefit from your Philips F1rst Choice Warranty. This three-year service warranty entitles you to a swap model on-site if your monitor turns out to be faulty or defective. Philips aims at a swap within 48 hours of your call being received. - Page 86 Note that products that are not originally designed, manufactured, approved and/or authorized for usage within the Philips F1rst Choice countries, do not apply to the Philips F1rst Choice Warranty. In these cases the Philips global warranty terms are valid.
- Page 87 Downloaded from ManualMonitor.com Manuals...
-
Page 88: F1Rst Choice Contact Information
F1rst Choice Contact Information Country Code Telephone number Tariff Austria 0810 000206 € 0.07 Belgium 078 250851 € 0.06 Denmark 3525 8761 Local call tariff Finland +358 09 2290 1908 Local call tariff France 082161 1658 € 0.09 Germany 01803 386 853 €... -
Page 89: Your Guarantee In Central And Eastern Europe
Your Guarantee in Central and Eastern Europe Dear Customer, Thank you for purchasing this Philips product, which has been designed and manufactured to the highest quality standards. If, unfortunately, something should go wrong with this product Philips guarantees free of charge labor and replacement parts during a period of 36 months from date of purchase. - Page 90 In order to avoid unnecessary inconvenience, we advise you to read the operating instructions carefully before contacting our dealers or Information Centers In case your Philips product is not working correctly or is defective, please contact your Philips dealer or directly the Philips Service and Consumer Information Centers http://www.philips.com/support...
-
Page 91: Consumer Information Centers
Consumer Information Centers Antilles Argentina Australia Bangladesh Brasil Canada Chile China Colombia Belarus Bulgaria Croatia Czech Republic Estonia Dubai Hong Kong Hungary India Indonesia Korea Latvia Lithuania Malaysia Mexico Morocco New Zealand Pakistan Paraguay Peru Philippines Romania Russia Serbia & Montenegro Singapore Slovakia Slovenia South Africa Taiwan Thailand Turkey Ukraine Uruguay Venezuela Eastern Europe BELARUS... - Page 92 ESTONIA FUJITSU SERVICES OU Akadeemia tee 21G EE-12618 Tallinn Tel: +372 6519900 www.ee.invia.fujitsu.com HUNGARY General Consumer Information Center 0680018544 (Local call tariff) Serware Szerviz Vizimolnár u. 2-4 HU - 1031 Budapest Tel: +36 1 2426331 Email: inbox@serware.hu www.serware.hu HUNGARY General Consumer Information Center 0680018544 (Local call tariff) Profi Service Center Ltd.
- Page 93 LITHUANIA ServiceNet LT Gaiziunu G. 3 LT - 3009 KAUNAS Tel: +370 7400088 Email: servisas@servicenet.lt www.servicenet.lt ROMANIA Blue Ridge Int'l Computers SRL 115, Mihai Eminescu St., Sector 2 RO - 020074 Bucharest Tel: +40 21 2101969 SERBIA & MONTENEGRO Tehnicom Service d.o.o. Viline vode bb Slobodna zona Beograd , L12/4 Belgrade 11000...
- Page 94 RUSSIA Tel: +7 095 961-1111 Tel: 8-800-200-0880 Website: www.philips.ru TURKEY Türk Philips Ticaret A.S. Yukari Dudullu Org.San.Bolgesi 2.Cadde No:22 34776-Umraniye/Istanbul Tel: (0800)-261 33 02 UKRAINE Comel Shevchenko street 32 UA - 49030 Dnepropetrovsk Tel: +380 562320045 www.csp-comel.com Latin America ANTILLES Philips Antillana N.V.
- Page 95 BRASIL Philips da Amazônia Ind. Elet. Ltda. Rua Verbo Divino, 1400-São Paulo-SP CEP-04719-002 Phones: 11 21210203 -São Paulo & 0800-701-0203-Other Regions without São Paulo City CHILE Philips Chilena S.A. Avenida Santa Maria 0760 P.O. box 2687Santiago de Chile Phone: (02)-730 2000...
- Page 96 Rambla O'Higgins 5303 Montevideo Uruguay Phone: (598) 619 66 66 Fax: (598) 619 77 77 Customer Desk: Phone: 0004054176 VENEZUELA Industrias Venezolanas Philips S.A. Apartado Postal 1167 Caracas 1010-A Phone: (02) 2377575 Fax : (02) 2376420 Canada CANADA Philips Electronics Ltd.
- Page 97 Level 1, 65 Epping Rd North Ryde NSW 2113 Phone: 1300 363 391 Fax : +61 2 9947 0063 NEW ZEALAND Philips New Zealand Ltd. Consumer Help Desk 2 Wagener Place, Mt.Albert P.O. box 1041 Auckland Phone: 0800 477 999 (toll free)
- Page 98 HONG KONG Philips Electronics Hong Kong Limited Consumer Service Unit A, 10/F. Park Sun Building 103-107 Wo Yi Hop Road Kwai Chung, N.T. Hong Kong Phone: (852)26199663 Fax: (852)24815847 INDIA Phone: 91-20-712 2048 ext: 2765 Fax: 91-20-712 1558 BOMBAY Philips India...
- Page 99 INDONESIA Philips Group of Companies in Indonesia Consumer Information Centre Jl.Buncit Raya Kav. 99-100 12510 Jakarta Phone: (021)-7940040 ext: 2100 Fax : (021)-794 7511 / 794 7539 KOREA Philips Consumer Service Jeong An Bldg. 112-2 Banpo-dong, Seocho-Ku Seoul, Korea Customer Careline: 080-600-6600...
- Page 100 Consumer Electronics 48F PBCOM tower 6795 Ayala Avenue cor VA Rufino St. Salcedo Village 1227 Makati City, PHILS Phone: (02)-888 0572, Domestic Toll Free: 1-800-10-PHILIPS or 1-800-10-744 5477 Fax: (02)-888 0571 SINGAPORE Accord Customer Care Solutions Ltd Authorized Philips Service Center...
- Page 101 MOROCCO Philips Electronique Maroc 304,BD Mohamed V Casablanca Phone: (02)-302992 Fax : (02)-303446 SOUTH AFRICA PHILIPS SA (PTY) LTD Customer Care Center 195 Main Road Martindale, Johannesburg P.O. box 58088 Newville 2114 Telephone: +27 (0) 11 471 5194 Fax: +27 (0) 11 471 5123 E-mail: customercare.za@philips.com...
-
Page 102: Your International Guarantee
In the event you require service whilst in another country a dealer address can be given to you by the Philips Consumer Help Desk in that country, the telephone and fax number of which can be found in the relevant part of this booklet. - Page 103 Downloaded from ManualMonitor.com Manuals...
- Page 104 Should you encounter any difficulties while installing or using this product, please contact Philips directly to benefit from your Philips F1rst Choice Warranty. This three-year service warranty entitles you to a swap model on-site within 48 hours of your call being received within the first year of purchase.
- Page 105 Where IS SERVICE AVAILABLE? Warranty service is available in all countries where the product is officially distributed by Philips Consumer Electronics. In countries where Philips Consumer Electronics does not distribute the product, the local Philips service organization will attempt to provide service (although there may be a delay if the appropriate spare parts and technical manual(s) are not readily available).
- Page 106 Please contact Philips at: (800) 479-6696 Three years free parts and three years free labor will be provided at Philips Canada depot or any one of its authorized service centers. (In Canada, this warranty is given in lieu of all other warranties. No other warranties are expressed or implied, including any implied warranties of merchantability or fitness for a particular purpose.
- Page 107 The full address to which the swap model should be delivered. Just a phone call away Philips customer help desks are located worldwide. Within the U.S. you can contact Philips customer care Monday-Friday from 8:00 AM-9:00 PM Eastern Time (ET) and on Saturdays from 10:00 AM-5:00 PM ET hrs by using one of the contact phone numbers.
- Page 108 Glossary A B C D E G H I R S T U V W X Y Z Active matrix This is a kind of liquid crystal display structure in which switching transistors are attached to each pixel to control the on/off voltage. It produces a brighter and sharper display with a broader viewing angle than a passive matrix display.
-
Page 109: Color Temperature
(degrees Kelvin). Lower Kelvin temperatures such as 2400° K are red; higher temperatures such as 9300° K are blue. Neutral temperature is white, at 6504° K. Philips monitors generally offers 9300° K, 6500° K, and user define. Contrast The luminance variation between light and dark areas in an image. -
Page 110: Contrast Ratio
Contrast ratio The ratio of luminance between the brightest white pattern and the darkest black pattern. RETURN TO TOP OF THE PAGE D-SUB A VGA Analog input connector. Your monitor comes with a D-Sub cable. Digital Visual Interface (DVI) (available for selective models) The Digital Visual Interface (DVI) specification provides a high-speed digital connection for visual data types that is display technology independent. - Page 111 promotes the manufacture and marketing of energy-efficient office automation equipment. Companies joining this program, must be willing to commit themselves to manufacture one or more products capable of going into a low -power state (< 30 W) either after a period of inactivity, or after a predetermined time selected by the user.
-
Page 112: Liquid Crystal
A technique of improving the viewing angle of an LCD where the liquid crystal molecules are switched in the plane of the LCD layer rather than vertical to it. LCD (liquid crystal display) A display composed of liquid crystal suspended between two transparent sheets. The display is composed thousands of pixels which can be turned on or off with electrical stimulation. - Page 113 Pixel PICture Element; the smallest element on a computerized CRT or LCD image, and hence a display. Polarizer A light filter which only allows light waves of a certain rotation through. Polarized material with perpendicular filtering is used in LCDs to enclose the liquid crystal. The liquid crystal is then used as the medium which twists the light waves 90°...
- Page 114 Using a standard unified color space, sRGB will help represent pictures taken by an sRGB compatible device correctly on your sRGB enabled Philips monitors. In that way, the colors are calibrated and you can rely on the correctness of the colors shown on your screen.
- Page 115 TFT(thin film transistor) Usually made from amorphous silicon (a-Si) and used as a switch to a charge storage device located below each sub-pixel on an active matrix LCD. TrueVision USB or Universal Serial Bus A smart plug for PC peripherals. USB automatically determines resources (like driver software and bus bandwidth) required by peripherals.
- Page 116 A Universal Serial Bus device that provides additional connections to the Universal Serial Bus. Hubs are a key element in the plug-and-play architecture of USB. The Figure shows a typical hub. Hubs serve to simplify USB connectivity from the user's perspective providing low cost and complexity.
- Page 117 Downstream The direction of data flow from the host or away from the host. A downstream port is the port on a hub electrically farthest from the host that generates downstream data traffic from the hub. Downstream ports receive upstream data traffic. Upstream The direction of data flow towards the host.
-
Page 118: Download And Print
Download instructions: To download the file: 1. Click-and-hold your mouse over the icon below. (Windows® 95/98/2000/Me/XP/Vista users right- click) 220SW9.pdf Download 2. From the menu that appears, choose 'Save Link As...', 'Save Target As...' or 'Download Link to Disk'. 3. Choose where you would like to save the file; click 'Save' (if prompted to save as either 'text' or 'source', choose 'source'). -
Page 119: Printing Instructions
Printing instructions: To print the manual: With the manual file open, follow your printer's instructions and print the pages you need. RETURN TO TOP OF THE PAGE Downloaded from ManualMonitor.com Manuals...
Need help?
Do you have a question about the 220SW9 and is the answer not in the manual?
Questions and answers