Table of Contents
Advertisement
Quick Links
INSTRUCTION MANUAL
Model I480
DEATH or SERIOUS INJURY can occur
•
Failure to use this Infant Seat properly increases the
risk of serious injury or death in a sudden stop or
crash.
•
Do not install or use this Infant Seat until you have
read and understand the instructions in this manual.
This Infant Seat is for use
by children who meet BOTH
of the requirements below:
Weight is:
Height is:
WARNING
5 to 35 pounds
(2,3 to 15,9 kg)
32 inches or less
(82 cm)
Advertisement
Table of Contents

Subscribe to Our Youtube Channel
Related Manuals for The First Years Contigo I480


Summary of Contents for The First Years Contigo I480
- Page 1 INSTRUCTION MANUAL This Infant Seat is for use by children who meet BOTH of the requirements below: Weight is: 5 to 35 pounds (2,3 to 15,9 kg) Height is: 32 inches or less (82 cm) Model I480 WARNING DEATH or SERIOUS INJURY can occur •...
-
Page 2: Section 1 Introduction
We hope that it will make your baby’s travel safer, easier, and more pleasant. We believe the Contigo I480 is the easiest Infant Seat to use. We do more testing than most companies to make it as safe as possible. And, we use the latest methods to assure the highest quality. -
Page 3: Table Of Contents
Section 2 - Table Of Contents Section 1 Introduction ..........1 Section 2 Table Of Contents ........2 Section 3 Warnings ............ 4 Section 4 Use Recommendations ......6 Section 5 Infant Seat parts ........7 Section 6 Selecting A Vehicle Seating Location ..10 Section 7 Installation and Use .........17 7.1 Base Installation........ - Page 4 Section 2 - Table Of Contents Section 7 Installation and Use- continued C-Harness Adjuster........30 D-Shoulder Height Adjuster.......31 7.10 Canopy..........32 7.11 Height insert........32 7.12 Head Bolster........33 7.13 Smaller Children........33 7.14 Pad Removal........34 7.15 Pad Installation........35 Section 8 Safety Checklist/Safe Practices.....36 Section 9 Additional Information......38 Section 10 Care and Cleaning.........39 Section 11 Replacement Parts........39 Section 12 Accidents Guidlines .
-
Page 5: Section 3 Warnings
Section 3 - Warnings WARNING DEATH or SERIOUS INJURY can occur • Failure to follow these instructions and Infant Seat labels can result in injury or death to a child from striking the vehicle’s interior during a sudden stop or crash. - Page 6 WARNING DEATH or SERIOUS INJURY can occur • Direct sunlight can make Infant Seat surfaces hot enough to burn your child. Use caution and check the vehicle and Infant Seat on hot, sunny days. • NEVER leave child unattended under any circumstance. DO NOT use this Infant Seat if it has been in more than •...
-
Page 7: Section 4 Use Recommendations
Contigo I480 Infant Seat Use Requirements: This child restraint is designed for use by children whose: - W eight is between 5 and 35 lbs (2,3 and 15,9 kg), and - Height 32 inches or less (81 cm). -
Page 8: Section 5 Infant Seat Parts
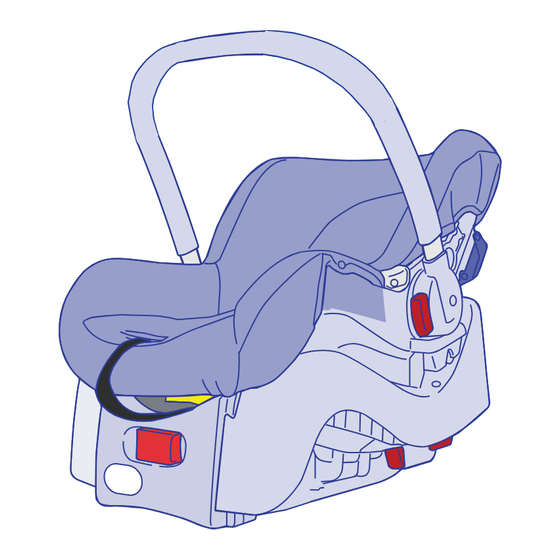
Section 5 - Infant Seat Parts F ull R ot a tion A luminum C ano p y Handle 5 P oi n t Head B ols t er Ha r ness Ha r ness B ase Heig h t A djus t er A djust Inst r u c tion... - Page 9 Section 5 - Infant Seat Parts Base Release Locking Knob Clip Storage Handle Harness Release Height Buttons Adjust Knob Harness Serial Retention Number Hooks Plate Base Height Auto Belt Adjust Lock Off LATCH Lower Connectors Steel Retention Hooks...
-
Page 10: Vehicle Seating Positions
Section 6 - Selecting A Vehicle Seating Location WARNING DEATH or SERIOUS INJURY can occur • Use only in a rear facing position when using this restraint in a vehicle. • DO NOT use this infant seat in a forward facing position. -
Page 11: Section 6 Selecting A Vehicle Seating Location
To determine the types of side impact air bag(s) your vehicle may have for individual seating positions, please refer to your owner’s manual. The Contigo I480 Infant Seat child restraint may be used in any rear seating position equipped only with side impact airbags that are roof mounted with “curtain”... - Page 12 Section 6 - Selecting A Vehicle Seating Location V ehicle Seats: DO NOT use this Infant Seat with the following vehicle seats: Rear Seats Of Seats Which Seats Which Small Extended Face Sides Of Face Rear Cab Pickup V ehicle Of Vehicle T rucks 4.
- Page 13 Section 6 - Selecting A Vehicle Seating Location Vehicle Seat Belt Systems: Use only the vehicle’s lap and shoulder belt, lap belt or LATCH system when restraining this Infant Seat. Design and operation of vehicle seat belt systems vary from vehicle to vehicle and from seating location to seating Lap Belt Only in the same vehicle.
-
Page 14: Unsafe Vehicle Seat Belt Systems
Section 6 - Selecting A Vehicle Seating Location LAP BELTS Manually-adjusted lap belt This type of lap belt is tightened by pulling on the excess belt once it is buckled. Lap belt with automatic locking retractor(ALR) This belt system’s retractor locks automatically and does not allow the lap belt to lengthen once it is buckled. - Page 15 Section 6 - Selecting A Vehicle Seating Location Unsafe Vehicle Seat Belt Systems cont.- Lap and Shoulder Belt with Dual Retractors Do Not Use!- Each autobelt Strap has a retractor at each end and is attached to the latch plate at one end. 6.
- Page 16 WARNING DEATH or SERIOUS INJURY can occur • Use only in a rear facing position when using this restraint in a vehicle. • Use only with children who weigh between 5 and 35 pounds (2,3 and 15,9 kg) or less and whose height is 32 inches (81 cm) or less.
- Page 17 WARNING DEATH or SERIOUS INJURY can occur • DO NOT exceed weight or height limits listed in written instructions and labeling on the Contigo. This Infant Seat is for use by children who meet BOTH of the requirements below: Weight is: Height is: 32 inches or less 5 to 35 pounds with base...
-
Page 18: Section 7 Installation And Use
Section 7 - Installation and Use Base Installation - 7.1 . Level Vehicle Check to make sure vehicle is on a level surface. 2- Leveling base. Handle MUST be in the most forward position when installed in the automobile! Rear of Vehicle - Place I480 and base on auto seat to check if base is level. -
Page 19: Base Installation W/ Auto Lap Belt
Section 7 - Installation and Use 7.2-Auto Belt - Base Installation with Lap Belt - After Ball is in the green area on Level indicator, open Lock Off and thread auto safety belt through the labeled “Belt Here” auto safety belt path. - Page 20 Section 7 - Installation and Use 7.2.1-Auto Belt - Base Installation Shoulder Belt with Lap and Shoulder Belt - After Ball is in the green area on Level indicator, open Lock Off and thread auto safety belt through Lap Belt the labeled “Belt Here”...
-
Page 21: Base Installation W/ Latch Bars
Section 7 - Installation and Use CRS Connector LATCH Anchor Points- 7.3 . Consult your automobile’s owners manual or manufacturer for location and availability of LATCH lower anchor points. BOTH Remove LATCH Lower Anchor connector from the LATCH Lower Anchor storage compartment. Attach the right and left LATCH Lower Anchor to the anchor points. - Page 22 Section 7 - Installation and Use CRS Connector LATCH Anchor Points- 7.3 Alternate Storage . Consult your automobile’s owners manual or manufacturer for location and availability of LATCH lower anchor points. BOTH Remove LATCH Lower Anchor connector from the LATCH Lower Anchor storage clips.
-
Page 23: Base Installation W/ Locking Clip
Section 7 - Installation and Use CRS Locking Clip Installation - . A Free Sliding Latch Plate will require the use of a locking clip if the base Lock Off feature is not used. TOMY requires the use of the Lock Offs at all times for all off base installations. -
Page 24: Infant Seat Installation
Section 7 - Installation and Use Installing Carrier onto the Base - Rear of Vehicle Ensure base is installed correctly as described in the Base Installation section before installing the Infant seat. Lower Infant seat onto the base. NOTE-You should hear a positive click when the Infant Seat is installed correctly. -
Page 25: Installation Pictograms
Section 7 - Installation and Use CRS Installation Pictograms -7.6 . Base installed with Lap belt This carrier must always be used with the base. Base installed with Lap and Shoulder belt. This carrier must always be used with the base. Base installed with LATCH connectors and LATCH Bars. - Page 26 Section 7 - Installation and Use CRS Installation Pictograms -7.6 . Infant Seat and Base installed with lap and shoulder belt. This carrier must always be used with the base. Infant Seat and base installed with LATCH connectors to LATCH bars.
-
Page 27: Handle Use
Section 7 - Installation and Use Handle - 7.7 Positioning of Handle Press red button on both sides of the handle to move handle. Only use position for anti- rebound position. Only use position to carry the Infant Seat. 2- Check That Handle is Locked - Before the Infant seat is lifted for any reason, check to make sure handle is locked into position... -
Page 28: I480 Removal From Base
Section 7 - Installation and Use Section 7 - Installation and Use Removal fron base 7.8 Grip red handle and gently pull Pull straight up on the I480 by the handle and the front or back edge. WARNING Children have STRANGLED in loose or partially buckled harness straps. -
Page 29: A-Chest Clip
Section 7 - Installation and Use Harness Sytem 7.9 A Chest Clip- To Unlock - Squeeze center locking tabs - Pull Chest clip apart - To Lock - Align locking tabs and press Chest Clip together until tabs snap into place. Note: Try to pull Chest Clip apart to ensure the clip is locked. -
Page 30: Pt. Buckle
Section 7 - Installation and Use Harness Sytem B 5 Point Buckle- To UnLock - Press red center button until the 5 Point Buckle releases. - Pull Buckle Tongue from Buckle 5 Point Buckle To Lock - Align Buckle Tongues and insert both Buckle Tongues into Buckle until Buckle Tongues lock in place. -
Page 31: Section 7 Installation And Use- Continued
Section 7 - Installation and Use Harness Sytem C Harness Adjuster To loosen harness system - The Harness Adjuster is located at the Lower end of the Infant Seat between the child’s feet. Press the yellow center button and pull the harness system outward from the seat back over the baby’s shoudler. -
Page 32: Harness System
Section 7 - Installation and Use Harness System D Shoulder Height Adjustment To Raise or Lower Harness Loosen harness system. - Pull out the yellow adjustment knob located on the seat back and slide the adjustment to either the upper or lower slot depending upon the height of the child. -
Page 33: Canopy - 7.10
Section 7 - Installation and Use Canopy - 7.10 Installation To install Canopy Insert Canopy post until the canopy clicks into place. Note:The pivoting canopy rod must be at the back of the seat. 2- Rotation - The canopy has a full rotation. Push or pull to raise or lower into desired location. -
Page 34: Head Bolster - 7.12
Section 7 - Installation and Use Head Bolster - 7.12 Positioning/Removal The Head Bolster is held in place with hook and loop fasteners. The top inside of the Head Bolster should be as close to the top of the child’s head as possible. -
Page 35: Pad Removal
Section 7 - Installation and Use Pad Removal -7.14 1-Unfasten outer snaps, remove canopy, head bolster and cold weather boot if included. 2-Loosen harness and place the harness out of the way as indicated in the picture. 3-Locate the Easy Off pad flaps and separate. -
Page 36: Pad Installation- 7.15
Section 7 - Installation and Use Pad Installation- 7.15 1. Lower dry pad on shell allowing the attachment flaps to remain open. 2. Pull harness through open flaps. Place harness in the harness location slots. Place harness to the side. . 3. -
Page 37: Section 8 Safety Checklist/Safe Practices
Section 8 - Safety Checklist/Safe Practices Safe Practices For assistance with installation or use, contact one of the following sources: - TOMY at: Phone: 1-888-899-2229 Email: cs@TOMY.com - A certified Child Passenger Safety (CPS) T echnician in your area. T o locate a CP S T echnician in your area, log onto www .nhtsa.dot.gov and select “Child Passenger Safety”... -
Page 38: Safety Checklist
Section 8 - Safety Checklist/Safe Practices Safety Checklist √ Did you read and understand these instructions and labels on the Infant Seat? √ Is the child the proper weight and height for the Infant Seat? √ Is the child secured in the back seat? √... -
Page 39: Section 9 Additional Information
Section 9 - Additional Information Certification: This child restraint system conforms to all applicable Federal Motor Vehicle Safety Standards for use in motor vehicles. This Infant Seat is certified for use in motor vehicles. Aircraft Use: This Restraint is Certified for Aircraft Use. V ehicle Seat Protection: Protect vehicle seat. -
Page 40: Section 10 Care And Cleaning
Section 10 - Care and Cleaning Removing Seat Pad: Gently unsnap metal snaps after following the directions on page 34. Cleaning Seat Pad, Head Bolster and Canopy: Hand wash in cool water and mild soap. - Air dry. Cleaning Shell: Wipe with mild solution of soap and water. -
Page 41: Section 12 Accidents Guidlines
Section 12 Accident seats DO NOT use this Via if it has been in an accident unless it meets the criteria for a minor crash as set by the National Highway Traffic Safety Administration (NHTSA). 1-According to NHTSA, a crash is minor if it meets ALL of the following: 2-the vehicle was able to be driven away from the crash site;... - Page 42 Keep this instruction manual for future use. Store in pocket on side of the Infant Seat. TOMY International Attn: Consumer Services 2021 9th St. SE Dyersville, IA 52040 or call 1-888-899-2229 or log onto ww w .tomy.com © 2012 TOMY International Inc. 4000001849 10 12...
Need help?
Do you have a question about the Contigo I480 and is the answer not in the manual?
Questions and answers