Table of Contents
Advertisement
Quick Links
Advertisement
Table of Contents

Related Manuals for Mede8er MED500X2


Summary of Contents for Mede8er MED500X2
-
Page 1: Quick Start Guide
Quick Start Guide MED500X2 High Definition Multimedia Player... -
Page 2: Table Of Contents
INDEX page 1 Index page 2 Introduction page 3 General Overview Installing a Hard Drive page 4 page 5 Connections page 6 Connections continued TV Output Settings page 7 page 8 Formatting the Hard Drive page 9 Remote Functionality Home Network Samba Server page10 page11 Wired Network Connection and Setup... -
Page 3: Important Safety Instructions
Please check the Mede8er forum for the latest user guide. www.mede8erforum.com Warranty Mede8er products carry a 24 month from date of purchase warranty. In the event of warranty service please provide proof of purchase. Return your product to the store that it was purchased from or return it directly to Sanji Electronics (Pty) Ltd 106, 16th Rd Midrand, Gauteng, South Africa. -
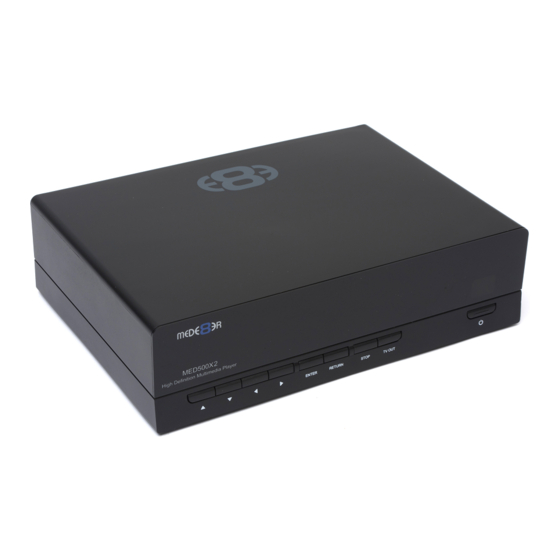
Page 4: General Overview
GENERAL OVERVIEW USB Slave USB Host SD Card Up Down Left Right Enter Return Stop TV Out Status Led On/Off Analogue Audio Out Composite Video Out Component Video PCIe WiFi Module Plus Antenna Under Development Page3... -
Page 5: Installing A Hard Drive
Connect the hard drive power connector and the red SATA data connector from the player to the hard drive diagram c. Re fit the hard drive cover into the Mede8er body and tighten the two securing screws x and y. -
Page 6: Connections
For digital audio connection to your Home Theatre System you can either use the TOSLINK Optical or the Co-Ax Digital output. The MED500X2 supports both Passthrough and Downmix for both Dolby Digital and DTS signals. If you want your Home Theatre Amplifier to decode the surround sound stream you should use either Digital Audio output and set the Audio Output to SPDIF RAW in the Setup menu. - Page 7 Press the On/ Off button on the Mede8ers front panel and front facia LED will turn on Blue. You can put your Mede8er into standby by pressing the On/ Off button on the remote.
-
Page 8: Tv Output Settings
Connect the Mede8er to your TV by one of the connection options as shown on page 6 & 7 and change the input option on your TV to match the option you selected. If you do not get to see the Mede8er GUI on your... -
Page 9: Formatting The Hard Drive
FORMATTING THE HARD DRIVE The MED500X2 has a built in Hard Drive format feature that formats the hard drive with a main NTFS partition and other small internal partitions for propriety use. The Hard Drive should be formatted in the Mede8er MED500X2 to ensure full functionality. A pre formatted Hard Drive can be used but you may not be able to use all the internal features of the MED500X. -
Page 10: Remote Functionality
Navigation Buttons Additional Functionality To assist ease of use operation - The Mede8er remote has been designed to be ergonomic and simple to use. While watching your Videos you can intuitively navigate and change certain function without the need to continually look at the remote control. -
Page 11: Home Network Samba Server
The Mede8er has NAS (Network Attached Storage) functionality built in. And although it is limited in transfer speed compared to standalone NAS servers it performs very well if speed is not your major requirement. You can also use the MED500X2 as a Media Server and stream content to other Mede8er’s on your home network. -
Page 12: Wired Network Connection And Setup
Alternately you may have to enter your IP address, subnet mask, router, and DNS addresses manually. DHCP IP (AUTO) Choose this option if you want your router to assign a dynamic IP address to Mede8er. This option is easy to use and recommended for normal users. - Page 13 Plug the MED10WFB into the USB extension base that was supplied with your Mede8er. Plug the USB cable into one of the USB host ports on the side of the Mede8er. Extend the cable and try to place the base in a position that is away from any metal object that could effect the RF signal strength.
-
Page 14: Home Page
HOME PAGE The Mede8er Home is the central point where you can launch all the user applications. Press the Right/Left Navigation buttons on the remote to navigate the Home Page and press “Enter” to launch the selected page. VIDEO WALL Create shortcuts and display your Video Collection on a Video Wall with metadata search. -
Page 15: Home Page Strip
HOME PAGE STRIP The Home Page can be accessed at any time by pressing the “Home Page” button on the remote. The Home Page Strip will appear at the bottom of the page and allow you to make your selection using the Left / Right Navigation buttons on the remote. -
Page 16: Media Library
MEDIA LIBRARY The Mede8er Media Library has five built in standard views ie Movie View, Music View, Picture View, List View, List View and Preview View. The Media Library has been designed so that the view can be easily changed on the fly. -
Page 17: Media Library Continued
MEDIA LIBRARY CONTINUED To change the View of the Media Library press the “View” button on the remote and the Media Library strip will light up. Now you can navigate with the Left /Right Navigation buttons on your remote and select the view you require. -
Page 18: Media Library Metadata Display
MEDIA LIBRARY METADATA DISPLAY The Media Library will display basic Movie Metadata in all views. This unique Mede8er functionality will greatly enhance your Media Library browsing experience and make it real easy for the whole family to enjoy. In order to take advantage of the advanced functionality you will need to scan your movie collection with Y2M (YAMJ to Mede8er) or Thumbgen in order to create the required xml files. -
Page 19: Media Library Music Player
MEDIA LIBRARY - MUSIC PLAYER Select any supported music file and the Music Player Screen will launch. If the music file has embedded information tags and images then these will be displayed on the right hand side in the preview window area. -
Page 20: Cover Art Preview In Media Library
COVER ART PREVIEW IN MEDIA LIBRARY The Mede8er has a built in facility to preview cover art and it will automatically read the folder.jpg and the about.jpg inside the movie folders. All you need to do in order to use this very useful feature is to arrange your collection with each video, in its own folder. -
Page 21: Play Folder
PLAY FOLDER Mede8er allows you to play a video file within a folder without the need to open the folder. Just focus on the required folder and press the “Play” button. The first video file found in the folder will be played. The folder play will only work with video files. -
Page 22: Media Scanner
Search, Genre, Last Played etc. You can select “Auto Scan” options in the Setup menu. The Media Scanner will automatically update the database when the Mede8er is powered “on” or when an external USB Hard Drive is connected. It is important to let the scanner complete the scan if you intend to use this function. -
Page 23: Lock Facility
LOCK FACILITY Mede8er has a built in Lock facility designed to restrict access to certain folders. Lock facility functions a. System access areas such as Hard Drive Format screen and File Manager. (Pin Protection) b. User Folders (Folder Protection) You can enable or disable these options in the Setup menu CHANGE PIN CODE The default 4 digit Pin Code is 0000. - Page 24 Left/Right Navigation button to select the function you require such as Time, Title or Chapter. Once the function is selected press the Up/Down Navigation button to select the numeric value you require and then press the “Enter” button and the Mede8er will jump to the time you selected in the Video. Time...
-
Page 25: Screen Calibration
TV screen. You can then do a fine adjustment to move the red rectangle so that it is just not visible. ZOOM The Mede8er is equipped with advanced zoom functionality and once your screen is calibrated you can zoom intuitively to either WIDTH or HEIGHT or XY of the video. -
Page 26: Subtitles
SUBTITLES Mede8er supports various types of subtitle files. If the subtitle is embedded into the video file it will automatically be available on the Subtitle Dialogue Screen. External Subtitles must be placed into the same folder as the video file and must be named to be exactly the same name as the video file eg Cloudy.With.A.Chance.Of.Meatballs.2009.720p.BluRay.HebDub.x264-WiKi.mkv... -
Page 27: Music Playlists
FILE MANAGER The Mede8er has a built in File Manager to manage and transfer files between your media sources. The File Manager is launched by pressing the “Edit” button on the remote Control while you are Media Library. - Page 28 FILE MANAGER - MULTIPLE FILES To Copy, Delete, Move or Rename multiple files just press the “Edit” button on the remote control while you are in Media Library view. Select “Multiple Select” and a new dialogue screen will open. Navigate to the files or folders on the left screen “A” that you want to perform the action on and press the “Play/Pause”...
- Page 29 PICTURES Press the “View” button on the remote and the Icon strip will light up. Now select the Picture Icon. The page will re-arrange into a image grid that is optimized for image thumbnail viewing. You can now navigate your pictures as normal and zoom the images to full screen by pressing the “Enter”...
-
Page 30: Video Wall
Autoplay Operation On power up the Mede8er will look for the “autoplay” folder and if found it will automatically play the contents of the “autoplay” folder. The contents will be played with the “Repeat All” as default. If a USB Drive is plugged into the Mede8er it will auto scan for the “Autoplay”... - Page 31 NFS (Network File System) Mede8er by default uses Samba to stream content on a local network and this should be more than sufficient for most users. NFS generally provides better throughput speeds when streaming on a local network. If you are streaming from a Windows PC you will require a NFS client to be running on the host PC.
- Page 32 Page31...
- Page 33 High Definition Multimedia Player MED500X2 www.mede8erforum.com www.mede8er.com www.mede8er.eu For more information or support please visit www.mede8er.eu/support/ or call +31(0)10-7142861 during business hours. Sanji Electronics (Pty) Ltd 106 16th Rd Midrand, Gauteng, South Africa. Tel: 2711 2667500 Fax: 2711 2667501 Email sales@mede8er.com...
Need help?
Do you have a question about the MED500X2 and is the answer not in the manual?
Questions and answers