Table of Contents
Advertisement
Owner 's Manual
Owner 's Manual
HVAC SERVICE PARTS
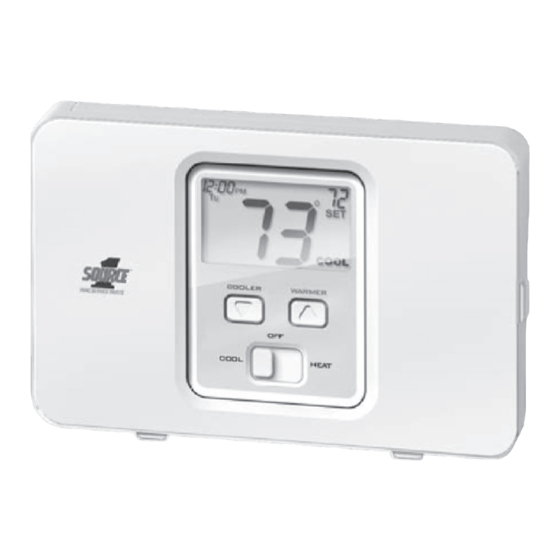
Heat Pump
Heat Pump
5+2 Day Programmable
5+2 Day Programmable
Control up to 2-Heat & 1-Cool
Control up to 2-Heat & 1-Cool
Battery or System Powered
Battery or System Powered
Backlit Digital Display
Backlit Digital Display
Emergency Heat
Emergency Heat
TM
Digital
Digital
Therm ostat
Therm ostat
Auxiliary Heat Indicator
Auxiliary Heat Indicator
Fahrenheit or Celsius
Fahrenheit or Celsius
Service Filter Indicator
Service Filter Indicator
Model
S1-THEH21P5S
BACKLIT
DISPLAY
Use with most
Use with most
Heat Pump systems:
Heat Pump systems:
1-Heat, 1-Cool
1-Heat, 1-Cool
2-Heat, 1-Cool
2-Heat, 1-Cool
Advertisement
Table of Contents

Related Manuals for Source 1 S1-THEH21P5S


Summary of Contents for Source 1 S1-THEH21P5S
-
Page 1: Heat Pump
Owner ’s Manual Owner ’s Manual Model S1-THEH21P5S BACKLIT DISPLAY HVAC SERVICE PARTS Use with most Use with most Heat Pump systems: Heat Pump systems: Digital Digital 1-Heat, 1-Cool 1-Heat, 1-Cool Heat Pump Heat Pump 2-Heat, 1-Cool 2-Heat, 1-Cool Therm ostat... -
Page 2: Table Of Contents
OWNER'S MANUAL S1-THEH21P5S Contents Page # Safety Warnings Location of Controls Display Normal Operation Manual Operation Programmed Operation Aux Heat Clock Set Time Period Programming Overview Weekday Programming Weekend Programming Advanced Setup Advanced Features Factory Defaults Calibration Battery Replacement Warranty... -
Page 3: Safety Warnings
OWNER'S MANUAL S1-THEH21P5S Safety Warnings P/N S1-THEH21P5S Follow Installation Instructions carefully. CAUTION DISCONNECT POWER TO THE HEATER - AIR CONDITIONER BEFORE REMOVING THE OLD THERMOSTAT AND INSTALLING WARNING THE NEW THERMOSTAT. CAUTION The two Alkaline “AA” batteries must be replaced at least once every 12 months to ensure proper operation. -
Page 4: Location Of Controls
OWNER'S MANUAL S1-THEH21P5S Location of Controls PROGRAM SWITCH MODE SWITCH RUN program Cool, Off, or Heat Program OFF SET program NEXT BUTTON For programming How to Use: The NEXT button is used to ad- vance from one step to the next in the progra-... -
Page 5: Display
OWNER'S MANUAL S1-THEH21P5S Display I2:00 Morning Evening MTuWThF SaSu FILTER Night HEAT COOL Day of the week. When programming, MTuWThF represent the five weekdays and SaSu represent the two weekend days. Heat and Cool indicators. In normal operation, Heat or Cool appears, depending on the Mode Switch position. -
Page 6: Normal Operation
OWNER'S MANUAL S1-THEH21P5S Normal Operation PROGRAM SWITCH RUN program MODE SWITCH Program OFF Cool, Off, or Heat SET program COOLER & WARMER FAN SWITCH BUTTONS On or Auto Manual Operation (Program Switch OFF) Select Cool or Heat with the Mode Switch. -
Page 7: Programmed Operation
OWNER'S MANUAL S1-THEH21P5S Normal Operation PROGRAM SWITCH RUN program MODE SWITCH Program OFF Cool, Off, or Heat SET program COOLER & WARMER FAN SWITCH BUTTONS On or Auto Programmed Operation Select Cool or Heat with the Mode Switch. Select RUN with the Program Switch. -
Page 8: Aux Heat
OWNER'S MANUAL S1-THEH21P5S Aux Heat AUX HEAT SWITCH Emergency - Disables all compressor functions* and energizes only Aux Heat to satisfy the heat demand. Normal - Aux Heat is allowed to run, if necessary, along with the heat pump to satisfy the heat demand. -
Page 9: Clock Set
OWNER'S MANUAL S1-THEH21P5S Clock Set PROGRAM Slide the program switch to the SET position. Setting the time & day are the first two steps after sliding the Program Switch to SET. 6:00 Use these buttons to adjust the current time. -
Page 10: Time Period Programming
OWNER'S MANUAL S1-THEH21P5S Time Period Programming Overview PROGRAM SWITCH PROGRAM Slide the Program Switch to the SET position. The blinking icon(s) on the display may be changed by pressing the COOLER or WARMER buttons. After the blinking icon is changed to the desired selection, press the NEXT button. -
Page 11: Weekday Programming
OWNER'S MANUAL S1-THEH21P5S Time Period Programming Weekday Programming Setting the time & day are the first two steps after PROGRAM sliding the Program Switch to SET (page 9). 6:00 Press NEXT Morning to advance Use these buttons to MTuWThF adjust the start time for NEXT the morning time period. - Page 12 OWNER'S MANUAL S1-THEH21P5S Time Period Programming Weekday Programming 8:00 Press NEXT to advance Use these buttons to MTuWThF adjust the cool setpoint for NEXT the day time period. COOL 8:00 Press NEXT Use these buttons to to advance MTuWThF adjust the heat setpoint for NEXT the day time period.
- Page 13 OWNER'S MANUAL S1-THEH21P5S Time Period Programming Weekday Programming Press NEXT 6:00 to advance Evening Use these buttons to MTuWThF NEXT adjust the heat setpoint for the evening time period. HEAT Press NEXT I0:00 to advance Use these buttons to MTuWThF...
-
Page 14: Weekend Programming
OWNER'S MANUAL S1-THEH21P5S Time Period Programming Weekend Programming 6:00 Press NEXT Morning to advance Use these buttons to SaSu adjust the start time for NEXT the morning time period. 6:00 Press NEXT Morning Use these buttons to to advance SaSu... - Page 15 OWNER'S MANUAL S1-THEH21P5S Time Period Programming Weekend Programming Press NEXT 8:00 to advance Use these buttons to SaSu NEXT adjust the cool setpoint for the day time period. COOL Press NEXT 8:00 8 00 to advance Use these buttons to...
- Page 16 OWNER'S MANUAL S1-THEH21P5S Time Period Programming Weekend Programming Press NEXT 6:00 to advance Evening Use these buttons to SaSu NEXT adjust the heat setpoint for the evening time period. HEAT Press NEXT I0:00 to advance Use these buttons to SaSu...
- Page 17 OWNER'S MANUAL S1-THEH21P5S Time Period Programming After you have completed setting the time PROGRAM period programming, you have two options: 1) Run the time period program by sliding the Program Switch to the RUN position. PROGRAM 2) Do not run the time period program. The thermostat will operate as a manual heat or cool thermostat.
-
Page 18: Advanced Setup
OWNER'S MANUAL S1-THEH21P5S Advanced Setup This is normally done by the installer at initial installation. Enter advanced setup by sliding the Program Switch to SET. When the clock is flashing, press the NEXT button for 5 seconds. Do not release the button until this screen appears. - Page 19 OWNER'S MANUAL S1-THEH21P5S Actual hours of fan operation Press NEXT Press RESET Press and hold the RESET to advance FILTER FILTER button to reset RESET NEXT FILTER FILTER the filter counter to 0 and remove the icon FILTER from the display.
-
Page 20: Factory Defaults
OWNER'S MANUAL S1-THEH21P5S CAUTION Factory Default If, for any reason, you desire to return all the stored settings back to the factory default settings, follow the instructions below. Enter advanced setup by sliding the Program Switch to SET. When the clock is flashing, press the NEXT button for 5 seconds. -
Page 21: Calibration
OWNER'S MANUAL TSTATG2152 CAUTION Calibration Under normal circumstances it will not be necessary to adjust the calibration of the temperature sensor. If calibration is required, please contact a trained HVAC technician to correctly perform the following procedure. Enter advanced setup by sliding the Program Switch to SET. -
Page 22: Battery Replacement
OWNER'S MANUAL S1-THEH21P5S Battery Replacement The batteries are easily accessible from the battery slot located on the front of the thermostat (fig. 1). To open the battery slot, press down on the battery cover (fig. 1) and pull out (fig. 2). -
Page 23: Warranty
OWNER'S MANUAL S1-THEH21P5S Warranty One-Year Warranty - This Product is warranted to be free from defects in material and workmanship. If it appears within one year from the date of original installation, whether or not actual use begins on that date, that the product does not meet this warranty, a new or remanufactured part, at the manufacturer’s sole option to replace any defective part, will be... - Page 24 Programming Worksheet see page 10 PERIOD START TIME COOL HEAT Morning Monday Tuesday Wednesday Evening Thursday Friday Night Morning Saturday Sunday Evening Night Printed on recycled paper. P/N 88-552 Rev. 4...
Need help?
Do you have a question about the S1-THEH21P5S and is the answer not in the manual?
Questions and answers