Table of Contents
Advertisement
Quick Links
Advertisement
Table of Contents

Subscribe to Our Youtube Channel
Related Manuals for Hyundai H-MS1113


Summary of Contents for Hyundai H-MS1113
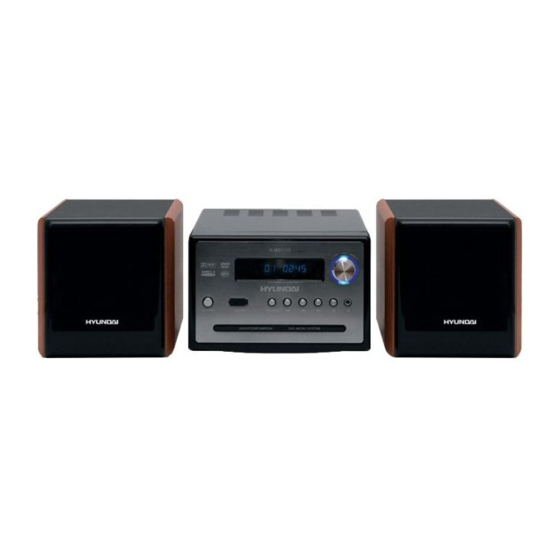
- Page 1 H-MS1113 DVD MICRO SYSTEM Instruction manual...
-
Page 2: Table Of Contents
Table of content Table of content............................2 For your attention .............................3 Features..............................4 Accessories...............................5 Disk features.............................7 Front panel and Rear panel illustrations ....................10 Connection .............................12 System Setup ............................14 Play ................................18 Troubleshooting............................23 Specifications ............................24... -
Page 3: For Your Attention
For your attention PLEASE READ THROUGH THE MANUAL CAREFULLY BEFORE CONNECTION AND OPERATION. WARNING: TO REDUCE THE RISK OF FIRE, ELECTRIC SHOCK OR PRODUCT DAMAGE, DO NOT EXPOSE THIS APPARATUS TO RAIN, MOISTURE, DRIPPING OR SPLASHING AND THAT NO OBJECTS FILLED WITH LIQUIDS, SUCH AS VASE, SHALL BE PLACED ON THE APPARATUS. -
Page 4: Features
Please keep this manual for future reference. Hyundai DVD Micro System is a new generation micro system, which can produce high quality video and audio. Its performance is much better than that of any previous home video playing equipment, it will give you the uppermost enjoyment! Built in Dolby AC-3, LPCM etc. -
Page 5: Accessories
Accessories Instructions manual Remote control A/V cable AM antenna FM antenna Speaker connect cable Batteries AAA 1.5V Insert the batteries into the cell box. Points the remote control at remote sensor within 8 metres and within 30 degree at left or right side. Take the battery out of the controller if it is not used for a long time... - Page 6 Accessories This unit can play the following types of discs Type of disc Symbol Contents Audio+Video SVCD Audio+Video Audio Video-CD Audio+Video (VCD) CD-DA Audio Kodak Picture JPEG Photo CD MPEG 4 Audio+Video...
-
Page 7: Disk Features
Disk features Features for DVD disc Different DVD discs have different combination of features, this is because of the different design created by the order and manufacturer, the following symbols indicate some features of the DVD disc. 5.1 sound channel output Regional code and the video output system Hiding subtitle Dolby digital surround... - Page 8 Handling discs When holding discs, please hold it by its rim. When holding discs, be sure the label side should be upwards Do not grasp the non-label side of the disc. Disc storage Never store disc in the place with high temperature, strong light or humidity. Put the disc back to the case after playback.
- Page 9 About Disc Terms Title Generally, pictures or music compressed on a DVD are divided into several sections that is “TITLE” Chapter The smaller section unit of picture or music in a DVD under the title, usually one title is comprised of one or more chapters and each of them is numbered for easy searching.
-
Page 10: Front Panel And Rear Panel Illustrations
Front panel and Rear panel illustrations Front panel buttons 1. Power 2. Disc loader 3. USB slot 4. Display 5. DVD/Radio 6. Prev 7. Next 8. Play/Pause 9. Open/Close 10. Headphone 11. Master vol Rear panel 1. Speaker output 2. Video output 3. - Page 11 Remote Control reference guide 1. Standby button (STANDBY) 2. Numbered buttons (1-9, 0) 3. Button to select title, chapter, track time to play (GOTO) 4. Setup button (SETUP) 5. Switch on or off PBC function (PBC) 6. Angle button (ANGLE) 7.
-
Page 12: Connection
Connection Connection to a television with output signal of progressive scanning Before connection Disconnect the AC power supply cord. Refer to the television’s instructions If your TV set with progressive scanning equipped Y Pb Pr input, you can use for connecting Y Pb Pr video output of Micro System. - Page 13 Audio connection system Two types of audio output systems: analog audio and digital audio. The analogue audio is 2 channel, the digital audio is outputted from the coaxial, and sound quality is much better than the analogue audio. Digital audio includes coaxial output. 2 CH output Use a pair of audio cable (red for right/white for left) to connect the audio input of the TV or AV amplifier to the audio output of this unit.
-
Page 14: System Setup
System Setup Press SETUP button, screen show setup page. In setup mode, press SETUP key again to quit the setup page. Press direction key to the desired item, press ENTER to confirm. (1) Some setup items are concerning the present modes. The items in gray can't be set up. (2) The setup is memorized and kept after power off. -
Page 15: Dolby Digital Setup
Audio Setup Page ANALOG AUDIO SETUP DOWNMIX LT/RT: The audio out is Left and Right channels format even if the original sound is 5.1CH format. STEREO :The audio out format is stereo even if the original sound is 5.1CH format. DIGITAL AUDIO SETUP DIGITAL OUTPUT SPDIF OFF: no digital signal out (coaxial output off), only analog audio output. -
Page 16: Video Setup
Video Setup VIDEO OUTPUT OFF: Set video output to the composite. YUV: set video output in analog component video format when connecting to Y/U/V terminals P-YUV: set progressive YUV signals. Connection same as YUV RGB: set video output in Red/Green/Blue format when connecting to SCART terminals P-RGB: progressive RGB signals. - Page 17 NTSC: this system is used in USA, TAIWAN, JAPAN etc. PAL: this system is used in CHINA, EUROPE, HONGKONG etc. Choose on or of PBC AUDIO, SUBTITLE, DISC MENU LANGUAGE SETUP These are the initial settings by your preference. If a setting is supported by disc content, it will work.
-
Page 18: Play
Play OPEN/CLOSE Press OPEN/CLOSE button when power on, the disc tray is pushed out. Put the disc on the tray with the title faced up. Press OPEN/CLOSE again to close the disc tray and the unit starts playing automatically. (Without auto-play function for mp3 and JPEG discs). STANDBY When playing, press STANDBY button, the machine will be power-off and go to standby state;... - Page 19 1 2 3 4 5 6 7 8 9 0/10 10+ When playing VCD 1.1, CD disc, after loading the disc, use the digit key to select the desired track or chapter directly. Press 10+ key and then another digit key to select the track which number is 10 or more than 10.
- Page 20 A - B When playing DVD, SVCD, VCD, CD disc, press A-B button to repeat a certain contents. Press A-B key on the start point (A) and the ending point (B) to select the repeat part. Press A-B the third time, cancel A-B repeat and return to normal play ZOOM When playing DVD, SVCD, VCD disc, press ZOOM to zoom in or zoom out the picture.
-
Page 21: Mp3 Playback
SOURCE AND CHOOSE RADIO STATIONS Please connect FM/AM antenna to the jacks on rear panel. Press SOURCE/SELECT button to go into Radio system, and press TITLE/AM/FM button on RC or AM/FM on the front panel to choose FM or AM range. Manual adjustment. -
Page 22: Play Picture Cd Disc
PLAY PICTURE CD DISC By default pictures are played in slideshow mode, to leave it press STOP button on RC. Also you can choose the following functions: [STOP]: entering picture preview mode; [PREV]: previous picture; [NEXT]: next picture; [PLAY]: to play picture; [UP]: mirror image in vertical;... -
Page 23: Troubleshooting
Troubleshooting Actions on elimination of Faultiness malfunction Insert the AC power supply cord The unit is automatically switched No power securely into the household AC to the standby mode outlet. Check the connection. Check the volume on the equipment you have connected. Sound Distorted sound Ensure that the input for the... -
Page 24: Specifications
Specifications Type of amplifier ANALOG Amplifier Number of the speakers and speakers Power of the amplifier 15 W X 2 The number of stations (AM/FM) Tuner Widen FM range 64-108 DVD-R/-RW, DVD+R/+RW, CD-R/- Format of disks DVD, DVCD, Super VCD, VCD, Formats of HDCD, CDDA, MP3, WMA, Kodak playback... - Page 25 :............................25 ........................26 ....................27 .............................28 DVD- ........................30 .................33 ............................35 ..........................37 ............................40 ............................41 SEARCH +/- ( ) ...........................42 .....................47 .........................48...
- Page 26 ~220 –...
- Page 27 DVD. DVD Hyundai – Dolby AC-3, LPCM Hi-Fi, 96 MPEG4: DivX 3.11, DivX 4.12, DivX5.11, DivX Pro, XviD ( Karaoke. AM/FM DVD, DVCD, Super VCD, VCD, HDCD, CDDA, MP3, WMA, Kodak Picture CD, JPEG. USB.
- Page 28 , AAA 1.5V • •...
- Page 29 SVCD Video-CD (VCD) CD-DA Kodak Picture MPEG 4...
- Page 30 DVD- DVD- Dolby digital surround...
- Page 31 DVD-...
- Page 32 – DVD- – VCD, " " PBC (SVCD,VCD) SVCD VCD, PBC ( 1.1) SVCD/VCD, PBC ( 2.0)
- Page 33 1. Power ( 3. USB DVD/ 6. Prev ( 7. Next ( 8. Play/Pause ( 9. Open/Close ( (VOLUME) VGA- S-Video 7. SCART...
- Page 34 STANDBY (1-9) GOTO SETUP ANGLE PROGRAM SEARCH TITLE/ FM/AM (UP/DOWN/LEFT/RIGHT) AUDIO/MEMORY S EFFECT REPEAT OPEN/ CLOSE 0/10 PLAY/PAUSE MUTE V-MODE SOURCE SELECT NEXT/PREV/RADIO FM/AM (SUBTITLE/AUTO) ENTER MENU/MONO/STEREO CH-LEVEL TONE ZOOM STEP STOP...
- Page 35 Y Pb Pr, Y Pb SETUP, « » (VIDEO SETUP PAGE), « – P-RGB» (P-YUV), S-Video Y U/Pb V/Pr VGA Scart Video Video Scart S-Video « » (DOWNMIX) « » (ANALOG AUDIO SETUP PAGE) « » (LT/RT), « » (STEREO). S-VIDEO SCART S-VIDEO...
- Page 36 – DVD- FM/AM SOURCE SELECT,...
- Page 37 SETUP, SETUP ENTER 4:3 PS: 4:3 LB: 16:9 – STANDBY...
- Page 38 : Lt/Rt ( DOLBY Pro LOGIC. SPDIF SPDIF SPDIF SPDIF/RAW: SPDIF/PCM: LPCM Dolby Digital...
- Page 39 HDCD - 1 . YUV: Y/U/V P-YUV: Y/U/V. RGB: SCART P-RGB: RGB. VGA: STOP)
- Page 40 PAL, NTSC. NTSC: PAL: AUDIO ( SUBTITLE ( : 136900) “ ” 136900. 136900 EXIT “ ”,...
- Page 41 OPEN/CLOSE ( OPEN/CLOSE ( OPEN/CLOSE JPEG STANDBY ( STANDBY ( STANDBY ( STANDBY ( POWER SOURCE SELECT ( SOURCE SELECT TITLE/AM/FM ( /AM/FM) TITLE/AM/FM – TITLE/AM/FM – AM V-MODE ( V-MODE ( (YUV-RGB-VGA AUDIO/MEMORY ( AUDIO/MEMORY 40). SUBTITLE/AUTO ( SUBTTITLE/AUTO, ANGLE ( ANGLE, MENU/MO/ST (...
- Page 42 RADIO +/- SEARCH +/- ( SEARCH VCD 1.1, CD STOP ( DVD, SVCD, VCD, CD STOP ( PLAY/PAUSE STOP PLAY/PAUSE ( PLAY/PAUSE ( STEP ( DVD, SVCD, VCD STEP ( PLAY/PAUSE ( PREV/NEXT ( PREV ( SVCD, VCD, CD PREV ( NEXT ( SVCD, VCD, CD NEXT (...
- Page 43 PROGRAM ( PROG NEXT ( UP/DOWN/LEFT/RIGHT START REPEAT( REPEAT ( REPEAT ( (CHAPTER), (TITLE), (ALL) SVCD, VCD, CD (TRACK), (ALL), (REPEAT ONE), (FOLDER), (SINGLE). DVD, SVCD, VCD, CD ZOOM ( DVD, SVCD, VCD ZOOM, S.EFFECT ( S.EFFECT ( VOLUME ( VOL+/VOL- VOLUME “10”,...
- Page 44 SETUP SETUP, CH-LEVEL CH-LEVEL, VOL +/-, PBC ( – ( . . PBC OFF), PBC ( VCD). 0-9). TONE TONE, VOL +/-, GOTO GOTO,...
- Page 45 SOURCE/SELECT ( TITLE/ FM/AM SEARCH ( AUTO/SUBTITLE SUBTITLE/AUTO ( FM AM Radio+/- +/-) – DVD VCD, MIC, MIC VOLUME DVD- MP3/JPG ENTER, ENTER PLAY/PAUSE, MENU,...
- Page 46 STOP MENU. ENTER. [STOP ( [NEXT ( [PREV ( [PLAY ( [LEFT ( [RIGHT ( [ZOOM ( [FAST FORWARD ( ZOOM; [FAST REWIND ( ZOOM; [UP/DOWN/LEFT/RIGHT FAST REWIND, FAST FORWARD). EXIT MENU...
- Page 47 V-MODE [ - DVD- 5-10...
- Page 48 (AM/FM) 64-108 DVD-R/-RW, DVD+R/+RW, CD-R/- DVD, DVCD, Super VCD, VCD, HDCD, CDDA, MP3, WMA, Kodak Picture CD, JPEG Dolby Digital AC-3 2.0/ (RCA) S-Video SCART MPEG 4 (DivX) MPEG4 & PAL/NTSC 16:9 ("0" ~220 /50...
Need help?
Do you have a question about the H-MS1113 and is the answer not in the manual?
Questions and answers