Lynx L27-2 Care, Use And Installation Booklet
Hide thumbs
Also See for L27-2:
- Care & use/installation manual (48 pages) ,
- Use & installation manual (48 pages) ,
- Care & use manual (48 pages)
Table of Contents
Advertisement
Advertisement
Table of Contents

Related Manuals for Lynx L27-2


Summary of Contents for Lynx L27-2
- Page 1 MaKe tHe Most oF Your care & use/installation...
-
Page 2: If You Smell Gas
warning Read this manual caRefully and completely before using your grill to reduce the risk of: 1. fire 2. Burn hazard, personal injury or property damage 3. Ruined steaks or other unpleasant cooking experiences 4. unapproved installation or servicing. this pRoduct is designed foR outdooR use only. improper installation, adjustment, alteration, service or maintenance can cause property damage, injury or death. -
Page 3: How To Light Your Grill Accessory
HOW TO LIGHT YOUR GRILL 1. Before each use, complete the checklist below 2. make sure all burner control knobs are in the “off” position 3. push and hold the control knob in for 2 – 5 seconds, allowing the igniter to heat up 4. - Page 4 13. tHIs manual must remaIn WItH tHe product oWner for future reference. this product complies with ansi standard Z21.58/csa 1.6 latest edition and has been tested and approved by intertek. to obtain replacement parts or service contact: lynx professional grills 5895 rickenbacker commerce, ca 90040 888-289-5969...
-
Page 5: Message To Our Customers
A MESSAGE TO OUR CUSTOMERS… ou’ve just joined the world of lynx cooks … a discriminating collection of amateur and professional chefs that take outdoor cooking to a new level. your grill has been designed and built with meticulous attention to detail and it offers some unique and powerful features. -
Page 6: Table Of Contents
Using The Rotisserie Burner ...................15 Using The Smoker Box ....................16 cleaning Your lynx Grill ....................17 troubleshooting Your lynx Grill ..................19 Potential Problems ......................20 How To Obtain Service From Lynx ..................23 The Lynx Story ......................23 Warranty ..........................24 residential Plus Warranty ....................25 INSTALLATION GUIdELINES ..............26... -
Page 7: Use & Care Guidelines
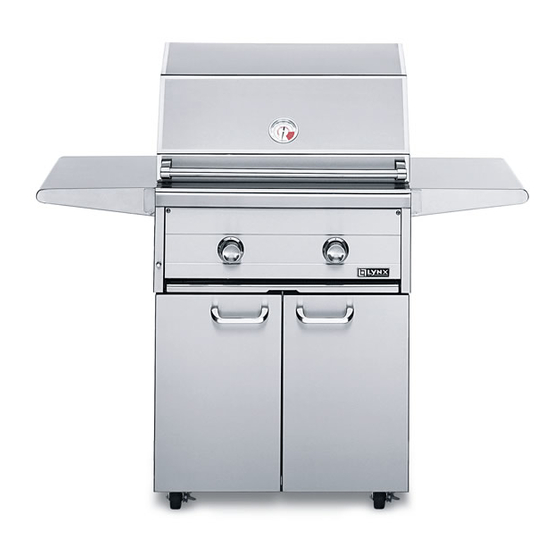
USE & CARE GUIdELINES this use & care manual covers the lynx grill models listed below. some features and options will vary based upon the model that you purchased. LYNx GRILL MOdELS Built-in fReestanding l27-2 l27f-2 l27R-2 l27fR-2 l27psR-3 l27psfR-3... -
Page 8: Important Safety Precautions
IMpORTANT SAFETY pRECAUTIONS please revIeW tHese Important safety precautIons before you use your grIll. 1. never leave tHe grIll unattended WHIle cooKIng. 2. ensure all tie-down wires have been removed from the burners. 3. always use caution when operating the grill in a windy area. (see indeX: “grilling in windy condi- tions”... -
Page 9: Grilling In Windy Conditions
rear. -
Page 10: Using Your Lynx Grill
Depending on the model you chose, your Lynx grill may be equipped with up to three different burner types. the operation of each type varies, so it is important to understand all three. -
Page 11: Lighting Your Grill
eacH before LIGHTING YOUR GRILL Before any use, always make sure that: WarnIng … ... you do not smell gas never attempt to light a burner if you smell gas. before you light the grill. if always keep the lid open (side-burner lids must be completely you do smell gas, shut every- removed) when lighting your grill. -
Page 12: Manual Lighting
using the lighting rod, place a prosear™ 2 burner cold WeatHer lit match in front of the manual the prosear™ 2 burner, does WarnIng: propane lighting tube for the burner not feature a manual lighting you wish to light. (see photo) tube. -
Page 13: Basic Grilling
2 burner in closed as much as possible important. pre-heating allows your lynx grill are capable during this type of cooking to the briquettes to properly of creating a range of heat... -
Page 14: Using The Prosear™ 2 Burner
SAFETY PRECAUTIONS professional cooking you should still restaurant Lynx grill cooking grids are pre-heat the prosear™ 2 chefs rely on a heavy duty. Dropping them burner for 2-3 minutes, or different type of on the ProSear™... -
Page 15: Using The Rotisserie Burner
(more so than the main grill serie. push the skewer through the burners). -
Page 16: Using The Smoker Box
operation. -
Page 17: Cleaning Your Lynx Grill
After your first use certain part of the appeal of your lynx specIal note for areas of the grill may discolor Grill is the fine grain finish. locatIons near pools... -
Page 18: Ceramic Briquettes
OR LIQUIDS TO ACCUMULATE IN THE DRIP TRAY AS THIS MAY CRE- Replacement briquette trays warning ATE A FIRE HAZARD. can be ordered from lynx or from your dealer. PROPER PLACEMENT OF NEVER USE GRILL WITHOUT DRIP EACH BURNER IS CRITICAL. -
Page 19: Troubleshooting Your Lynx Grill
► have you opened the valve on the propane cylinder? ► is the grill plugged in to a live electric circuit? if you’ve checked the above items, review the trouble-shooting list below before calling for lynx for service. -
Page 20: Potential Problems
► checK the igniteRs match, then the igniter may not be functioning correctly. your lynx grill uses an electric call for service. ignition system that does not spark. instead, the igniters if the burner will not match …... -
Page 21: Low Or Insufficient Heat
… wait a few seconds and it is correctly set up for the relite a burner. A yellow flame on the main type of fuel you are using. ► Bulk lp cylinder users burners indicates a lack of air. -
Page 22: Check The Flame
WHen set to socket. the glass cover should (see indeX: “obtaining service “loW” from lynx” for further details.) be gently snapped back into place. the valves on the grill feature lIgHts Won’t lIgHt an adjustable low setting. -
Page 23: How To Obtain Service From Lynx
HOW TO OBTAIN SERvICE FROM LYNx Before calling for service, for warranty service, contact your satisfaction is of the please make sure you have the lynx customer service utmost importance to us. if a the following information: department for an authorized... -
Page 24: Warranty
This warranty gives you specific legal rights and you may have other rights which vary from state to state. 7) no one has the authority to add to or vary lynx’s warranty, or to create for lynx any other obligation or liability in connec- tion with the sale or use of its products. -
Page 25: Residential Plus Warranty
This warranty gives you specific legal rights and you may have other rights which vary from state to state. 7) no one has the authority to add to or vary lynx’s warranty, or to create for lynx any other obligation or liability in connec- tion with the sale or use of its products. -
Page 26: Installation Guidelines
& l30 Rotisserie grill ...................40 l36 & l42 Rotisserie grill ...................41 l54 Rotisserie grill .....................42 lynx Professional Grills exploded Parts View ..............43 lynx Professional Grills Parts list ..................44 Model specific Btu outputs ...................45 Maximum runs for all appliances on supply line ............45... - Page 27 warning 1. Always maintain the required clearances from combustible construction as detailed. The grill is designed for outdoor use only. neVeR use in a garage, building, shed, breezeway or other enclosed area. this grill shall not be used under any overhead combustible construc- tion.
-
Page 28: Before You Start
“concealed damage” claim with them. This should be done within (15) days of the date delivery is made to you. Be sure to hold on to the container for inspection. we cannot assume responsibility for damage or loss incurred in transit. (see indeX: “obtaining service from lynx” for further details.) warning ►... -
Page 29: Clearance To Combustibles
(45.7 cm struction below the top of à partir des parois latérales et unit are 12” from the sides lynx built-in grills are intended 45.7 cm à partir de l’arrière). and back. either for installation in a... -
Page 30: Cut Out Dimensions
cut-out dImensIons for buIlt-In grIlls... -
Page 31: Unpacking And Assembly
Lynx experi- ence. Grill will not slide directly off pallet. shipping weight on smaller units is app. 300 pounds and... - Page 32 heat shield Removed, Orifice/Venturi Position Inside View, Orifice all the way into venturi legs in slot Burner sitting flat...
-
Page 33: Gas Connections
Never coNNect a gas liNe directly to the grill. a pressure regulator must be iNstalled oN all gas equipmeNt. all local codes require it aNd lyNx supplies the correct regulator with your grill. removiNg or failiNg to iNstall the pressure regulator caN result iN fire aNd serious persoNal iNjury aNd will void the warraNty. -
Page 34: Lp Gas
4/11 regulator. (lynx p/n structed and marked in accor- compound break loose and 30781) dance with the specifications clog a burner valve or when using the 4/11 regulator for lp gas cylinders of the u.s. -
Page 35: Side Burner/Lpsge Hookup
SIdE BURNER/LpSGE HOOKUp buIlt-In InstallatIon Requires 3/4 - 1/2 Reducer ► shut off the gas supply at the main valve. ► disconnect all plumbing (if already attached) from the grill and the gas supply valve. ► Remove all the fittings from the grill manifold. -
Page 36: Electrical Connections
ELECTRICAL CONNECTIONS warning - electrIcal groundIng ► product installation must meet local electric codes or, in the absence of local codes, the latest edition of the national electrical code ansi/nfpa no. 70 or the canadian electrical code cga 1.6b2005. ► use only a ground fault interrupter (gfi) protected circuit with this outdoor cooking gas ap- pliance. -
Page 37: Final Checks
1/4 turn to align side burners on your lynx light the grill. with the gas flow. grill feature an adjustable low ► make sure all grill controls setting. - Page 38 ► If the flame is noisy (sounds lynx technical support bright-blue core should be about like a torch) and tends to lift 888-289-5969 3/8 inch high with a total flame away from the burner, indi- height of about 1 1/2 inches.
-
Page 39: Wiring Schematics
WIRING SCHEMATICS l27 non-RotisseRie gRill... -
Page 40: L27 & L30 Rotisserie Grill
l27 & l30 RotisseRie gRill... -
Page 41: L36 & L42 Rotisserie Grill
l36 & l42 RotisseRie gRill... -
Page 42: L54 Rotisserie Grill
l54 RotisseRie gRill... -
Page 43: Lynx Professional Grills Exploded Parts View
LYNx pROFESSIONAL GRILLS ExpLOdEd pARTS vIEW... -
Page 44: Lynx Professional Grills Parts List
professIonal grIlls parts lIst professIonal grIlls parts lIst... -
Page 45: Model Specific Btu Outputs
model-specIfIc btu outputs model H burner rotIsserIe prosear™ 2 total Input l27(f) 2 @ 25,000 btu 50,000 btu/Hr l27(f)r 2 @ 25,000 btu 1 @ 14,000 64,000 btu/Hr l27ps(f)r 1 @ 25,000 btu 1 @ 14,000 1 @ 21,000 62,000 btu/Hr l30r(f) 2 @ 25,000 1 @ 14,000... - Page 47 ...... 12 trouble shooting ...... 20 clean the Brass Burner ..... 18 lighting your grill ....3, 11 cleaning your lynx grill ... 17 lighting Rotisserie Burner ..3, 11 clearance to combustibles ..29 low heat burner adjustment ... 35 contacting lynX ......
- Page 48 5859 Rickenbacker Rd. commerce, ca 90040 service: (888) Buy-lynx (888-289-5969) fax: (323) 838-1778 www.lynxgrills.com...
Need help?
Do you have a question about the L27-2 and is the answer not in the manual?
Questions and answers
J'ai un L27PSFR-3-LP depuis avril 2014. Quand j'allume le ProSear après 2minute il fait un gros pouf et il s'éteint. Quel est le problème. J'ai tout vérifié les orifices pour m'assurer qu'il ne sont pas bouché. Sur le coté du bruleur je n'ai pas ce problème.