
Related Manuals for E.C.A. 22 HS -11


Summary of Contents for E.C.A. 22 HS -11
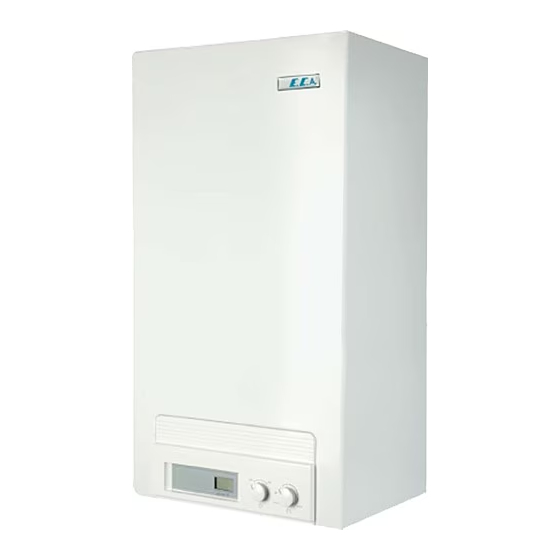
- Page 1 22 HS -11 Room Sealed Electronic Gas Water Heater INSTALLATION AND USER’S OPERATING INSTRUCTIONS...
-
Page 2: Table Of Contents
CONTENTS PREFACE GUARANTEE & SERVICE SYMBOLS’ DEFINITIONS SAFETY INSTRUCTIONS AND WARNINGS PRODUCT General Specifications Product Notation Technical Data PACKAGING INSTALLATION Selection Of The Location Mounting Heater CONNECTIONS Flue Connection Gas Supply & Water Systems Electricity Supply START-UP Final Checks And Operations Before Start-up Control Panel Operating The water Heater GAS TYPE CONVERSION... -
Page 3: Guarantee & Service
PREFACE This manual contains installation and user’s operating instructions. The detailed information about technical data, selection of the appliance location, fitting the connections (water systems, gas supply, flue connection and electricity supply), gas type conversion, maintenance and fault/Error finding are placed in your manual. Please read the instructions carefully for operating the water heater a long time period and to maximize benefit from the water heater specifications. - Page 4 SAFETY INSTRUCTIONS AND PRECAUTIONS Safety Instructions When a gas leak is found or suspected: - Turn off the gas valve of the water heater and other appliances which operate with gas. - Shut off the oven, cooker and similar appliances to put their flame out. - Do not light match, lighter etc.
-
Page 5: General Specifications
Operating The Water Heater And Maintenance Read carefully instructions and precautions in this manual against wrong usage which causes unsafe conditions. The water heater should be checked and serviced for general maintenance once a year. Maintenance and service operations must be carried out only by qualified person. Only a damp cloth should be used for cleaning the outer surface and then the surfaces should be dried completely. -
Page 6: Product Notation
Required fresh air for combustion is provided independently from the installation room by concentric air/flue ducts and products of combustion can be also discharged by the same air/flue ducts. Table 2 Unit 22 HS -11 Gas Category 2H 3B/P Natural gas - LPG Type of gas... -
Page 7: Packaging
Wiring Diagram Fig.1 PACKAGING CAUTION: The instructions on the water heater package should be considered during transportation and storage. - The product is covered with a cardboard box of which dimensions are 640x360x240 mm (HxWxL) and supported by upper and lower styrofoams (fig. 2). Fig.2... -
Page 8: Installation
Components Fig.3 1- Hot Water Connection 10- High Limit Thermostat (85 2- Gas Inlet Connection 11- Flow Switch 3- Cold Water Connection 12- Control Panel 4- Gas Valve 13- On/Off Knob 5- Burner 14- Temperature Control Knob 6- Ignition Electrode 15- Water Inlet (Cold) 7- Ionization Electrode 16- Gas Inlet... - Page 9 Fig. 4 indicates minumum clearances from the ceiling and the sides. fig. 4 - The appliance should be mounted against a closed wall. - The outer surface of the water heater do not exceed 85 C in maximum running mode so do not take additional precautions againts constructional materials (combustible materials) WARNING: Do not block the air vents which provide fresh air to the installation room.
-
Page 10: Mounting Heater
The air/flue terminal must be exposed to the external air and allow free passage of air cross it at all times. - The minimum acceptable dimensions from the terminal to obstructions and ventilation openings must obey national and local requirements. - The air/flue ducts should be fitted at a slight % 1 or 2 downwards incline to prevent any water or... -
Page 11: Connections
CONNECTIONS Flue Connection Air/flue kit consists of the following parts: - Apart from the water heater package, a standard concentric air/flue kit is given with a cardboard box. a) 90 Concentric elbow with flange (φ60/100mm), - Flat sealing ring - Sealing ring, Viton (φ60mm) - Sealing ring, Silicone (φ100mm) b) Concentric terminal, L=860mm, (φ60/100mm) - Inner and outer flanges, 2 pieces (φ100mm) - Page 12 1x90 1< ≤ 2 ∅ 47 1x90 2< ≤ 3 1x90 3< ≤ 4 ∅ 45 2x90 ≤ 1 22 HS -11 ∅ 47 2x90 1< ≤ 2 2x90 2< ≤ 3 ∅ 47 3x90 ≤ 1 3x90 1< ≤ 2...
-
Page 13: Gas Supply & Water Systems
fig. 9 Gas Supply & Water System - Water & gas connections distance between the pipes’ connections are shown in fig. 10. fig. 10 - A suitable valve should be mounted on the gas inlet and the water circuits. In addition, a water filter should be mounted on cold water (1/2”) inlet. -
Page 14: Electricity Supply
Electricity Supply Electrical installation should be made according to the national and local instructions. The water heater must be earthed and a standard 230 V AC - 50 Hz supply is required. WARNING: Disconnect power supply to prevent electrical shock before connecting the electricity supply. -
Page 15: Control Panel
Control Panel The control panel shown in fig. 11 consists of the following parts as detailed below. fig. 11 ON/OFF Knob The appliance is turned ON/OFF using the ON/OFF knob. Temperature Control Knob Tempereature control knob has 2 functions. a) Set the water temperature between 35 °C and 60 °C b) Reset the appliance if the error cause a lock out condition LCD Display Water heater functions, water temperature (set and actual values), fault/error conditions can be seen... -
Page 16: Operating The Water Heater
Operating The Water Heater Start up / Shut off - To start up the water heater, turn the ON/OFF knob to ‘ ON ’ position (fig. 13a) and then set to temperature control knob to desired temperature between Min. (35 C) and Max. -
Page 17: Gas Type Conversion
fig.15 Frost Protection The appliance goes on and off automatically depending on actual water temperature values measured by the water temperature sensor for protecting water circuit against freezing. - If the water sensor measures a low water temperature in the system (less than 5 °C ), the frost protection is activated. - Page 18 fig. 17a fig. 17b Maximum operating pressure adjustment: - Operate the water heater at maximum load (use Parameter menu detailed in service manual). - Connect the tube of a clocking gas meter to outlet pressure measurement point (2) after loosening the plastic adjusment cover (fig.18).
-
Page 19: Replacement Of The Burner Injectors
Table 4 Max. operating gas pressure (mbar) 11,2 Natural Gas Min. operating gas pressure (mbar) Max. operating gas pressure (mbar) Min. operating gas pressure (mbar) Replacement Of The Burner Injectors WARNING: Keep the gas valve on the water heater and electricity supply closed during replacement of the burner injectors. -
Page 20: Fault/Error Finding
FAULT/ERROR FINDING Several checks are included to protect the water heater and its environment. In case of error condition, the error is displayed on the LCD panel (Table 6) and heat demands will be disabled. Table 6 Fault/Error and error code Cause Solution - Lack of electricity. -
Page 21: Maintenance
Fault/Error and error code Cause Solution - No flame in burner after 3 ignition - Reset procedure is necessary. No flame signal trials (burner start is unsuccessful). - If the lockout condition continues after (ON) reset, consult qualified service. FL (blink) “key”...
Need help?
Do you have a question about the 22 HS -11 and is the answer not in the manual?
Questions and answers