Table of Contents
Advertisement
Quick Links
Advertisement
Table of Contents

Related Manuals for E.C.A. PHOENIX PH HM 11 LT/DK


Summary of Contents for E.C.A. PHOENIX PH HM 11 LT/DK
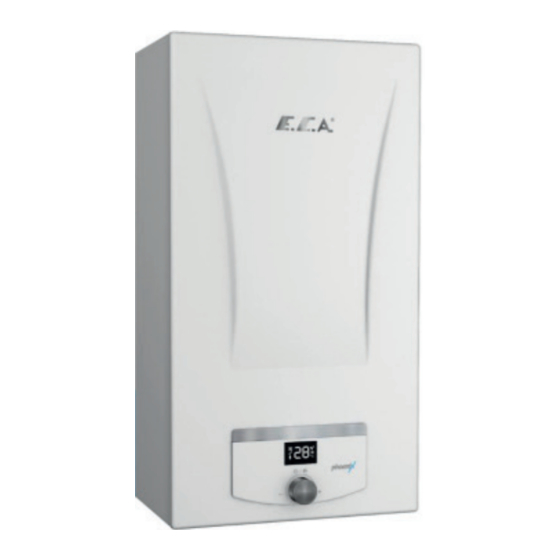
- Page 1 PHOENIX HERMETIC GAS WATER HEATER PHOENIX PH HM 11 LT/DK SERVICE MANUAL...
-
Page 2: Table Of Contents
CONTENT FLUES......................................2 Flue Length Selection (Initial Start-up)............................. 2 Horizontal Flue Connections................................4 Vertical Flue Connections................................. 5 SERVICE MENU..................................6 Introduction to the Menu................................7 Parameter Menu (PA) and Setting Format............................8 Calibration Menu (CA)..................................9 Auto Calibration (Auto)..................................9 Manual Calibration (NAnu)................................ -
Page 3: Flues
FLUES Flue Length Selection (Initial Start-up) Combustion is different according to the total flue length in order to have the best efficiency and flue emission values and it must be adjusted from the software parameters by the authorized service. Appliances with gas, water and electricity connections are enabled after the flue connections are made,when electricity is given to the appliances to be enabled for the first time, the text FA appears on the screen together with the fan icon. - Page 4 Parameter 11 Product Elbow L (m) Lmax (m) Set value 4x90° 3x90° 2x90° 1x90° 0x90° 3x90° 2x90° 1x90° 0x90° 2x90° 1x90° 0x90° 1x90° 0x90° 0x90° Selec�on of flue length parameters for ver�cal flue Fan Speed and Appliance Capacity Flue Length...
-
Page 5: Horizontal Flue Connections
Horizontal Flue Connections The horizontal flue kit consists of the following parts (7006908351): • Gas water heater box is supplied with a separate cardboard box containing a standard concentric flue kit. a) 90° flanged elbow (Ø 60/100mm), Sealing ring Sealing ring, Viton (Ø 60mm) Sealing ring, Silicon(Ø... -
Page 6: Vertical Flue Connections
Vertical Flue Connections 1. Vertical Flue Set (Ø 60/100mm) (7006902326) 2. Vertical Flue Adaptor (Ø 60/100mm) (7006901413) 3. Extension Pipe 500mm / 1000mm (Ø 60/100mm)(7006901415)/(7006901416) 4. 45° Elbow (Ø 60/100mm) (7006901420) 5. 90° Elbow (Ø 60/100mm) (7006901421) -
Page 7: Service Menu
SERVICE MENU Single Button(Turning and Pressintg) A single button has been designed to provide ease of use to enter the service menu and complete all other settings in Phoenix Gas Water Heater.. Adjustments are made by pressing or turning left or right this button. -
Page 8: Introduction To The Menu
Solar Panel Fan Symbol Symbol Malfunction Symbol Symbol (Wrench) Temperature Flame Symbol Symbol Indicator Digits Introduction to the Menu The appliance must be switched to OFF mode to enter the service menu. The appliance is then de-energized and energized again. The following images appear on the screen respectively; The appliance starts in OFF mode (double line) after the “ECA”... -
Page 9: Parameter Menu (Pa) And Setting Format
Parameter Menu (PA) and Setting Format It is the parameter menu used to control appliance functions. When clicked, the 1st Parametre will appear as “P1” on the screen. At the same time, the set value (stored) alternately set with this parameter number appears on the screen. Alternately Visible Parameter Number... -
Page 10: Calibration Menu (Ca)
Igni�on Curve Type Selec�on 1= Mid Calibra�on Type Selec�on 5 is selected for calibra�on. DHW Modula�on with Flow Sensor 0 = No 1 = Yes It can be adjusted between 5-20. Combus�on Time in Frost Protec�on (sec) Solar NTC Selec�on 0 = No 1 = Yes It can be adjusted between 6-24. -
Page 11: Manual Calibration (Nanu)
After the text appears, C and 01 start to appear alternately on the screen automatically. Setting C01is the parameter tab used to set the nominal combustion load of the appliance. A gas valve operating stage between 0 ... 100 is selected to adjust the load. The ideal stage setting may differ from appliance to appliance. -
Page 12: Error "Alarm" Menu (Al)
Error “Alarm” Menu (AL) The AL menu is used to see the last 10 errors encountered by the appliance. While the last error encountered when entering the menu appears on the screen alternately with the code “A1”, 10th error, is shown alternately with “A” “10” view. For example, if A1 and 02 appear alternately as shown below, it means that the AL02 error was last seen. - Page 13 PROBLEM CODE PROBABLE CAUSE RECOMMENDED SOLUTION AL41 Wrong moun�ng place selec�on for Error detec�on is made from the AL error Flame Loss for More than 6 the gas water heater menu. Consecu�ve Faults AL42 Bu�on and electronic board assembly The bu�on is stuck Bu�on Failure should be checked.
-
Page 14: Information Menu (In)
Information Menu (In) The software version is followed using this menu. Flue Menu (CS) The “CS” Menu is used to be able to combust the appliance at nominal and minimum gas settings. When the “CS” menu is selected, the appliance starts to flash at maximum load and “Hı” appears on the screen. When you turn the button to the left, the appliance will start to light at minimum load and “Lo”... -
Page 15: Control Card Circuit Diagram
CONTROL CARD CIRCUIT DIAGRAM PHOENIX MOTHERBOARD CONNECTIONS CONNECTOR ORDER DESCRIPTION CONNECTOR ORDER DESCRIPTION - EV1 GAS VALVE GROUND SERIES (OPTIONAL) - EV2 GAS VALVE (MODE) +24V SERIES (OPTIONAL) + EV1 GAS VALVE TX D2 SERIAL INTERFACE (OPTIONAL) + EV2 GAS VALVE (MODE) RX D2 SERIAL INTERFACE (OPTIONAL) + EV3 GAS VALVE (ON/OFF) - EV3 GAS VALVE... -
Page 16: Part Disassembly - Installation Information And Maintenance Instructions
PART DISASSEMBLY - INSTALLATION INFORMATION AND MAINTENANCE INSTRUCTIONS 1. Front Cover The front cover is removed by removing the two screws at the bottom and then removing it from the mounting pins at the top. It is attached to the pins in the same way to install, and mounted with two screws. The insulation behind the front cover provides both heat and sound insulation and hermetic cabin sealing. -
Page 17: Control Panel And Motherboard
3. Control Panel and Motherboard Topic Descrip�on Part Func�on Electronic Board Impact in Case ofMalfunc�on The appliance will not work, Light will not appear on the screen, Bu�on will not work, Main Associated Error Codes AL11, AL42,AL86 -Supply energy should be controlled, -Card’s fuse should be checked, - There may be a lack of contact in the supply cable, Diagnos�cs-Test Method and... - Page 18 To access the motherboard, the electrode cable and ground wire are removed. Then, the holder at the bottom is pulled upwards from the cover slides. The connectors are removed. The card is removed from the claw by removing 3 screws that connect the motherboard to the front panel. The button and button shaft on the front are carefully held and the card is removed from its place.
-
Page 19: High Voltage Cable Group
4.High Voltage Cable Group Topic Descrip�on Part Func�on High Voltage Cable Group Impact in Case ofMalfunc�on Appliance will not work, Main Associated Error Codes AL12, AL86 -Supply energy 230V AC (195V AC-250V AC) should not be out of tolerance range, Diagnos�cs-Test Method and -Check that there is no looseness in the high voltage cable connector motherboard Maintenance... -
Page 20: Low Voltage Cable Group
5.Low Voltage Cable Group Topic Descrip�on Part Func�on Low Voltage Cable Group Impact in Case ofMalfunction Appliance will not work Main Associated Error Codes AL01, AL02, AL06, AL07, AL12, AL70, AL72, AL86 -Cables should be checked, any breakage or deforma�onshould be observed, -It should be checked that the terminals at the connec�on point are correctly Diagnos�cs-Test Method and installed,... -
Page 21: Electrode
6. Electrode To remove the electrode cable, the cable terminal is removed, the screws on the electrode flange are removedand the cable seal is pulled up and removed. While mounting, it should be visually checked that the distance between the electrode tip and the burner is approximately 4mm. -
Page 22: Fan
7.Fan Phoenix 22 HM gas water heater uses 32W fan. The fan body is attached to the hood with 3 screws. Make sure that the fan O-ring is in place when installing the fan. Topic Descrip�on Part Func�on Impact in Case ofMalfunc�on The appliance will not work, it will work loudly, Main Associated Error Codes AL81, AL82, AL83,AL84,AL86... -
Page 23: Gas Valve
8. Gas Valve Topic Descrip�on Part Func�on Gas Valve Impact in Case ofMalfunc�on Gas leak, The need for calibra�on, The appliance will not work Main Associated Error Codes AL11, AL12, AL62 -Whether there is a gas leak should be checked with the controller. -In case of calibra�on requirement AL62 error occurs, calibra�on should be done. -
Page 24: Flow Sensor
9. Flow Sensor Topic Descrip�on Part Func�on Flow Sensor Boiling, Not ge�ng hot water, Dry combus�on Impact in Case ofMalfunc�on Main Associated Error Codes AL02, AL72 If calcifica�on is present in the water circuit, boiling may occur due to low water flow rate. - Page 25 Composite Body Turbine Clip Flow Rate Limiter Turbine Turbine Filter The flow sensor can be opened by removing the clip, the clip assembly must be done on the clawed side of the body. Clawed structure Clamp Sensor card 11 lt/min flow rate limiter is used inside the sensor.
- Page 26 It should be checked that no melting occurs in the turbine blades during unusual temperature rises, and if there is melting, the flow sensor should be replaced. Flow Rate Limiter Turbine Blade Flow and Frequency Curve Flow (It/min)
-
Page 27: Temperature Sensor (Ntc)
10.Temperature Sensor (NTC) Topic Descrip�on Part Func�on Temperature Sensor The appliance will not work, it will make incorrect measurements Impact in Case ofMalfunc�on Main Associated Error Codes AL06, AL07, AL70, AL72, Diagnos�cs-Test Method and NTC with 10 kOhm and a beta value of 3435 is used. Cable connec�ons should be Maintenance checked. -
Page 28: Overheat Thermostat
ll.Overheat Thermostat Topic Descrip�on Part Func�on Overheat Thermostat Impact in Case ofMalfunc�on The appliance is deac�vated, Boiling, Blackening in the heat exchanger, Main Associated Error Codes AL02 -Water temperature should be measured. f the water temperature is above 85 ± 4 ° C, the overheat thermostat will be ac�vated and will terminate the hea�ng. -
Page 29: Hood
13. Hood There are two phillips head screws in heat exchanger holder bracket and there are a total of four phillips head screws in the hood two on the right and two on the left. These screws must be removed to remove the hood. -
Page 30: Heat Exchanger
14. Heat Exchanger Topic Descrip�on Part Func�on Heat Exchanger High CO or CO2 emissions, Boiling, Dry Combus�on, Recircula�on (combus�on Impact in Case ofMalfunc�on products mix into the inlet air and re-enter in combus�on, and emission values increase), Boiling sound, Noisy Main Associated Error Codes AL82, AL84 -Check whether there is corrosion in the heat exchanger or if there is corrosion in the... -
Page 31: Burner
2. First, the burner is removed, then the hood bracket and the heat exchanger bracket are removed and the heat exchanger is taken down. 15.Burner Topic Descrip�on Part Func�on Burner Impact in Case of Malfunc�on There is gas or water leakage, High CO or CO2 emission. Explosive combus�on occurs. - Page 32 After the gas pipe and water pipes are taken from the burner, the burner brackets on the right and left sides are removed.
Need help?
Do you have a question about the PHOENIX PH HM 11 LT/DK and is the answer not in the manual?
Questions and answers