Table of Contents
Advertisement
Quick Links
Advertisement
Table of Contents

Related Manuals for AIRIS PRAGMA N785


Summary of Contents for AIRIS PRAGMA N785
-
Page 3: Limitation Of Liability
Preface Copyright 2004 All Rights Reserved. The information in this document is subject to change without prior notice in order to improve reliability, design and function and does not represent a commitment on the part of the manufacturer. In no event will the manufacturer be liable for direct, indirect, special, incidental, or consequential damages arising out of the use or inability to use the product or documentation, even if advised of the possibility of such damages. - Page 4 Notices Federal Communications Commission Radio Frequency Interference Statement This equipment has been tested and found to comply with the limits for a Class B digital device, pursuant to Part 15 of the FCC Rules. These limits are designed to provide reasonable protection against harmful interference in a residential installation.
- Page 5 Canadian DOC Notice For Class B Computing Devices This Class B digital apparatus meets all requirements of the Canadian Interference - Causing Equipment Regulations. Cet appareil numerique de la classe B repecte toutes les exigences du Règlement sur le matèriel brouilleur du Canada.
- Page 6 Page intentionally left blank...
-
Page 7: Table Of Contents
Table of Contents Chapter 1: Before you Start --------------------------------------------------------------------------------- 1 Conventions of This Manual.......................... 1 Things you must remember before working on your computer ..............6 Chapter 2: Introduction --------------------------------------------------------------------------------------- 9 Welcome to the Notebook PC........................9 Getting to Know Your Computer........................10 Chapter 3: Getting Started ----------------------------------------------------------------------------------- 19 Connecting to a Power Source ........................ - Page 8 Introduction..............................43 Navigating through BIOS Setup ........................43 Accessing the BIOS Setup Program ......................43 The Menu Bar ..............................44 The Legend Bar ............................. 44 Launching Submenus............................. 45 General Help ..............................45 The Main Menu ............................. 46 The Advanced Menu............................47 The Boot Menu ..............................
-
Page 11: Chapter 1: Before You Start
Conventions of This Manual Use this manual will help you get the most from your notebook computer. If you are an experienced user of computers and/or Microsoft’s Windows operating systems, you might find it useful to read the Quick Start Guide that comes along with your accessories. If you are a less experienced user, you should through the manual carefully before using your system. - Page 12 Place the power cord in such a way that people can not step on it. Do not place anything on top of the power cord. All cautions and warnings on the equipment should be noted. If the equipment is not use for a long time, disconnect the equipment from the main power outlet to avoid being damaged by transient overvoltage.
-
Page 13: Wichtige Sicherheitshinweise
• All components of the cord set must bear a “PSE” or “ T ” mark and registration number in accordance with the Japanese Dentori Law. • The minimum specifications for the flexible cord are .75m ㎡ conductors. For Other Countries: •... - Page 14 Vor jedem Reinigen ist das Gerät vom Stromnetz zu trennen. Versenden Sie Keine Flüssig- oder Aerosolreiniger. Am besten eignet sich ein angefeuchtetes Tuch zur Reinigung. Die Netzanschluβsteckdose soll nahe dem Gerät angebracht und leicht zugänglich sein. Das Gerät ist vor Feuchtigkeit zu schützen. Bei der Aufstellung des Gerätes ist auf sicheren Stand zu achten.
- Page 15 Landes, in dem Sie das Netzteil einsetzen, genügen, je nachdem, ob die Netzspannung 100- 120 oder 200-240V Wechselspannung beträgt. • Das Kabel-Set muss für das Land, in dem es eingesetzt wird, zugelassen sein. • Der Gerätestecker des Kabels muss in eine CEE22/ EN603/ IEC 320 Buchse passen. Für die USA und Kanada: •...
-
Page 16: Things You Must Remember Before Working On Your Computer
Es besteht Explosionsgefahr, wenn der Akku nicht ordnungsgemäß ersetzt wird. Ersetzen Sie den Akku nur durch einen Akku gleichen oder äquivalenten Typs, der vom Hersteller empfohlen wird. Entsorgen Sie Akkus entsprechend den Anweisungen des Herstellers. Entfernen Sie den Akku auf keinen Fall bei eingeschaltetem Notebook, da hierdurch Daten verloren gehen könnten. - Page 17 There are some things you can tolerate that the computer can’t – things like static electricity, dust, water, steam and oil. In case you decide to pull over for roadside computing, try to choose a clean, comfortable work area for your system. A lithium-ion battery pack will be available when you are traveling.
- Page 18 Page intentionally left blank...
-
Page 19: Chapter 2: Introduction
There are more and more people spending large amounts of time in front of computer monitors now that scientists from many fields including anatomy, psychology, and occupational safety are involved in the study of ergonomically sound work environments. A few tips to help you work effectively without a lot of physical discomfort: Purchase a chair with armrests and good back support. -
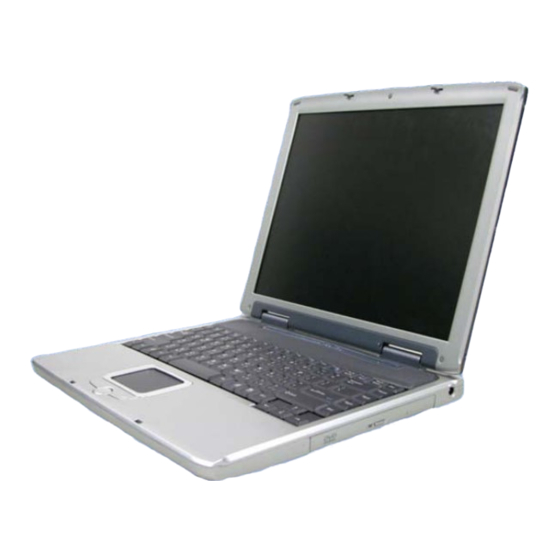
Page 20: Getting To Know Your Computer
Getting to Know Your Computer Opening the LCD Panel At the front of the Notebook you will find a retaining latch on the display panel that locks the display in closed position when the Notebook is not in use. Slide the display panel latch to the right until the display panel releases, and then raise the LCD screen. - Page 21 With the LCD screen open, you will see several features important for operating your Notebook computer. Each of these features is briefly described below. LCD Cover Release Latch LCD Screen Internet Explorer Button Wireless LAN Button System Status Indicator Panel...
- Page 22 Indicates that the computer is accessing the hard disk drive. Numeric Lock Indicates that the keyboard is in Num Lock mode. Caps Lock Indicates when the keyboard is in Caps Lock mode. In this mode, the keyboard produces uppercase text when you press a key. When you press the Caps Lock key again, the indicator goes off and the keyboard produces lowercase text.
- Page 23 The Left Side Ventilation Opening USB Port USB Port The LAN Port When using a LAN, please use an EMI Shielding Cable to minimize an inteference when transmitting.
- Page 24 The Modem Port Always disconnect all telephone lines from the wall outlet before servicing or disassembling this equipment. To reduce the risk of fire use only No. 26 AWG or larger telecommunication line cord. Microphone Jack Audio Line Out Jack These three LED indicators are separately program for the following functions: Power On, Suspend Mode and Battery Charge.
- Page 25 The Right Side The CD-ROM/DVD-ROM or DVD CD-RW Combo (Option) DC IN Connector...
- Page 26 The Rear Ventilation Opening Kensington Lock S-Video Port Parallel Port External CRT Port USB Ports...
- Page 27 The Bottom Panel MiniPCI/Wireless LAN/Modem Combo Compartment (Option) Expansion Compartment Battery Release Latch Battery Hard Disk Drive...
- Page 28 Page intentionally left blank...
-
Page 29: Chapter 3: Getting Started
Connecting to a Power Source Connecting the AC Adapter A universal AC adapter is provided to supply your computer with power and also charge the computer’s battery pack. The adapter’s AC input voltage can range anywhere from 100 to 240 volts, covering the standard voltages available in almost every country. -
Page 30: Turning On Your Notebook Computer
Whenever possible, keep the AC adapter plugged into the Notebook and an electrical outlet to recharge the battery. Never turn off or reset your Notebook while the hard disk is in use and the HDD status icon is lit; doing so can result in loss or destruction of your data. Always wait at least 5 seconds after turning off your Notebook before turning it back on;... -
Page 31: Inserting And Removing The Battery Pack
Only use batteries that are approved by an authorized dealer. All batteries are not the same and therefore should not be treated as such. Using the wrong battery could cause serious damage to your computer and yourself through toxic emissions. Inserting and Removing the Battery Pack The battery pack should already be inserted in your Notebook computer when you unpack it. - Page 32 Lift the release latch to release the battery from the bay. At this time the battery will now be angled slightly out of the bay. Hold the battery at the finger grip and lift it out of the compartment. Charging the Battery Pack The installed battery pack charges automatically any time the computer is connected to the AC adapter and an external power source.
-
Page 33: Chapter 4: Using The Notebook Computer
Adjusting the LCD Screen Display The LCD screen display can be adjusted by the following key combinations. KEYS FUNCTIONS [Fn] + [F7] Decreases the brightness level. [Fn] + [F8] Increases the brightness level. [Fn] + [F10] Use this key combination to expand your video screen or reset to its original size. -
Page 34: A Tour Of The Notebook's Keyboard
You can hook up an external monitor through the 15-pin CRT connector. Configurations are available: LCD only CRT only Simultaneous display of the LCD screen and CRT monitor TV only Simultaneous display of the LCD screen and TV screen Simultaneous display of the TV screen and CRT monitor You can switch between these display configurations by pressing the key combination [Fn] + [F12]. -
Page 35: The Touchpad
while keeping the keypad on an external keyboard activated, use the [Fn] + [NumLk] hot key on the Notebook keyboard. The Notebook’s Hot Key Controls KEYS FUNCTION(S) Power Button Press this button once to power on or enter the suspend/resume mode. Press this button for more than 4 seconds to power off the system. -
Page 36: Connecting An External Tracking Devices
TouchPad Precautions The TouchPad is a pressure sensitive device. Please take note of the following precautions. Make sure the TouchPad does not come into contact with dirt, liquids or grease. Do not touch the TouchPad if your fingers are dirty. Do not rest heavy objects on the TouchPad or the TouchPad buttons. -
Page 37: The Cd-Rom/Dvd-Rom/Combo Drive
The CD-ROM/DVD-ROM/Combo Drive Features of the CD-ROM/DVD-ROM/Combo Drive The features of the CD-ROM/DVD-ROM/Combo Drive are listed below. The Audio Play feature allows you to play music CDs Front panel load/unload button Supports CD-DA, CD-ROM mode 1 and mode 2, Multi-Session Photo CD™, CD-I/Video CD (pcs.) Low power consumption 12.7mm height... -
Page 38: Power Saving Modes
Push the eject button and pull the tray all the way out. Carefully pick up the CD disk by the edges and – while pressing down on the center ring – remove the CD-ROM/DVD-ROM/Combo from the tray. Do not insert any foreign objects into the disc tray. If you experience difficulty when ejecting the CD disk tray, stretch a paper clip (or use a pin or a thin metal rod) and insert it into the emergency eject hole located on the right side of the front panel. -
Page 39: Automatic Battery Pack Charging Function
To calibrate the battery pack follows the instructions below: Insert the battery into the battery compartment and turn on the Notebook. If the battery is completely without power go to the next step. Otherwise, let the battery run down until the battery low-low warning beeps are heard. The system will automatically enter Suspend mode. - Page 40 Battery Low Warning When the pack initially reaches the “Battery Low” state approximately 10 ~ 15 minutes of the usable battery life is left. You will hear an audible beep signal every 1.5 seconds alerting you to the “Battery Low” status. When the battery power reaches the “Battery Low Low” status the beeping sound will accelerate.
-
Page 41: Adjusting The Brightness
Adjusting the Brightness To adjust the brightness on the LCD screen, press and hold down the [Fn] key in the lower left hand corner of the keyboard and press the [F7] key to reduce the brightness or [F8] to increase the brightness. - Page 42 Page intentionally left blank...
-
Page 43: Chapter 5: Desktop Operation
Your notebook is capable of providing you with efficient and productive mobile computing, it also has the speed and capacity to service as a desktop system. This chapter discusses those functions of your notebook that are typical of desktop systems. Audio The Multimedia Sound System The Notebook’s built-in audio capabilities allow you to take advantage of a wide range of... -
Page 44: Connecting Peripheral Devices
Audio Volume Control The Notebook is equipped with hot-key volume controls: Pressing the [Fn] + [F3] hot-key combination decreases the audio output volume, press the [Fn] + [F4] hot-key combination increases the audio output volume. Audio Software Your notebook comes equipped with an integrated sound system capable of providing you with quality audio sound through the built-in speakers or through external speakers connected via the system ports. - Page 45 The computer is equipped with several interface ports, including an enhanced parallel (printer) port, a serial port, and USB ports. These are provided as a means of connecting peripheral devices to the computer. Connect peripheral devices to the computer's interface ports as shown below:...
- Page 46 Page intentionally left blank...
-
Page 47: Chapter 6: Internet Connection
There are numerous ways to connect to the Internet. This may vary from the user’s working environment as well as system specifications. Using a modem and a telephone line Using a wired LAN Using a wireless LAN Using a modem for Connection to Internet Use a telephone line to connect to the modem port of your computer. - Page 48 In the “Network Tasks” window, use your mouse pointer to click on the “Local Area Connection”. Select “Properties” from the popup menu that appears In the “This connection uses the following items” field, select “Internet Protocol (TCP/IP), and click “Properties”.
- Page 49 Enter the system’s IP and DNS server addresses on the General tab of the “Internet Protocol (TCP/IP) Properties” window. If DHCP is used, click “Obtain an IP address automatically” and “Obtain DNS server address automatically” on the General tab.
-
Page 50: Using Both Dhcp And Static Ip For Connection To Internet
After all the all the information are correctly entered in the “Internet Protocol (TCP/IP) Properties” window, click “OK” to finish. Using Both DHCP and Static IP for Connection to Internet When you are alternatively using networks with either DHCP or static IP addressing, you can use alternative settings that enable simultaneous configurations of DHCP and static IP to use both of the network connects without reconfiguring. - Page 51 button. Select the “Wireless Networks” tab and enable the “Use Windows to configure my wireless network Settings”. Click “OK”. A small icon will display on your lower right end of the Windows display. Click on the icon and select the setting for the available network shown on the list and click on the “Connect”...
- Page 52 Page intentionally left blank...
-
Page 53: Chapter 7: Running Bios Setup
Introduction The BIOS (Basic Input and Output System) Setup program is a menu driven utility that enables you to make changes to the system configuration and tailor your system to reflect installed hardware or alter system performance. When the Notebook is turned back on, the system is configured with the values stored in CMOS. -
Page 54: The Menu Bar
Item Specific Help On the right side of the Setup screen is an area labeled Item Specific Help. This area will list navigation key shortcuts and information that is specific for the item that you are currently editing. The Menu Bar The top of the screen has a menu bar with the following selections: Main - Use this menu to make changes to the basic system configuration. -
Page 55: Launching Submenus
→ Selects the menu item to the right. ↑ or ↓ Keypad Moves the cursor up and down between fields. arrow keys Enter Moves the cursor to the next position available in the field. Scrolls backward through the values for the highlighted Minus key ( field. -
Page 56: The Main Menu
Save Changes and Exit the Setup Program Refer to the Exit menu section of this chapter for detailed information on saving changes and exiting the setup program. The Main Menu When the Setup program is accessed, the following screen appears:... -
Page 57: The Advanced Menu
The Advanced Menu Selecting Advanced from the menu bar displays the Advanced menu:... -
Page 58: The Boot Menu
The Boot Menu The Boot menu allows the user to specify the order in which the Notebook is to check for a device to boot the system. You can also configure the way that the system will boot up. To make changes, select Boot from the menu bar. The following screen appears:... -
Page 59: The Security Menu
The Security Menu The Notebook’s advanced system of security allows you to set a password to prevent unauthorized access to system resources, data, and the BIOS Setup Program. -
Page 60: The Exit Menu
The Exit Menu Once you have made all of your selections from the various menus in the Setup program, you should save your changes and exit Setup. Select Exit from the menu bar to display the following menu:... -
Page 61: Chapter 8: The Software Utilities Disks
AutoRun Installation Follow the step-by-step procedures on the CD-ROM/DVD-ROM to execute the “AutoRun” application by selecting the topic of “Driver Installation”. Installing VGA Display Drivers Insert the CD-ROM Driver into your CD-ROM/DVD-ROM drive. Click “Start” and Select “Run”. Type the following: D:\Driver\VGA\SiS\setup.exe (If D is not your CD-ROM/DVD-ROM drive, substitute D with the correct drive letter). - Page 62 Type the following: D:\Driver\Lan\Realtek\setup.exe (If D is not your CD-ROM/DVD-ROM drive, substitute D with the correct drive letter). Click on “Setup” to begin the Installation Wizard. Follow the Wizard’s on-screen instructions to complete the installation. Restart the system. Installing the TouchPad Driver Insert the CD-ROM Driver into your CD-ROM/DVD-ROM drive.
-
Page 63: Vga Utilities
Select the "Include this location in the search" item and click on the "Browse" button and specify for the designate location of your CD driver D:\Driver\WLan\QCOM\RALINK2_RT2500.EXE VGA Utilities After you have restarted Windows, open the “Control Panel” and double click on the “Display” icon. - Page 64 Gamma Correction...
- Page 65 Video Setting...
- Page 66 Driver Mode Setting...
-
Page 67: Chapter 9: Troubleshooting
This chapter describes locating and solving problems that you may encounter while using your computer. Locating a Problem Problems with your computer can be caused by something as minor as an unplugged power cord – or as major as a damaged hard disk. The information in this chapter is designed to help you find and solve minor problems. -
Page 68: The Power-On Self Test
To check the power cables, and connections: If you have been using battery power, connect the Notebook to an external power source and make sure that the battery has a charge. If you are using the Notebook with the AC adapter, check the power outlet, the power cord, and any power switches that may affect your computer. -
Page 69: General Hardware Problems
Error messages that indicate a failure with either the hardware, the software, or the Basic Input/Output System (BIOS). These critical malfunctions prevent the computer from operating at all or could cause incorrect and apparent results. An example of a critical error is microprocessor malfunction. - Page 70 Solution: Check and make sure that you do not have a non-bootable floppy diskette inserted in your floppy drive. If your USB FDD is empty, you may not have an operating system installed on your drive. Contact technical support for assistance. Problem: You hear irregular beeps during operation of the Notebook and the system halts.
-
Page 71: Contacting Your Dealer
Check the cable connection. Check the mouse with another application to see if there is a software incompatibility problem. If possible, check the mouse with another computer to see if it works. If it doesn’t operate on a different system, the mouse might be broken. Contacting Your Dealer If you still have a problem after reading the preceding sections, the next step is to contact your dealer. - Page 72 Page intentionally left blank...
-
Page 73: Chapter 10: Upgrading Your System
Upgrading your Memory Refer to the following instructions and illustration for information on upgrading your notebook's memory. Turn off the computer and disconnect the AC adapter and all peripherals. Turn the notebook over so that the rear ports are facing you and locate the memory module compartment. -
Page 74: The Easy To Upgrade Hdd Module
The Easy to Upgrade HDD Module The hard drive in your notebook computer is made to be easily swapped out for upgrading. You should back up your hard drive before attempting o change the hard drive. Make sure that before you install a new drive, all the files in your system should be backed up. - Page 75 Slide the compartment cover into place and be sure the screw holes on the cover align completely with the screw holes in the case. Secure the cover with the three screws.
-
Page 76: Upgrading Your System Cpu
Upgrading your System CPU Refer to the following instructions and illustration for information on upgrading your notebook's Turn off the computer and disconnect the AC adapter and all peripherals. From the rear side of your notebook, use your index finger to lift up the hinge cover attached to the LCD screen. Bend your LCD screen into 90 degree angle then carefully lift up the hinge cover. - Page 77 Remove all the screws attached to the heatsink. Before removing the screws, there are certain measures to followed in removing the heatsink To remove the heatsink, first loosen the screw carefully. After loosening one screw, be certain that the next to be loosen should be the screw on its adjacent side as shown on the illustration.
- Page 78 Page intentionally left blank...
-
Page 79: Appendix A: Specification
Detailed Notebook Specifications ® ® Intel Celeron M (Banias) processor, 512KB L2 cache, Processor FSB400MHz 479pin mFCPGA Package ® ® Microsoft Windows XP Professional Edition Operating System ® ® Compliance Microsoft Windows XP Home Edition SiS 661 + 963L Core Logic Expansion 2 slots of 200pin DDR SO-DIMM SDRAM module, Memory expandable up to 2GB system memory... - Page 80 3.0mm travel, inverted-T, 88 keys with windows key Keyboard For Connectivity Interface Ports Mic-in, Headphone Jack with adapter for 5.1 channel SPDIF out Left Side support, Modem port, LAN port, USB 2.0 port*2 DC -in jack Right Side USB 2.0 portx2, TV-out connector, CRT connector, parallel port Rear Side Audio Controller: integrated chipset, Audio Codec : CMedia 9761 Audio...
- Page 81 2.6 kg with 14.1” panel, 4 cell battery and Optical Drive installed Weight...
Need help?
Do you have a question about the PRAGMA N785 and is the answer not in the manual?
Questions and answers