
Related Manuals for AIRIS KIRA Series


Summary of Contents for AIRIS KIRA Series
- Page 2 Preface © Copyright 2008 © All Rights Reserved. The information in this document is subject to change without prior notice in order to improve reliability, design and function and does not represent a commitment on the part of the manufacturer. In no event will the manufacturer be liable for direct, indirect, special, incidental, or consequential damages arising out of the use or inability to use the product or documentation, even if...
- Page 3 Reorient or relocate the receiving antenna Increase the separation between the equipment and receiver Connect the equipment into an outlet on a circuit different from that to which the receiver is connected Consult the dealer or an experienced radio TV technician for help This device complies with Part 15 of the FCC Rules.
-
Page 4: Table Of Contents
Table of Content ................2 EFORE YOU TART ..........9 ET YOUR COMPUTER ACCLIMATE ITSELF ............9 UMIDITY LARE ..............10 UITABLE PLACE TO WORK ..................12 NTRODUCTION ..................13 RONT ..................15 IEWS ..................15 IGHT ................18 ETTING TARTED AC A ............18 ONNECTING THE DAPTER :............20 NSTALL THE ATTERY : ............21 EMOVE THE... - Page 5 ..................45 ETUP ..................46 ETUP VGA U ..................48 TILITIES 3G C ..................53 ONNECTION ................57 ROUBLESHOOTING ................58 O SPEAKER OUTPUT ............58 OUND CANNOT BE RECORDED ..59 HE HARD DISK DRIVE DOES NOT WORK OR IS NOT RECOGNIZABLE .....59 HE HARD DRIVE IS MAKING ABNORMAL WHINING NOISES ......59 HE HARD DISK DRIVE HAS REACHED ITS CAPACITY ........60...
- Page 6 CHAPTER 1...
-
Page 7: Before You Start
Conventions of This Manual Use this manual will help you get the most from your notebook computer. If you are an experienced user of computers and/or Microsoft’s Windows operating systems, you might find it useful to read the Quick Start Guide that comes along with your accessories. - Page 8 Make sure to use the right voltage for the power source when connecting the equipment to the power outlet. Place the power cord in such a way that people can not step on it. Do not place anything on top of the power cord. All cautions and warnings on the equipment should be noted.
- Page 9 The minimum specifications for the flexible cord are No. 18 AWG, (2) Type SPT-2, and (3) 2-conductor. For Japan: All components of the cord set must bear a “PSE” mark and in accordance with the Japanese Dentori Law. The minimum specifications for the flexible cord are .75m ㎡...
- Page 10 Use only the power cord and batteries indicated in this manual. Do not dispose of batteries in a fire. They may explode. Check with local codes for possible special instructions. Do not use the AC adapter near open water or other liquids. Never spill liquid into the AC adapter.
-
Page 11: Wichtige Sicherheitshinweise
Diese Flachewird sehr heiss. When you see this symbol, be careful as this spot may be very hot. Wichtige Sicherheitshinweise Bitte lesen Sie diese Hinweis sorgfältig durch. Heben Sie dirse Anleitung für den späteren Gebrauch auf. Vor jedem Reinigen ist das Gerät vom Stromnetz zu trennen. Versenden Sie Keine Flüssig- oder Aerosolreiniger. - Page 12 Das Gerät ist gefallen und/oder das Gehäuse ist beschädigt. Wenn das Gerät deutliche Anzeichen eines Defektes aufweist. VORSICHT: Explosiongsgetahr bei unsachgemäßen Austausch der Batterie. Ersatz nur durch denselben oder einem vom Hersteller empfohlenem ähnlichen Typ. Entsorgung gebrauchter Batterien nach Angaben des Herstellers.
- Page 13 Die Zubehörteile des Kabel-Sets müssen das Prüfsiegel derjenigen Stelle, die in dem jeweiligen Land für die Sicherheitsprüfung zuständig ist, tragen. Das Kabel muss vom HAR (harmonisierten) Typ H03VVH2-F sein. Das Kabel-Set muss eine Stromkapazität von mindestens 2,5 Ampere haben und Spannungen von 125 oder 250 V Wechselstrom gestatten.
-
Page 14: Things You Must Remember Before Working On Your Computer
durch einen Akku gleichen oder äquivalenten Typs, der vom Hersteller empfohlen wird. Entsorgen Sie Akkus entsprechend den Anweisungen des Herstellers. Entfernen Sie den Akku auf keinen Fall bei eingeschaltetem notebook, da hierdurch Daten verloren gehen könnten. Der Netzeingabeanschluss dient als Hauptschalter des Geräts. Things you must remember before working on your computer Let your computer acclimate itself... -
Page 15: Suitable Place To Work
Suitable place to work Your computer will run well wherever you’re comfortable but extremes of temperature and humidity can be challenging to your system’s parts. There are some things you can tolerate that the computer can’t – things like static electricity, dust, water, steam and oil. In case you decide to pull over for roadside computing, try to choose a clean, comfortable work area for your system. - Page 16 CHAPTER 2...
-
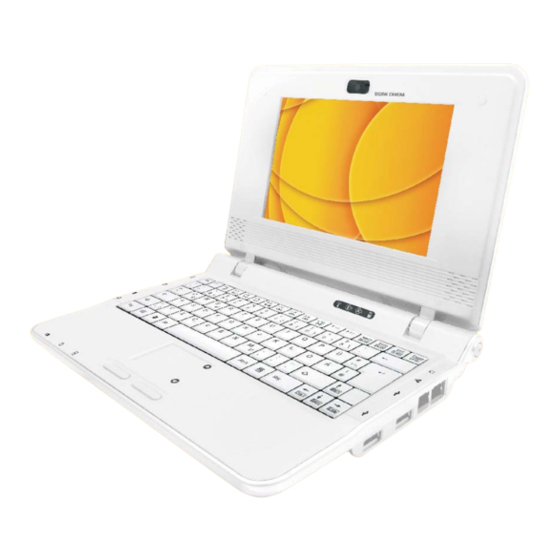
Page 17: Introduction
Preparing your Computer Install the battery pack Connecting the AC adapter Opening the display panel Turning on your computer Knowing your Computer With the LCD screen open, you will see several features important for operating your notebook computer. -
Page 18: Front View
To avoid damage to the display panel: 1. Try not to slam the display upon closing it. 2. Try not to place any object on top when it is closed or open. 3. Be sure the system is turned off or in suspend mode before you close the display panel. - Page 19 Keyboard The keyboard differs for each territory Touchpad Touchpad Buttons Power / Suspend Button Press for 1~1.5 seconds to turn on the system. Press and hold for at least 4 seconds to turn off the system. Press the power / suspend button again to return from the suspend mode.
-
Page 20: Left Views
Blue light indicates the WLAN/Bluetooth/HSPA is active. Battery status Charging – Lavender Full – Blue Low - Red Blue light indicates the hard drive and/or optical drive is being accessed. Left Views Kensington Lock DC In CRT Port USB 2.0 Port 4-in-1 Card Reader (SD/MMC/MS/MS Pro Memory Card) Right View... -
Page 21: Bottom View
USB 2.0 Port Ethernet / LAN Port When using a LAN, please use an EMI Shielding Cable to minimize an inteference when transmitting. Modem Port (Optional) Always disconnect all telephone lines from the wall outlet before servicing or disassembling this equipment. - Page 22 CHAPTER 3...
-
Page 23: Started
Connecting to a Power Source Connecting the AC Adapter A universal AC adapter is provided to supply your computer with power and also charge the computer’s battery pack. The adapter’s AC input voltage can range anywhere from 100 to 240 volts, covering the standard voltages available in almost every country. -
Page 24: Turning On Your Notebook Computer
Never turn off or reset your notebook while the hard disk is in use and the CD-ROM status icon is lit; doing so can result in loss or destruction of your data. Always wait at least 5 seconds after turning off your notebook before turning it back on;... -
Page 25: To Install The Battery Pack
laws. Explisionsgefahr bei unsachgernazen Austausch der Batterie. Ersatz nur durch denselben oder einem Hersteller empfohlenem ahnlichen Typ. Entsorgung gebrauchter Batterien navh Angaben Herstellers. Installing and Removing the Battery Pack To Install the Battery Pack:... -
Page 26: To Remove The Battery Pack
To Remove the Battery Pack: Charging the Battery Pack The installed battery pack charges automatically any time the computer is connected to the AC adapter and an external power source. It is a good idea to occasionally discharge the battery pack fully to preserve its operating performance. - Page 27 CHAPTER 4...
-
Page 28: Using The Notebook Computer
Adjusting the LCD Screen Display The LCD screen display can be adjusted by the following key combinations. - Changes Display Mode: LCD-only, CRT- only, LCD/CRT simultaneously - Increases the brightness level. - Decreases the brightness level. LCD Care LCD screens are delicate devices that need careful handling. Please pay attention to the following precautions: When you are not using the computer, keep the LCD screen closed to protect it from dust. -
Page 29: External Crt Display
External CRT Display You can hook up an external monitor through the 15-pin CRT connector. Three configurations are available: LCD only CRT only LCD and CRT simultaneously You can switch between these display configurations by pressing the key combination [Fn] + [F4]. The Notebook’s Hot Key Controls Function Keys (Quick Keys) - Bluetooth on/off. -
Page 30: The Touchpad
- Decreases the speaker volume. - Increases the brightness level. - Decreases the brightness level. - Enable/Disable the Touchpad - Mute the system volume - Enters the silent mode - Enable/Disable the camera application The TouchPad The touchpad is a rectangular electronic panel located just below your keyboard. -
Page 31: Touchpad Precautions
TouchPad Precautions The TouchPad is a pressure sensitive device. Please take note of the following precautions. Make sure the TouchPad does not come into contact with dirt, liquids or grease. Do not touch the TouchPad if your fingers are dirty. Do not rest heavy objects on the TouchPad or the TouchPad buttons. -
Page 32: Preparing The Battery Pack For Use (Battery Calibration)
See Battery Status later in this section for a description and explanation of the Windows Battery icon. Charging the battery takes about 2.5 hours to charge when the system is in off state. If possible, always charge the battery completely. If you use the battery so frequently that it exceed more than 20 times by fully discharging/charging in a single month alone, we recommend you to perform the... -
Page 33: Automatic Battery Pack Charging Function
In general, using the battery until the low-low battery-warning indicator appears and fully recharges the battery each time (full discharge/charge cycle) will ensure the accurate reporting of the battery gauge status. Automatic Battery Pack Charging Function To charge the battery, while the battery pack is in the notebook, plug the AC adapter into the notebook and an electrical outlet. -
Page 34: Small Battery For The Real Time Clock
Beeping Battery Low Low: Indicates that there is 1 to 2 accelerates minutes of battery charge remaining. Save your work and turn off the notebook, or connect the AC adapter. When there is only one minute of battery charge remaining, the notebook will suspend to the HDD and power off. -
Page 35: Help Windows
Adjusting the Brightness To adjust the brightness on the LCD screen, press and hold down the [Fn] key in the lower left hand corner of the keyboard and press the [F8] key to reduce the brightness or [F7] to increase the brightness. - Page 36 Recycle Bin Used for storing deleted files in case you want to recover and save it in your system. The files will only be deleted from the Recycle Bin permanently only if you empty it by right clicking your mouse and select the “Empty Recycle Bin”.
- Page 37 The Start menu allows you to adapt and show the programs used most frequently. If you wish to keep an item, right click the item and click Pin to Start menu. Log Off will enable the current user to log off and allows a new user to log on.
-
Page 38: Control Panel
Notification The icons that appear here are for quick access to some programs and computer functions that you frequently used. To prevent Windows XP from hiding icons: From an empty spot on the Taskbar, right click your mouse and select the Properties, remove the checked mark on the Auto-hide the taskbar. - Page 40 CHAPTER 5...
-
Page 41: Internet Connection
There are numerous ways to connect to the Internet. This may vary from the user’s working environment as well as system specifications. Using a modem and a telephone line (optional) Using a wired LAN Using a wireless LAN Using a modem for Connection to Internet (optional) Use a telephone line to connect to the modem port of your computer. -
Page 42: Using A Wired Lan For Connection To Internet
Using a wired LAN for Connection to Internet For you connect to the Internet, a wired LAN environment normally uses the company’s LAN or a broadband modem. -
Page 43: Using Wireless Lan Network For Connection To Internet
Using Wireless LAN Network for Connection to Internet LUETOOTH ONNECTION Bluetooth is a developing, world wide, open, short-range radio specification focused on communication between the Internet and Net devices, plus it defines communication protocols between devices and computers. It connect wirelessly to your world: In home, at work, in motion and at play. - Page 44 This will be the display that will appear on your screen. If the system detects any other devices, it will be shown as illustrated in the Bluetooth setting window:...
- Page 45 CHAPTER 6...
-
Page 46: Running Bios Setup
The Setup Utility is a hardware configuration program built into your computer’s BIOS (Basic Input/Output System). It runs and maintains a variety of hardware functions. It is menu-driven software, which allows you to easily configure and change the settings. The BIOS contains manufacture’s default settings for the computer’s standard operations. -
Page 47: Bios Action Keys
BIOS Action Keys Function Command Description Leaves a sub-menu to return to the Exit previous menu OR exits the BIOS setup while saving changes. General Help Shows the Help Screen Saves changes and reboots the Save and Exit computer. <Tab> Select a field Selects the next field. -
Page 48: Info Setup
Info Setup... -
Page 49: Advanced Setup
Advanced Setup Security... -
Page 50: Power Setup
Power Setup Boot Setup... -
Page 51: Exit Setup
Exit Setup... - Page 52 CHAPTER 7...
-
Page 53: Vga Utilities
You can click the touchpad or mouse right button and select the “Properties” item. Select the “Display Settings” option to enter its window display. Click on the “Advanced Settings” tab to enter “Plug and Play Monitor on Mobile Intel ® 945 Express Chipset Family” window display. - Page 56 Display Devices Display Settings...
- Page 57 Color Correction Hot Keys...
-
Page 58: Connection
3G is the third generation of mobile phone standards and technology. 3G enable users a wide range of more advanced service while achieving greater network capacity through improved spectral efficiency. Press on the 3G icon to bring the 3G application and then press the hot key combination of “Fn + F2”... - Page 59 To disconnect, click on the “Connect” icon will exit the 3G application. Another way for 3G connection is by clicking on the “Menu” button...
- Page 60 Select the “Setting” and click on the “Internet Connections” to enter the connection window display. Click on the “Add new Connection” in case you want to connect to other telecom company.
- Page 61 CHAPTER 9...
-
Page 62: Troubleshooting
Your computer has been fully tested and complies with the system specifications before shipping. However, incorrect operations and/or mishandling may cause problems. This chapter provides a reference for identifying and correcting common hardware and software problems that you may encounter. When you encounter a problem, you should first try to go through the recommendations in this chapter. -
Page 63: No Speaker Output
Be sure all the device drivers are installed properly. For example, without the audio driver properly installed, the speakers and microphone will not work. If external devices such as USB camera, scanner, printer do not function correctly when connected to the system, it is usually the device’s own problem. -
Page 64: The Hard Disk Drive Does Not Work Or Is Not Recognizable
After Click OK button, the recording volume control panel will appear. Go to [Start > Settings > Control Panel] and double-click the Multimedia icon (or Sounds and Audio Devices icon). In the Volume or Audio page, make sure that the audio codec mentioned in the spec is the default recording device. -
Page 65: The Hard Disk Takes Longer To Read A File
The hard disk takes longer to read a file If you have been using the drive for a period, the files may be fragmented. Go to [Start > Programs > Accessories > System Tools > Disk Defragmenter] to perform a disk defragmentation. -
Page 66: The Built-In Keyboard Accepts No Input
while typing or using the touch pad. The built-in keyboard accepts no input Please try to make sure the system doesn’t hang up and is still working. The characters on the screen repeat while I type You may be holding the keys down too long while you’re typing. -
Page 67: The O/Sissues An Insufficient Memory Error Message During Operation
The O/S issues an insufficient memory error message during operation This is often a software or Windows-related problem. A program is draining the memory resources. Close the application programs you’re not using and restart the system. PC Card Problems Some system may not have the PC Card Slot option. -
Page 68: The Computer Becomes Hot
Performance Problems The computer becomes hot In a 35 C environment, the certain areas of the computer’s back case are expected to reach 50 degrees. Make sure the air vents are not blocked. If the fan does not seem to be working at high temperature (50 degrees Celsius and up), contact the service center. - Page 69 APPENDIX A...
-
Page 70: Specification
O.S. Supports Windows XP OS with SATA HDD Supports Linux Linpus Lite 9.4 with uSSD Support Intel Atom CPU single core Memory DDRII 533/667 support RAM socket * 1 System DDRII up to 1 GB total Core Logic Intel Cantiga 945GSE+ICH7M Intel 945GSE Audio Codec Realtek ALC662... - Page 71 Mini Card w/ PCI-E interface IEEE 802.11 B/G support w/ 1 Antenna Camera CCD Support 1.3M & 0.3M Camera Keyboard 80/81 keys KB support Pointing Device PS2 Touch Pad with 2 buttons 10.2"/8.9” SWVGA, resolution 1024X600 LED panels support HDD for 2.5" 9.5mm SATA support SHSC: Suspensory HDD Shockproof Capability Battery Pack HYB cell...
- Page 72 Dimension: 259mm x 180mm x 26~35mm Weight – 1.4kg with 6 cell battery with HDD + 10.2” LCD 1.2kg with 4 cell battery with uSSD + 8.9” LCD CE/FCC CE, R&TTE report/document Safety CB report/ETL/CCC...
- Page 74 En Guadalajara, a 8 de Agosto de 2008 D. Antonio González Fernández Director de Calidad Infinity System, S.L. A-2, Km 48.5, Pol. Ind. de Cabanillas, Parcela 12B, 19171 Guadalajara, ESPAÑA tel +34 949 349 100 · fax +34 949 349 149 · www.airis.es...
Need help?
Do you have a question about the KIRA Series and is the answer not in the manual?
Questions and answers