
Related Manuals for Liebert 8 Tons


Summary of Contents for Liebert 8 Tons
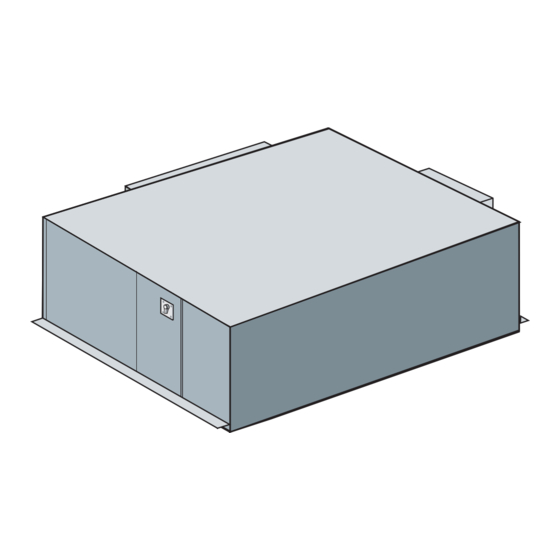
- Page 1 Liebert Mini-Mate2 ™ User Manual - 8 Tons, 50 & 60Hz Precision Cooling For Business-Critical Continuity™...
-
Page 3: Table Of Contents
Canister Humidifier ........ - Page 4 Indoor Water- and Glycol-Cooled Condensing Unit Installation..... . 27 2.7.1 Location Considerations............27 2.7.2 Piping Connections .
- Page 5 Refrigeration System ............52 6.2.6 Steam Generating Humidifier - Operation Procedures ......55 6.2.7 Circuit Board Adjustments .
- Page 6 Humidifier control board DIP switch settings........
-
Page 7: Model Number Nomenclature
G = Filter Clog, Smoke Detector, & Firestat Table iii Heat rejection matchup – 60 Hz Nominal Cooling Indoor Air-Cooled Capacity Unit Centrifugal Fan 8 Tons MMD96E MCD96A 8 Tons MMD8TC Table iv Heat rejection matchup – 50 Hz Nominal Cooling... -
Page 9: Product Features
RODUCT EATURES Standard Product Features The Mini-Mate2 is a temperature/humidity control system designed to be installed above a ceiling grid system. The unit is available as a split system evaporator to be matched with an Indoor Centrif- ugal Fan Condensing Unit, Outdoor Prop Fan Condensing Unit, or Indoor Water/Glycol Condensing Unit. -
Page 10: Optional Equipment
1.2.1 Canister Humidifier The optional, factory-installed steam generating humidifier adds pure water vapor to the room air to control humidity. Room humidity setpoints are established by the user. The humidifier components include: a steam canister (replaceable), control board, inlet strainer, fill and drain valves. -
Page 11: Ancillary (Ship Loose Accessories)
Refer to detailed instructions and drawings supplied with the pump. 1.3.5 Remote Monitoring and Control Liebert can provide a variety of remote monitoring and control devices to enhance your Mini-Mate2 system. These include water detection, remote monitoring of a single unit, and remote control/moni- toring of multiple units. -
Page 12: Site Preparation And Installation
REPARATION AND NOTE Before installing unit, determine whether any building alterations are required to run piping, wiring, and duct work. Carefully follow all unit dimensional drawings and refer to the submittal engineering dimensional drawings of individual units for proper clearances. Installation Considerations The evaporator unit is usually mounted above the suspended ceiling using field supplied threaded rods. -
Page 13: Location Considerations
2.1.2 Location Considerations CAUTION Units contain water. Water leaks can cause damage to sensitive equipment below. DO NOT MOUNT UNITS OVER SENSITIVE EQUIPMENT. A field-supplied pan with drain must be installed beneath cooling units and water/glycol-cooled condensing unit. NOTE Do not mount units in areas where normal unit operating sound may disturb the working environment. -
Page 14: Figure 1 System Configurations-Air Cooled Systems
Figure 1 System configurations—air cooled systems Evaporator Figure 2 System Configurations—water/glycol systems Evaporator Water/Glycol Condensing Unit Prop Fan Condensing Unit Evaporator Centrifugal Fan Condensing Unit Cooling Tower WATER-COOLED SYSTEMS GLYCOL-COOLED SYSTEMS Evaporator Water/Glycol Condensing Unit Site Preparation and Installation Drycooler... -
Page 15: System Weights
If you discover any damage when you uncrate the unit, report it to the shipper immediately. If you later find any concealed damage, report it to the shipper and to your Liebert supplier. Evaporator... -
Page 16: Installing The Evaporator Or Chilled-Water Units
Installing the Evaporator or Chilled-Water Units WARNING Be sure the supporting roof structure is capable of supporting the weight of the unit(s) and the accessories during installation and service. (See 2.2 - System Weights.) Be sure to securely anchor the top ends of the suspension rods. Make sure all nuts are tight. The evaporator unit and indoor condensing unit are usually mounted above the ceiling and must be securely mounted to the roof structure. -
Page 17: Close Coupled Installations
2.4.1 Close Coupled Installations If the evaporator and condensing units are to be mounted side-to-side (close coupled), hang each unit before connecting them together (See Figure 5). If Single Point Power Kit is used, install the box into the evaporator prior to suspending the units. Route power wire flex conduit into condensing unit as units are suspended. -
Page 18: Evaporator Air Distribution
The optional filter box mounts directly to the return air opening of the evaporator. The filter box is supplied with two (2) 20% (Liebert part no. A-0320) or 30% (Liebert part no. A-0400) 25" x 20" x 4" fil- ters. -
Page 19: Piping Connections And Coolant Requirements
A 3/4 in. (19.1 mm) female pipe thread (FPT) connection is provided for the evaporator coil condensate drain. This line also drains the humidifier, if applicable. The drain line must be located so it will not be exposed to freezing temperatures. The drain should be the full size of the drain connection. -
Page 20: Figure 7 Condensate Pump Installation
Humidifier Water Supply Line Units supplied with the optional humidifier package have a 1/4 in. (6.4 mm) FPT connection for water inlet. Supply pressure range is 10 psig to 150 psig. Required flow rate is 1 gpm. A shut-off valve should be installed in this line to isolate the humidifier for maintenance. -
Page 21: Figure 8 General Arrangement Diagram - Chilled-Water Systems
** Hose Bibs * Field piping refers to the use of hard piping using sweat adapter kit or precharged line set. ** Components are not supplied by Liebert but are recommended for proper circuit operation and maintenance. Bleed Valve Chilled Water... -
Page 22: Figure 9 Refrigerant Piping Diagram
3-ton 50 feet 5-ton 100 feet 5-ton 150 feet 5-ton Consult your Liebert representative for longer line lengths. NOTE If field supplied refrigerant piping is installed, refrigerant (R-22) must be added to the system. Figure 9 Refrigerant piping diagram Evaporator... -
Page 23: Table 8 Line Charges (Field Piping)
Refrigerant Charge Requirements: are evacuated during installation or maintenance. For safe and effective operation, refer to 2.4.3 - Piping Connections and Coolant Requirements. Total refrigerant = Units and Lines Table 7 8-ton unit refrigerant charge Evaporator Charge (ounces) Model No. 3-ton circuit MMD96E MMD95E... -
Page 24: Figure 10 Evaporator Or Chilled-Water Unit Dimensional Data
Figure 10 Evaporator or chilled-water unit dimensional data Customer Supplied threaded rods for module support from ceiling (1/2" minimum diameter recommended) (typ. 4). 2" Air Outlet (50.8mm) Air Inlet 26 1/2 " (673mm) 19 1/2 " (495mm) 1 " (25.4mm) 1 "... -
Page 25: Electrical Connections, Evaporator Or Chilled-Water Unit
2.4.4 Electrical Connections, Evaporator or Chilled-Water Unit WARNING Unit contains hazardous electrical voltage. Disconnect power supply before working within. Line side of factory disconnect remains energized when disconnect is off. WARNING UNIT CONTAINS HAZARDOUS ELECTRICAL VOLTAGE. More than one disconnect may be required to remove power. -
Page 26: Figure 11 Evaporator Unit Electrical Connections
Board Remote Control Panel Connection to TB3-1,2,3,4 connected with field supplied Thermostat wire (22ga, shielded/jacketed: available from Liebert or others). Heat Rejection Connection. Field supplied 24V NEC Class 2 wiring TB1-10. See note 2. Remote Unit Shutdown. Use field supplied Optional Remote Sensor 24V Class 2 wire. -
Page 27: Indoor Air-Cooled Centrifugal Fan Condensing Unit Installation
Indoor Air-Cooled Centrifugal Fan Condensing Unit Installation 2.5.1 Location Considerations The centrifugal fan air-cooled condensing unit may be located above the dropped ceiling or any remote indoor area. If noise is of concern, the condensing unit should be located away from personnel. Normal operating sound may be objectionable if the condensing unit is placed near quiet work areas. -
Page 28: Piping Connections
2.5.3 Piping Connections Details for refrigerant (R-22) loop piping are in 2.4.3 - Piping Connections and Coolant Require- ments. Figure 12 Piping connections - indoor air-cooled centrifugal fan condensing unit Suction Line Male Quick Connect Coupling Suction Line Female Quick Connect Coupling Sensing Bulb External Equalizer... -
Page 29: Figure 13 Indoor Air-Cooled Centrifugal Condensing Unit Dimensions And Pipe Connections
Figure 13 Indoor air-cooled centrifugal condensing unit dimensions and pipe connections Customer supplied threaded rods for module support from ceiling (1/2" minimum diameter recommended) (typ. 4). 13/16" (21mm) 23 7/8 " (606mm) 42 17/32 " (1080.3mm) THREADED ROD CENTERS NOTE: Unit is spaced evenly in reference to threaded 9/16"... -
Page 30: Figure 14 Indoor Air-Cooled Centrifugal Condenser Electrical Connections
1 volt drop in control line. Field Supplied Unit Disconnect Switch when Factory Unit Disconnect Switch is not Supplied. Electric Service not by Liebert. Line Voltage Electric Power Supply Conduit. Low Voltage Electric Power Supply Conduit Entrance. 6 "... -
Page 31: Outdoor Air-Cooled Condensing Unit Installation
Outdoor Air-Cooled Condensing Unit Installation 2.6.1 Location Considerations To insure a satisfactory air supply, locate air-cooled propeller fan condensing units in an environment providing clean air, away from loose dirt and foreign matter that may clog the coil. Condensing units must not be located in the vicinity of steam, hot air, or fume exhausts, or closer than 18 inches from a wall, obstruction, or adjacent unit. -
Page 32: Figure 15 Electrical Field Connections - Outdoor Condensing Unit
Figure 15 Electrical field connections - outdoor condensing unit Electric service connection to contactor or terminal block. Single or three phase electric service not provided by Liebert. High voltage electric power supply entrance. Low voltage electric power supply entrance. Earth ground connection terminal for field wiring. -
Page 33: Figure 16 Footprint Dimensions - Outdoor Condensing Unit
Figure 16 Footprint dimensions - outdoor condensing unit GUARD HEIGHT LEFT INTAKE 2 " (51mm) SHADED AREA INDICATES A RECOMMENDED CLEARANCE OF 18" (457mm) FOR PROPER AIR FLOW 36 1/8 " (918mm) 4 23/32 " (120mm) 25 3/32 " (637mm) Model 60 Hz 50 Hz... -
Page 34: Figure 17 Piping And Electrical Connections - Outdoor Condensing Unit
Figure 17 Piping and electrical connections - outdoor condensing unit Model Numbers 60 Hz 50 Hz PFC096A-L PFC095A-L Electrical Connections In. (mm) 8-1/2 (51) (152) (216) Site Preparation and Installation SL-11081Page7 Piping Connections In. (mm) 4-3/4 7-3/4 8-1/2 11-1/2 (121) (197) (216) (292) -
Page 35: Indoor Water- And Glycol-Cooled Condensing Unit Installation
Regulating Valve Water/Glycol-cooled units include a coolant flow regulating valve which is factory adjusted and should not need field adjustment. Standard water pressure and high water pressure valves are adjusted differently. Contact Liebert Service before making any adjustments. 2.7.3 Electrical Connections Refer to 2.4.4 - Electrical Connections, Evaporator or Chilled-Water Unit for general wiring... -
Page 36: Figure 18 Indoor Water/Glycol Condensing Unit Dimensional Data
Figure 18 Indoor water/glycol condensing unit dimensional data 1. 24V GND System 1 2. 24V Supply System 1 3. High-Pressure Alarm System 1 4. Hot Gas Bypass Connection System 1 (only on units with hot gas bypass. If no hot gas bypass, connection is provided in the evaporator module. -
Page 37: Figure 19 Indoor Water/Glycol Condensing Unit Electrical Field Connections
Site Preparation and Installation Figure 19 Indoor water/glycol condensing unit electrical field connections... -
Page 38: Figure 20 System Piping With Indoor Water/Glycol-Cooled Condensing Unit
Site Preparation and Installation Figure 20 System piping with indoor water/glycol-cooled condensing unit Two circuits provided. Single circuit shown. SL-11088Pg7... -
Page 39: Optional Equipment Piping
Optional Equipment Piping 2.8.1 Free-Cooling Coil (GLYCOOL) The free-cooling coil is a secondary coil located upstream of the DX coil. To take maximum advantage of available free-cooling, the secondary coil may operate at the same time as the DX coil. A tempera- ture sensor is factory-mounted to the free-cooling piping. -
Page 40: Figure 22 Optional Free Cooling Coil (3-Way Valve) On Air-Cooled Units
Site Preparation and Installation Figure 22 Optional free cooling coil (3-way valve) on air-cooled units SL-11088Pg12... -
Page 41: Checklist For Completed Installation
___ 4. Condensate pump installed (if required). ___ 5. Drain line Connected. ___ 6. Water supply line connected to humidifier (if required). Route to allow air filter removal. ___ 7. Field provided pan with drain installed under all cooling units and water/glycol condensing units. -
Page 42: Microprocessor Control
ICROPROCESSOR The Microprocessor Control for the Liebert Mini-Mate2 unit features an easy to use menu-driven LCD display. The menus, control features, and circuit board details are described in this section. Detailed information concerning controls (4.0 - System Performance Microprocessor Controls) and alarms (5.0 - Alarms) are provided. -
Page 43: Main Menu
Main Menu <Menu> Press the MENU key to display the Main Menu. The Menu selections (in the following order) include: • SETPOINTS • STATUS • ACTIVE ALARMS • ALARM HISTORY • TIME • DATE • SETBACK • SETUP OPERATION • SETPT PASSWORD •... -
Page 44: Setpoints
Setpoints Setpoints and system setup parameters are kept in nonvolatile memory. Selecting SETPOINTS from the Main Menu will display the following selections: • TEMPERATURE SETPOINT • TEMPERATURE SENSITIVITY • HUMIDITY SETPOINT • HUMIDITY SENSITIVITY • HIGH TEMPERATURE ALARM • LOW TEMPERATURE ALARM •... -
Page 45: Time
Time The controller time clock must be set to allow for the setback control. The clock uses the 24-hour sys- tem (i.e., 12 midnight is entered 24:00). To change the time press ENTER to select the function, then use the UP/DOWN arrow to change the first character, press ENTER to store, then press the UP/ DOWN arrow key to change the character, press ENTER to store, etc. -
Page 46: 3.10.2 C/F Degrees
RH reading will then be lower than actually desired. If the temperature drop was significant enough, the percentage RH could be low enough to activate the humidifier. If the absolute humidity control is selected, over-dehumidification may be avoided. When overcooling occurs (i.e., causing an increase in the RH reading) the humidity control program estimates what the... -
Page 47: Cw Flush (For Systems With A Modulating Chilled-Water Valve)
3.10.7 CW Flush (For Systems With a Modulating Chilled-Water Valve) This function shows the interval time at which the system will perform a modulating chilled-water valve system flush cycle. The factory default is 24 (hours) and is programmable from 0 (hours) which signifies to never flush, to 99 (hours) which signifies to flush after every 99 hours of valve non-use. -
Page 48: Alarm Time Delay
3.14 Alarm Time Delay Each individual alarm can be programmed with a time delay (Table 13), causing the unit to delay a specified amount of time (0-255 seconds) before recognizing the alarm. The alarm condition must be present for the full amount of the time delay before the alarm will sound. If the alarm condition is diverted prematurely, the alarm will not be recognized and the time delay will automatically reset. -
Page 49: Table 15 Switch Settings (Wallbox Board)
3.17 Custom Text To modify the two custom alarm messages select “CUSTOM TEXT”. Then select “Custom Text #1,” “Custom Text #2” or “Custom Text #3.” Text can be up to 16 characters in length and can be either a blank space or any of the following alphanumeric characters and symbols: •... -
Page 50: Run Diagnostics
• High Water in Pan • High Head Comp1 • High Head Comp2 • Air Sail Switch (requires additional factory-installed components) • Filter Clog • Humidifier Prob. • Custom Alarm #1 • Custom Alarm #2 • Custom Alarm #3 Microprocessor Control... -
Page 51: Figure 24 Control Menu
Test Micro By selecting this function, the microcontroller will perform a self test lasting approximately 10 sec- onds. When the test is complete, the display will show the ROM checksum, ROM part number, and firmware revision number. Figure 24 Control menu Menu Setpoints Status... -
Page 52: Figure 25 Control Board (Inside Evaporator)
Figure 25 Control board (inside evaporator) Figure 26 Wall box board TB3-1 TB3-2 TB3-3 TB4-4 TB3-4 Connection to Terminal #4 Wallbox TB3-3 Connection to Terminal #3 Wallbox TB3-2 Connection to Terminal #2 Wallbox TB3-1 Connection to Terminal #1 Wallbox P16 Remote Sensor Connection G2 G3 G4 G5 Microprocessor Control Wall Box... -
Page 53: System Performance Microprocessor Controls
YSTEM ERFORMANCE Control Type Response Proportional Control The percent requirement is determined by the difference between the return air temperature and the temperature setpoint. As the return air temperature rises above the temperature setpoint, the per- cent cooling required increases proportionally (from 0 to 100%) over a temperature band equal to the temperature sensitivity plus 1 degree Fahrenheit. -
Page 54: Dehumidification / Humidification Percent Required
Alarm will occur. Communications The control system uses a two-wire, RS-422 channel to communicate with Liebert Site Products via a proprietary protocol. A converter board (ECA2) is available to allow communications with a “dumb” terminal or a computer using RS-232 channel. More details are provided in the Site Products and ECA2 User Manual. -
Page 55: Alarms
When a new alarm occurs, it is displayed on the screen and the audible alarm is activated. (If commu- nicating with a Liebert Site Product, the alarm is also transmitted). The message “PRESS ALARM SILENCE” will prompt the operator to silence the alarm. After the alarm is silenced, the display will return to the Normal Status Display. -
Page 56: Humidity
5.1.5 Humidifier Problem Alarm The Humidifier Problem Alarm will sound and display a message if any of the following humidifier conditions occur: overcurrent detection; fill system fault or end of cylinder life. Check fault indicator LED on humidifier control board: •... -
Page 57: Optional/Custom Alarms
Optional/Custom Alarms 5.2.1 Change Filter Periodically, the return air filters in the evaporator must be changed. The Change Filter alarm noti- fies the user that filter replacement is necessary. A differential air pressure switch closes when the pressure drop across the filters becomes excessive. The switch is adjustable using the procedure on the switch label. -
Page 58: System Operation , Testing , And Maintenance
YSTEM PERATION This section describes system testing, maintenance and replacement procedures. Use copies of the Maintenance Inspection Checklist to record preventive maintenance inspections. WARNING Unit contains hazardous electrical voltage. Disconnect power supply before working within. Line side of factory disconnect remains energized when disconnect is off. System Testing 6.1.1 Environmental Control Functions... -
Page 59: Maintenance And Component Operation
Maintenance and Component Operation 6.2.1 Electric Panel The electric panel should be inspected on a semi-annual basis for any loose electrical connections. 6.2.2 Filters Filters are usually the most neglected item in an environmental control system. In order to maintain efficient operation, they should be checked monthly and changed as required. -
Page 60: Electric Reheat
6.2.4 Electric Reheat Reheat element sheets and fins are manufactured with stainless steel. Regular inspections are neces- sary to assure proper cleanliness of the reheating element. Should inspection reveal corrosion parti- cles on the reheating element or adjoining surfaces (including ducts and plenums), appropriate cleaning should be performed. -
Page 61: Glycol Solution Maintenance
Regulating Valves (Water/Glycol Condensing Units) The water regulating valve automatically regulate the amount of fluid necessary to remove the heat from the refrigeration system, permitting more fluid to flow when load conditions are high and less fluid to flow when load conditions are low. The water regulating valve is designed to begin opening at 180 psi (1240 kPa) and be fully opened at 240 psi (1655 kPa). -
Page 62: Replacement Procedures
(as required by the service contractor). If the compressor is under warranty, it must be returned to Liebert in order to receive proper warranty credit. It should be returned in the same container the replacement was shipped in. The possible cause(s) or condition(s) of the damage should be legibly recorded on the provided return tag. -
Page 63: Steam Generating Humidifier - Operation Procedures
Steam generating humidifiers operate efficiently over a wide range of water quality conditions and automatically adjust to changes in the conductivity of water. The system will automatically drain and refill to maintain a current setpoint and alert the operator when the humidifier canister needs to be replaced. -
Page 64: Circuit Board Adjustments
(1 VDC) and should not be readjusted without consulting your Liebert supplier. The DIP switch settings are used to set the capacity of the humidifier. If the humidifier is replaced in the field the DIP switches should be set to the required settings described below. -
Page 65: Maintenance Inspection Checklist
___ 1. Amp Draw ____ / ____ / ____ ___ 2. Inspect elements for cleanliness HUMIDIFIER ___ 1. Check for Clogs ___ 2. Check Humidifier Lamps/tank ___ 3. Check for Mineral Deposits ___ 4. Check Water Make-Up Valve for Leaks ___ 5. Check Drain & Trap for Debris ___ 6. -
Page 66: Troubleshooting
Replace wallbox or temperature/humidity circuit board (if remote). Make sure switch is in Run position. Check humidifier water supply (including filter screen) and check nylon overflow line if canister is full. Check fill valve screen opening and capillary tube for obstructions. - Page 67 Table 18 Troubleshooting (continued) Symptom Possible Cause Cooling cycle too Sensor response delay too short short Display freezes and control pads Static discharge do not respond Condensate Open or short circuit in pump does not wiring operate Continuous Failed temperature sensor Cooling Continuous Heating...
- Page 68 Troubleshooting NOTES...
- Page 69 Troubleshooting...
- Page 70 Troubleshooting...
- Page 72 © 2007 Liebert Corporation All rights reserved throughout the world. Specifications subject to change without notice. ® Liebert and the Liebert logo are registered trademarks of Liebert Corporation. All names referred to are trademarks or registered trademarks of their respective owners.
Need help?
Do you have a question about the 8 Tons and is the answer not in the manual?
Questions and answers