LG WM0642H Owner's Manual
Lg washer user manual
Hide thumbs
Also See for WM0642H:
- User's manual & installation instructions (68 pages) ,
- Owner's manual (48 pages) ,
- Service manual (48 pages)
Table of Contents
Advertisement
Available languages
Available languages
Quick Links
Advertisement
Chapters
Table of Contents

Related Manuals for LG WM0642H


Summary of Contents for LG WM0642H
- Page 1 P/ No.: 3828ER3020Y...
-
Page 2: Washing Machine
Owner's Manual Washing Machine WM0642H* Please read this manual carefully. It provides instructions on safe installation, use, and maintenance. Retain it for future reference. Record the model and serial numbers of your machine and report this information to your dealer if your machine... -
Page 3: Table Of Contents
Important Safety Information ...3 Specifications...4 Installation Instructions ...5 Preparation Before Washing...10 Using the Dispenser ...11 Cycles ...13 How to Use the Washer...14 Maintenance ...17 Troubleshooting Guide ...20 Warranty ...23 ■ Direct Drive System The advanced Brushless DC motor directly drives the drum without belt and pulley. -
Page 4: Important Safety Information
WARNING To reduce the risk of fire, electric shock, or injury to persons when using the washer, follow basic precautions, including the following: • Read all instructions before using the washer. -
Page 5: Specifications
Specifications subject to change by manufacturer. Accessories ■ 1) Per IEC 60456, washes the equivalent of a 3.83 cu. ft. agitator washer. Front-loading Washing Machine 120V~ 60Hz 68.6 cm (W) X 75.0 cm (D) X 111.5 cm (H), 126.5 cm (D, door open) ”(D) X 44”(H), 49... -
Page 6: Installation Instructions
Properly ground washer to conform with all governing codes and ordinances. To reduce the risk of electric shock, do not install the washer in humid spaces. The base opening must not be obstructed by carpeting when the washing machine is installed on a carpeted floor. -
Page 7: Installation Clearances
• Carpeting and soft tile surfaces are not recommended. • Never install the washer on a platform or weakly supported structure. NOTE: A firm, solid floor is even more critical to a front-loading washer than to a top-loader. -
Page 8: Connecting Water Supply Hose
INSTALLATION INSTRUCTIONS ■ Electrical connection • Do not use an extension cord or double adapter. • If the supply cord is damaged, it must be replaced by a qualified person in order to avoid a hazard. • If the machine will not be used for an extended time, unplug it and shut off the water supply. •... -
Page 9: Installation Of Drain Hose
INSTALLATION INSTRUCTIONS ■ Installation of drain hose • The drain hose should not be placed higher than 96 in. from the bottom of the washer. • Properly securing the drain hose will protect the floor from damage due to water leakage. -
Page 10: Level Adjustment
• Make sure that all four feet are stable and resting on the floor and then check that the appliance is perfectly level (Use a level). • After the washer is level, tighten the lock nuts up against of the base of the washer. All lock nuts must be tightened. -
Page 11: Preparation Before Washing
Wash lint producers and lint collectors separately. • Check all the pockets to make sure that they are empty. Things such as clip, matches, pens, coins, and keys can damage both your washer and your clothes. • Close zippers, hooks, and strings to make sure that these items do not snag on other clothes. -
Page 12: Using The Dispenser
Detergent usage may need to be adjusted for water temperature, water hardness, size and soil level of the load. For best results, avoid using too much detergent. NOTE : Liquid detergent will drain into the washer drum as it is added. 1. Prewash Detergent Compartment... -
Page 13: Main Wash Detergent Compartment
NOTE: Do not place, store, or spill laundry products (soap, detergent, bleach, softener, etc.) on the top of your washer or dryer. These products can damage the finish or controls if left there too long. -
Page 14: Cycles
CYCLES ■ Select cycles designed for different types of fabric and soil levels. -
Page 15: How To Use The Washer
Speed, Soil Level, and Option (See page 13). • The preset settings can be changed anytime before Start. NOTE: This front load washer requires longer cycle time and gets clothes much cleaner, yet is more gentle on the fabrics, than top load washers. -
Page 16: Spin Speed
HOW TO USE THE WASHER 3. Beeper • Press repeatedly to adjust the volume of the Beeper. 4. Wash/Rinse Temperature • Select a water temperature based on the type of load you are washing. • Follow the fabric care label and chart below for best results. -
Page 17: Status Indicator
Power button. You can lock the washer while it is operating. DOOR LOCKED • Lights whenever the door of the washer is locked. • The door can be unlocked by pressing the Start/Pause button to stop the washer. -
Page 18: Maintenance
MAINTENANCE Before cleaning the washer interior, unplug the electrical power cord to avoid electrical shock hazards. When disposing of the appliance, cut off the power cable, destroy the plug, and disable the door lock to prevent young children from being trapped inside. -
Page 19: Cleaning The Dispenser
NOTE: Do not use any cleaning substance on the main dispenser other than water because it will drain into the tub. If this should happen, set the washer for a rinse and spin cycle to remove any cleaning substance from the washer before doing a load of laundry. -
Page 20: Cleaning Your Washer
NOTE: Remove hard water deposits using only cleaners labeled as safe for washing machines. ■ Winterizing instructions If the washer is stored in an area where freezing can occur or moved in freezing temperatures, follow these winterizing instructions to prevent damage to the washer: 1. -
Page 21: Troubleshooting Guide
Stop washer and rearrange wash load. Adjust the leveling feet. Make sure all four feet are in firm contact with the floor, while the washer is in the spin cycle with a load. Check and tighten hose connections. Unclog drain pipe. Contact plumber if necessary. - Page 22 Close the door and press the Start/Pause button. After pressing the Start/Pause button, it may take a few moments before the clothes washer begins to spin. The door must lock before spin can be achieved. If the imbalance is detected or if the suds removing program operates, the wash time shall be increased.
- Page 23 • The water overfills due to the faulty water valve. • The water level sensor malfunction. • Overload in motor. • Overload in motor. • The washer experienced a power failure. Solution Check another tap in the house. Fully open tap. Straighten hose.
-
Page 24: Warranty
WARRANTY (available 24/7/365) - Page 25 NOTES...
-
Page 26: Manual Del Propietario
MANUAL DEL PROPIETARIO Lavadora WM0642H* Lea este manual cuidadosamente. Le proveerá instrucciones para una instalación, uso y mantenimiento seguros. Consérvelo para futuras referencias. Cite esta información a su proveedor si requiere de servicio. -
Page 27: Características Del Producto
CARACTERÍSTICAS DEL PRODUCTO CONTENIDO Información Importante de Seguridad ...27 Especificaciones ...28 Instrucciones de Instalación ...29 Preparación Antes de Lavar ...34 Usando el Distribuidor ...35 Ciclos ...37 Como Usar la Lavadora...38 Mantenimiento ...41 Guía para la Detección de Problemas...44 Garantía...47 ■ Sistema DD Invertidor. El avanzado motor de DC sin cepillo que mueve directamente el cilindro sin cinturón ni polea. -
Page 28: Información Importante De Seguridad
INFORMACIÓN IMPORTANTE DE SEGURIDAD LEA TODAS LAS INSTRUCCIONES ANTES DE USARLA. ADVERTENCIA! Para su seguridad, la información en este manual debe ser seguida para minimizar el riesgo de incendio ó explosión, descarga eléctrica, ó para prevenir daños a su propiedad, a su persona ó pérdida de la vida. ADVERTENCIA: Para reducir el riesgo de incendio, descarga eléctrica, ó... -
Page 29: Especificaciones
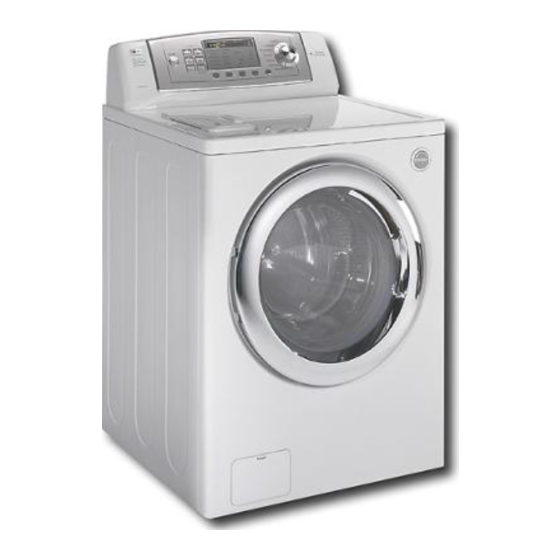
ESPECIFICACIONES Panel de Control Distribuidor Manguera de Desagüe Puerta Cilindro Tapa Inferior de Cubierta Filtro de Bomba de Desagüe Conexión de Desagüe ■ Nombre: ■ Suministro de Energía: ■ Dimensiones: ■ Peso: ■ Capacidad de Lavado: ■ Velocidad de Giros: ■... -
Page 30: Instrucciones De Instalación
INSTRUCCIONES DE INSTALACIÓN Instale ó almacene en un lugar donde no esté expuesta a temperaturas inferiores a la congelación ni expuesta a la intemperie. Conecte a tierra correctamente y cumpliendo con todos los códigos y ordenanzas gubernamentales. Para reducir los riesgos de electrocución, no instale la lavadora en lugares húmedos. La abertura de la base no debe ser obstruida por alfombra cuando esté... -
Page 31: Dimensiones De La Lavadora
INSTRUCCIONES DE INSTALACIÓN ■ Espacios Libres de instalación El lugar debe ser lo suficientemente grande para abrir en su totalidad la puerta de la lavadora. ■ Dimensiones de la lavadora • La mayoría de las instalaciones requieren un mínimo de 10 cm. Libres detrás de la lavadora. Espacio mínimo de instalación para ■... - Page 32 INSTRUCCIONES DE INSTALACIÓN ■ Conexión Eléctrica • No use un cable de extensión ni un adaptador doble. • Si el cordón proveedor de energía es dañado, debe ser repuesto por una persona calificada para evitar peligros. • Si la lavadora no va a ser usada en un periodo largo de tiempo, deconèctela de la energía y de la corriente de agua. •...
- Page 33 INSTRUCCIONES DE INSTALACIÓN ■ Instalación de la Manguera de Desagüe Aprox. 70 Aprox. 53 Aprox. 70 Aprox. 66 Aprox. 37 Aprox. 49 • La manguera de desagüe no debe ubicarse a mas de 96" desde la base de la lavadora. •...
- Page 34 INSTRUCCIONES DE INSTALACIÓN ■ Nivelar Pie ajustable Alto Pie ajustable • Nivelar correctamente la lavadora previene el ruido y las vibraciones excesivos. Instale el aparato sobre un piso sólido y parejo y preferentemente en una esquina de la habitación. • Si el piso está disparejo, ajuste las patas ajustables según lo requiera (No inserte piezas de madera, etc.
-
Page 35: Preparación Antes De Lavar
PREPARACIÓN ANTES DE LAVAR Para reducir el riesgo de incendio, descarga eléctrica ó daño a personas, lea las Instrucciones Importantes de Seguridad antes de operar este aparato. 1. Etiquetas de Cuidado Busque etiquetas de cuidado en sus prendas. Esto le dirá sobre el contenido de las telas de su ropa y como debe ser lavada. -
Page 36: Usando El Distribuidor
USANDO EL DISTRIBUIDOR El distribuidor automático consiste de cuatro compartimentos que retienen 1) cloro líquido blanqueador, 2) suavizante de telas líquido, 3) detergente líquido ó en polvo para el prelavado y 4) detergente en polvo ó líquido y blanqueador seguro para los colores para el lavado principal. Todos los productos de lavandería pueden ser añadidos al mismo tiempo en su compartimiento distribuidor. -
Page 37: Compartimiento De Blanqueador Líquido
USANDO EL DISTRIBUIDOR 2. Compartimiento de Detergente del Lavado Principal • Añada el detergente con medida a este compartimiento para el lavado Principal. El detergente es drenado del distribuidor al comenzar el ciclo. Puede usarse tanto detergente líquido como en polvo. •... -
Page 38: Ciclos
CICLOS ■ Usted puede seleccionar ciclos diseñados para diferentes tipos de telas y niveles de suciedad. -
Page 39: Como Usar La Lavadora
COMO USAR LA LAVADORA 1. Ciclos • Gire la perilla selectora de ciclos para seleccionar el ciclo diseñado para los diferentes tipos de telas y niveles de suciedad. • Cada ciclo tiene una temperatura, velocidad de giros, nivel de suciedad y Opciones predeterminadas (Véase página 37). -
Page 40: Custom Program
COMO USAR LA LAVADORA 2. Programación Personalizada (Custom program) • La programación personalizada le permite almacenar un ciclo de lavado personalizado para uso futuro. • Para crear el ciclo personalizado: 1. Seleccione un ciclo. 2. Seleccione Temperatura de Lavado/Enjuague, Velocidad de Giro, Nivel de Suciedad. - Page 41 COMO USAR LA LAVADORA OPCIONES (OPTION) 1. Prelavado (Prewash) • Use esta opción para cargas que requieran tratamiento previo. Añade 16 minutos de prelavado y desagüe. - Cuando use la opción de Prelavado, no use detergente líquido en el compartimiento de Lavado Principal.
-
Page 42: Mantenimiento
MANTENIMIENTO Antes de limpiar el interior de la lavadora, desconéctela del suministro eléctrico para evitar recibir una descarga eléctrica. Cuando deseche el aparato, corte el cable de corriente y destruya la clavija. Deshabilite el seguro de la puerta para evitar que algún niño pequeño quede atrapado dentro. ■... - Page 43 MANTENIMIENTO ■ Limpiando el Distribuidor • El distribuidor puede necesitar que lo limpie periódicamente debido a los residuos de los aditivos de lavandería. Abra la tapa del Distribuidor. • Deje correr agua caliente y un cepillo suave ó trapo sobre las dos partes para eliminar cualquier resto de aditivos de lavandería.
- Page 44 MANTENIMIENTO ■ El inyector de la circulación del agua • Limpie el inyector de la circulación del agua, si está estorbando. ■ Limpiando su Lavadora 1. Exterior El cuidado adecuado de su lavadora puede extender su vida. El exterior de la máquina puede ser limpiado con agua tibia y un detergente casero neutral, no-abrasivo. Limpie inmediatamente cualquier derrame.
-
Page 45: Guía Para La Localización De Problemas
GUÍA PARA LA LOCALIZACIÓN DE PROBLEMAS Esta lavadora está equipada con funciones de seguridad automáticas que detectan y diagnostican fallas tempranamente y reaccionan apropiadamente. Cuando la máquina no funcione apropiadamente ó no funcione para nada, verifique los puntos siguientes antes de llamar al Departamento de Servicio. Problema Ruido de golpeteo metálico... - Page 46 GUÍA PARA LA LOCALIZACIÓN DE PROBLEMAS Problema La lavadora no enciende • El cable de suministro de energía puede no estar conectado ó está suelto. • El fusible de la casa puede estar fundido, ó se botó el interruptor de circuito, ó no hay luz.
- Page 47 GUÍA PARA LA LOCALIZACIÓN DE PROBLEMAS Problema Posible Causa • El suministro de agua no es adecuado en el área. • Las llaves del agua no están completamente abiertas. • Las mangueras de entrada de agua están torcidas. • El filtro de la manguera de entrada está...
-
Page 48: Garantía
Grant a Limitada En Los Estados Unidos De Lavadora LG Su lavadora LG será reparada o reemplazada, a consideración de LG, si prueba ser defectuosa en material o en ejecución dentro de un uso normal, dentro del periodo de garantía ("periodo de garantía") descrito en la parte inferior, efectivo desde la fecha ("fecha de compra") de la compra del producto por el consumidor.
Need help?
Do you have a question about the WM0642H and is the answer not in the manual?
Questions and answers