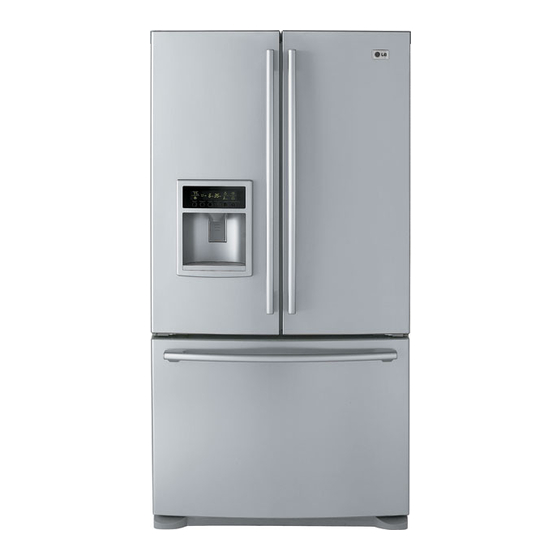
LG LFX25950 User Manual
Bottom-freezer refrigerator
Hide thumbs
Also See for LFX25950:
- Specifications (2 pages) ,
- Energy manual (1 page) ,
- User manual (41 pages)
Table of Contents
Advertisement
website http://us.lge.com
¤
1-800-243-0000
24 HOURS A DAY, 7 DAYS A WEEK FOR LG CUSTOMER SERVICE
para el Servicio LG (Atención al Cliente) 24 horas al día, 7 días a la semana
24 HEURES SUR 24, SERVICE À LA CLIENTÈLE LG 7 JOURS SUR 7
BOTTOM FREEZER
REFRIGERATOR
User's Guide
Please read this guide thoroughly
before operating and keep it handy for
reference at all times.
CONGELADOR
INFERIOR
REFRIGERADOR
Guía para el Uso y Cuidado
Lea detenidamente estas instrucciones antes
utilizar el frigorífico y guárdelas como referencia
para el futuro.
CONGÉLATEUR
INFÉRIEUR
RÉFRIGÉRATEUR
Guide d'Utilisation et
d'Entretien
Veuillez lire ce manuel en entier avant de mettre
en marche l'unité et conservez-le à portée de la
main pour le consulter à tout moment.
Models / Modelos / Modèles
LFX25950 **
P/No. MFL37933501
Advertisement
Table of Contents

Related Manuals for LG LFX25950


Summary of Contents for LG LFX25950
-
Page 1: Bottom Freezer
24 HOURS A DAY, 7 DAYS A WEEK FOR LG CUSTOMER SERVICE para el Servicio LG (Atención al Cliente) 24 horas al día, 7 días a la semana 24 HEURES SUR 24, SERVICE À LA CLIENTÈLE LG 7 JOURS SUR 7... -
Page 2: Table Of Contents
Setting The Controls Ensuring Proper Air Circulation How To Use A New Door Ice Bucket Adjusting Control Settings Food Storage Guide Storing Frozen Food u u Refrigerator Section Water Dispenser Refrigerator Shelves Snack Pan Crisper Humidity Control Removing Crisper Dairy Bin... -
Page 3: Warranty (Usa)
LG REFRIGERATOR LIMITED WARRANTY - USA Your LG Refrigerator will be will repaired or replaced, at LG’s option, if it proves to be defective in material or workmanship under normal use, during the warranty period ("Warranty Period") set forth below, effective from the date ("Date of Purchase") of original consumer purchase of the product. -
Page 4: Warranty (Canada)
LIMITED WARRANTY (CANADA) LG Electronics will repair or at its option replace, without charge, your product which proves to be defective in material or workmanship under normal use, during the warranty period listed below from the date of original purchase. This warranty is good only to the original purchaser of the product during the warranty period as long as it is in any Canadian Province. -
Page 5: Safety Instructions
Junked or abandoned refrigerators are still dangerous…even if they will sit for you are getting rid of your old refrigerator, please follow the instructions at right to help prevent accidents. Your old refrigerator may have a cooling system that used CFCs (chlorofluorocarbons). -
Page 6: Grounding Requirements
RECOMMENDED GROUNDING METHOD The refrigerator should always be plugged into its own individual properly grounded electrical outlet rated for 115 Volts, 60 Hz, AC only, and fused at 15 or 20 amperes. This provides the best performance and also prevents overloading house wiring circuits which could cause a fire hazard from overheated wires. - Page 7 It may damage the power cord to cause fire or electric shock. Unplug the power plug when cleaning, handling or replacing the interior lamp of the refrigerator. • It may cause electric shock or injury. • When replacing the interior...
- Page 8 Use the submerged refrigerator after checking it. It may cause electric shock or fire. IMPORTANT SAFETY INFORMATION Do not install the refrigerator in the wet place or the place which water or rain splashes. Deterioration of insulation of electric parts may cause electric leakage.
- Page 9 It may cause to lock out the child. Do not insert the hands or the metal stick into the exit of cool air, the cover, the bottom of the refrigerator, the heatproof grill (exhaust hole) at the backside. It may cause electric shock or injury.
- Page 10 Do not put glass containers in the freezer. It may freeze the contents to break the bottle to cause injury. Do not install the refrigerator in a wet place or a place which water or rain splashes. Deterioration of insulation of electric parts may cause electric leakage.
-
Page 11: Parts And Features
Use this page to become more familiar with the parts and features. Page references are included for your convenience. NOTE This manual purports to cover only one model. There should be no question about what this model includes. We should edit the manual accordingly. Refrigerator Light (p. 29) Filter (Inside) (p. -
Page 12: Refrigerator Installation
They are packed together to prevent possible damage during shipment. 3. Let your refrigerator run for at least 2 or 3 hours before putting food in it. Check the flow of cold air in the freezer compartment to ensure proper cooling. -
Page 13: How To Remove Door Handles
HOW TO REMOVE DOOR HANDLES To move refrigerator through a house door, it may be necessary to remove the refrigertor door handles. NOTE Handle appearance may vary from illustrations on this page. 1. Removing Refrigerator Handle • Grasp the handle tightly with both hands and slide the handle up (1) (this may require some force). - Page 14 HOW TO REPLACE DOOR HANDLES NOTE Handle appearance may vary from illustrations on this page. 1. Reinstalling the Refrigerator Door Handle • Align keyhole slots (1) on the top and bottom of the back of the handle with the screws (2) mounted on the front of the door.
-
Page 15: Removing And Replacing
REMOVING AND REPLACING REFRIGERATOR DOORS 1. Removing Refrigerator Door Before you begin, unplug the refrigerator. Remove food and bins from doors. w w CAUTION u u Left Door - FIGURE 2 1. Disconnect water supply tube by pushing back on the disconnect ring (4). - FIGURE 1 2. - Page 16 2. Reinsalling the Refrigerator Door u u Right Door 1. Lower the door onto middle hinge pin (10). 2. Fit top hinge (8) over hinge lever latch (9) and into place. Insert hinge lever (7) under lever latch. Rotate lever counterclockwise to secure hinge.
-
Page 17: Removing Pullout Drawer
• Separate the left and right rail cover • Remove the screws(2) of the rail on both sides. REFRIGERATOR INSTALLATION • With both hands, hold both sides of the door and pull it up to separate it from the rails. - Page 18 • Hook door supports (1) into rail tabs (2). • Lower door into final position and tighten the screws (3). REFRIGERATOR INSTALLATION • Make sure you have a right rail cover for each side. • Align the top holes of the rail cover with the top holes of the door supports to assemble the rail covers.
-
Page 19: Leveling And Door Alignment
If your refrigerator seems unsteady or you want the doors to close easier, adjust the refrigerator’s tilt using the instructions below 1. Plug the refrigerator’s power cord into a 3-prong grounded outlet. Move the refrigerator into its final position. Remove the base cover. -
Page 20: Using Your Refrigerator
SETTING THE CONTROLS Temperature • Your refrigerator has a control pad on the dispenser that lets you regulate the temperature in the freezer and refrigerator compartments. • Initially set the REFRIGERATOR CONTROL at 37°F (3°C) and the FREEZER CONTROL at 0°F (–18°C). Leave it at this setting for 24 hours (one day) to stabilize. -
Page 21: Ensuring Proper Air Circulation
If the ice room door were not closed tightly, the cold air in the ice room would come into refrigerator compartment and freeze food. This could cause the ice maker not to produce ice. Close the ice room door until you hear the sound click. -
Page 22: How To Use A New Door Ice Bucket
How to reinstall the Door Ice Bucket. 1 . Replace ice bucket by slightly slanting it to avoid touching the ice maker. USING YOUR REFRIGERATOR 2. Lift the lower part slightly. * Avoid touching the automatic shut off arm when replacing the ice bucket. -
Page 23: Adjusting Control Settings
Freezer compartment to make it colder. If you need to adjust temperatures in the refrigerator or freezer, start by adjusting the refrigerator. Then wait 24 hours before checking the freezer temperature. If it is too warm or too cold, then adjust the freezer control. -
Page 24: Storing Frozen Food
Successful freezing depends on correct packaging. When you close and seal the package, it must not allow air or moisture in or out. If it does, you could have food odor and taste transfer throughout the refrigerator and also dry out frozen food. Packaging recommendations •... -
Page 25: Refrigerator Shelves
IMPORTANT Do not clean glass shelves with warm water when they are cold. -
Page 26: Removing Crisper
1. To remove the dairy bin, simply lift it and pull straight out. 2. To replace the dairy bin, slide it in above the desired location and push down until it stops. USING YOUR REFRIGERATOR MODULAR DOOR BIN The door bins are removable for easy cleaning and adjusting. -
Page 27: Durabase
WARNING When the divider of the freezer drawer is removed, children may crawl inside. USING YOUR REFRIGERATOR PULL OUT DRAWER To separate the drawer, push the front left and right hooks direction to pull up and remove. Then gently lift and pull it out in... -
Page 28: Filter
Rotate the knob of the cartridge counter clockwise. Pull out the filter cartridge. USING YOUR REFRIGERATOR 2. Replace with a new cartridge. Take the new cartridge out of its packaging and remove protective cover from the o-rings. With cartridge knob in the vertical position, push the new filter cartridge into the cover until it stops. -
Page 29: Care And Cleaning
To help remove odors, you can wash the inside of the refrigerator with a mixture of baking soda and warm water. Mix 2 tablespoons baking soda to 1 quart of water (26 g soda to 1 liter water.) Be sure the baking soda is completely dissolved so does it not scratch the surfaces of the refrigerator. -
Page 30: Power Interruptions
CARE AND CLEANING WHEN YOU GO ON VACATION If you choose to leave the refrigerator on while you are away, follow these steps to prepare your refrigerator before you leave. 1. Use up any perishables and freeze other items. -
Page 31: About The Automatic Icemaker
• When the ice bucket is removed for more than a minute or two. • When the refrigerator will not be used for several days. NORMAL SOUNDS YOU MAY HEAR NOTE Keeping the power switch in the I (on) position before the water line is connected can damage the icemaker. -
Page 32: Installation Instructions
To determine how much tubing you need measure the distance from the water valve on the back of the refrigerator to the water supply pipe. Then add 8 feet (2.4 m). Be sure there is sufficient extra tubing (about 8 feet [2.4 m] coiled into 3 turns of about 10″... - Page 33 NOTE Be sure there is sufficient extra tubing (about 8 feet coiled into 3 turns of about 10 ″ diameter) to allow the refrigerator to move out from the wall after installation. CONNECTING THE WATER LINE 7.
-
Page 34: Plug In The Refrigerator
Reattach the compressor compartment access cover. Arrange the coil of tubing so that it does not vibrate against the back of the refrigerator or against the wall. Push the refrigerator back to the wall. Set the icemaker power switch to the ON position. -
Page 35: Troubleshooting Guide
UNDERSTANDING SOUNDS YOU MAY HEAR Your new refrigerator may make sounds that your old one didn’t make. Because the sounds are new to you, you might be concerned about them. Most of the new sounds are normal. Hard surfaces, like the floor, walls and cabinets, can make the sounds seem louder than they actually are. - Page 36 The refrigerator will take up to 24 hours to cool completely. u See the Adjusting Control Settings section on page 23.
- Page 37 Rub a thin coat of appliance polish or kitchen wax on the gaskets after cleaning. the refrigerator. As the warm air cools, it can create a vacuum. If the door is hard to open, wait 5 minutes to allow the air pressure to...
- Page 38 Adding food warms the refrigerator. It can take a few hours for the refrigerator to return to normal temperature. u Wrap food tightly and wipe off damp containers prior to storing in the refrigerator to avoid moisture accumulation.
- Page 39 MEMO...
Need help?
Do you have a question about the LFX25950 and is the answer not in the manual?
Questions and answers