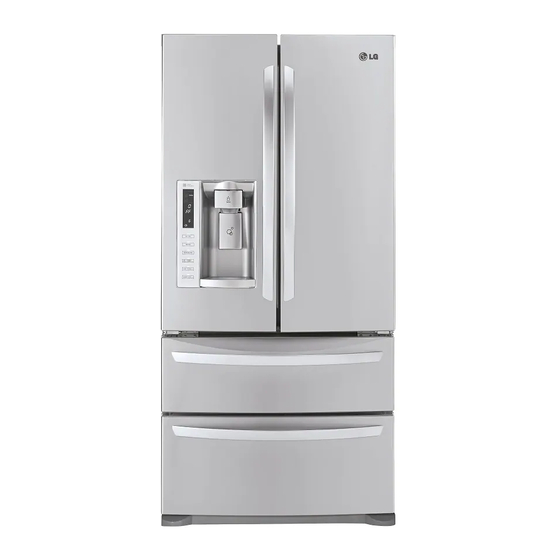
LG LMX25988ST Owner's Manual
Bottom freezer refrigerator
Hide thumbs
Also See for LMX25988ST:
- Specification (2 pages) ,
- Service manual (83 pages) ,
- Owner's manual (54 pages)
Table of Contents
Advertisement
OWNER'S MANUAL
BOTTOM FREEZER
REFRIGERATOR
Please read this manual carefully before operating
your set and retain it for future reference.
MANUAL DE USUARIO
REFRIGERADOR
CON CONGELADOR INFERIOR
Lea detenidamente este manual antes de empezar
a utilizar el refrigerador y guárdelo como referencia
para el futuro.
Model Name/Nombre de Modelo **
GM-B258R4*
GM-L26AN*JP
LMX25988**
P/No. MFL67227302
=color number/número de color
LFX25778**
GM-B259R*
GM-L268F*XP
LFX25978**
GM-B258R*
www.lg.com
Advertisement
Table of Contents
Troubleshooting

Related Manuals for LG LMX25988ST


Summary of Contents for LG LMX25988ST
- Page 1 CON CONGELADOR INFERIOR Lea detenidamente este manual antes de empezar a utilizar el refrigerador y guárdelo como referencia para el futuro. Model Name/Nombre de Modelo ** =color number/número de color GM-B258R4* LFX25778** LFX25978** GM-L26AN*JP GM-B259R* GM-B258R* LMX25988** GM-L268F*XP www.lg.com P/No. MFL67227302...
-
Page 2: Table Of Contents
Refrigerator Section 27-29 Congratulations on your purchase and Refrigerator Shelves 27-28 welcome to the LG family. Your new LG French Door Refrigerator Crisper Humidity Control combines advanced cooling technology Door Racks with simple operation and high Dairy Compartment efficiency. Follow the operating and care... -
Page 3: Important Safety Instructions
IMPORTANT SAFETY INSTRUCTIONS SAFETY MESSAGES This manual contains several important safety notices. Always read and obey all of the following safety messages. This is the safety alert symbol. This symbol is a warning to potential dangers that could cause death, injury or damage to you, others or the product. -
Page 4: Requirements For Ground Connection
115 V ~ 60 Hz, AC or 127 V ~ 60 Hz, If the power cord is damaged, it must be replaced by AC (according to the National rating). This provides our service center or qualified LG technician to avoid the best performance and prevents an overload which any risk. -
Page 5: Parts And Features
24-hour period to keep the ice dispenser fully supplied. The in-door design creates more shelf space. CRISPERS LG’s crispers preserve humidity and help vegetables stay crisp. GLIDE‘N’SERVE (In some models). Provides storage space with a variable... - Page 6 PARTS AND FEATURES 4 DOORS MODELS (LMX25988**, GM-B258R4*M, GM-L26AN*JP). KEY PARTS AND COMPONENTS In addition to the special features and components outlined in the Special Features section, there are several other important components that are referenced in this manual. ADJUSTABLE REFRIGERATOR SHELVING LED INTERIOR LAMPS The refrigerator compartment shelves are Refrigerator interior is lit by the LED array.
- Page 7 PARTS AND FEATURES 3 DOORS MODELS (LFX25978**, GM-B258R*). KEY PARTS AND COMPONENTS In addition to the special features and components outlined in the Special Features section, there are several other important components that are referenced in this manual. ADJUSTABLE REFRIGERATOR SHELVING LED INTERIOR LAMPS The refrigerator compartment shelves are Refrigerator interior is lit by the LED array.
-
Page 8: Parts And Features
PARTS AND FEATURES 3 DOORS MODELS (LFX25778**, GM-B259R*, GM-L268F*XP). KEY PARTS AND COMPONENTS In addition to the special features and components outlined in the Special Features section, there are several other important components that are referenced in this manual. ADJUSTABLE REFRIGERATOR SHELVING LED INTERIOR LAMPS The refrigerator compartment shelves are Refrigerator interior is lit by the LED array. -
Page 9: Refrigerator Installation
REFRIGERATOR INSTALLATION 3. Install the refrigerator in an area between 55 °F WARNING (13 °C) and 110 °F (43 °C). If the surrounding temperature is lower or higher than previously mentioned, it can EXCESSIVE WEIGHT HAZARD adversely affect the unit. Use the assistance of two or more persons to move or install the refrigerator. - Page 10 REFRIGERATOR INSTALLATION TOOLS YOU MAY NEED 10 mm 1 / 4 in 1/4 in 3 / 8 in 3 / 32 in Hex Socket Wrench Phillips Screwdriver Flat Head Screwdriver Allen Wrench NOTE: It is always recommended that the doors be removed when it is necessary to move the refrigerator through a narrow opening.
-
Page 11: Refrigerator Doors
REFRIGERATOR INSTALLATION REFRIGERATOR INSTALLATION HOW TO REMOVE AND INSTALL REFRIGERATOR DOOR 1. Removing Refrigerator Doors Remove the left-side door first. NOTE: Handle, top hinge and hinge cover appearance may vary from illustrations on this page. WARNING • Disconnect electrical supply to the refrigerator before installing. Failure to do so could result in death or serious injury. -
Page 12: How To Remove And Install Handle
REFRIGERATOR INSTALLATION HOW TO REMOVE AND INSTALL REFRIGERATOR DOOR (CONT.) 2. Refrigerator Door Reinstallation Install the right-side door first. Left Door Righ t Door • Lower the door onto the middle hinge pin (7). • Lower the door onto the middle hinge pin (1). •... -
Page 13: How To Remove And Install Pull-Out Drawer
REFRIGERATOR INSTALLATION HOW TO REMOVE AND INSTALL THE PULL • Insert the water supply tube into the connector. OUT DRAWER (4 DOORS MODELS). • Insert the tube at least 5/8 in. (15 mm) into the connector. 1. Removing Pull out Top Drawer IMPORTANT: To avoid possible injury, product or property damage, you will need two persons to perform the following instructions. - Page 14 REFRIGERATOR INSTALLATION • With both hands, bend the center bar just enough • With both hands, hold both sides of the door to allow the gears on both ends to release from (Fig. 3) and pull it up to separate it from the rails. their tracks.
- Page 15 REFRIGERATOR INSTALLATION • Hook door supports into rail tabs. (Fig. 2) Fig.2 Fig.1 • Hook door supports into rail tabs. (Fig. 2) • Lower door into final position and tighten the screws. (Fig.3) Fig.2 Fig.3 • Lower door into final position and tighten the screws.
- Page 16 REFRIGERATOR INSTALLATION • Remove the screws of the rail on both sides. HOW TO REMOVE AND INSTALL THE PULL (Fig. 4) OUT DRAWER (3 DOORS MODELS). 1. Removing Pull out Drawer Fig. 4 IMPORTANT: To avoid possible injury, product or property damage, you will need two persons to perform the following instructions.
- Page 17 REFRIGERATOR INSTALLATION • Hook door supports into rail tabs. (Fig. 10) • Push the rails back into drawer cavity. With both hands, hold the center of the bar and push it in so that both rails go back simultaneously. (Fig.7) Fig.
-
Page 18: Closing And Aligning The Doors
USING YOUR REFRIGERATOR CLOSING AND ALIGNING THE DOORS Aligning the Doors To adjust the height of the doors, use the wrench (Included with the User Manual) to adjust the bolt in Closing the Doors the door hinge (counter clockwise to raise or clockwise Your refrigerator has two front leveling screws, one on the right and one on the left. -
Page 19: Control Panel Features
USING YOUR REFRIGERATOR CONTROL PANEL FEATURES NOTE: The shape of the buttons may not match your model. LED DISPLAY The LED display shows the temperature settings, dispenser options, water filter, door alarm, and locking status messages. ICE TYPE BUTTON The ICE TYPE button is used to select Cubed Ice or Crushed Ice. -
Page 20: The Led Display
USING YOUR REFRIGERATOR THE LED DISPLAY The LED display shows the temperature settings, dispenser options, water filter, door alarm, and locking status messages. DISPENSER SELECTION INDICATOR Shows Cubed ice or Crushed Ice selection that will be dispensed when the push switch is pressed. -
Page 21: Adjusting The Temperatures And Display
USING YOUR REFRIGERATOR ADJUSTING THE TEMPERATURES AND POWER SAVING MODE (in some models) • The display will remain off until the next time the door DISPLAY is opened. • The display will also turn on when any button is Adjust Freezer Temperature pressed, and it will remain on for 20 seconds after To adjust the temperature in the freezer compartment, the last door opening or button selection. -
Page 22: Operating The Dispenser
USING YOUR REFRIGERATOR OPERATING THE DISPENSER DISPENSING WATER DISPENSING CRUSHED ICE Press the push water switch with a glass Press the ICE TYPE or other container and chilled water will button to illuminate the be dispensed. Crushed Ice icon. When the water switch is pressed, the Press the push ice switch light will be illuminated. -
Page 23: Setting The Functions
USING YOUR REFRIGERATOR SETTING THE FUNCTIONS ACTIVATING ICE PLUS SETTING THE DISPENSER LOCK Press and hold the Press the ICE PLUS/ ALARM/LOCK button ENERGY SAVING or ICE for three seconds to lock PLUS button once to the dispenser and all of activate the ICE PLUS the other control panel function. -
Page 24: Spaceplus Ice System
USING YOUR REFRIGERATOR SPACEPLUS ICE SYSTEM CAUTION • Keep hands and tools out of the ice compartment NOTE: If the On/Off switch on the icemaker is set to door and dispenser chute. You could break some- Off for an extended time, the ice compartment will thing or injure yourself. -
Page 25: Automatic Icemaker
USING YOUR REFRIGERATOR AUTOMATIC ICEMAKER WARNING Ice is made in the automatic icemaker and sent to the Personal Injury Hazard dispenser. The automatic icemaker can make 10 or 12 • DO NOT place fingers or hands on the automatic ice cubes (depending on your device) at a time, above icemaking mechanism while the refrigerator is 100 cubes per 24-hour period. -
Page 26: Adjusting Control Settings
USING YOUR REFRIGERATOR FOOD STORAGE GUIDE ADJUSTING CONTROL SETTINGS Give the refrigerator time to cool down completely before ITEMS HOW TO STORE adding food. It is best to wait 24 hours before adding Storing Fresh Food Wrap or store food in the food to the refrigerator. -
Page 27: Refrigerator Section
USING YOUR REFRIGERATOR REFRIGERATOR SECTION Packaging Recommendations: • Use sealed plastic containers. • Use plastic containers with a smooth surface. REFRIGERATOR SHELVES • Package with aluminum foil of high resistance. The shelving of your refrigerator can be adjusted to • Wrap with paper layered with plastic. comply with your storage necessities;... -
Page 28: Crisper Humidity Control
USING YOUR REFRIGERATOR Sliding Shelves (in some models) You can slide some of the shelves in your refrigerator towards inside or outside like explained below. • To slide the shelf towards the outside: Pull towards you, figure A. • To slide the shelf towards the inside: Push until it stops, figure B. -
Page 29: Door Racks
USING YOUR REFRIGERATOR Glide‘N’Serve (In some models). WARNING: Somebody can be hurt if door racks The Glide‘N’Serve provides storage space with avariable are not firmly assembled. temperature control that keeps thecompartment colder CAUTION : DO NOT allow children to play with than refrigerator. -
Page 30: Freezer Section
USING YOUR REFRIGERATOR FREEZER SECTION WARNING: In order to prevent accidents, such as suffocation, DO NOT let children and ICE BIN (In some models) pets play inside the durabase. To remove Ice Bin: WARNING: There is enough space for the children •... -
Page 31: Refrigerator Care And Cleaning
REFRIGERATOR CARE AND CLEANING BACK COVER WARNING WARNING EXPLOSION HAZARD ELECTRICAL SHOCK HAZARD Before you begin, either unplug the refrigerator or turn off power at the circuit breaker or fuse box. NOTE: Back Cover should only Do not use flammable cleaners. Not following these removed qualified instructions can cause death, explosion or fire. -
Page 32: Power Interruptions
REFRIGERATOR CARE AND CLEANING POWER INTERRUPTIONS WHEN MOVING In case of a black out, call your electric company If you decide to take your refrigerator with you when and ask how long it will last. moving, consider the following: In case of a 24 hour or less black out, do not open 1. - Page 33 REFRIGERATOR CARE AND CLEANING REPLACING THE WATER FILTER (TYPE 1) It is recommended that you replace the filter approximately every 6 months, when the water filter indicator reaches 0 months, or when the ice and water dispenser noticeably decreases out-put. Remove the old cartridge.
- Page 34 REFRIGERATOR CARE AND CLEANING REPLACING THE WATER FILTER Replace with a new cartridge. NOTE: After replacing the filter, flush 2.5 gallons through filter before use (flush for approximately 5 minutes). Check the filter for leaks. When the water filter indicator displays the message 0 Filter Month, hold 3 seconds.
-
Page 35: Performance Data Sheet (Type 1)
REFRIGERATOR CARE AND CLEANING Performance Data Sheet Model: LG ADQ36006101-S Use Replacement Cartridge: ADQ36006101 The concentration of the indicated substances in water entering the system was reduced to a concentration less than or equal to the permissible limit for water leaving the system as specified in NSF/ANSI Standard 42 and Standard 53. -
Page 36: Water Filter (Type 2)
REFRIGERATOR CARE AND CLEANING REPLACING THE WATER FILTER (TYPE 2) 2. Hold the filter with the unlock symbol facing towards you as shown in the picture below. Insert the WATER FILTER filter into the filter receptacle on the right side of the Filter Reset: When the filter icon turns on, you have to refrigerator compartment. -
Page 37: Performance Data Sheet (Type 2)
REFRIGERATOR CARE AND CLEANING Performance Data Sheet Models Number 5231JA2002A-S Use with replacement cartridge 5231JA2002A This system has been tested according to NSF/ANSI Standards 42 for the reduction of the substances listed below. The concentration of the indicated substances in water entering the system was reduced to a concentration less than or equal to the permissible limit for water leaving the system as specified in NSF/ANSI 42. - Page 38 If your water pressure exceeds 80 psi, you must 1-888-LGCANADA (24 hours per day/7 days install a pressure limiting valve. Contact a plumbing per week or visit our website at www.lg.com). professional if you are uncertain how to check your water pressure.
-
Page 39: Water Filter (Type 1)
WATER FILTER State of California Department of Public Health Water Treatment Device Certificate Number 09 - 2018 Date Issued: December 15, 2009 Trademark/Model Designation Replacement Elements ADQ36006101-S ADQ36006101 Manufacturer: Cuno Inc. The water treatment device(s) listed on this certificate have met the testing requirements pursuant to Section 116830 of the Health and Safety Code for the following health related contaminants: Microbiological Contaminants and Turbidity Inorganic/Radiological Contaminants... -
Page 40: Connecting The Water Line
CONNECTING THE WATER LINE BEFORE START To determine how much pipe material is needed, measures the distances between the valves located behind the refrigerator and the source of water and add The water source is not guaranteed by the refrigerator to that 8 feet (2,4 m). - Page 41 CONNECTING THE WATER LINE 3. DRILL A HOLE FOR THE VALVE 7. CONNECT PIPELINE TO VALVE Drill a 1/4” (6,35 mm) diameter Place the compression nut and the copper pipe ferule at hole water pipeline. the end of the pipe and connect to the valve. Make sure Remove jagged edges produces the pipe is completely inserted into the valve.
- Page 42 CONNECTING THE WATER LINE 11. CONNECT TO REFRIGERATOR • Remove the ring plug (1) from the valve located at the top of such device. Fix pipeline in a way that it does not vibrate on the refrigerator wall. Push refrigerator against wall. 12.
-
Page 43: Troubleshooting Guide
TROUBLESHOOTING GUIDE UNDERSTANDING SOUNDS YOU MAY HEAR Your new refrigerator might produce certain noises that your previous refrigerator did not. It is normal if you worry. Most of the new sounds you will be hearing are actually normal and expected. Hard surfaces like walls or floor can increase sounds and make them sound louder than they really are. - Page 44 TROUBLESHOOTING GUIDE Problem Possible Causes Solutions STRANGE SOUNDS • The refrigerator is not correctly • You need to adjust the leveling screws due the OR SNOOZING/ positioned. floor is unleveled or weak. Read the Installation VIBRATIONS section. • The replaced refrigerator was an • Modern refrigerators with a bigger storage older model.
-
Page 45: Troubleshooting Guide
TROUBLESHOOTING GUIDE Problem Possible Causes Solutions • The refrigerator is in defrosting • The water will evaporate. It is normal that some THERE´S WATER IN cycle. water falls on the bin. THE DRAINING BIN • It’s more humid than usual. • It might take a while for the water to evaporate. This is normal when the weather is hot and humid. -
Page 46: Smart Diagnosis
(In some models). Should you experience any problems with your refrigerator, it has the capability of transmitting data via your telephone to the LG service center. This gives you the capability of speaking directly to our trained specialists. The specialist records the data transmitted from your machine and 4. -
Page 47: Warranty
Should your LG Refrigerator (“Product”) fail due to a defect in materials or workmanship under normal home use, during the warranty period set forth below, LG will at its option repair or replace the product. This limited warranty is valid only to the original retail purchaser of the product and applies only when purchased and used within the United States including U.S. - Page 48 WARRANTY: Should your LG Refrigerator (“Product”) fail due to a defect in material or workmanship under normal home use during the warranty period set forth below, LG Canada will at its option repair or replace the Product upon receipt of proof of original retail purchase.
- Page 49 NOTES / NOTAS...
-
Page 50: Spanish Version
LG Customer Information Center 1-800-243-0000 USA, Consumer User 1-888-865-3026 USA, Commercial User 1-888-542-2623 CANADA Register your Product Online! www.lg.com...
Need help?
Do you have a question about the LMX25988ST and is the answer not in the manual?
Questions and answers