Glow-worm 18si Instructions For Use Installation And Servicing
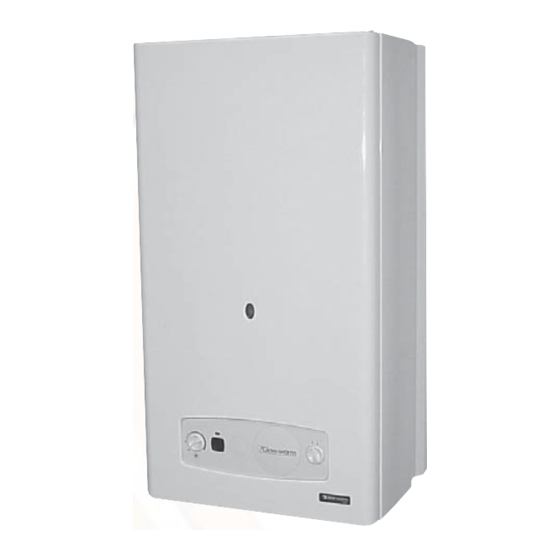
Glow-worm 18si fanned flue combination boiler
Hide thumbs
Also See for 18si:
Table of Contents
Advertisement
Installation and Servicing
18si
Fanned Flue Combination Boiler
G.C. No. 41-047-61
This is a Cat I
The instructions consist of three parts, User, Installation and Servicing Instructions, which includes the Guarantee Registration
Card. The instructions are an integral part of the appliance and must, to comply with the current issue of the Gas Safety
(Installation and Use) Regulations, be handed to the user on completion of the installation.
Thank you for installing a new Glow-worm appliance in your home.
Glow-worm appliances' are manufactured to the very highest standard so we are pleased to offer our customers' a
This product is guaranteed for 24 months from the date of installation or 30 months from the date of manufacture,
whichever is the shorter, for parts. In addition this product is guaranteed for 12 months from the date of intallation or
18 months from the date of manufacture, whichever is the shorter, for labour.
The second year of the parts guarantee, from the beginning of the 13th month onwards after installation or
manufacture, is conditional upon the boiler having been serviced by a CORGI registered gas installer, in accordance
with the manufacturer's recommendations. We strongly recommend regular servicing of your gas appliance, but where
the condition is not met, any chargeable spare parts or components issued within the applicable guarantee period still
benefit from a 12 month warranty from the date of issue by the manufacturer.
We recommend you complete and return as soon as possible your guarantee registration return literature, supplied in
If your guarantee registration return literature is missing you can obtain a copy or record your registration by
telephoning the Heatcall Customer Service number 01773 828100.
One Contact Local Service
Supplied By www.heating spares.co Tel. 0161 620 6677
Instructions for Use
To b e l e f t w i t h t h e u s e r
Appliance
2H
Guarantee Registration
Comprehensive Guarantee.
the document envelope.
REGISTER YOUR GLOW-WORM APPLIANCE
CALL 0208 247 9857
Customer Services:
Tel: (01773) 828100
Fax: (01773) 828070
Hepworth Heating Ltd.,
Nottingham Road, Belper, Derbyshire. DE56 1JT
General/Sales enquiries:
Tel: (01773) 824141 Fax: (01773) 820569
2000225058A.04.02
Advertisement
Table of Contents

Related Manuals for Glow-worm 18si


Summary of Contents for Glow-worm 18si
-
Page 1: Instructions For Use
Guarantee Registration Thank you for installing a new Glow-worm appliance in your home. Glow-worm appliances' are manufactured to the very highest standard so we are pleased to offer our customers’ a Comprehensive Guarantee. This product is guaranteed for 24 months from the date of installation or 30 months from the date of manufacture, whichever is the shorter, for parts. -
Page 2: Important Information
If you see any exception to this rule, please contact your nearest Glow-worm dealer. Thank you in advance for your assistance. -
Page 3: Table Of Contents
Contents CONTENTS DESCRIPTION SECTION PAGE No. Important Information Introduction INSTRUCTION Controls and Lighting Programmer FOR USE Draining Safety Devices Servicing and Maintenance Technical Data Dimensions Heating System Design Boiler Schematic Boiler Location, Flue and Ventilation INSTALLATION Fixing Jig pack INSTRUCTIONS Piping System Installation Boiler Installation Horizontal Top Telescopic Flue Installation... -
Page 4: Controls And Lighting
It should supply the Controls and lighting Your 18si boiler has been factory configured to operate at the heart of an existing installation. However, because many installations are specially designed, do not hesitate to contact... - Page 5 If the fault continues call your Installation/Servicing company or Heatcall. Turn the switch ON ( I ) (Glow-worm’s own service organisation) using the telephone number on the front cover of this literature. 5. Installation filling : 2.
-
Page 6: Programmer
Programmer Instructions for use Optional Programmers inclusive of installation and user instructions:- These are available from your nearest stockist. Electro/Mechanical Part No. S1010801 Digital Part No. S1011100 Draining Protection against freezing The boiler has a built in frost protection programme as long as the electricity and gas are left switched on. -
Page 7: Safety Devices
OFF, the red light will flash and the fan will continue to run. The boiler will be ready to operate when the fault has been The 18si has a built in frost protection device that protects the cleared. boiler from freezing. If the boiler is to be left and there is a risk... -
Page 8: Technical Data
1 Technical Data Heating Natural Gas (G20) Heat input (max) NET Q 20,7 kW Ø Burner injector 1,2 mm 70,628 BTU/H Inlet pressure 20 mbar Heat input (min) NET Q 11 kW Maxi. Burner pressure 8 mbar 37,532 BTU/H Mini. Burner pressure 2,25 mbar Heat output (max) GROSS P 18,4 kW... -
Page 9: Heating System Design
Gross lift weight (boiler and packaging) 35 kg Diagram 2.1 3 Heating System Design • The 18si is for use only with sealed central heating systems. an average temperature of 75°C and a maximum service pressure of 3 bar. This pressure setting can be modified at •... - Page 10 3 Heating System Design 3.2 Filling the Sealed System • Provision for filling the system at low level must be made. Three methods are shown in diagram 3.2. There must be no permanent connection to the mains water supply, even through a non-return valve.
-
Page 11: Boiler Schematic
5 Boiler Schematic 1 - Fan. 12 - Ignition module. A - Heating Return. 2 - Air pressure switch. 13 - By-pass. B - Heating Flow. 3 - Heat exchanger. 14 - Gas valve. C - Gas. 4 - Overheat thermostat. 15 - Loss of water sensor. -
Page 12: Boiler Location, Flue And Ventilation
PROVIDING that adequate Horizontal extended flue pack consideration is given for Servicing/Repairs at a later date. If Vertical flue pack. any doubt exists, contact the Glow-worm’s Technical Helpline 01773 828300. Twin flue pack. The minimum acceptable spacings from the terminal to Extensions, 90°... -
Page 13: Fixing Jig Pack
E - wall template C - Heating Return. F - copper connections Please note that the 18SI uses standard ISO arrangement for the fittings G - sealing washers and screws on the jig - You may refer to the 30SI for details... -
Page 14: Piping System Installation
8 Piping System Installation 8.1 Fixing jig, refer to diagram 7.1 8.4 Gas connection • Remove the contents of the fixing jig pack. • The supply from the governed gas meter must be of adequate size to provide a constant inlet working pressure of 20 mbar (8 •... -
Page 15: Boiler Installation
9 Boiler Installation 9.1 Statutory requirements 9.4 Discharge safety valve, refer to diagram 9.1. The installation of this boiler must be carried out by a qualified registered person in accordance with the relevant requirements WARNING: It must not discharge above an entrance or window of the current issue of: or any type of public access area. - Page 16 10 Horizontal Telescopic Top Flue Installation The Horizontal Telescopic Top Flue, Kit No. A2004500 is suitable for installations that require a flue length from 425 minimum to 659.5 maximum. If longer flueing is required extensions and bends are available, see note below.
-
Page 17: Horizontal Top Flue Installation
10A Horizontal Top Flue Installation 10A.1 Horizontal top flue - kit 86285 Max. Std flue length 930mm The Horizontal top flue (adjustable by cutting) Min. Std flue length 300mm is suitable for installations that require a flue length from 300 minimum to 930 maximum 70mm (without extensions). - Page 18 10A Horizontal Top Flue Installation 10A.4 Installation of horizontal top flue assembly • Fit rubber sealing collar (F), see diagram 10A.3, into groove at the outer end of pipe (A). • Fit air duct pipe (A) into wall with groove to the outside. •...
-
Page 19: Electrical Connection
Warning: This appliance must be wired in accordance with these instructions. Any fault arising from incorrect wiring cannot (E) Wire link be put right under the terms of the Glow-worm guarantee. VOLTAGE Important: If a replacement supply cable is required it must be FREE purchased. -
Page 20: Commissioning
12 Commissioning Please ensure the “Benchmark” logbook is completed and left with the user. The commissioning and first firing of the boiler must only be done by a qualified registered person. Gas installation It is recommended that any air is purged from the supply at the gas inlet test point on the gas valve, see diagram 12.1. -
Page 21: Changing Gas Type
12 Commissioning • Ensure the display indicates a system pressure • Bleed each radiator to remove air, ensure all of 1.5 bar adjust if necessary. bleed screws are re-tightened. • If necessary repressurise the system, refer to procedure 4 • Refill system to a pressure of between 1 and 2 bar and vent as before. -
Page 22: Settings
14 Settings Bypass The 18si boiler has a built-in bypass. This must be adjusted according to the requirements of the system, refer to the flow rate pressure curve (diagram 1.1). The boiler is supplied with the built-in bypass open a half a turn. It is adjusted by turning the bypass screw (a), see diagram 14.1. - Page 23 15 Routine Cleaning and Inspection To Drain the boiler BOILER DRAIN VALVE • Close isolating screws on the isolating valves (b) and (c) turn from vertical to horizontal to close. • Open the boiler drain valve (a). HEATING HEATING RETURN FLOW Note: Isolating water cocks are shown in the: OFF position...
- Page 24 15 Routine Cleaning and Inspection • Unhook each panel from the front retaining tabs. • Pull each panel forward from the rear retaining tabs to remove. 15.7 Combustion chamber cover • Unscrew and remove the two screws securing combustion chamber cover to combustion chamber, see diagram 15.5. •...
- Page 25 15 Routine Cleaning and Inspection BURNER RETAINING SCREWS BURNER AIR PRESSURE GUIDE SWITCH SENSING TUBE FLUE HOOD Diagram 15.7 FAN RETAINING EARTH HEAT EXCHANGER Diagram 15.9 BOLTS LEAD FILTER POWER SUPPLY LEADS Diagram 15.8 RETAINING CLIP Diagram 15.10 2000225058A Supplied By www.heating spares.co Tel. 0161 620 6677...
-
Page 26: Fault Finding
16 Fault Finding IMPORTANT: On completion of the fault finding task which has Before trying to operate the boiler make sure that : required the breaking or remaking of the electrical connections, • All gas supply cocks are open and that the gas supply has the continuity, polarity, short circuit and resistance to earth been purged of air. - Page 27 16 Fault Finding COMPONENT NORMAL MEASURE CHECK Under demand during ignition sparks: If 0 Volt: the gas control valve Gas control valve Resistance of coil 116Ω 24V dc for 1 to 2 seconds, then is not faulty. 12Vdc (constant) at the gas control If 24 Volts and then 12 Volts valve electrical connection.
- Page 28 16 Fault Finding FAULT: NO HEATING The setting is too low or the boiler Is the heating set high enough ? is set to summer mode. Turn the setting up by turning the central heating temperature control knob clockwise. Is the room thermostat in demand ? Adjust the setting.
- Page 29 16 Fault Finding FAULT: THE BURNER LIGHTS BUT THEN GOES OUT. THERE IS NO FLAME DETECTED. The flame is not spreading across the whole burner and is not reaching Check that the gas taps are fully open the sensing electrode. Is the gas Check the gas pressure.
- Page 30 16 Fault Finding FAULT: THE BURNER DOES NOT LIGHT AT ALL, BUT THERE IS AN IGNITION SPARK. Are the gas taps on? Turn on the gas taps. Is there 24Vdc at the Check the wiring. gas control valve? If the problem persists, change the control board (PCB).
- Page 31 16 Fault Finding FAULT: THE FAN DOES NOT START. Does the warning light flash 45 seconds Check the power from the room thermostat. after the start of the demand? Replace the interface board or control board (PCB). Check the fan (loose terminal connector, windings burnt out).
-
Page 32: Wiring Diagram
17 Wiring Diagram AIR PRESSURE SWITCH IGNITION PLUG ELECTRODES SENSE ELECTRODE IGNITOR UNIT CONTROL VALVE OVERHEAT PUMP CH THERMOSTAT CHASSIS THERMISTOR EARTH WATER PRESSURE SENSOR THERMOSTAT 230V CONTROLS BOARD 2 INPUT (FROST STAT) THERMOSTAT 1 INPUT (ROOM STAT) MAINS VOLTAGE EXTERNAL CONTROLS VOLTAGE CONNECTION PLUG... -
Page 33: Replacement Of Parts
18 Replacement of Parts To Drain the boiler BOILER DRAIN VALVE • Close isolating screws on the isolating valves (b) and (c) turn from vertical to horizontal to close. • Open the boiler drain valve (a). HEATING HEATING RETURN FLOW Note: Isolating water cocks are shown in the: OFF position Diagram 18.1... - Page 34 18 Replacement of Parts • Remove air pressure switch tube from sensing probe on flue • When refitting electrical connections to replacement thermostat hood. the polarity is not important. Note: Do not fit tube until the air pressure switch is in position. 18.9 Ignition electrode •...
- Page 35 18 Replacement of Parts 18.11 Heat exchanger, refer to diagram 18.7. GROMMET Before starting refer to the front of Section 18 Important information. GAS SUPPLY PIPE • Remove the front panel, refer to Section 15.3. SENSE ELECTRODE • Remove the sealed chamber cover, refer to Section 15.5. ASSEMBLY •...
- Page 36 18 Replacement of Parts 18.13 Printed circuit board (PCB), refer to 18.14 User interface board, refer to diagram diagram 18.9. 18.10. Before starting refer to the front of Section 18 Important Before starting refer to the front of Section 18 Important information.
- Page 37 18 Replacement of Parts 18.16 Central heating pump head, refer to diagram 18.11. Before starting refer to the front of Section 18 Important PUMP information. ELECTRICAL • Remove the front panel, refer to Section 15.3. CONNECTION • Lower the control panel, refer to Section 15.4. •...
- Page 38 18 Replacement of Parts 18.19 Bypass valve, refer to diagram 18.13. Before starting refer to the front of Section 18 Important information. • Remove the front panel, refer to Section 15.3. • Lower the control panel, refer to Section 15.4. •...
- Page 39 18 Replacement of Parts 18.22 Gas control valve stepper motor, refer to diagram 18.16 Before starting refer to the front of Section 18 Important information. • Remove the front panel, refer to Section 15.3. • Lower the control panel, refer to Section 15.4. DISCHARGE •...
-
Page 40: Spare Parts
18 Replacement of Parts • Disconnect the mains cable and any external controls cables. • IMPORTANT: With regards to the manual handling operations, 1992 regulations, the following operation exceeds the recommended weight for one man lift. • Lift up to remove the boiler from the wall. INNER •...
Need help?
Do you have a question about the 18si and is the answer not in the manual?
Questions and answers