
Related Manuals for Sunbeam Mixmasters


Summary of Contents for Sunbeam Mixmasters
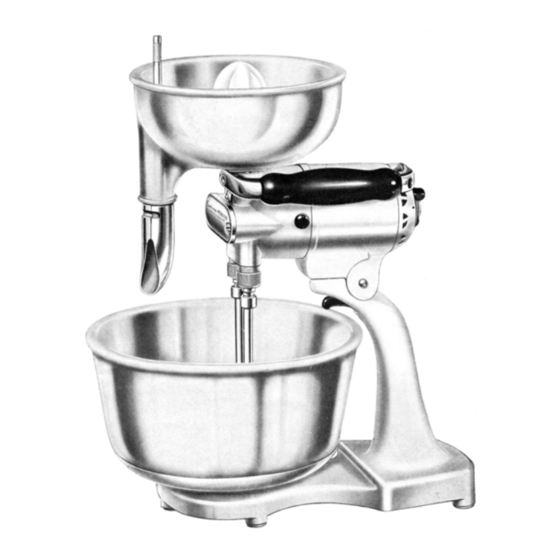
- Page 1 Instructions for Servicing Vintage Sunbeam Mixmasters Original Sunbeam Factory Service Information for Models: 1, 3A, 3B, 3 ‘Automatic’ Compiled by Dave’s Repair Service New Albany, PA 2004 All Rights Reserved www.DavesRepair.com...
- Page 2 Page 3, although referring directly to Model 1, actually apply to all three models. The AUTOMATIC Mixmasters have greater power, and the speed control differs from that in earlier models, and in other mixers. Older Mixmaster models had a rheostat connected in series with the motor, to limit the voltage applied to the motor;...
- Page 3 or “dummy” set is made of cold rolled steel. The purpose of the steel point and lever arm is to balance the movement of the tungsten point and its lever arm and to give smooth, quiet operation, which is important. Since the breaker points are mounted on a rotating disc to enable centrifugal force to act upon them, the current is fed to the rotating governor through a pair of stationary brushes, hence there are two governor brushes.
- Page 4 HOW TO SERVICE MODEL 1 AUTOMATIC MIXMASTER If Mixmaster does not run when electric cord is plugged into an outlet of the same voltage shown on the motor name plate, detach the cord from the socket and remove switch cover (see Key #71 on the general diagram at the end of this bulletin) by taking out the two screws (90 and 65);...
- Page 5 Frozen Bearings To check the bearings to find if any have seized because of lack of oil or other causes, grasp the lower part of the whippers (21), and turn inward. If the bearings for whipper spindle sleeves (13 and 20), motor bearings (45), or governor slide bearing (113) have seized it will be impossible to turn the whippers.
- Page 6 5-B. Next disconnect the three leads fastened under screws and nuts 106, 92, and 94 and take out two screws (91) which hold switch mounting bracket assembly (105) in motor. Remove this assembly, including the two governor brushes (97) and resistor (43). Removing the Armature (27) Following the work outlined in the preceding sections take out the two retaining screws (23) and gently tap front housing to help break the lacquer...
- Page 7 bottom of gear case (5), the two parts of the motor housing should be brought together with care to prevent dirt, etc. from getting between the joint. The two retaining screws (23) should be in place and then tightened up evenly so there will be no misalignment of bearings.
- Page 8 brush should be pushed down into the brush holder a few times to be certain that it will travel or slide freely in and out of the bolder. If governor brushes and springs are not in first class condition as outlined above they should be replaced.
- Page 9 The felt wick (110) in the cover should feed oil to the governor slide bearing. 14-A.If the parts referred to in the preceding section are all in good shape the switch cover (71) may be put in place. First turn the Switch Knob (70) to the “OFF”...
- Page 10 Follow the same procedure with the other worm gear (9) and assemble it to whipper spindle sleeve 13. Again be sure that the gears (9) are fitted to sleeves with set screw holes held exactly in front, in order to get proper timing of the whippers.
- Page 11 Third, remove screw (87) terminal box cover (84) and terminal insulation cover (95). Untwist the lead wires with a hot soldering iron and pliers, and remove the terminal insulation box (96) by lifting straight up. The condenser (69) is now ready to be taken out but workman should carefully note the layout of the leads before removing.
- Page 12 22. Motor Runs on High Speed Only 22-A. Breaker point condenser (connected across terminals 92 and 94) is shorted. Replace condenser unit (69) as in section 19. 22-B. Tungsten points (102) may be fused together. Replace governor (100) as in sections 5, 5-A, 13, 13-A, 13-B 14, and 14-A. 23.
- Page 13 Single Open-end wrench for adjusting screw lock nut (P6649). Purchase locally. Open End Wrench for adjusting screw (P—20751). Purchase locally. Special Gear Box Gauge (Not Available). Adjust Height 6—3/8” from base. SUNBEAM CORPORATION 5600 West Roosevelt Road Chicago 50, IL. — U. S. A.
- Page 14 SERVICE BULLETIN NO. 18 INSTRUCTIONS FOR SERVICING SUNBEAM MIXMASTER MODEL 3 AUTOMATIC (See Model Number Stamped on Bottom of Mixmaster Base) Revised May 14, 1949 The Model 3 Automatic Mixmaster motor is controlled by an air governor that operates on the following principle: A fan draws air into the motor housing through the grille on the front, carries it past the armature and field coils, on through the governor control, and delivers it out the back of the motor.
- Page 15 HOW TO SERVICE MODEL 3 AUTOMATIC MIXMASTER Taking the Motor Apart The parts referred to in this bulletin are illustrated on the diagram attached to the end of the bulletin with parts list. The tools that will be mentioned are described on page 9. Threads on all screws and other fasteners used in the Model 3 Automatic are right hand, except armature thrust adjustment cap (see Key number 107 on parts diagram), which is left hand.
- Page 16 A-9. Brush holders (18) occasionally become loose because of shrinkage due to heat from the motor under prolonged use. To tighten or replace brush holders, set screws (22) which keep the holders in place can be adjusted. With a long thin screw driver inserted in the same screw hole through which baffle p1ate retaining screws (23) enter.
- Page 17 retaining screws (23) and tighten in place. When fitting baffle plate, care should be taken not to pinch the two lead wires coming up from the field coils. The wires must be passed through the two semi-circular slots in extreme edge of baffle plate.
- Page 18 the thrust cap. If motor is put on the Mixmaster stand, both hands will be left free for this adjustment. When the rubbing noise is heard, pull wall plug out immediately, turn thrust cap and try again. When a point is found where the rubbing noise is not heard, leave wall plug in outlet so motor will run continually.
- Page 19 determined by ear (the higher the motor speed the higher will be the pitch of the sound). The two upper and lower cover screws (65) fasten to the fan housing, which in turn contains the rear armature shaft bearing; hence if the screws are adjusted too tight they will spring the rear bearing out of alignment, and slow down the motor by preventing the parts from turning freely.
- Page 20 remove scored marks or roughness on armature shaft or spindle sleeves with an oil stone, and if parts are worn badly replace with new. (NOTE: If armature hearings (45 and 135) are worn or require replacement for any reason, return motor to factory for service.
- Page 21 Radio Interference The model 3 automatic motor is well filtered with condensers (69 and 140) to reduce and eliminate radio interference, and will give satisfaction in the great majority of homes. Local conditions in some places, especially in communities some distance away from radio stations, in cases where indoor aerials or long unshielded “lead-ins”...
- Page 22 Standard Extra deep Socket, Size 7/16 In. Standard File (Automobile Distributor Point File) Standard Adjustable pliers. *Tools with T number - order from the factory. Standard tools - purchase locally. Sunbeam Corporation 5600 W. Roosevelt Rd. Chicago 50, ILL. U.S.A.
Need help?
Do you have a question about the Mixmasters and is the answer not in the manual?
Questions and answers