Table of Contents
Advertisement
CLARITY, a Division of Plantronics, Inc.
4289 Bonny Oaks Drive • Chattanooga, TN 37406
Tel: 800-426-3738 • Fax: 800-325-8871
E-mail: claritycs@plantronics.com • Website: www.clarityproducts.com
PRINTED IN CHINA
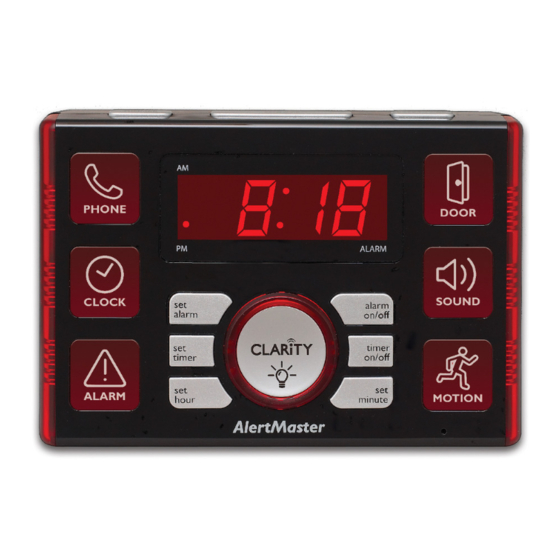
AlertMaster AL10
Visual Alert System
User Guide
Clarity, a Division of Plantronics, Inc.
4289 Bonny Oaks Drive, Chattanooga, TN 37406
Tel: 800-426-3738 Fax: 800-325-8871
E-mail: claritycs@plantronics.com Website: www.clarityproducts.com
©2010 Clarity, a Division of Plantronics, Inc. All rights reserved.
AlertMaster, Clarity, Clarity AlertMaster, the logo design, AL10, AL11,
AL12, AMPX, AMPXB, AMAX, AMBX, AMDX and AMSX are trademarks
or registered trademarks of Plantronics, Inc.
Rev. E (07-10)
™
™
E
N
G
L
I
S
H
Advertisement
Table of Contents

Related Manuals for Clarity AlertMaster AL10

Summary of Contents for Clarity AlertMaster AL10
- Page 1 E-mail: claritycs@plantronics.com Website: www.clarityproducts.com 4289 Bonny Oaks Drive • Chattanooga, TN 37406 Tel: 800-426-3738 • Fax: 800-325-8871 ©2010 Clarity, a Division of Plantronics, Inc. All rights reserved. E-mail: claritycs@plantronics.com • Website: www.clarityproducts.com AlertMaster, Clarity, Clarity AlertMaster, the logo design, AL10, AL11, AL12, AMPX, AMPXB, AMAX, AMBX, AMDX and AMSX are trademarks or registered trademarks of Plantronics, Inc.
-
Page 2: Important Safety Instructions
Important Safety Instructions appliance is subsequently used. When using your Clarity AL10, basic safety precautions should always be 14. Unplug this product from the wall outlets and refer servicing to the followed to reduce the risk of fire, electric shock and persons including... -
Page 3: Additional Safety Notes For Canadian Users
Important Safety Instructions Important Safety Instructions ADDITIONAL SAFETY NOTES FOR CANADIAN USERS CAUTION RISK OF ELECTRIC SHOCK The following items are included as part of the CS-03 Requirements. DO NOT OPEN The standard connecting arrangement for the equipment is CA11A. This product meets the applicable Industry Canada technical specifications. -
Page 4: Package Checklist
NOTE: PLEASE RETAIN A COPY OF PROOF OF PURCHASE FOR YOUR RECORDS. DIMMER button RESET/PAGE button Sidebar lights SNOOZE button Digital alarm clock AlertMaster AL10 Door illumination light Phone illumination light User Guide PHONE DOOR Clock illumination light Sound illumination light... -
Page 5: Installation And Setup
Installation and Set-Up Installation and Set-Up An ideal location for setting up the base unit is in the bedroom. Do B. Doorbell not put any of the AL10 components on or next to metal surfaces, computers, television, microwaves, or other areas with electronic equipment that can cause interference to the wireless system. -
Page 6: Monitoring Functions
Installation and Set-Up Operations C. Clock A. Monitoring Functions 1. Press the SET CLOCK (on the back of the unit) and the SET The console has six indicator lights for each of the alerting functions of HOUR or SET MINUTE (both on the front of the unit) buttons the AL10. -
Page 7: Alarm / Snooze
Operations Operations 2. DOOR The door indicator light and sidebar lights illuminate when the doorbell button is pressed. The lamp will turn on for five seconds, off for two seconds, on again for two seconds and repeat until two minutes have passed;... - Page 8 You must purchase the optional Audio Alarm Transmitter (Model AMAX) light and sidebar lights illuminate when continuous sound is from Clarity to use this function. When a signal is received from the detected for 12 seconds or longer in the room by the built-in Audio Alarm Transmitter, the indicator light illuminates, and the lamp will microphone.
-
Page 9: Security Timer
Operations Operations 1. Master Reset 2. Motion Sensor 3. Audio Alarm 4. Baby Sound 5. Room Sound 6. Phone 7. Door 8. Paging 9. Alarm Clock PHONE DOOR 10. Random (Security) Timer D. Security Timer CLOCK SOUND With this feature, the lamp connected to your AlertMaster system will go on automatically every evening and turn off later in the evening. - Page 10 Press the DIMMER button on top of the console to adjust the clock display brightness level. G. Battery The AlertMaster AL10 operates on 10 “AA” size rechargeable NiMH batteries (not included) during a power outage. Attach the doorbell body Screw on the back cover to the mounting plate.
-
Page 11: Channel Settings
1 2 3 4 1. Unplug AC power and locate DIP switch (a 4-position switch) on the back of the AlertMaster AL10. Lift rubber cover to access the switch. 2. Open the battery compartment of the doorbell. NIGHTLIGHT SET CLOCK 3. -
Page 12: Troubleshooting
Troubleshooting Optional Accessories If any problem should occur during operation of your AlertMaster The AlertMaster AL10 is designed to work with optional wireless remote Notification System, review the “Symptom and Remedy” list below. Make receivers and transmitters, each sold separately. -
Page 13: Regulatory Compliance
Optional Accessories Regulatory Compliance D. Audio Alarm Transmitter (AMAX™) Important Information for Customers Place this next to any audio alarm for PART 68 OF FCC RULES INFORMATION notification when the alarm is activated. It activates the Alarm function of the This AL10 Notification System complies with Part 68 of the FCC AlertMaster system and has a range of up rules and the requirements adopted by the ACTA. -
Page 14: Customer-Owned Coin/Credit Card Phones
If trouble is experienced with this telephone equipment, for repair Your AL10 Notification System has been tested and found to or warranty information, please contact Clarity, 800-426-3738. If the equipment is causing harm to the telephone network, the telephone comply with the limits of a Class B digital device, pursuant to Part 15 of company may request that you disconnect the equipment until the FCC rules. -
Page 15: Warranty
If returned after 30 days but within one year from the date of purchase, we method of connection. In some cases, the company’s inside wiring will repair or replace it at no charge. In the repair of your AlertMaster AL10, associated with a single line individual service may be extended by means we may use new or reconditioned replacement parts.
Need help?
Do you have a question about the AlertMaster AL10 and is the answer not in the manual?
Questions and answers