Table of Contents
Advertisement
Quick Links
Advertisement
Table of Contents

Related Manuals for Asus PT201 series


Summary of Contents for Asus PT201 series
-
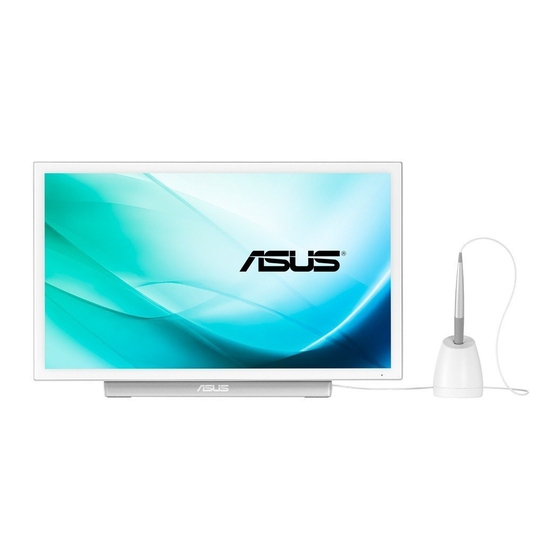
Page 1: Lcd Monitor
PT201 Series LCD Monitor User Guide... - Page 2 E9503 June 2014 First Edition Information on the Disposal of this Equipment Do not throw your this product in municipal waste. This product has been designed to enable proper reuse of parts and recycling. The symbol of the crossed out wheeled bin indicates that the product (electrical, electronic equipment and mercury-containing button cell battery) should not be placed in municipal waste.
-
Page 3: Important Information
IMPORTANT INFORMATION WARNING: TO REDUCE THE RISK OF FIRE OR ELECTRIC SHOCK, DO NOT EXPOSE THIS PRODUCT TO RAIN OR MOISTURE. The lightning flash with arrowhead symbol, within a triangle, is intended to alert the user to the CAUTION presence of uninsulated “dangerous voltage” within the product’s enclosure that may be of RISK OF ELECTRIC sufficient magnitude to constitute a risk of electric... -
Page 4: Dear Asus Customer
DEAR ASUS CUSTOMER Thank you for your purchase of an ASUS LCD product. To ensure safety and many years of trouble-free operation of your product, please read the Safety Precautions carefully before using this product. SAFETY PRECAUTIONS Electricity is used to perform many useful functions, but it can also cause personal injuries and property damage if improperly handled. - Page 5 SAFETY PRECAUTIONS (Continued) 19. Usage of the monitor must not be accompanied by fatal risks or dangers that, could lead directly to death, personal injury, severe physical damage or other loss, including nuclear reaction control in nuclear facility, medical life support system, and missile launch control in a weapon system.
-
Page 6: Tips And Safety Instructions
- Illustrations in this manual may not exactly represent the - Do not use your nails, touch pens or digitizer pens other actual product or display. than the one supplied, ASUS pencils, or other hard objects to operate the unit. LED Backlight - If the pen tip of the digitizer pen is worn or damaged, replace the pen tip. -
Page 7: Table Of Contents
Installing on a table Federal Communications Commission Interference (Pen writing position/Horizontal position) ....15 Statement ..............3 Turning Power On/Off ............16 DEAR ASUS CUSTOMER ..........4 Turning on the power ..........16 SAFETY PRECAUTIONS ..........4 Turning off the power ..........16 TIPS AND SAFETY INSTRUCTIONS .......6 Touch Actions ..............17... -
Page 8: System Requirements
System Requirements nTouch panel To use the touch panel, the monitor must be connected to a computer using a USB cable. Touch panel operating conditions are as described below. Computer PC/AT compatible computer with a USB 1.1 port and able to output a resolution of 1920 x 1080. Windows 8.1 (32-bit or 64-bit version), Windows 8 (32-bit or 64-bit version), Windows 7 (32-bit or 64-bit version) •... -
Page 9: Part Names
Part Names nFront view 1. Power LED (See page 16.) nRear view 1. VESA holes (See page 28.) 2. Anti-theft hole ( ) Allows the monitor to be secured using a commercially available anti-theft lock. The anti-theft hole is compatible with Kensington’s MicroSaver security system. -
Page 10: Connecting Devices
Connecting Devices Connection with a PC Caution • Be sure to turn off the power and disconnect the plug from Connect the monitor and a PC using the connection cable. the power outlet before connecting/disconnecting cables. Also, read the manual of the equipment to be connected. nInputting video and audio •... -
Page 11: Connecting Usb Devices
Connecting Devices Connecting the digitizer pen displayed. In this state, even if a signal is input from the other terminal, the display is not switched. To switch the display, use [Input Select] on the menu screen. (See page When using the supplied digitizer pen, connect the digitizer 22.) pen cable. -
Page 12: Binding Cables
Binding Cables Caution • When connecting cables, spread a soft cloth on a stable level surface such as a desk, and gently place the monitor on it with the screen facing down. Video cable and USB cable Secure the video cable (HDMI or DisplayPort) and USB cable using the cable clamp. 1. -
Page 13: Connecting The Monitor To A Power Source
Connecting the Monitor to a Power Source Caution • Use only the AC adapter and power cord supplied with the monitor. 1. Connect the monitor to the power outlet using the supplied AC adapter and power cord. Back of monitor For power outlet AC adapter... -
Page 14: Installation
Installation Installing on a stand 3. Place the monitor in the standing position, and adjust the angle of the stand. (Standing position) Hold the top of the display with one hand so that it does not fall over, hold the rear leg of the stand with your other hand, Placement on the variable stand and adjust the angle of the stand. -
Page 15: Installing On A Table (Pen Writing Position/Horizontal Position)
Installation Installing on a table Horizontal position Place the monitor on a table or other level surface. (Pen writing position/Horizontal position) Caution • When using the monitor horizontally, use the horizontal tab Remove the monitor from the stand and place face-down on a in the upright position. -
Page 16: Turning Power On/Off
Turning Power On/Off Turning on the power Turning off the power 1. Press the POWER button. 1. Turn off the PC. 2. Depress the POWER button for around 2 seconds. POWER button POWER button Press Depress for around 2 seconds The power LED turns off. -
Page 17: Touch Actions
Touch Actions Touch action modes Single-tap Touch the screen with your finger/pen. There are three touch action modes: finger/pen mode, pen- only mode, and finger-only mode. These modes can be changed on the menu screen. The monitor is set to finger/pen mode when shipped. Caution •... - Page 18 Touch Action nFinger actions Drag-and-drop Touch the screen with your finger/pen and move without lifting. Zoom When you have finished the movement, lift your finger/pen. While touching the screen with two fingers, move them closer together and farther apart. Slide to pan With your finger/pen touching the screen, move it up and Pinch down to scroll the screen.
-
Page 19: Digitizer Pen
Touch Action Digitizer pen You can wrap the digitizer pen cable around the digitizer pen stand. The PT201 monitor supports a digitizer pen. To use the digitizer pen, the utility software must be installed and configured. (See page 19.) nDigitizer pen actions Top cover Button operations Function button 2... -
Page 20: Other Functions
Touch Action nSpare pen tip storage 1. Unscrew the pen tip cover and remove it. The pen stand features a pen tip storage area where you can store spare pen tips. TIPS • Spare pen tips are not stored in the stand at the time of purchase. -
Page 21: Monitor Settings
Monitor Settings Menu operations 4. Touch [Exit] or press the MENU button. The menu screen disappears. The monitor settings are configured by displaying the menu screen. The operations on this page are the basic operations. Caution • Do not turn off the power while the menu screen is displayed. -
Page 22: Menu Functions
Monitor Settings Menu functions Exit Setup Input Select Volume Finger-only Pen-only Finger/pen mode mode mode Touch mode selection Touch mode selection These icons switch the touch action mode. Input Select ) mark is displayed at the top of the icon for the selected mode. -
Page 23: Setup Menu Details
Monitor Settings SETUP Menu Details nMode on Start Up Touch Mode This setting configures the touch action mode (See page 22) used when the monitor is turned on. Position Reset: The monitor starts in finger/pen mode. Save: The monitor starts in the mode that was last used. Position Position When the monitor is used in portrait orientation (power/menu... -
Page 24: Prohibiting Operations (Operation Lock)
Monitor Settings Prohibiting operations (operation lock) Operation lock is enabled. A key mark is displayed on the screen and it disappears after around 5 seconds. This function makes it possible to prohibit operations to turn The key mark can be set to always be displayed. (See the power off and to prohibit touch action on the screen. -
Page 25: Monitor Status Indicators
Monitor Settings n Disabling key lock Monitor status indicators 1. Press the MENU button. The status is displayed on the right-side of the screen. The menu screen is displayed. Touch Mark MENU button Key Mark Touch Mark The touch mark displays the current touch action mode. Finger/pen mode Press This mark is displayed during finger/pen mode. -
Page 26: Troubleshooting
Troubleshooting If you are experiencing any problem with your display, before The touch panel does not respond. calling for service, please review the following troubleshooting • Is the USB cable connected properly? (See page 11.) tips. • The touch panel may not work properly if there is a large contact area (e.g. if the screen is touched with the palm of There is no picture or sound. -
Page 27: Specifications
USB (for touch panel x 1, microUSB Type B Ver.2.0 communication) Maximum touch points 10-point multi-touch Power requirement AC 100 V - 240 V, 50/60 Hz (when using the supplied AC adapter), DC 19 V Operating temperature 0°C to 35°C Operating humidity 20% to 80% (no condensation) Power consumption 41W (29W, 0.3W) (when using the supplied AC adapter) (during normal operation, power off) * Dimensions (excluding protrusions) (mm) Approx. 463.8 x 25.2 x 274.8 (WDH) Weight (kg) Approx. 2.3 (excluding stand) Approx. 3.6 (including stand) * When the DisplayPort input terminal and touch panel are connected. As a part of our policy of continuous improvement, ASUS reserves the right to make design and specification changes for product improvement without prior notice. The performance specification figures indicated are nominal values of production units. There may be some deviations from these values in individual units. - Page 28 Specifications nDimensional Drawings Note that the values shown are approximate values. VESA holes * 1-15/16 1-15/16 [50] [50] 1 [25.2] Unit: inch [mm] (excluding protrusions) 18-1/4 [463.8] Screen display size (17 [432]) * Use a VESA-compliant mounting bracket capable of supporting 4 times the weight of the monitor. * When attaching a VESA-compliant mounting bracket, use M4 screws that are 3/16inch to 1/4inch (4 to 6 mm). longer than the thickness of the mounting bracket. * When mounting the monitor on a wall or ceiling, ensure that the mounting location is capable of supporting 4 times the weight of the monitor (e.g. a concrete wall or column). nStanding position 20°...
- Page 29 Specifications nSupported frequency Resolution Frame rate Remarks 640×480 60Hz 800×600 60Hz SVGA 1024×768 60Hz 720×480p 59.94/60Hz 1280×720p 50/59.94/60Hz 1920×1080p 50/59.94/60Hz 720×576p 50Hz * All are compliant only with non-interlaced. * Each is scaled to 16:9 and displayed using the full screen. * Depending on the connected PC, images may not be displayed properly even if the compatible signal described above is input. nDDC (plug and play) The monitor supports the VESA DDC (Display Data Channel) standard.
Need help?
Do you have a question about the PT201 series and is the answer not in the manual?
Questions and answers