Table of Contents
Advertisement
Quick Links
Advertisement
Table of Contents

Related Manuals for Slick MP180R


Summary of Contents for Slick MP180R
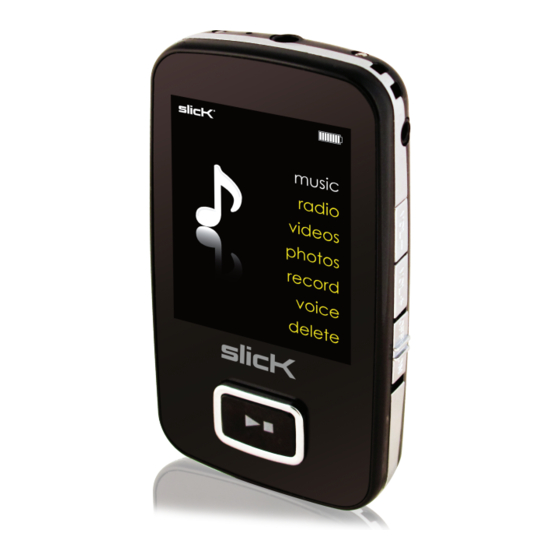
- Page 1 M P 1 8 0 R User Guide...
-
Page 2: Usb Cable
In the box music radio videos • MP3 Player photos • Headphones record Headphones USB Cable voice • USB Cable delete • Quick Start Guide • CD (Video Converter and User Guide) MP3 Player Quick Start Guide... - Page 3 Features & location of controls Features • 2 GB internal memory • High resolution 1.8” LCD display • Rechargeable Li-ion battery • FM digital radio • Stores & plays music, video, and pictures • Digital voice recording Location of controls USB connection port [] - Previous track/up (menu list)/ Fast rewind...
-
Page 4: Basic Operation
Basic Operation Power on/off To navigate the main menu ● To turn on the player, make sure the switch is in the “ON” [OFF ON] [] moves the selection up position and press and HOLD the [ ] button until the display lights ... -
Page 5: Charging The Battery
Charging the battery music radio videos photos record voice delete 1. Connect the MP3 Player to your computer using the included USB cable 2. Charge the battery between 3 and 5 hours. (Do not charge for more than 8 hours). Battery level indication: indicates that the battery is full indicates low battery;... -
Page 6: Transferring Media To The Player
Transferring media to the player 1.Find music, picture, or video files on your computer. 2. Connect the MP3 Player to your computer, and locate “MP3. ” 3. Drag the files into the player as shown below. *Screenshots below may be slightly different than your computer’s operating system. -
Page 7: Music Settings
Main menu Main Menu [MODE] When you turn on the player the main menu apperars (to access the main menu at any time, press and HOLD the button). [ ] Use the [] [] button to select an item, and press the button to confirm your selection. -
Page 8: Skipping Tracks
Music To play music • Select “music” from the main menu and press the button to confirm. [ ] • Press the [ ] button to start playing. Pausing playback • While a song is playing, press the [... - Page 9 To set play mode The play mode setting enables you to select a play mode to enjoy the music in a desired order. Repeat 1. Press the [MODE] button while listening to music. The music menu appears on the screen. Equalizer [] []...
-
Page 10: Using Windows Media Player
Using Windows Media Player Windows Media Player allows you to organize your media collection, Player is not installed on your computer, you can get the latest version 1. Open Windows Media Player. by going to 2. Click on the “Rip” tab. www.microsoft.com/windows/windowsmedia/player/download/ 3. - Page 11 Windows Media Player gives you an easy way to add, or “Sync”, Click the “Sync” tab music to your MP3 Player. 1. Open Windows Media Player. 2. Connect your MP3 Player to the computer using the USB cable. 3. Click on the “Sync” tab in Windows Media Player. 4.
- Page 12 Radio Select “radio” from the main menu and press the button to confirm. [ ] Note: The headphones must by plugged into the player for the FM Radio feature to work. To switch between the Normal and Preset modes, press the button while listening to FM Radio.
-
Page 13: Pausing Playback
Videos • To watch videos, select “videos” from the main menu and press the [ ] button to confirm. [] [] • Use the button to select a video and press the [ ] button videos to start playing the selected video. photos previous video/fast rewind record... -
Page 14: Using The Video Converter
Using the Video Converter Before transferring video files to the MP3 Player, you must convert them to the correct format. Use the Video Converter provided on the included CD to convert most video files to the correct format suitable for the player. To open the Video Converter: 1. - Page 15 Converting videos: 3. Click on “Output Video” to select the destination for the 1. Connect the MP3 Player to a USB port on your computer converted video. You can send it directly to your player by (optional). selecting “MP3” and clicking “OK”, or if you would like to save 2.
- Page 16 4. Click on “Advanced Setting”, and select “160 x 128” as the 5. Click on “Start Conversion”. “Output Frame Size”, and select “MTV” as the “Output Format” 6. When the conversion is complete, click “OK”. and then click “OK”. 7 . Copy the new MTV file to your player. Converted video Click “Advanced...
- Page 17 Photos This player supports the playback of pictures in formats of JPEG and BMP . [ ] 1. Select “photos” from the main menu and press the button to confirm. [ ] 2. Use the [] [] button to select the photo you would like to view and press the button to confirm.
-
Page 18: Voice Recorder
Voice recorder Your player has the ability to record and play back voice memos recorded using the built-in microphone. To record voice memos: To play back recorded voice memos: 1. Select “record” from the main menu and press the [ ] button to 1. - Page 19 1. Select “delete” from the main menu and press the [ ] button to 4. Press the [VOL −] button and select “Delete”. confirm (this will take you to the “File Browse”screen). 5. Select “Yes” to delete selected file or files. Press the button to [...
-
Page 20: System Settings
System settings To access the System Settings, select “settings” from the main menu and press the [ ] button to confirm. System Settings options: Time: Change the date and time displayed on the player. Power: Set the Auto-Off timer. This timer turns the player off after the choosen period of inactivity to conserve battery power. Choose “Close”... -
Page 21: Troubleshooting
• Check if the format of music file is supported by the player. images. Try to eliminate them by saving the file with another name. Can not record • Check if there is enough memory and battery capacity. Online support www.southerntelecom.com/slick Customer Support: 1-877-768-8483(Toll Free) cs@southerntelecom.com... -
Page 22: Important Safety Precautions
Important safety precautions Always follow these basic safety precautions when using your player. • Never apply heavy impact on the player, or place it on a magnet. This will reduce the risk of product damage and personal injury. • Route the USB cable so that people and pets are not likely to trip •... -
Page 23: Legal Information
Legal information FCC Part 15: Copyright Information: Trademarks and trade names used in this instruction manual are This equipment has been tested and found to comply with the requirements owned by their respective companies or organizations. for a Class B digital device under Part 15 of the Federal Communications Commission (FCC) rules. -
Page 24: Limited Warranty
Limited warranty In the unlikely event that this product is defective, or does not perform To obtain service after the warranty period, please e-mail properly, you may within ninety (90) days from your original date of cs@southerntelecom.com with product information, date of purchase purchase return it to the authorized service center for repair or and nature of the problem. - Page 25 Manufactured by Southern Telecom Inc. Brooklyn, NY 11232 Customer Support: 1-877-768-8483 (Toll Free) Slick is a registered trademark of Southern Telecom Inc. Brooklyn, NY USA cs@southerntelecom.com © 2010 Southern Telecom Inc. All rights reserved.
Need help?
Do you have a question about the MP180R and is the answer not in the manual?
Questions and answers