
Related Manuals for Snowrex GC-6D


Summary of Contents for Snowrex GC-6D
-
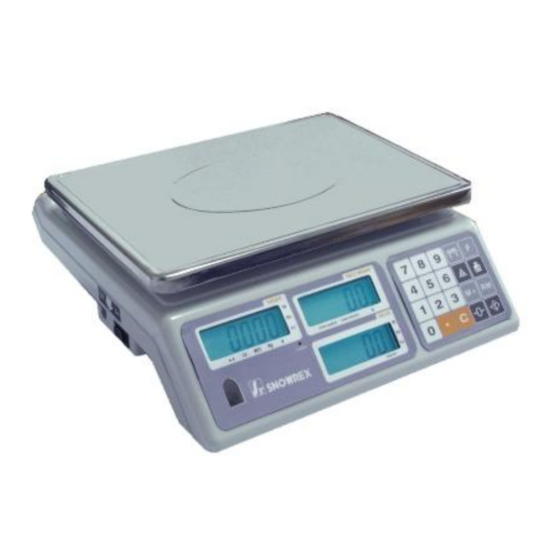
Page 1: User Manual
Precise Counting Scale – GC User Manual SNOWREX INTERNATIONAL CO., LTD. SRGC 20100415... -
Page 2: Table Of Contents
Table of Contents Table of Contents ..................1 Specifications ......................2 Basic specification..................2 Series specification(EC TYPE/OIML APPROVED)........2 Series specification(NON-APPROVED)............2 Display and keypad ....................3 LCD Display....................3 Displays ......................3 Keypad......................5 Using the Digital Counting Scale ...............6 Zero function ...................... -
Page 3: Specifications
Less than 85% Humidity DC9V / 500mA, AC adapter; Power Built in 6V Rechargeable Battery Interface RS-232C (optional) Series specification(EC TYPE/OIML APPROVED) Model GC-6D GC-15D GC-30D / Max 3kg / 6kg 6kg / 15kg 15kg / 30kg / Min 20g / 3kg... -
Page 4: Display And Keypad
Display and keypad LCD Display Displays The display panel consists of three display windows and a set of function keypad. Display DESCRIPTION WEIGHT Displays the weight or the tared weight in g/kg. PIECE WEIGHT Displays the average piece weight either by sampling or direct input. PIECES Display the counts on the weighing pan. - Page 5 ▼ is positioned above the icon when gram is selected as the unit of gram indicator weight. ICON INDICATOR DESCRIPTION ▼ is positioned above the icon when the sample LIGHT SAMPLES LIGHT SAMPLES indicator weight is too light. ▼ is positioned above the icon when the piece weight LIGHT WEIGHTS LIGHT WEIGHTS indicator...
-
Page 6: Keypad
Keypad ICON KEYS DESCRIPTION Numerical Keys Press to input digit data, e.g. piece weight and numbers of samples. Decimal Key Press to set decimal point when taring and sampling Zero Key Press to set the scale to zero. Tare Key Press to subtract out the mass of the weighing container. -
Page 7: Using The Digital Counting Scale
Using the Digital Counting Scale Zero function When there is no weight loaded and the scale shows trivial weight, press the clear the weight and set the scale to zero. Press the key to clear the trivial weight. The WEIGHT display should be cleared. ▼... -
Page 8: Clearing Input Data, Piece Weight, And Accumulated Weights
3. Press the key. Now the average piece weight shows on the PIECE WEIGHT display. The sampling number will show on the PIECES display. B. Piece Weight setting (If the piece weight of the sample is known) 1. Enter the piece weight value by numerical keys. It will show and flash on the PIECE WEIGHT display. -
Page 9: Operation Of M
-->Establish the current keyed-in value as upper bound of weight. --> Establish the current keyed-in value as lower bound of weight. --> Establish the current keyed-in value as upper bound of quantity. --> Establish the current keyed-in value as low bound of quantity. When weight alarm is set, the indicator left to Go icon on the WEIGHT Display ►... -
Page 10: Operation Of Mr
Operation of MR In weighing mode, press to recall the accumulated weighing results. “WT” is displayed in WEIGHT Display. The Total Weight is displayed in the PIECE WEIGHT Display and the total accumulation is displayed in the PIECES Display. Press again. -
Page 11: Programme Setting
Programme Setting You can modify the settings for Zero Tracking, Tare Function, Auto Off Time, Backlight, Print-out Format and Baud Rate. (*shows the default setting) To enter the programme setting mode, do the following 1. Press and hold any key while powering on. The Weight Display will shows 2. - Page 12 Print label using LP printer with preset format Auto print label using LP printer w/ preset format when stabilized E. Baud rate F. Linearity linear Disable default linearity calibration values linear Enable default linearity calibration values In weighing mode, press for 2 seconds and then press again to choose the following settings:...
-
Page 13: Calibration
Calibration Note: To enter calibration menu, you have to remove the jumper JP3 first. Put the jumper back after the calibration is complete. The calibration procedures are to be performed by engineers only. 1. Press and hold any key while powering on. The Weight Display will show 2.
Need help?
Do you have a question about the GC-6D and is the answer not in the manual?
Questions and answers