Table of Contents
Advertisement
Quick Links
Advertisement
Table of Contents

Related Manuals for Grundig M 2100


Summary of Contents for Grundig M 2100
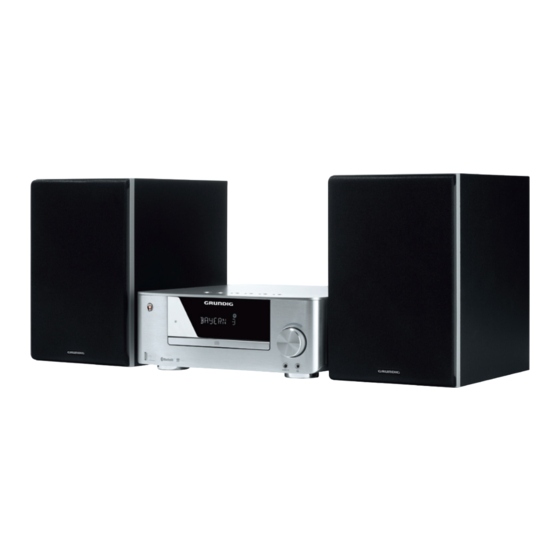
- Page 1 MINI HIFI SYSTEM M 2100...
-
Page 2: Table Of Contents
CONTENTS ---------------------------------------------------------------------------------------------------------------------------------- 3 SETUPANDSAFETY 16 EXTERNALDATAMEDIAMODE Using CDs 4 OVERVIEW O peration with an MP3 player or USB The hi-fi system controls memory stick The remote control Inserting/connecting music data media The hi-fi system displays Playback D isplaying track information 10 CONNECTIONANDPREPARATION (for MP3/WMA) Connecting the loudspeakers Repeat functions Connecting the antenna P laying back tracks in random order C onnecting an MP3 player or a USB (Random) memory stick Playing the start of each track (intro) Connecting external devices Creating a playlist Connecting the headphones Connecting an external recording device 20... -
Page 3: Setupandsafety
SETUPANDSAFETY ----------------------------------------------------------------------------- Please note the following instructions: Thunderstorms are a danger to all electrical devices. Even if the hi-fi is switched off, it can The hi-fi system is designed for the playback be damaged by a lightning strike to the mains. of audio signals. All other uses are expressly Always remove the power plug during a thun- prohibited. der storm. If you want to set up the hi-fi system on wall Prolonged listening with the shelves or in cupboards, please ensure that it headphones at loud volumes can is adequately ventilated. There must be at least damage your hearing. 10 cm of space at the side, above and behind the hi-fi system. Note: Do not cover the hi-fi system with newspapers, D o not connect any other equipment while table cloths, curtains, etc. the device is switched on. Also switch off the other equipment before connecting it. When setting up the hi-fi system, remember that furniture is often coated with various types O nly plug the device into the mains socket of varnish and plastic, which often contain after you have connected the external de-... -
Page 4: Overview
OVERVIEW ------------------------------------------------------------------------------------------------------- Thehi-fisystemcontrols SOURCE AUDIOIN ● ENGLISH 4... - Page 5 OVERVIEW ------------------------------------------------------------------------------------------------------- Thefrontofthedevice Thetopofthedevice P ress briefly to switch the device SOURCE S witches the device on from in and out of standby mode. standby mode. P ress and hold down to activate S elects the input sources Tuner, ECO mode. Bluetooth, Aux, Audio In, Disc and USB. U SB port type A for connecting a USB memory stick or an MP3 I n tuner mode: press and hold player. down to start the reverse or for- wards frequency search; ● I nfrared sensor for remote con- p ress briefly to change the fre- trol signals. quency backwards or forwards in steps. T he hi-fi system displays. I n external data media mode: forward or reverse track selec- CD compartment.
- Page 6 OVERVIEW ------------------------------------------------------------------------------------------------------- Thebackofthedevice AC ~ LINEOUT AUXIN ANTENNA SPEAKEROUT +R–+L– AC ~ Socket for mains cable. Note: T he only way to completely disconnect the hi-fi system from the mains supply is to pull out the plug. SPEAKEROUT Terminals for connecting the +R–+L– loudspeaker cables. R = right channel, L = left channel. LINEOUT A udio signal output for con- necting an external recording device. AUXIN A udio signal input (3.5 mm) for connecting an external device, e.g. an MP3 player. ANTENNA A ntenna socket for the roof an- tenna or the auxiliary antenna supplied.
-
Page 7: The Remote Control
OVERVIEW - --------------------------------------------------------------------------------------------------------------------------------- Theremotecontrol S witches the hi-fi system to standby mode and from standby mode to the last input source selected. O pens and closes the CD compart- ment. FM S elects the tuner input source. Selects the Bluetooth input source. CD Selects the CD input source. Selects the USB input source. AUDIOIN S elects the Audio In and Aux AUX i nput sources for use with an external data medium. I n tuner mode: switches between FM stereo and mono reception. Changes the brightness of the display. - Page 8 OVERVIEW - --------------------------------------------------------------------------------------------------------------------------------- PROG I n tuner mode: activates the memory I n external data media mode: select function; tracks forwards or backwards. s aves radio stations to presets. I n standby and timer mode: for setting I n external data media mode: the hours/minutes. activates the Create playlist function; I n tuner mode: press and hold down s tores the track when creating a to start the reverse or forwards fre- playlist. quency search;...
-
Page 9: The Hi-Fi System Displays
OVERVIEW - --------------------------------------------------------------------------------------------------------------------------------- Thehi-fisystemdisplays Ä 888888 ALB TRK PRG SHUF REP ALL ALB I n external data media mode: T he loudness function is displays albums. activated. TRK I n external data media mode: D ata medium mode (disc) displays tracks. selected. PRG I n tuner mode: a station is A UX mode selected. being stored. D ata media mode (USB) I n external data media mode: selected. -
Page 10: Connectionandpreparation
CONNECTIONANDPREPARATION --------------------------------------- Connectingtheloudspeakers Connecting an MP3 player or a USBmemorystick Caution: The hi-fi system must be switched off while the USB connection is being made. If it is not switched off, data can be lost. 1 Insert the wires of the loudspeaker cable into the side of the threaded fasteners on the loud- speakers and tighten the threaded fasteners. 2 Insert the wires of the loudspeaker cable into the »SPEAKEROUTRL« threaded fasteners on the hi-fi system and tighten the threaded fas- 1 Connect the USB interface of the MP3 player teners. to the » « socket of the hi-fi system with a Notes: standard USB cable; Observe the left and right channels (L = left or channel, R = right channel). insert the USB plug of the USB memory stick Connect each of the red sockets (+) on the into the USB interface » « of the hi-fi sys- hi-fi to the red sockets (+) on the loudspeak- tem. -
Page 11: Connecting External Devices
CONNECTIONANDPREPARATION --------------------------------------- Connectingexternaldevices Connectinganexternalrecord- ingdevice Note: Switch the hi-fi system off before you connect external devices. 1 Use standard audio cables to connect the sound inputs of the external recording device to the »LINEOUT« sockets on the hi-fi system. 1 Use standard audio cables to connect the audio outputs of the external device to the »AUXIN« sockets on the hi-fi system. Note: If possible, connect MP3 players to the »AUDIOIN« socket. -
Page 12: Connecting The Power Cord
CONNECTIONANDPREPARATION --------------------------------------- Connectingthepowercord Insertingbatteriesintothe remotecontrol Notes: Check that the mains voltage on the type plate (on the back of the hi-fi system) cor- responds to your local mains supply. If this is not the case, contact your specialist dealer. All the other devices/loudspeakers must be connected before you connect the power cord. 1 Open the battery compartment by pressing down on the catch and then remove the lid. 2 Observe the polarity marked on the base of the battery compartment when inserting the batteries (micro batteries, 2 x 1.5 V, R 03/... -
Page 13: Settings
SETTINGS - -------------------------------------------------------------------------------------------------------------------------------------- Settingthetime Tuningandstoringradiostations The first time you connect the hi-fi system to the You can store up to 40 FM radio stations on pre- mains, it switches to standby. set channels. The time can only be changed in standby mode. Switch on the hi-fi system by pressing » «, 1 To set the time in standby mode, press and »SOURCE«on the device or »FM« on the re- ¥ hold » « for about 2 seconds. mote control. – D isplay: »CLOCK SET« and then »CLOCK 2Select the TUNER input source by pressing 24 HR«. -
Page 14: Generalfunctions
GENERALFUNCTIONS --------------------------------------------------------------------------------------- Switchingonandoff Selectingsoundsettings The only way to disconnect the hi-fi system from You can choose between preset sound settings. the mains supply is to pull out the plug. 1 Select the sound setting using »DSC« on the 1 Switch on the hi-fi by pressing » « or remote control. »SOURCE« on the device. Changingthebassortreble – T he last input source used is automatically selected. 1 Change the bass using » – BASS+« on the remote control. Note: 2 Change the treble using » – TREBLE+« on the The hi-fi system can also be switched on by remote control. -
Page 15: Tunermode
TUNERMODE - ----------------------------------------------------------------------------------------------------------------------- Selectingthetunerinputsource 1Select the TUNER input source by pressing »SOURCE«on the device or »FM« on the re- - mote control. – T he most recently selected station is played (Last Station Memory). Selectingpresets 1 Select a preset by pressing » « or » « on the remote control. Note: You can also select the preset with the number buttons »1...0«. For two-digit preset numbers, first press »10+«. The "10s place" then stays selected. Stereo/monoreception When the hi-fi system receives stereo channels, » « appears in the display. If the signal from the stereo channel is weak, you can improve the sound quality by switching to mono reception. -
Page 16: Externaldatamediamode
EXTERNALDATAMEDIAMODE - ------------------------------------------------------ UsingCDs OperationwithanMP3player orUSBmemorystick The device is suitable for music CDs displaying the The » « socket is not compatible with logo shown here (CD- USB hubs and cannot be connected directly DA) and for CD-Rs and to a PC. CD-RWs with audio data. The USB interface of this device is a stand- ard interface. All currently-known MP3 chip concepts were taken into account when it was developed. Due to rapid progress in MP3 technology and new manufacturers The device cannot play CD-ROM, CD-I, CDV, appearing every day, the compatibility of... -
Page 17: Playback
EXTERNALDATAMEDIAMODE - ------------------------------------------------------ ConnectinganMP3playeroraUSB Pausingandresumingplayback memorystick 1 To pause playback, press » /PAIRING« once. 1 Switch the device to standby mode by press- – I f you select the data medium again, play- ing » «. back continues from the point at which it 2 Connect the USB interface of the MP3 player stopped. to the » « socket of the hi-fi system with a Stoppingplayback standard USB cable; 1 To stop playback, press » /PAIRING«... -
Page 18: Repeat Functions
EXTERNALDATAMEDIAMODE - ------------------------------------------------------ Repeatfunctions Playingbacktracksinrandom order(Random) Repeatingatrack(RepeatOne) 1 Press » « during playback. 1 Press » « once during playback. – D isplay: »SHUF«. – D isplay: »REP«, the current track is repeated. – A ll tracks on the data medium are played 2 To stop the function, press » « so repeat- back once in random order. edly until the display »REP« disappears. 2 Press » « to switch off the random func- Repeatingallthetracksofafolder tion. – T he display »SHUF« disappears. (RepeatFolder)(MP3/WMAonly) Playingthestartofeachtrack 1 Press » « twice during playback. -
Page 19: Creating A Playlist
EXTERNALDATAMEDIAMODE - ------------------------------------------------------ Creatingaplaylist You can create a track memory of up to 32 tracks for the current data medium in any order you choose and then play them back in that sequence. A track may be saved more than once. The entries can only be made in stop mode. Selectingandstoringtracks 1 Press » /PAIRING« to end playback. 2 Press »PROG« to open the function. – D isplay: »1 1 P−−01«, »PRG« lights up. 3 Select the folder by pressing » + –... -
Page 20: Bluetoothmode
BLUETOOTHMODE --------------------------------------------------------------------------------------------------- T he M 2100 automatically connects to the last Bluetooth auxiliary device that was logged on. I f the Bluetooth auxiliary device is not recog- Compatiblewiththefollowing nised, it has to be activated again via its own devices menu. Your M 2100 can be connected to any com- PlaybackfromtheBluetooth mercially available Bluetooth-compatible de- auxiliarydevice vices that comply with the A2DP standard. This 1 Start playback on the Bluetooth auxiliary de- includes smartphones, laptops and tablet PCs, vice. -
Page 21: Usingexternaldevices
USINGEXTERNALDEVICES --------------------------------------------------------------------- Listeningtotheaudiosignal Recordingonanexternalre- fromanexternaldevice cordingdevice You can play the audio signal from an external Note: device (e.g. an MP3 player) on the hi-fi system. The external recording device must be con- Notes: nected to the »LINEOUT« socket. The external devices must be connected to 1 Select the input source by pressing »FM«, the »AUXIN« socket or the »AUDIOIN« »CD«, »USB«, » « or »AUDIOINAUX«. socket. 2 Connect/insert data medium and start play- If possible, connect MP3 players to the back; »AUDIOIN« socket. or 1 Switch on the device from standby by press- select radio station. ing »... -
Page 22: Timermode
TIMERMODE -------------------------------------------------------------------------------------------------------------------------- Your hi-fi system has two timer modes: Activatinganddeactivatingthe – T he timer, which switches the hi-fi system on alarm at a preset time and wakes you with the input ≈ 1 Deactivate the alarm by pressing » « once source you selected. briefly. – T he sleep timer, which switches the hi-fi sys- ≈ – D isplay: » « disappears when the timer is tem off at a preset time. deactivated. Notes: Sleeptimer You can only set the timer mode with the but- Settingthesleeptimer tons on the remote control. -
Page 23: Information
INFORMATION - ----------------------------------------------------------------------------------------------------------------- Cleaningthehi-fisystem Receiverunit Reception range: Pull the power cord out of the mains socket. Clean F M: 87.5 ...108.0 MHz the appliance with a damp cloth and a mild de- tergent. Do not use any detergents containing CDunit alcohol, spirit, ammonia or scouring agent. Frequency response: 20 Hz ... 20 kHz Noise voltage ratio: ≥ 96 dBA CleaningtheCDunit MP3/WMA If the device is un- able to scan CDs Folderandtrack: properly, use a Max. 256 folders and 999 tracks per CD standard, com- Filesystem/foldermanagement: mercially avail- ISO 9660 Level 1 compatible able cleaning CD to clean the USB... -
Page 24: Environmental Note
INFORMATION - ----------------------------------------------------------------------------------------------------------------- Environmentalnote Generalinformationonlaser devices This product has been made from high-quality parts and This device is a CLASS materials which can be re-used CLASS 1 M 1 M LASER PRODUCT. and recycled. This means that the laser LASER PRODUCT is designed in such a Therefore, do not dispose of the product along way as to ensure that the maximum permissible with normal household waste at the end of its emission value cannot be exceeded under any service life. Take it to a collection point for the circumstances. -
Page 25: Troubleshooting
INFORMATION - ----------------------------------------------------------------------------------------------------------------- Troubleshooting Not every kind of sound interference is caused not resolve the problem satisfactorily, please visit by a defect in your hi-fi system. Cables that have www.grundig.com, product range: hi-fi, micro accidentally been disconnected, damaged CDs CD stations or contact your specialist dealer. and flat batteries for the remote control will impair functioning. If the following measures do Problem Possiblecause/remedy Insert a CD. Check that the CD was inserted with the label facing upwards. »NO DISC« is displayed. Moisture may have collected on the laser lens; wipe it clean. Clean the CD (see "INFORMATION") or use a different CD. The CD-RW/CD-R is not finalised. Reception signal too weak; position the wire antenna differently. Poor radio reception. Move the hi-fi further away from the television. The hi-fi system does not react Disconnect the power cord from the mains plug, reinsert it after a short when the buttons are pressed. - Page 26 Grundig Intermedia GmbH Beuthener Strasse 41 90471 Nürnberg www.grundig.com 72011 909 1600 13/34...
Need help?
Do you have a question about the M 2100 and is the answer not in the manual?
Questions and answers