Table of Contents INTRODUCTION .......................... 3 ASSEMBLY ........................... 6 Setting up the Tripod............................. 6 Attaching the Equatorial Mount .......................... 7 Installing the Counterweight Bar & Counterweight(s) ..................7 Attaching the Slow Motion Cables ........................8 Attaching the Telescope Tube to the Mount......................8 Installing the Diagonal &...
PowerSeeker telescopes carry a two year limited warranty. For details see our website at www.celestron.com Some of the many standard features of the PowerSeeker include: •...
Page 4
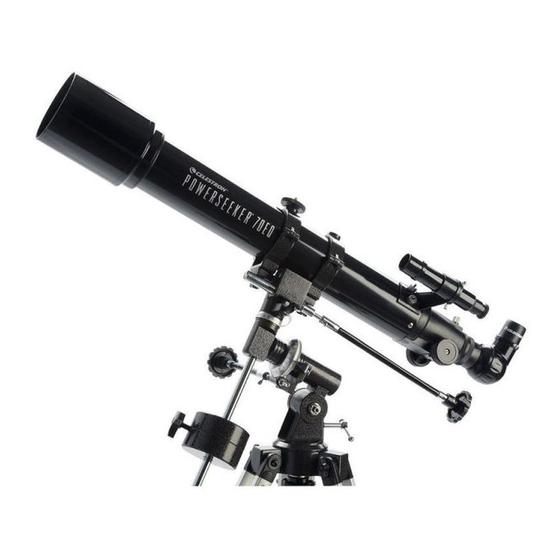
Figure 1-1 PowerSeeker 80EQ Refractor PowerSeeker 60EQ & PowerSeeker 70EQ Similar Telescope Optical Tube Latitude Adjustment Screw Mounting Bracket w/ Tube Rings Tripod Accessory Tray R.A. Setting Circle Tripod Finderscope Counterweight Bar Eyepiece & Diagonal Counterweight Focus Knob Equatorial Mount Dec.
Page 5
Figure 1-2 PowerSeeker 114EQ Newtonian PowerSeeker 127EQ Newtonian Similar Eyepiece Tripod Accessory Tray Tube Ring Tripod Telescope Optical Tube Counterweight Primary Mirror R.A. Setting Circle Dec. Slow Motion Cable Equatorial Mount R.A. Slow Motion Cable Dec. Setting Circle Latitude Adjustment Screw Focus Knob...
This section covers the assembly instructions for your PowerSeeker telescope. Your telescope should be set up indoor the first time so that it is easy to identify the various parts and familiarize yourself with the correct assembly procedure before attempting it outdoor. Each PowerSeeker comes in one box.
The equatorial mount allows you to tilt the telescopes axis of rotation so that you can track the stars as they move across the sky. The PowerSeeker mount is a German equatorial mount that attaches to the tripod head. To attach the mount: 1.
The PowerSeeker mount comes with two slow motion control cables that allow you to make fine pointing adjustments to the telescope in both R.A. and Declination. To install the cables: 1. Locate the two cables with knobs on them. The longer one is for the R.A. axis and make sure the screw on each cable end does not protrude through the opening.
Figure 2-16 Figure 2-17 Figure 2-18 Figure 2-19 & & The diagonal is a prism that diverts the light at a right angle to the light path of the refractor. This allows you to observe in a position that is more comfortable than if you had to look straight through.
To install the finderscope: 1. Locate the finderscope (it will be mounted inside the finderscope bracket) – see Figures 1-1 and 1-2. 2. Remove the knurled nuts on the threaded posts on the optical tube – see Figure 2-22. 3. Mount the finderscope bracket by placing it over the posts protruding from the optical tube and then holding it in place thread on the knurled nuts and tighten them down –...
In order to properly use your telescope, you will need to move your telescope manually at various portions of the sky to observe different objects. To make rough adjustments, loosen the R.A. and Dec. locking knobs slightly and move the telescope in the desired direction. To make fine adjustments, when the knobs are locked you turn the slow motion control cables.
Figure 2-26 Figure 2-25 In order for a motor drive to track accurately, the telescope’s axis of rotation must be parallel to the Earth’s axis of rotation, a process known as polar alignment. Polar alignment is achieved NOT by moving the telescope in R.A. or Dec., but by adjusting the mount vertically, which is called altitude.
A telescope is an instrument that collects and focuses light. The nature of the optical design determines how the light is focused. Some telescopes, known as refractors, use lenses, and other telescopes, known as reflectors (Newtonians), use mirrors. Developed in the early 1600s, the refractor is the oldest telescope design. It derives its name from the method it uses to focus incoming light rays.
The image orientation changes depending on how the eyepiece is inserted into the telescope. When using a star diagonal with refractors, the image is right-side-up, but reversed from left-to-right (i.e., mirror image). If inserting the eyepiece directly into the focuser of a refractor (i.e., without the diagonal), the image is upside-down and reversed from left-to-right (i.e., inverted).
Determining the field of view is important if you want to get an idea of the angular size of the object you are observing. To calculate the actual field of view, divide the apparent field of the eyepiece (supplied by the eyepiece manufacturer) by the magnification.
Up to this point, this manual covered the assembly and basic operation of your telescope. However, to understand your telescope more thoroughly, you need to know a little about the night sky. This section deals with observational astronomy in general and includes information on the night sky and polar alignment.
Figure 4-2 All stars appear to rotate around the celestial poles. However, the appearance of this motion varies depending on where you are looking in the sky. Near the north celestial pole the stars scribe out recognizable circles centered on the pole (1). Stars near the celestial equator also follow circular paths around the pole.
This method utilizes Polaris as a guidepost to the north celestial pole. Since Polaris is less than a degree from the celestial pole, you can simply point the polar axis of your telescope at Polaris. Although this is by no means perfect alignment, it does get you within one degree.
Figure 4-6 Aligning the equatorial mount to the polar axis of the Earth Polar alignment to the South Celestial Pole (SCP) is a little more challenging due to the fact that there is no very bright star close to it like Polaris is in the NCP. There are various ways to polar align your telescope and for casual observing the methods below are adequate and will get you reasonably close to the SCP.
Pointing at Sigma Octantis This method utilizes Sigma Octantis as a guidepost to the celestial pole. Since Sigma Octantis is about 1° degree from the south celestial pole, you can simply point the polar axis of your telescope at Sigma Octantis. Although this is by no means perfect alignment, it does get you within one degree.
In order to align the R.A. setting circle, you will need to know the names of a few of the brightest stars in the sky. If you don’t, they can be learned by using the Celestron Sky Maps (#93722) or consulting a current astronomy magazine.
To allow tracking of celestial objects, Celestron offers a single axis DC motor drive for the PowerSeeker equatorial mount. Once polar aligned, the motor drive will accurately track objects in Right Ascension as they move across the sky. Only minor adjustments in Declination will be necessary to keep celestial objects centered in the eyepiece for long periods of time.
See the "Seeing Conditions" section later in this section. To increase contrast and bring out detail on the planetary surface, try using Celestron eyepiece filters. Although overlooked by many amateur astronomers, solar observation is both rewarding and fun. However, because the Sun is so bright, special precautions must be taken when observing our star so as not to damage your eyes or your telescope.
Deep-sky objects are simply those objects outside the boundaries of our solar system. They include star clusters, planetary nebulae, diffuse nebulae, double stars and other galaxies outside our own Milky Way. Most deep-sky objects have a large angular size. Therefore, low-to-moderate power is all you need to see them. Visually, they are too faint to reveal any of the color seen in long exposure photographs.
During the last few years a new technology has evolved which makes taking superb images of the planets and moon relatively easy and the results are truly amazing. Celestron offers the NexImage (# 93712) which is a special camera and included is software for image processing. You can capture planetary images your first night out which rivals what professionals were doing with large telescopes just a few short years ago.
NOT sealed, the covers should be placed over the openings when not in use. This will prevent contaminants from entering the optical tube. Internal adjustments and cleaning should be done only by the Celestron repair department. If your telescope is in need of internal cleaning, please call the factory for a return authorization number and price quote.
Aligning the Primary Mirror Now adjust the primary mirror screws to re-center the reflection of the small secondary mirror, so it’s silhouetted against the view of the primary. As you look into the focuser, silhouettes of the mirrors should look concentric. Repeat steps one and two until you have achieved this.
Page 28
With Polaris or a bright star centered within the field of view, focus with either the standard ocular or your highest power ocular, i.e. the shortest focal length in mm, such as a 6mm or 4mm. Another option is to use a longer focal length ocular with a Barlow lens.
Flashlight, Night Vision (# 93588) – The Celestron flashlight uses two red LED’s to preserve night vision better than red filters or other devices. Brightness is adjustable. Operates on a single 9-volt included battery.
Need help?
Do you have a question about the PowerSeeker 60EQ 21043 and is the answer not in the manual?
Questions and answers