Table of Contents
Advertisement
Quick Links
Download this manual
See also:
Owner's Manual
Advertisement
Table of Contents

Subscribe to Our Youtube Channel
Related Manuals for Hobie Hobie T2


Summary of Contents for Hobie Hobie T2
- Page 1 Hobie Cat® Owner’s manual - Hobie T2...
- Page 2 Welcome in the «Hobie Way of Life» Congratulations for the purchase of your new HOBIE CAT and welcome to the HOBIE sailing family. The Hobie Cat is a long life boat. We offer this manual as a guide to increased safety and enjoyment of your new boat. The purpose of this publication is to provide easy, simple and accurate instructions on how to get your Hobie ready for the water.
-
Page 3: Table Of Contents
Hobie Cat® Owner’s manual - Hobie T2 Table of Contents Owners Manual Boat Description ........................................4 Safety Advices ........................................5 Complementary Information .....................................6 Handling & Maintenance ....................................7 Assembly Manual Parts List ..........................................9 Hull Assembly : Crossbar Fixation ..................................11 Trampoline Assembly ......................................13 Front Spreader Bar ......................................16 Wire Assembly .........................................17... -
Page 4: Boat Description
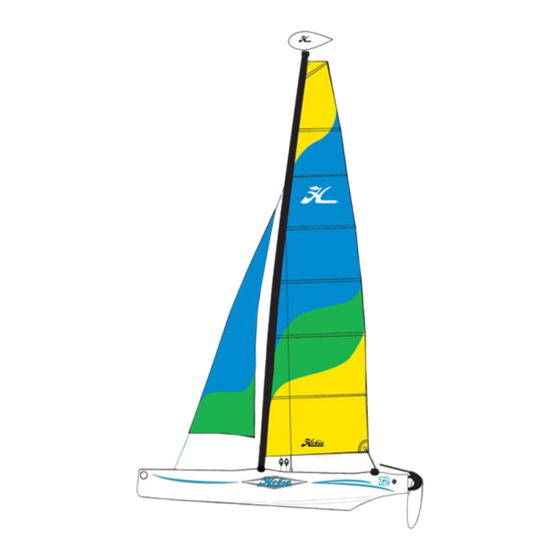
Hobie Cat® Owner’s manual - Hobie T2 Boat Description Length 16’ / 4.90 m Beam 7’ 8” / 2.34 m Draft w/ Rudder Up 10” / 0.25 m Mast Length 26’ 6” / 8.07 m Weight 388 lbs / 176 kg... -
Page 5: Safety Advices
Hobie Cat® Owner’s manual - Hobie T2 Safety Advices Read carefully before sailing : • Whether on land or on the water, WATCH FOR OVERHEAD POWER LINES. Contact with power lines can cause serious injury or death. • DO NOT sail while under the influence of alcohol and/or drugs •... -
Page 6: Complementary Information
INTERNATIONAL HOBIE CLASS ASSOCIATION (I.H.C.A.) Hobie Cat owners are organized in a world-wide class association : the IHCA (International Hobie Class Association). Visit their web site : http://www.hobieclass.com/ to find the name and contact details of the association of your country. -
Page 7: Handling & Maintenance
In order to avoid hull damages : • Always use a dolley to transport your Hobie on the beach (even if it is a sand beach) and for launching. Step into the water with the dolley and once the cat is afloat take out the dolley. -
Page 8: Handling And Maintenance
Maintenance of your Hobie • Hobie Cat does not recommend leaving your Hobie in the water on a mooring. Accelerated wear to the boat and rigging will be experienced. Damage to the hull material is possible. Limitation of the mast rotation and tensioning of the rigging are required to lessen this wear. -
Page 9: Parts List
Hobie Cat® Owner’s manual - Hobie T2 Parts List Your Hobie T2 is composed of : Description Hulls (right & left) Crossbars (front & rear) Trampoline Mast Rudder assembly (right & left) Tiller crossbar Wire bag with furler Rig bag... - Page 10 Hobie Cat® Owner’s manual - Hobie T2 List of the parts : Wire bag with jib furler Shrouds, Trap Wires Rope Kit Mainsheet Blocks Furler & Bridles Trapeze Handles Rigging Hardware Kit Beam Bolts...
-
Page 11: Hull Assembly : Crossbar Fixation
Hobie Cat® Owner’s manual - Hobie T2 Hull Assembly : Crossbar Fixation Illustration Steps Description For the assembly we will use the #17 wrench and the crossbar screws that are included in the rig bag. DO NOT USE any ratchet key on the screw.This would cause over heating of the screw in the insert. - Page 12 Hobie Cat® Owner’s manual - Hobie T2 Hull Assembly : Crossbar Fixation Illustration Steps Description Drive the screws into the front crossbar, on the left side and then on the right side so that the crossbar is rightly positionned (tighten loosely).
-
Page 13: Trampoline Assembly
Hobie Cat® Owner’s manual - Hobie T2 Trampoline Assembly Illustration Steps Description The opening to slide the two parts of the trampoline is on the left side of the front crossbar, so insert first the right half of the trampoline and afterwards the left part. - Page 14 Hobie Cat® Owner’s manual - Hobie T2 Trampoline Assembly Illustration Steps Description Continue lacing until the very last eyelet and stop knot at the end just in front of the rear crossbar. Insert the fiberglass trampoline rod into the rear stripes of the two trampolines halves.
- Page 15 Hobie Cat® Owner’s manual - Hobie T2 Trampoline Assembly Illustration Steps Description When the lacing comes to the end, make a loop and use it to tension and tighten the lacing line using half-key knots to secure it. The trampoline must always be fully tightened.
-
Page 16: Front Spreader Bar
Hobie Cat® Owner’s manual - Hobie T2 Front Spreader Bar Illustration Steps Description Install bow spreader bar with the two anchor bolts provided in the rigging kit. Attach the jib bridles using the clevis pin and split rings supplied. NEVER USE THE FORWARD SPREADER BAR TO CARRY THE BOAT. -
Page 17: Wire Assembly
Hobie Cat® Owner’s manual - Hobie T2 Wire Assembly Illustration Steps Description Shroud anchor plates Take the two shroud anchor plates and fix them on the hull with the screws. Fixing the stay adjusters Take the stay adjusters and fix them to the anchor plates using the axes and split rings. -
Page 18: Mast Set-Up : Wire Assembly
Hobie Cat® Owner’s manual - Hobie T2 Mast Set-up : Wire Assembly T2 mast extrusion to CompTip assembly: The purpose is to bond the two sections together and seal out water. This will keep the joint in proper alignment. This can affect the sail shape if the fit becomes loose. Use masking tape to mask the area above and below the joint to make cleanup easier. - Page 19 Hobie Cat® Owner’s manual - Hobie T2 Mast Set-up : Wire Assembly (model with jib furler) Illustration Steps Description If you do not have the jib furler, go directly to the next page Take the jib furler in the wire bag and connect it to the two bridle wires using the clevis pins and split rings.
- Page 20 Hobie Cat® Owner’s manual - Hobie T2 Mast Set-up : Wire Assembly CAUTION DANGER : ALUMINIUM MAST STAY AWAY FROM ELECTRICAL WIRES CONTACT WITH ELECTRICAL WIRES MAY CAUSE DEATH Illustration Steps Description With the base of the mast facing towards the front of the boat, lay the mast on top of the boat. (place some padding un- der the mast to prevent scratching).
-
Page 21: Stepping The Mast
Hobie Cat® Owner’s manual - Hobie T2 Stepping the Mast CAUTION DANGER : ALUMINIUM MAST STAY AWAY FROM ELECTRICAL WIRES CONTACT WITH ELECTRICAL WIRES MAY CAUSE DEATH Illustration Steps Description Now, ensure that the forestay wire is not twisted around any other wires and you are ready for raising the mast. - Page 22 Hobie Cat® Owner’s manual - Hobie T2 Stepping the Mast CAUTION DANGER : ALUMINIUM MAST STAY AWAY FROM ELECTRICAL WIRES CONTACT WITH ELECTRICAL WIRES MAY CAUSE DEATH Illustration Steps Description Connect jib to furler (Standard) With the person on the trampoline supporting the mast, the other person takes the forestay and connects it to the stay adjuster fixed to the jib furler.
-
Page 23: Trapeze Assembly
Hobie Cat® Owner’s manual - Hobie T2 Trapeze Assembly Illustration Etapes Description Take the trapeze line and handles in the wire bag Assembling the J&H handles Tie a knot firmly at the end of the 6 mm line. Fix the... -
Page 24: Main Sail
Hobie Cat® Owner’s manual - Hobie T2 Main Sail Always point your Hobie directly into the wind before you raise the mainsail. Reef points are not intended for use with comptip mast (American Continent). Illustration Steps Description Unfold the sail on the trampoline. Insert the battens into the batten pockets. -
Page 25: Cunningham
Hobie Cat® Owner’s manual - Hobie T2 Cunningham Illustration Steps Description Take the cunningham line in the rope bag Take the hook with the double block in the rig bag Thread the cunningham line : 1. Insert one end in the pad-eye, make a buckle and stop with a bowline knot. -
Page 26: Mainsheet System
Hobie Cat® Owner’s manual - Hobie T2 Mainsheet System Illustration Etapes Description Take the mainsheet system in the rig bag. It is already assembled. Fasten the mainsheet ratchet block onto the top of the main traveller on the rear crossbar. - Page 27 Hobie Cat® Owner’s manual - Hobie T2 Jib Sail Assembly Illustration Steps Description Installation of the jib sheet line Take the jib sheet in the rope bag and the jib blocks in the rig bag. Attach the blocks at the clew point of the jib using the safety hook.
-
Page 28: Easy Lock Rudder Assembly
Hobie Cat® Owner’s manual - Hobie T2 Easy Lock Rudder Assembly Illustration Steps Description Place the rudder assembly on the boat pintle. Note : the Housing may only be installed or removed from the boat pintles when the rudder blade is in- between the upper and lower positions. -
Page 29: Tiller Crossbar And Extension
Hobie Cat® Owner’s manual - Hobie T2 Tiller Crossbar and Extension Illustration Steps Description Tiller crossbar Insert the stainless steel pins of the tiller crossbar into the two rudder arms. Then secure the pins with the check plates attached with the shock cords on the rudder arms in order to avoid the rudder arms falling off the tiller crossbar. -
Page 30: Righting Line And Mast Floating Device
Hobie Cat® Owner’s manual - Hobie T2 Righting Line and Mast Floating Device Illustration Steps Description Righting line Take the righting line in the rope bag. Tie a knot around the dolphin striker. Take the end up through the middle of the trampoline. -
Page 31: Spinnaker Kit (Option)
Hobie Cat® Owner’s manual - Hobie T2 Spinnaker Kit (Option) Illustration steps Description Attach the spinnaker pole on its fixation on the front crossbar. Remove pin from bridle and install with a 1/4” shackled, as shown. Attach the black spi pole bending rope as shown on the picture. - Page 32 Hobie Cat® Owner’s manual - Hobie T2 Spinnaker Kit (Option) Illustration steps Description Attach the rear of the bag on the front crossbar using the two small white lines : one on the nylon pad-eye on the crossbar, the other to the spi pole fixation.
- Page 33 Hobie Cat® Owner’s manual - Hobie T2 Spinnaker Kit (Option) Illustration steps Description Take the other loose end of the halyard and thread it in the block that is facing the mast on the spi pole. insert it in one of the sister blocks.
- Page 34 Hobie Cat® Owner’s manual - Hobie T2 Spinnaker Kit (Option) Illustration steps Description Then, lead it through the sheave on the front crossbar, then, through the grommet of the spi bag stripe use a batten as bodkin to insert the halyard through the bag and have it coming out of the trumpet mouth.
- Page 35 Hobie Cat® Owner’s manual - Hobie T2 Spinnaker Kit (Option) Illustration steps Description Make a knot in the third patch. Take the tack line and fix it at the tacking point of the spinnaker, then in the block that is at the end of the...
- Page 36 Hobie Cat® Owner’s manual - Hobie T2 Spinnaker Kit (Option) - Line Circuit Spinnaker tack line Spinnaker halyard Spinnaker sheet line...
- Page 37 Hobie Cat® Owner’s manual - Hobie T2...
- Page 38 Hobie Cat® Owner’s manual - Hobie T2 Hobie Cat Company Holding Company Oceanside, California, USA 1-800-HOBIE-49 hobiecat.com Hobie Cat Australasia Subsidiary Huskisson, New South Wales Australia 1-800-4-HOBIE hobiecat.com.au Hobie Cat Europe Subsidiary Toulon, France +33 (0) 494 08 78 78 hobie-cat.net...
Need help?
Do you have a question about the Hobie T2 and is the answer not in the manual?
Questions and answers